Cross4FinOps
Cross4FinOps is a role-based system designed to meet the needs of various teams. It allows teams to request resources based on their requirements, enables managers to monitor team expenditures, assign budgets to teams, and manage resources more effectively.
Units
In the units section, you can efficiently manage your units by creating new ones, removing those that are no longer needed, or adjusting preferences related to specific units. This functionality allows you to keep your resources organized and tailored to your current requirements, ensuring optimal use and management of your system.
New Unit Creation
As an Admin, you can create new units to manage your resources. To create a new unit;
- Click the Create New Unit button at the top of the page.
Show the instruction with images

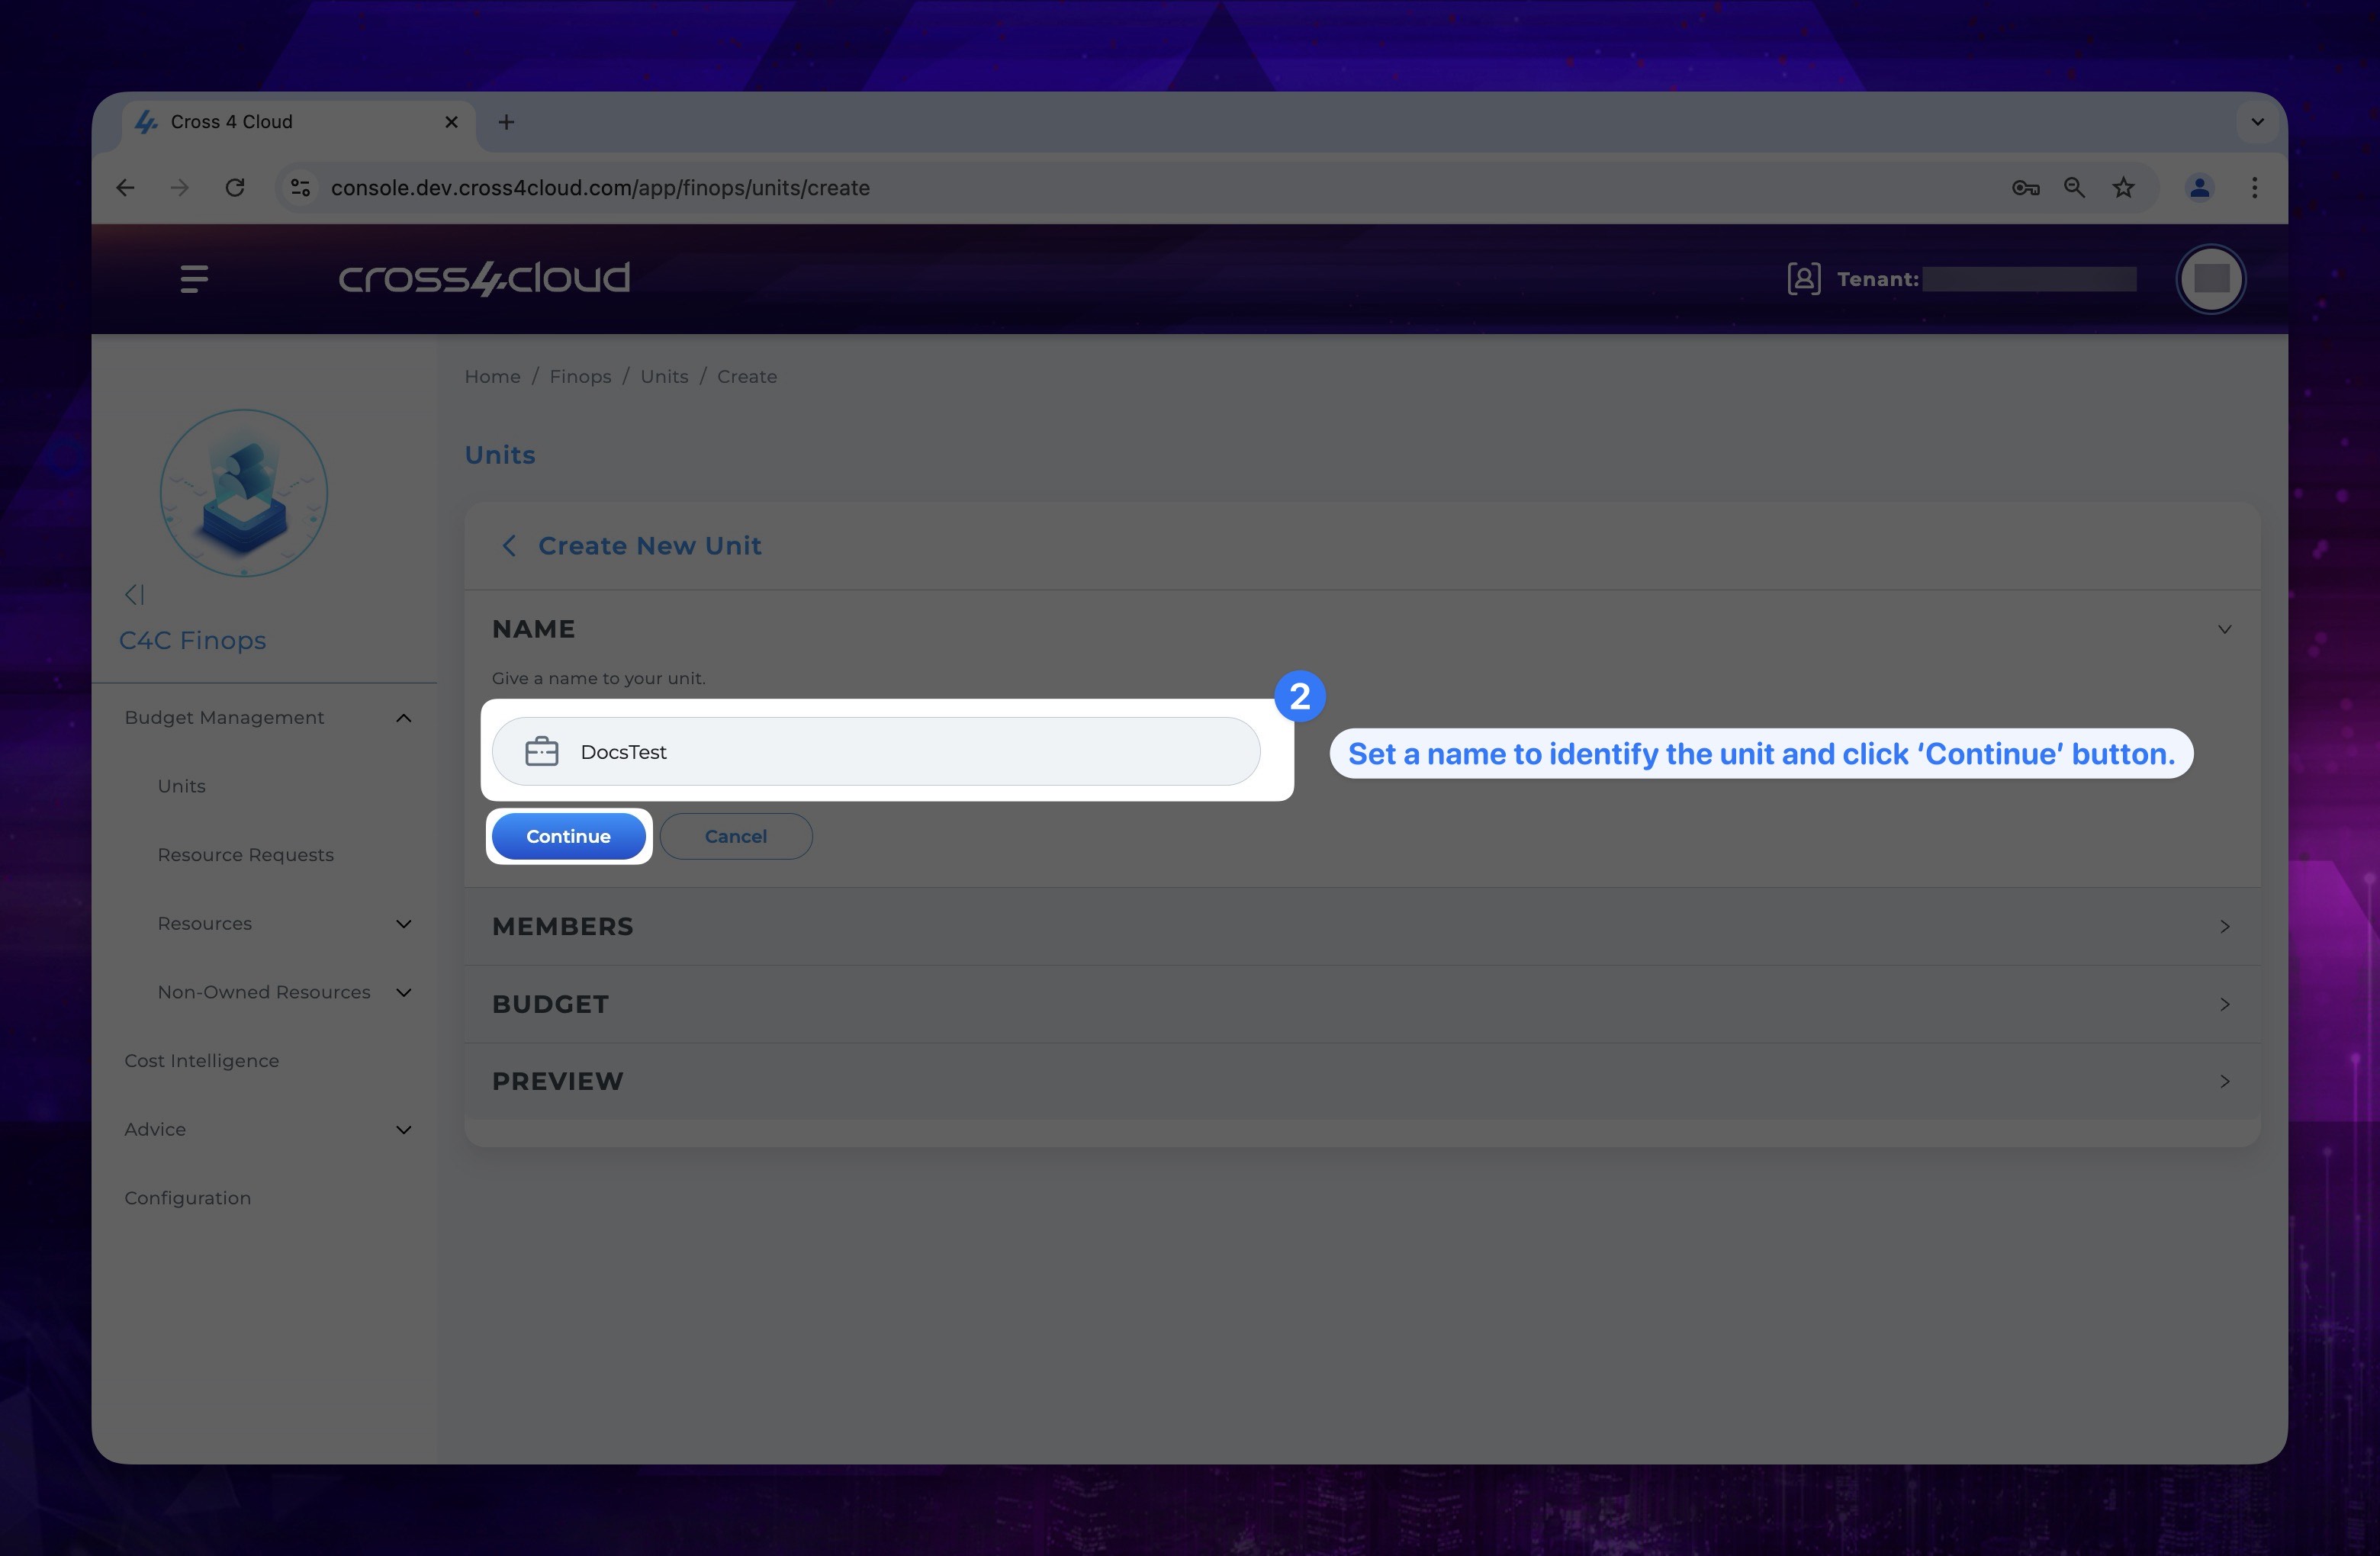
- After setting your units name click Continue button.
Show the instruction with images
- To include members in the unit, use the toggle button next to each user. Activate the toggle button for the desired members and then click the Continue button to proceed.
Show the instruction with images
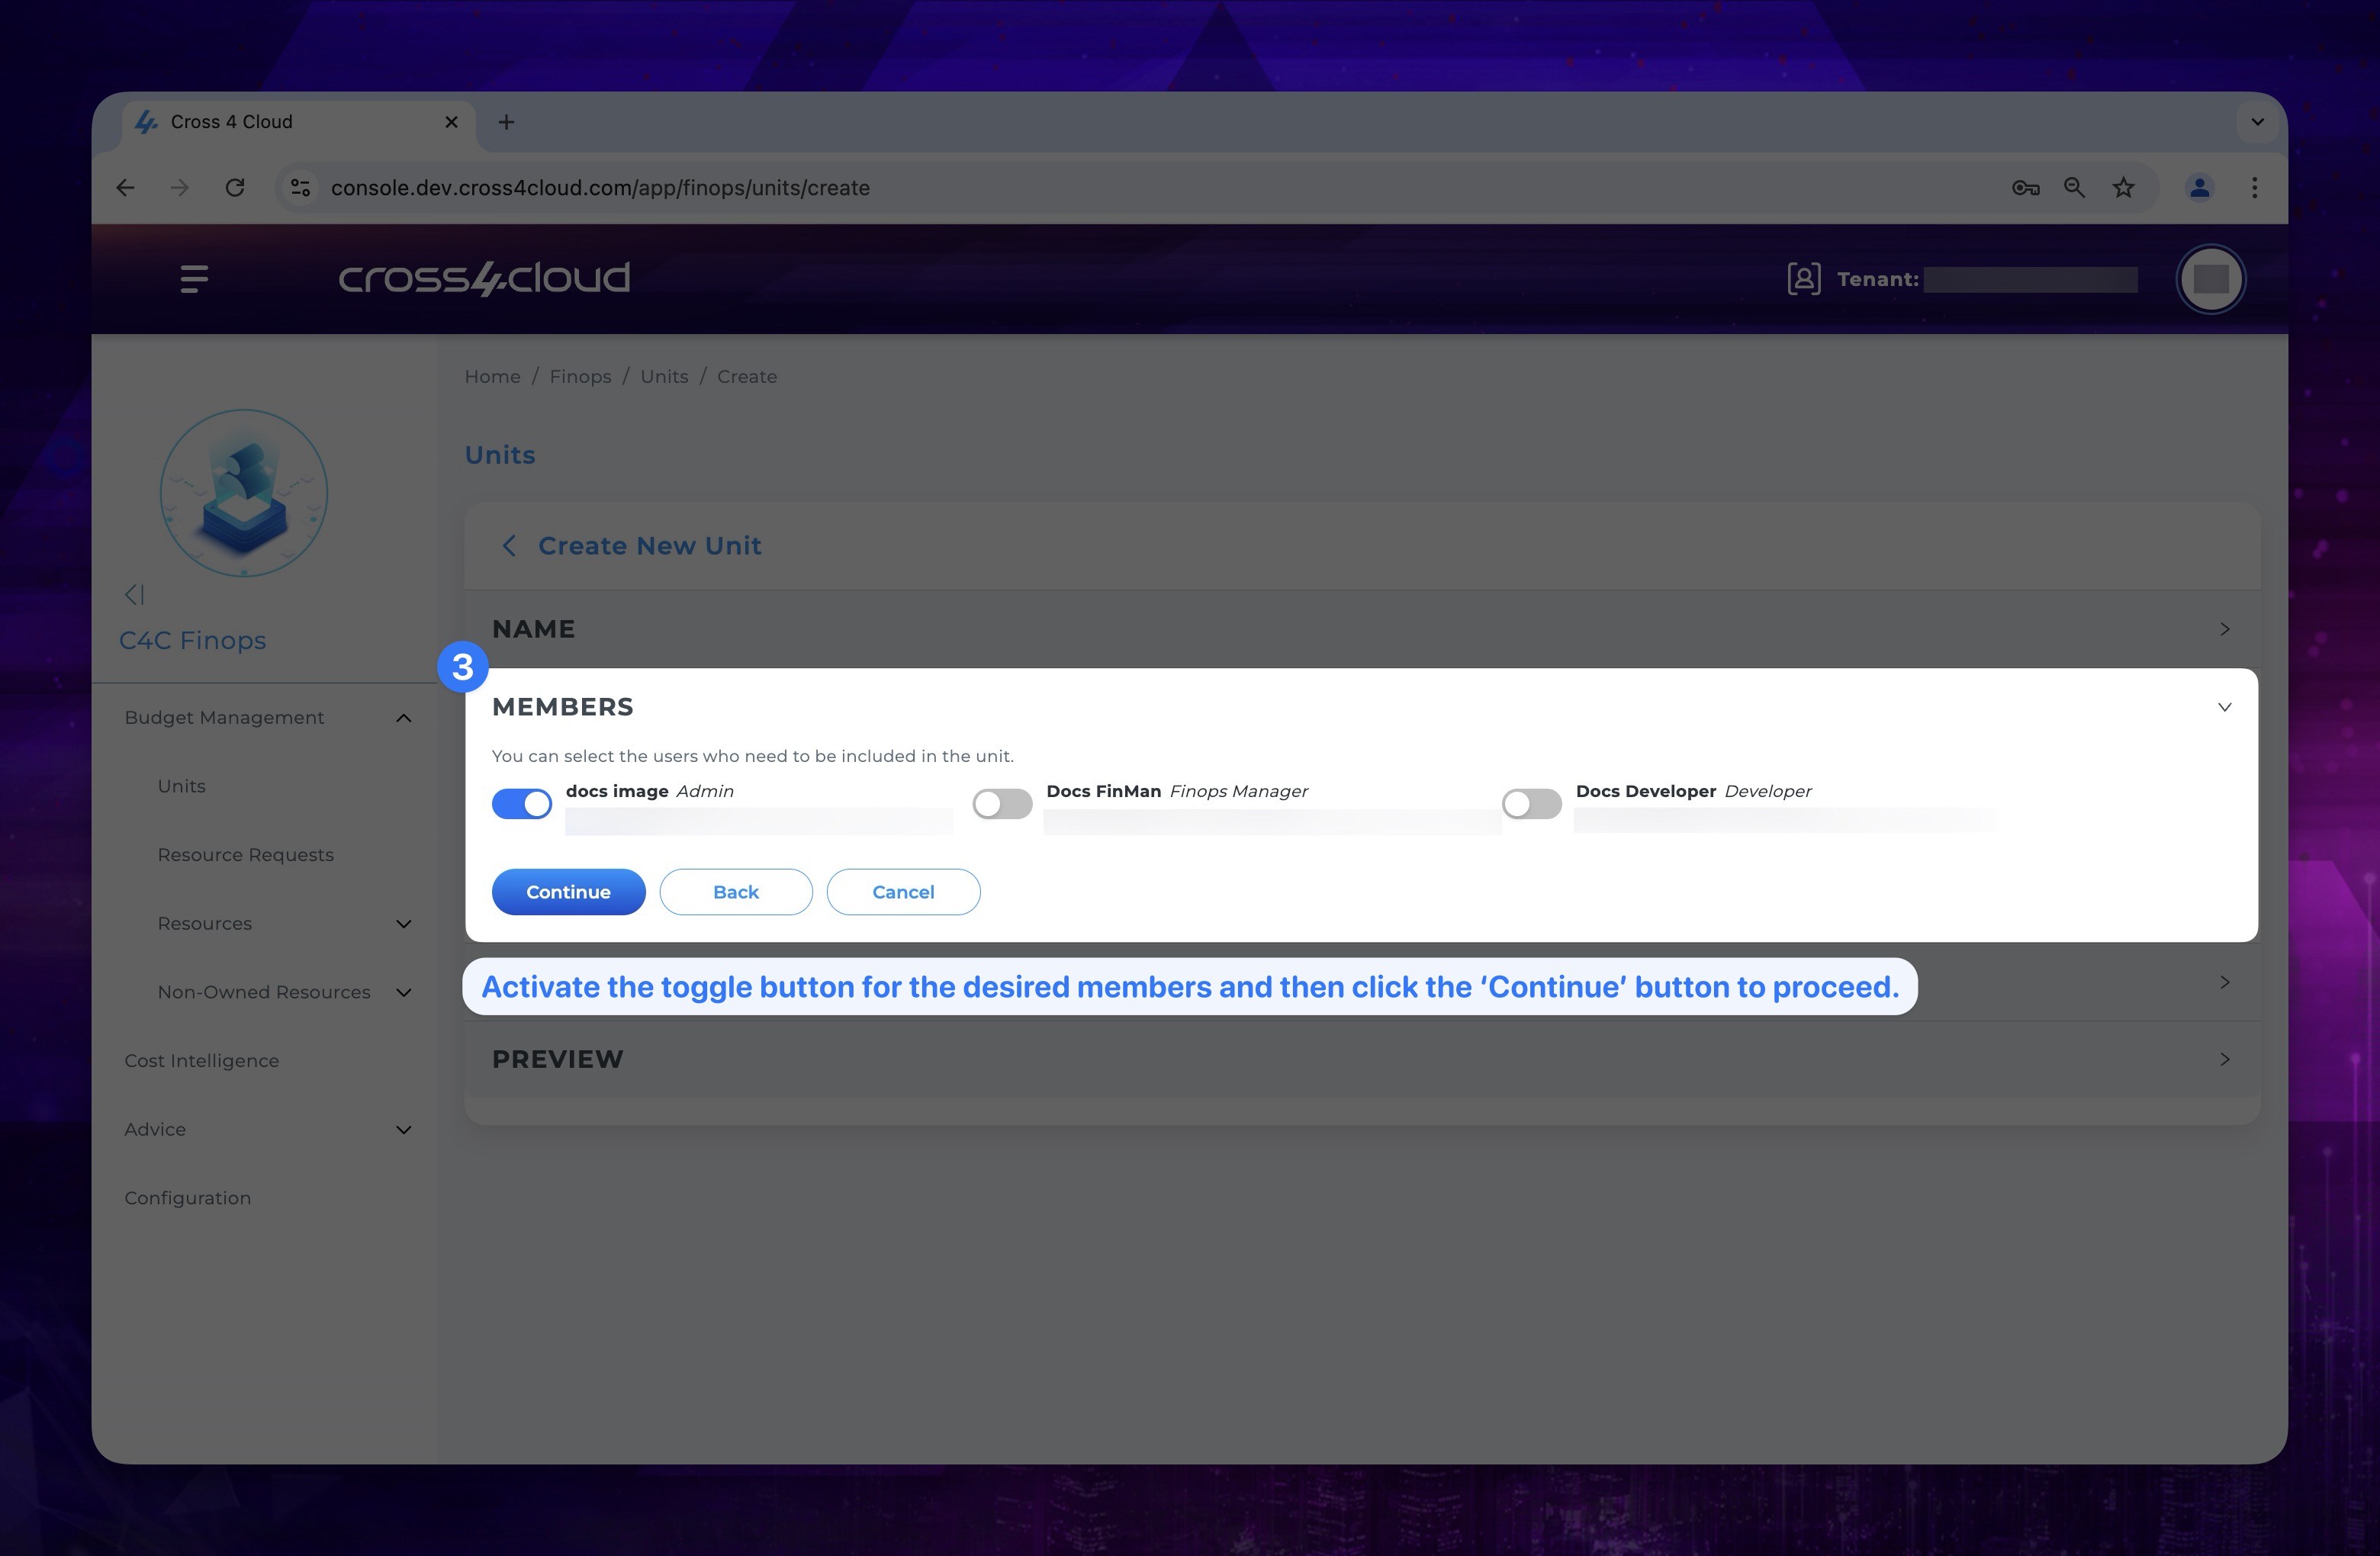
When adding members to your unit, please remember that each user can only belong to one unit at a time. A user cannot be assigned to multiple units simultaneously.
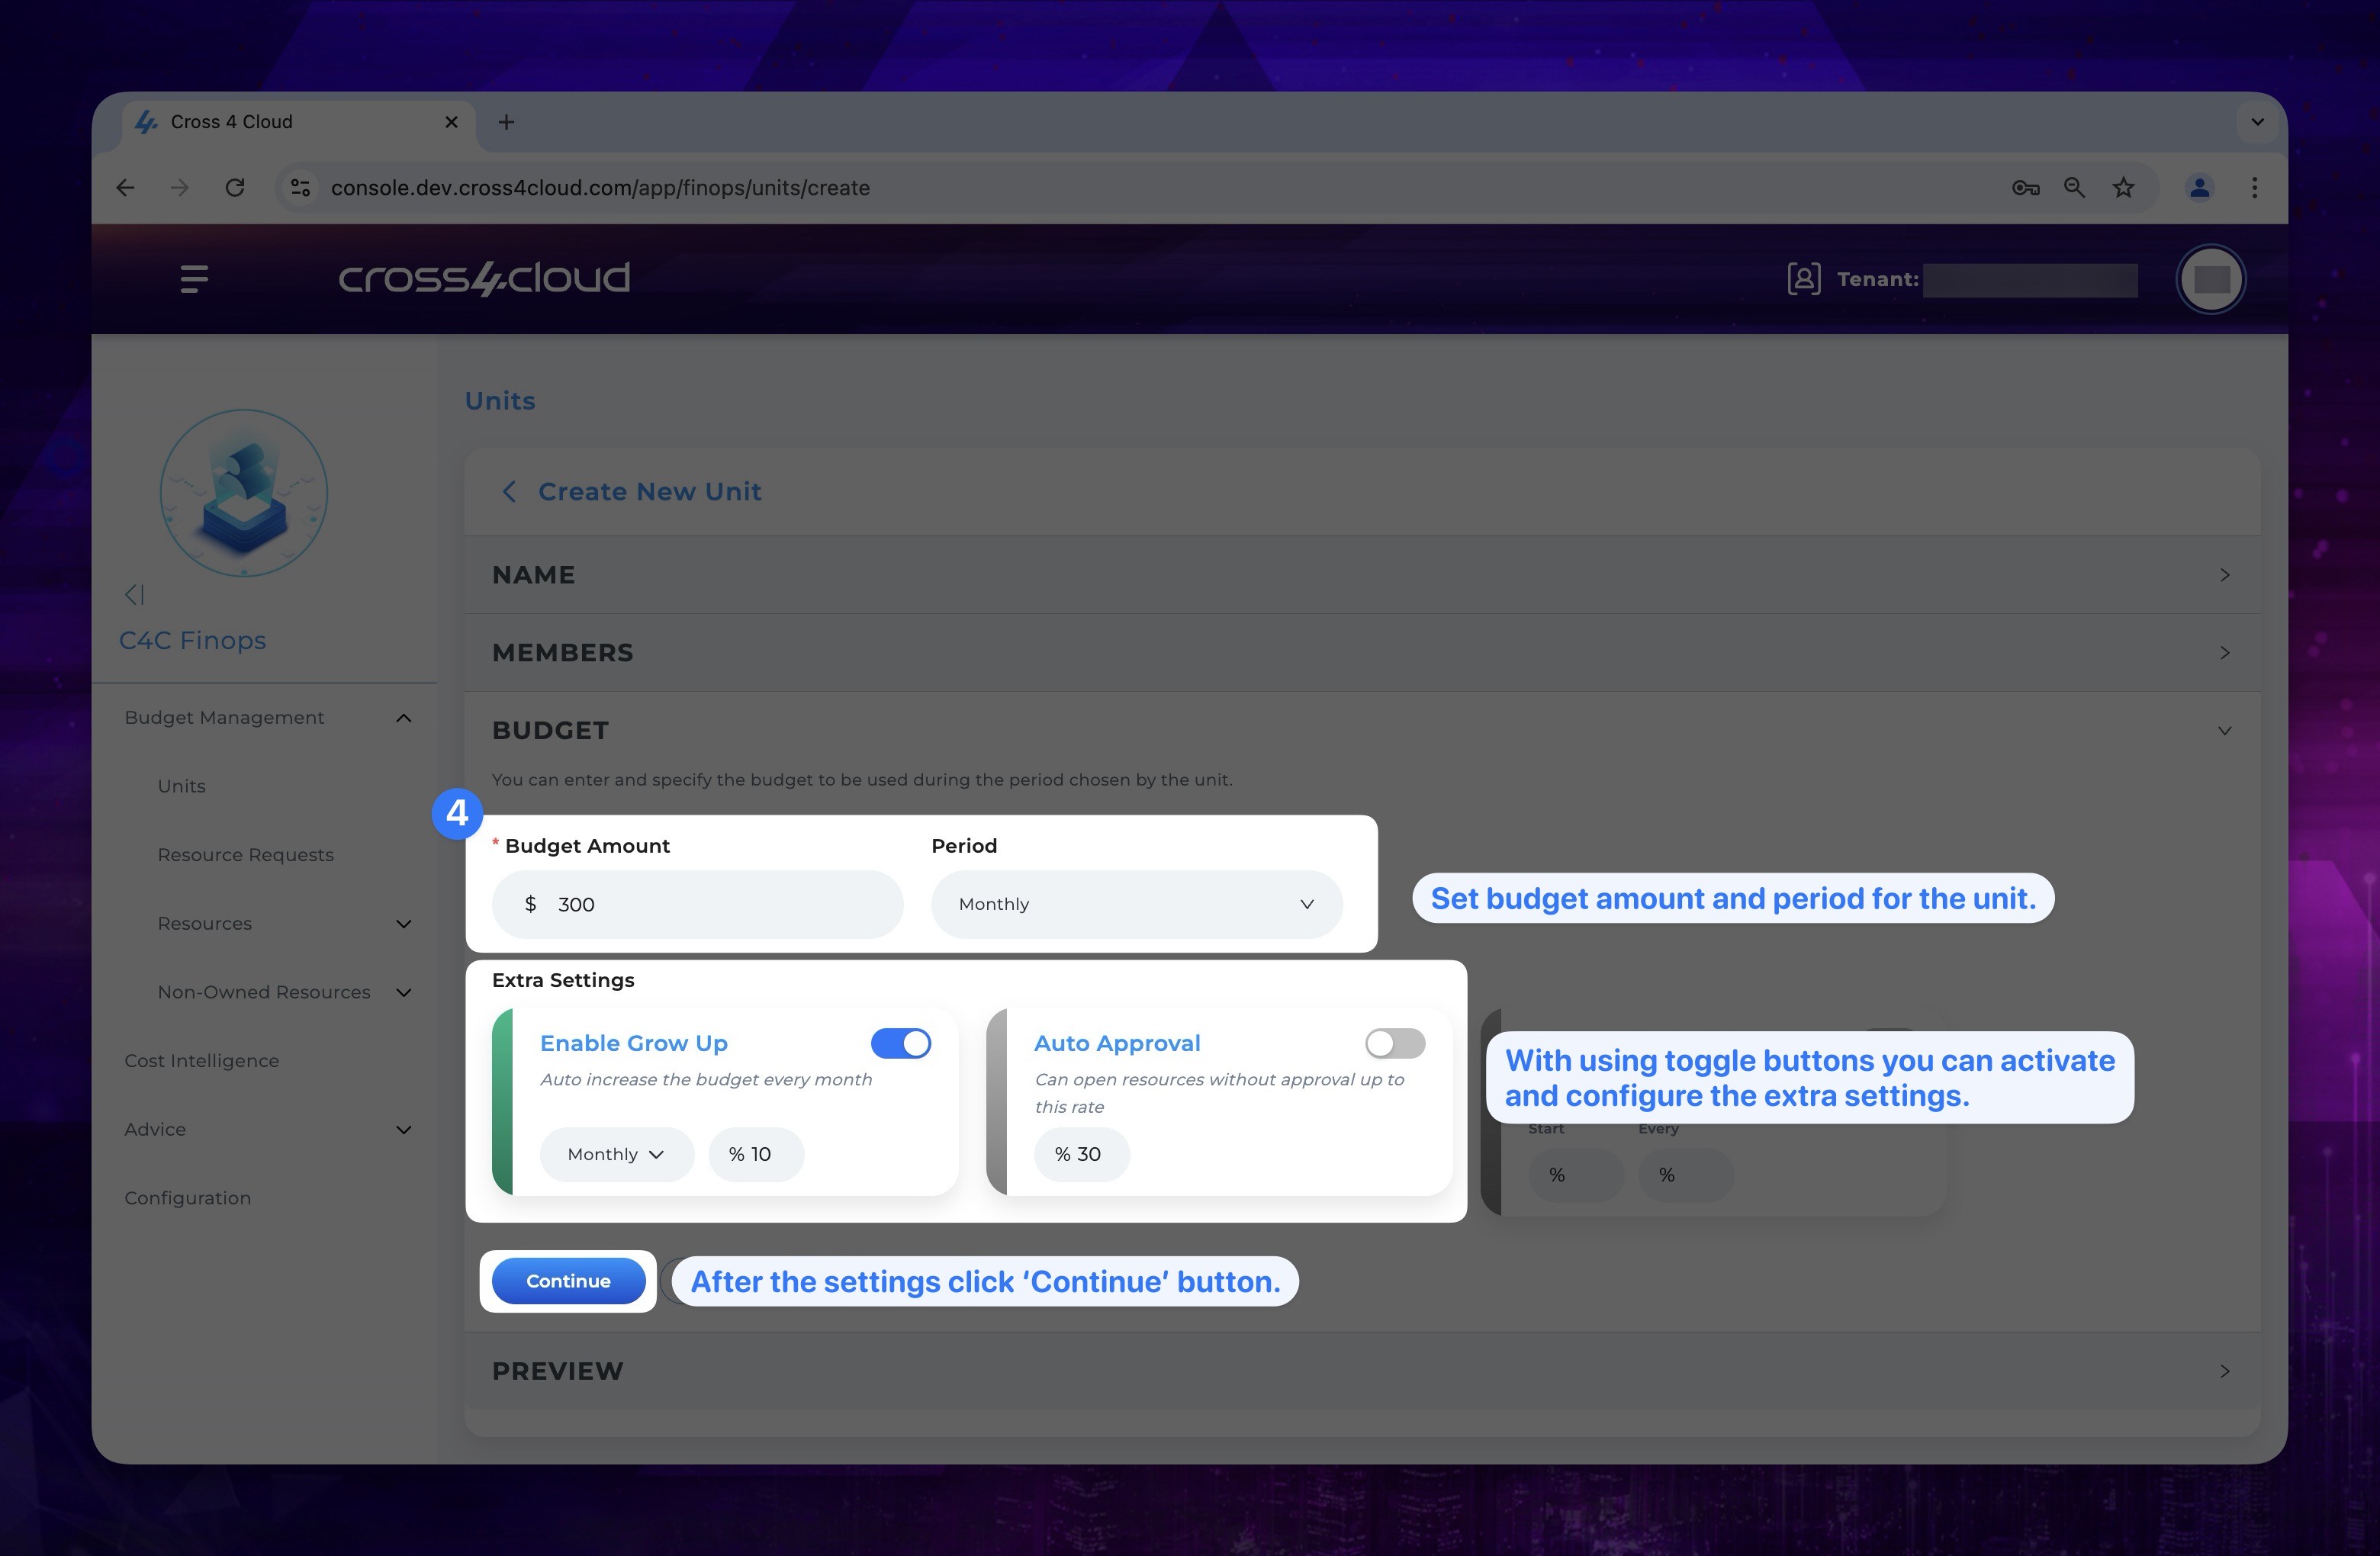
- Inside the Budget section, set a budget amount for the unit, define the period, and configure additional settings such as Grow Up and Auto Approval. After making these adjustments, click the Continue button to proceed.
Show the instruction with images
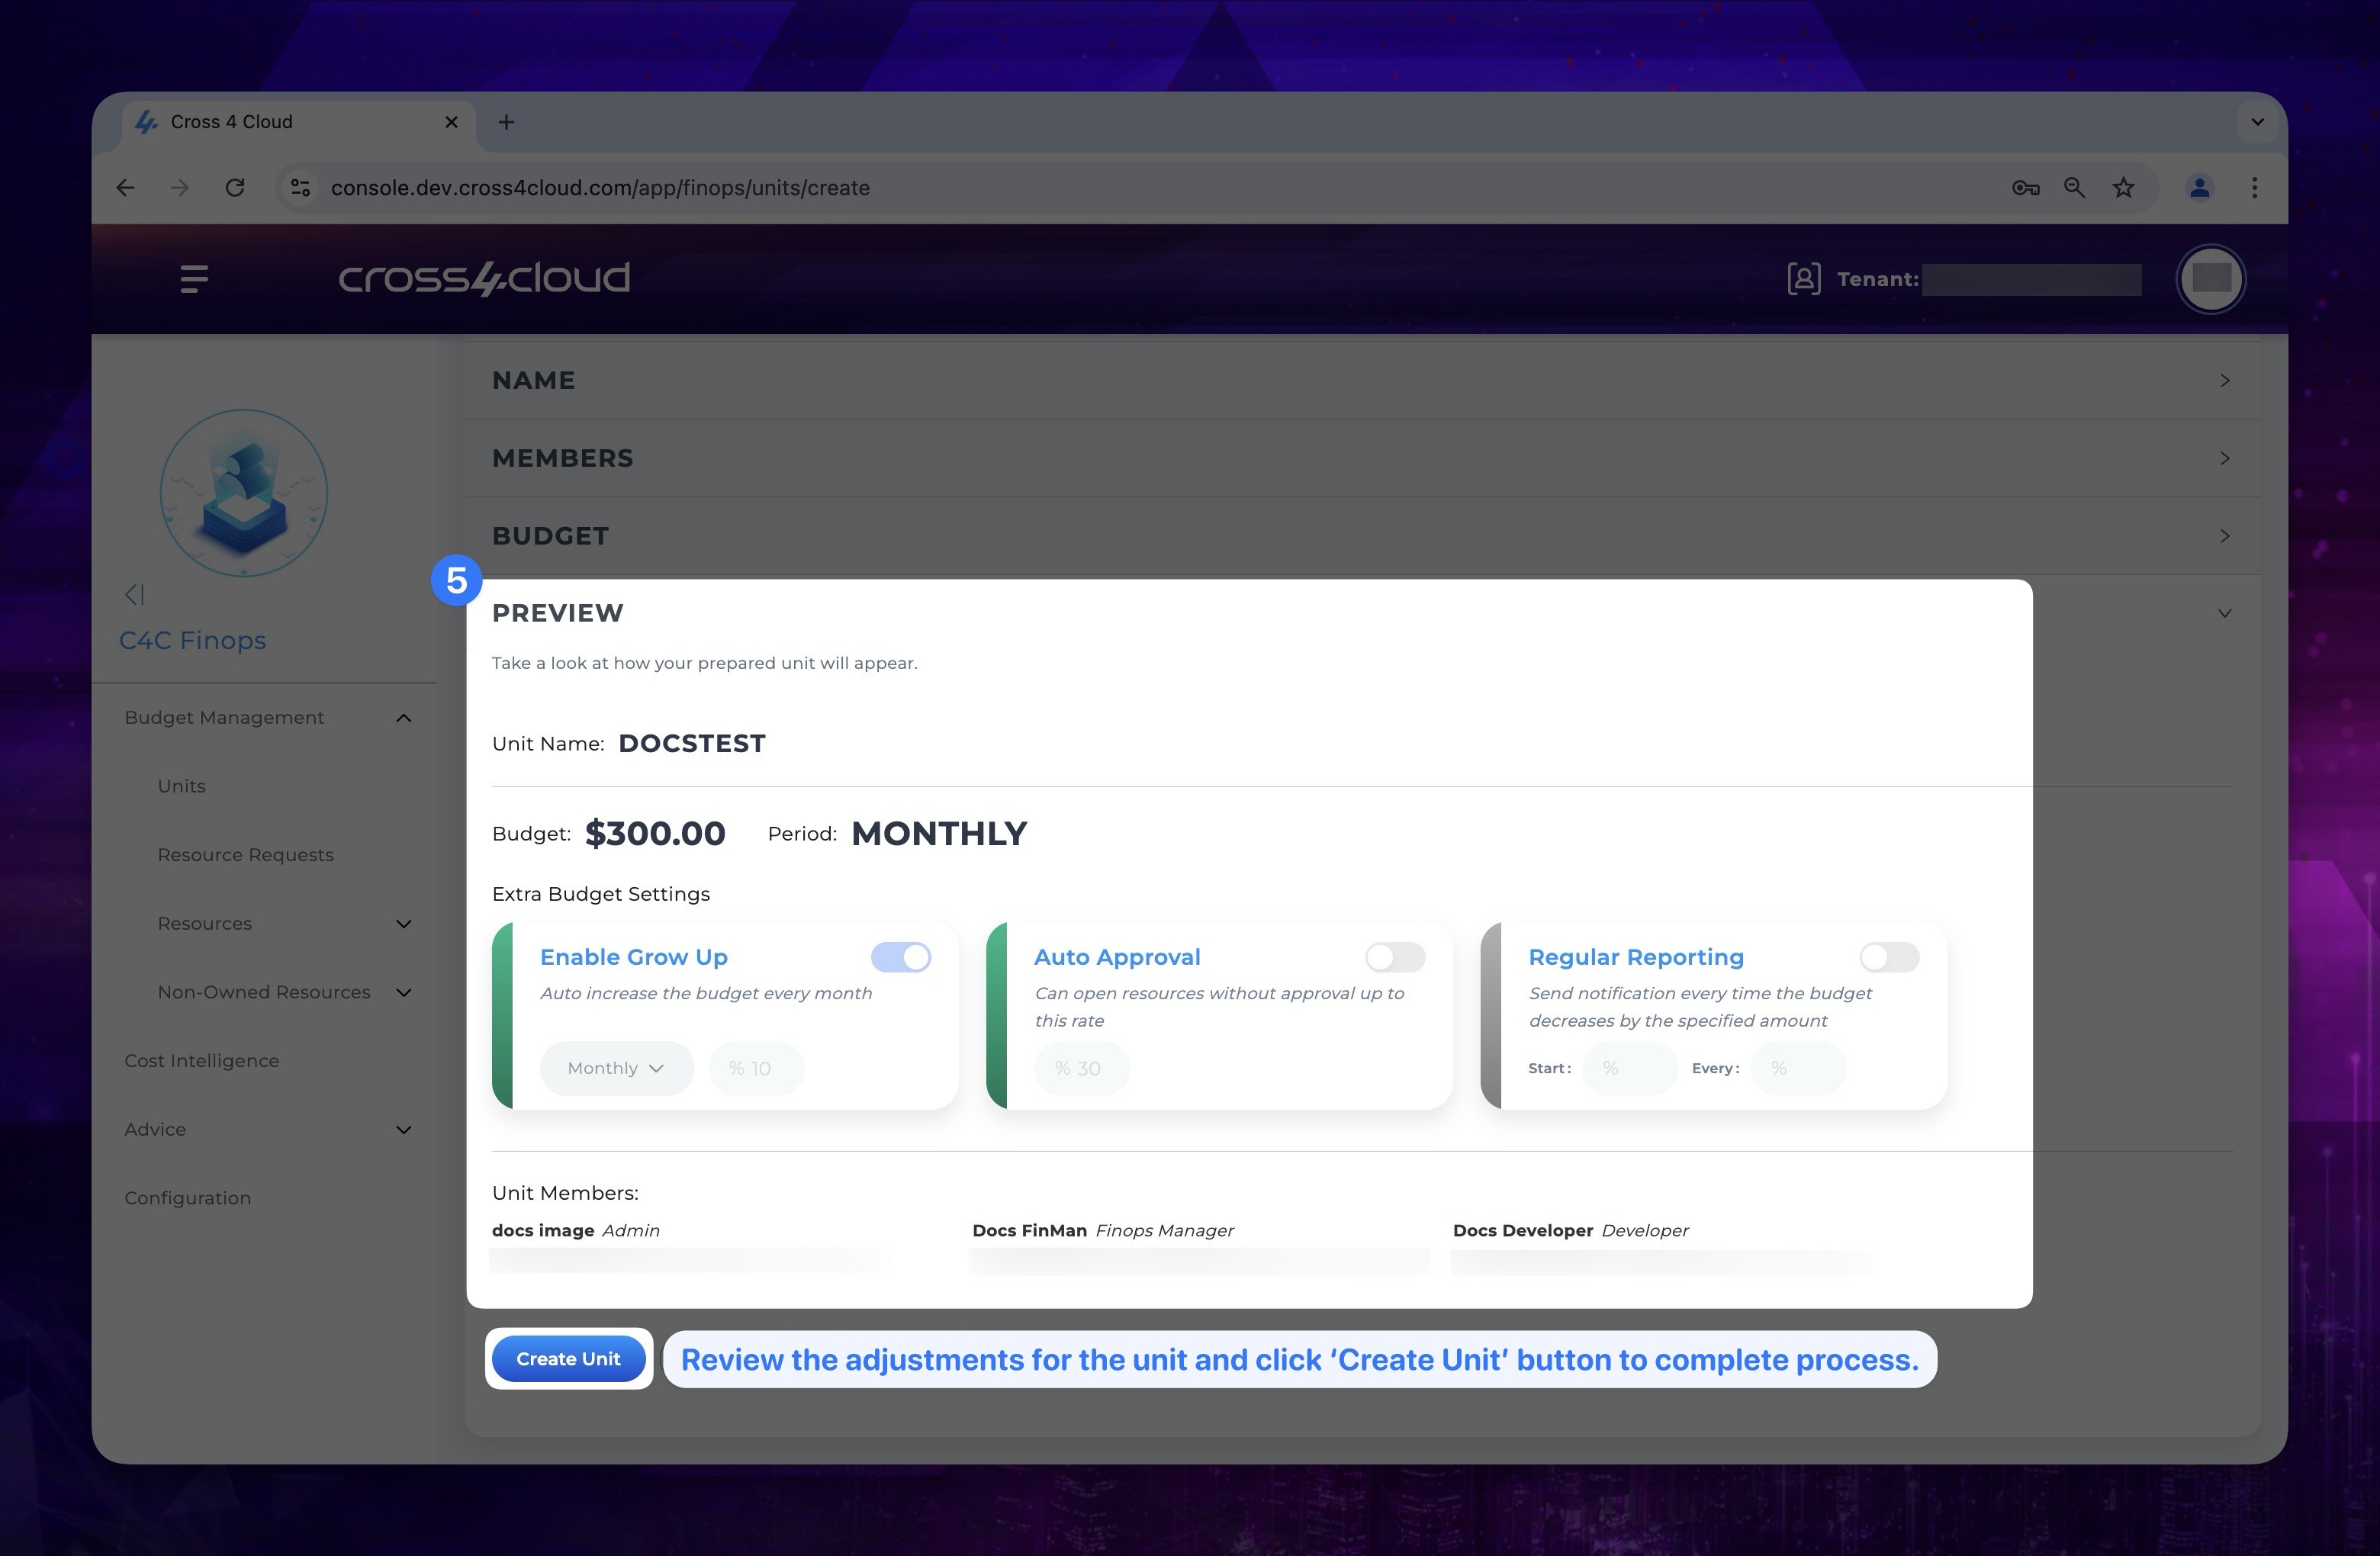
- Lastly, in the Preview section, you can review your adjustments. If you want to create the unit with these preferences, click the Create Unit button. If you need to make changes, use the Back button to edit preferences, or click the Cancel button to cancel the creation process.
Show the instruction with images
After completing the process, you can see the new unit listed on the units page.
Managing Units
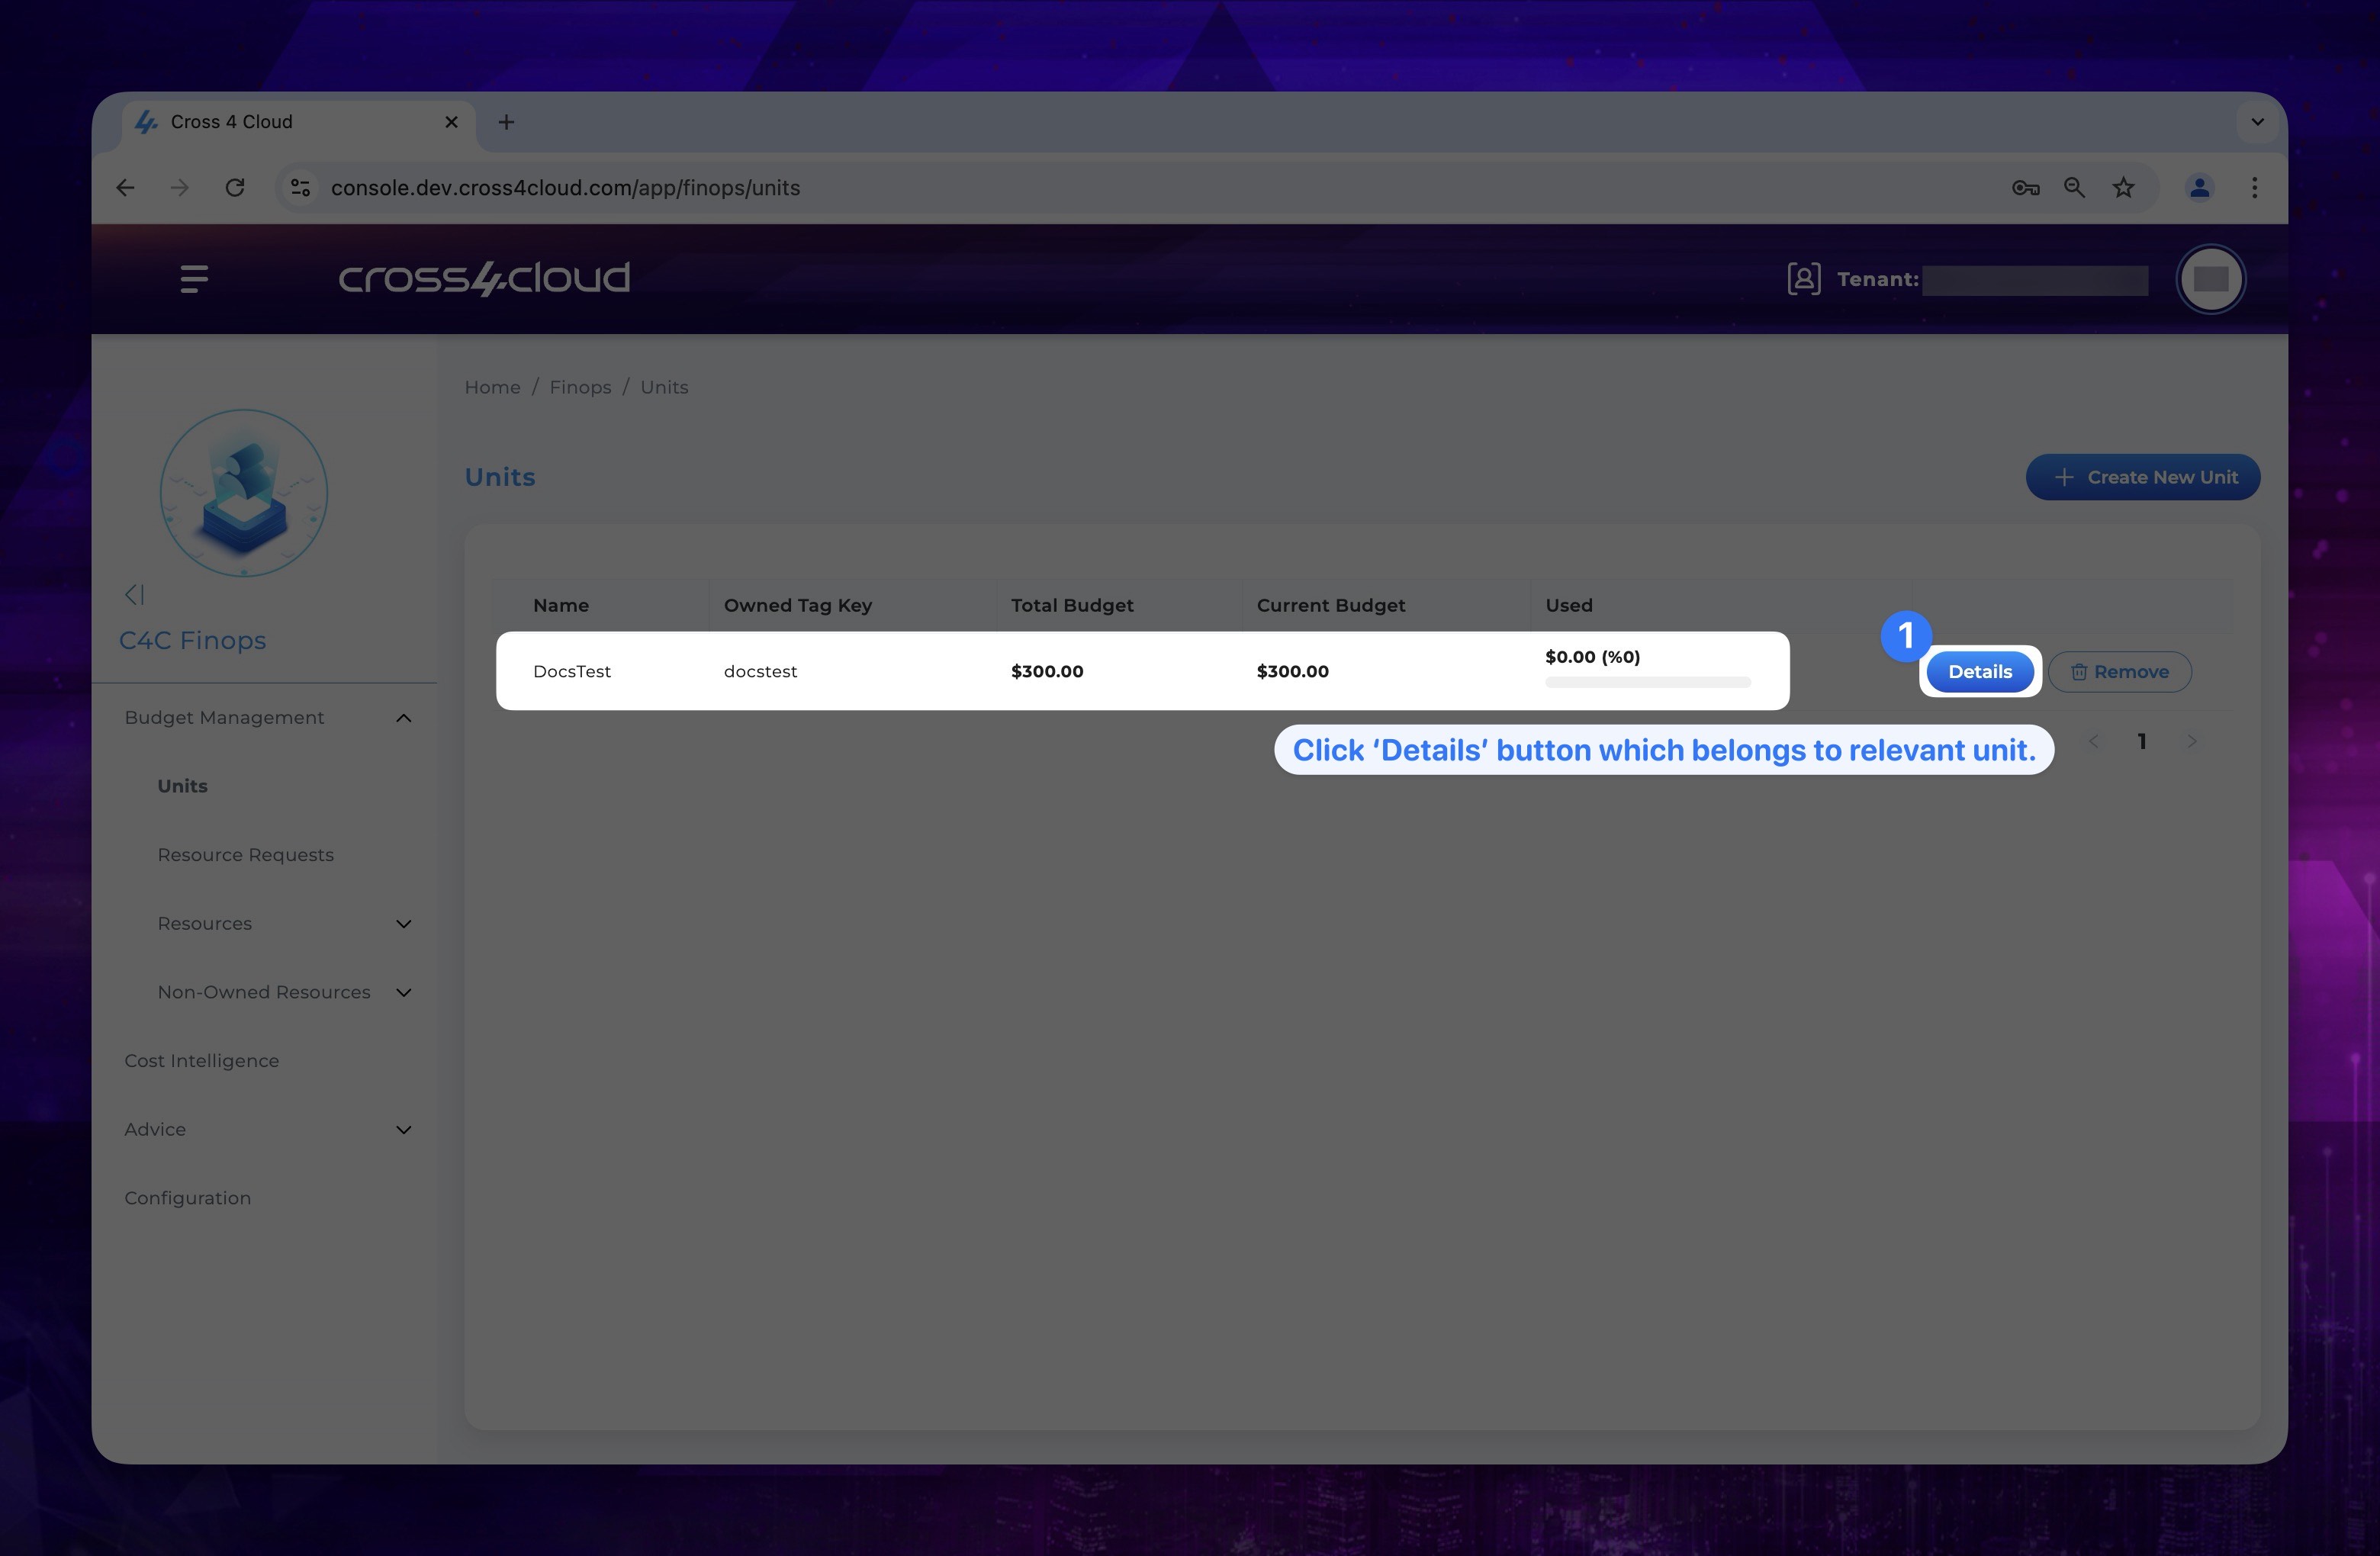
To check which unit has how many budgets, how much of the budget has been used, or which members are included in a specific unit, click the Details button in the relevant unit's row. This will provide you with comprehensive information about the unit's budget and member allocation.
For the unit's current and used budget information, it is updated daily based on the unit's daily usage.
Unit Editing
Inside the units page, you can view all of your units. If you want to modify any preferences or settings related to a unit, you can:
- Click on the Details button next to the unit you want to modify in the list of units.
Show the instruction with images
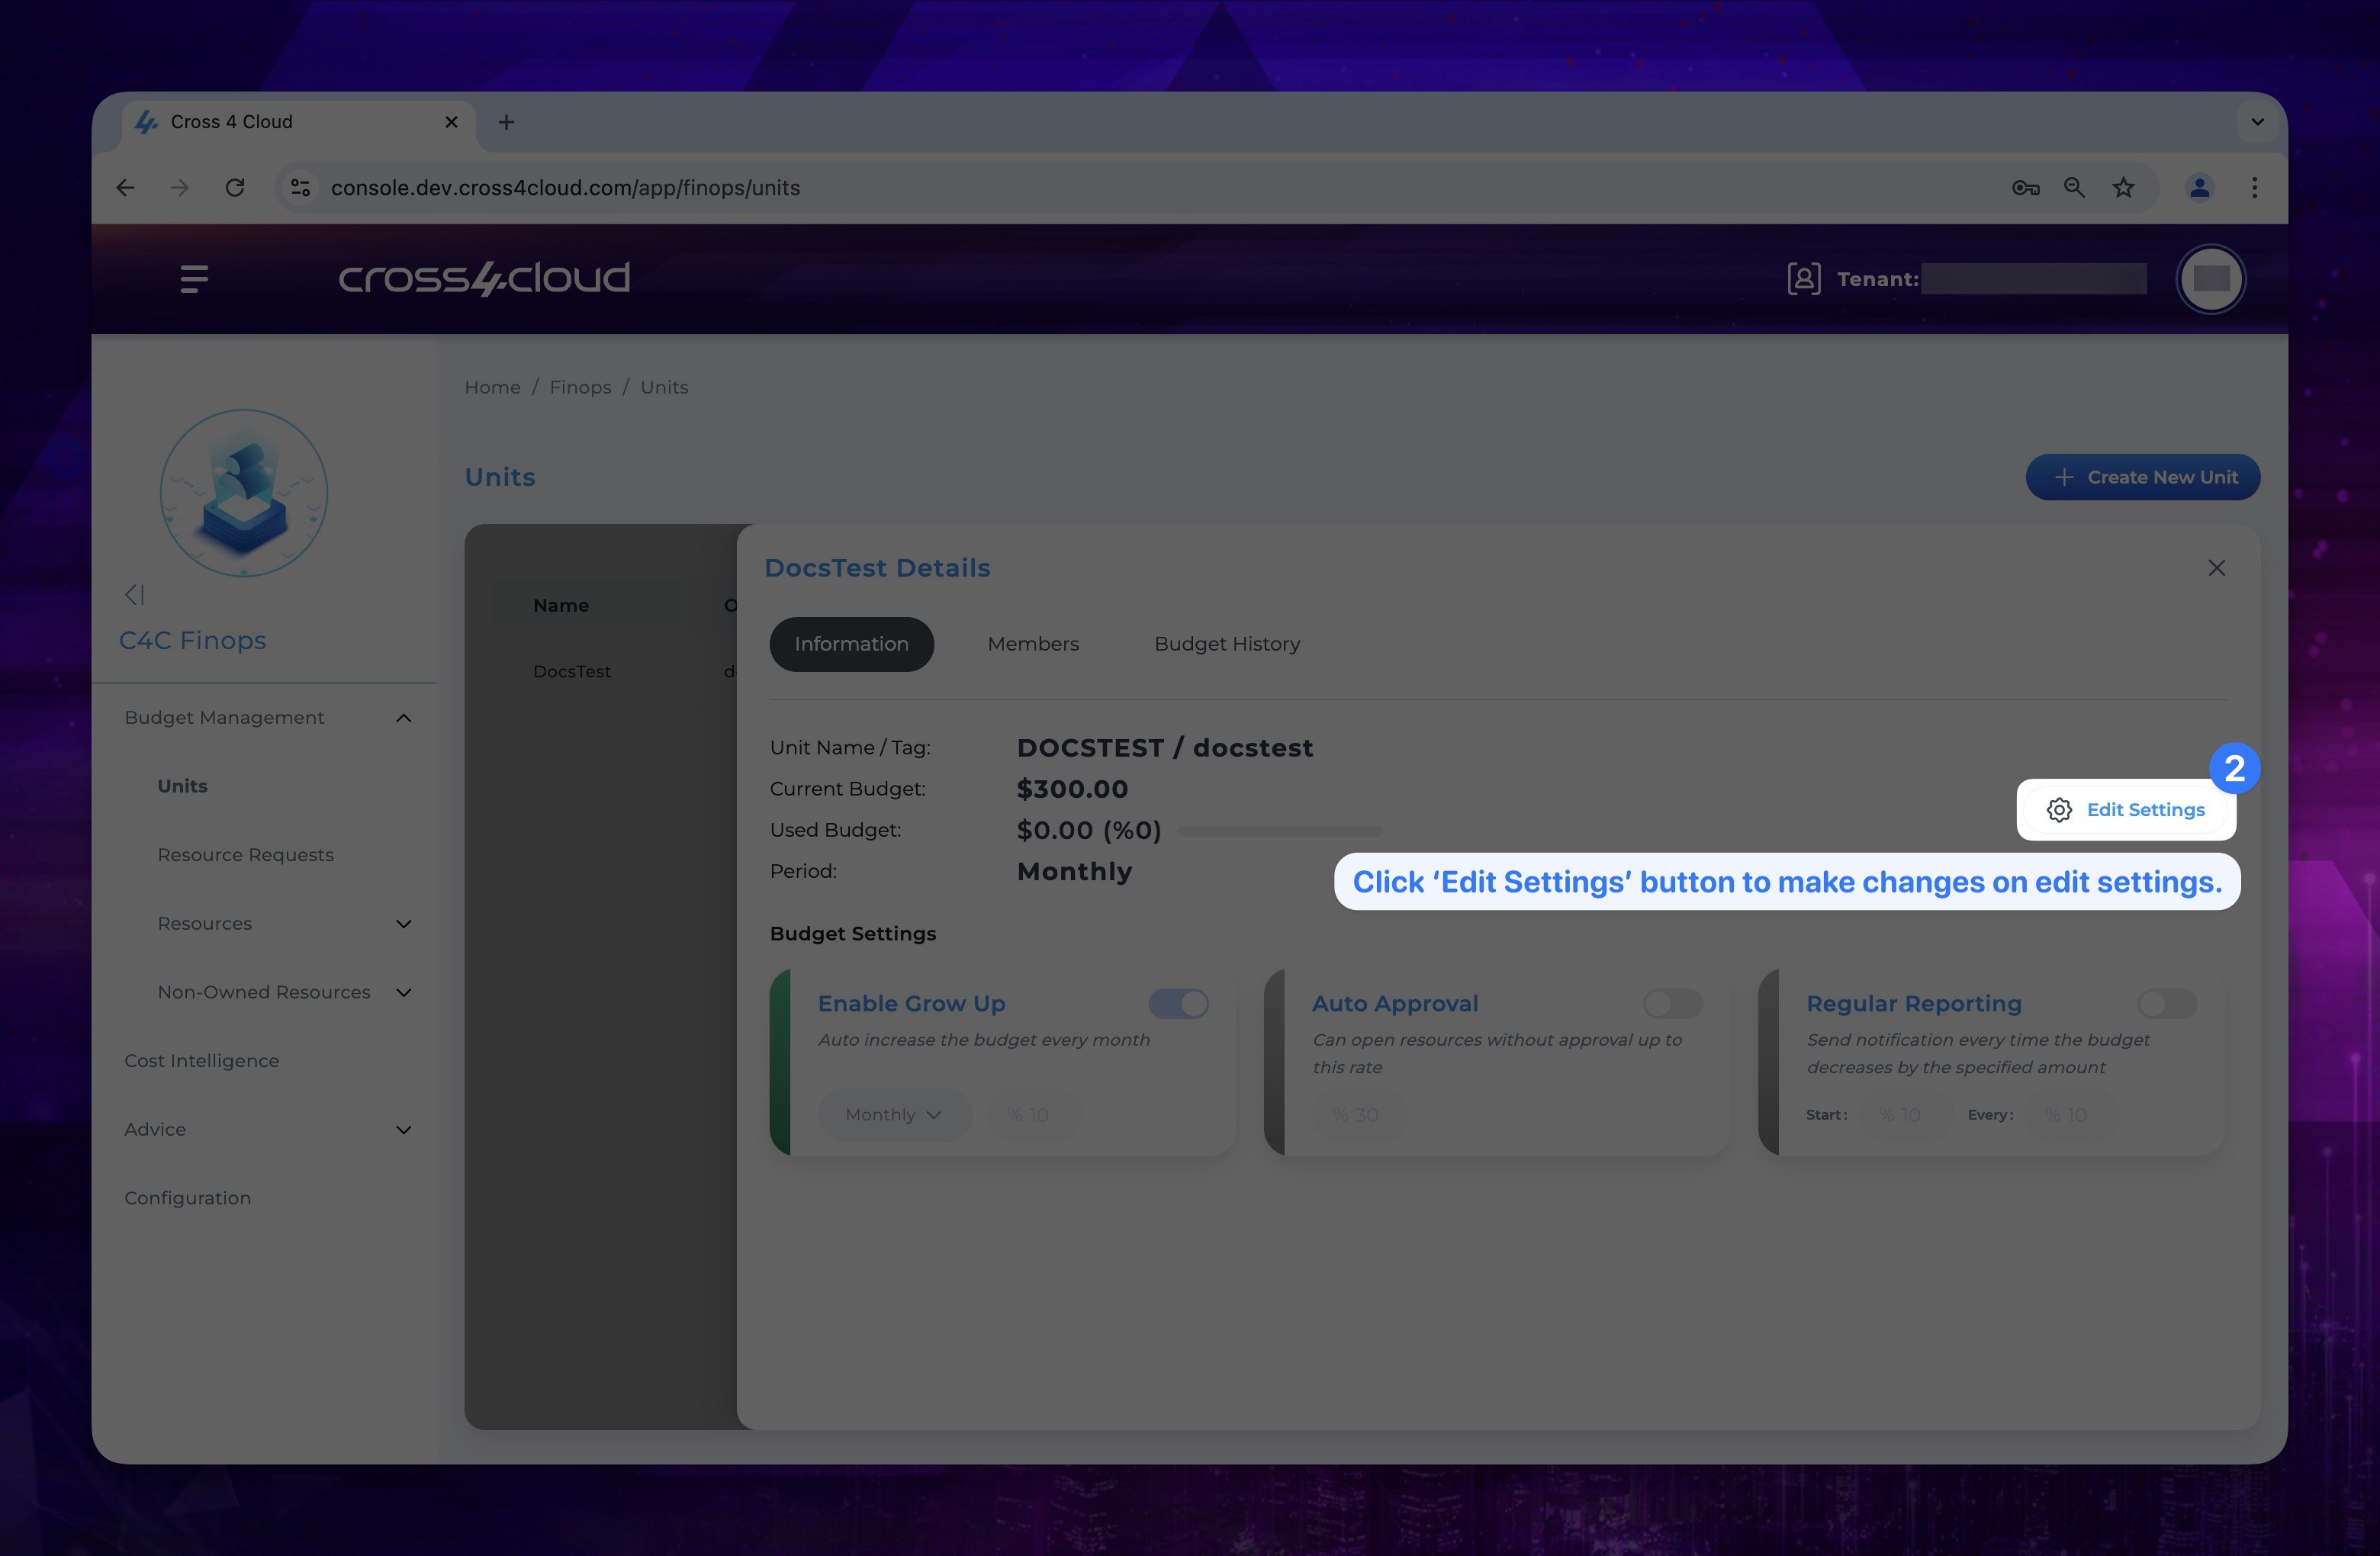
- In the pop-up window, you can view the current settings and budget history related to the unit. To make changes to the unit settings, click on the Edit Settings button found in the Information tab.
Show the instruction with images
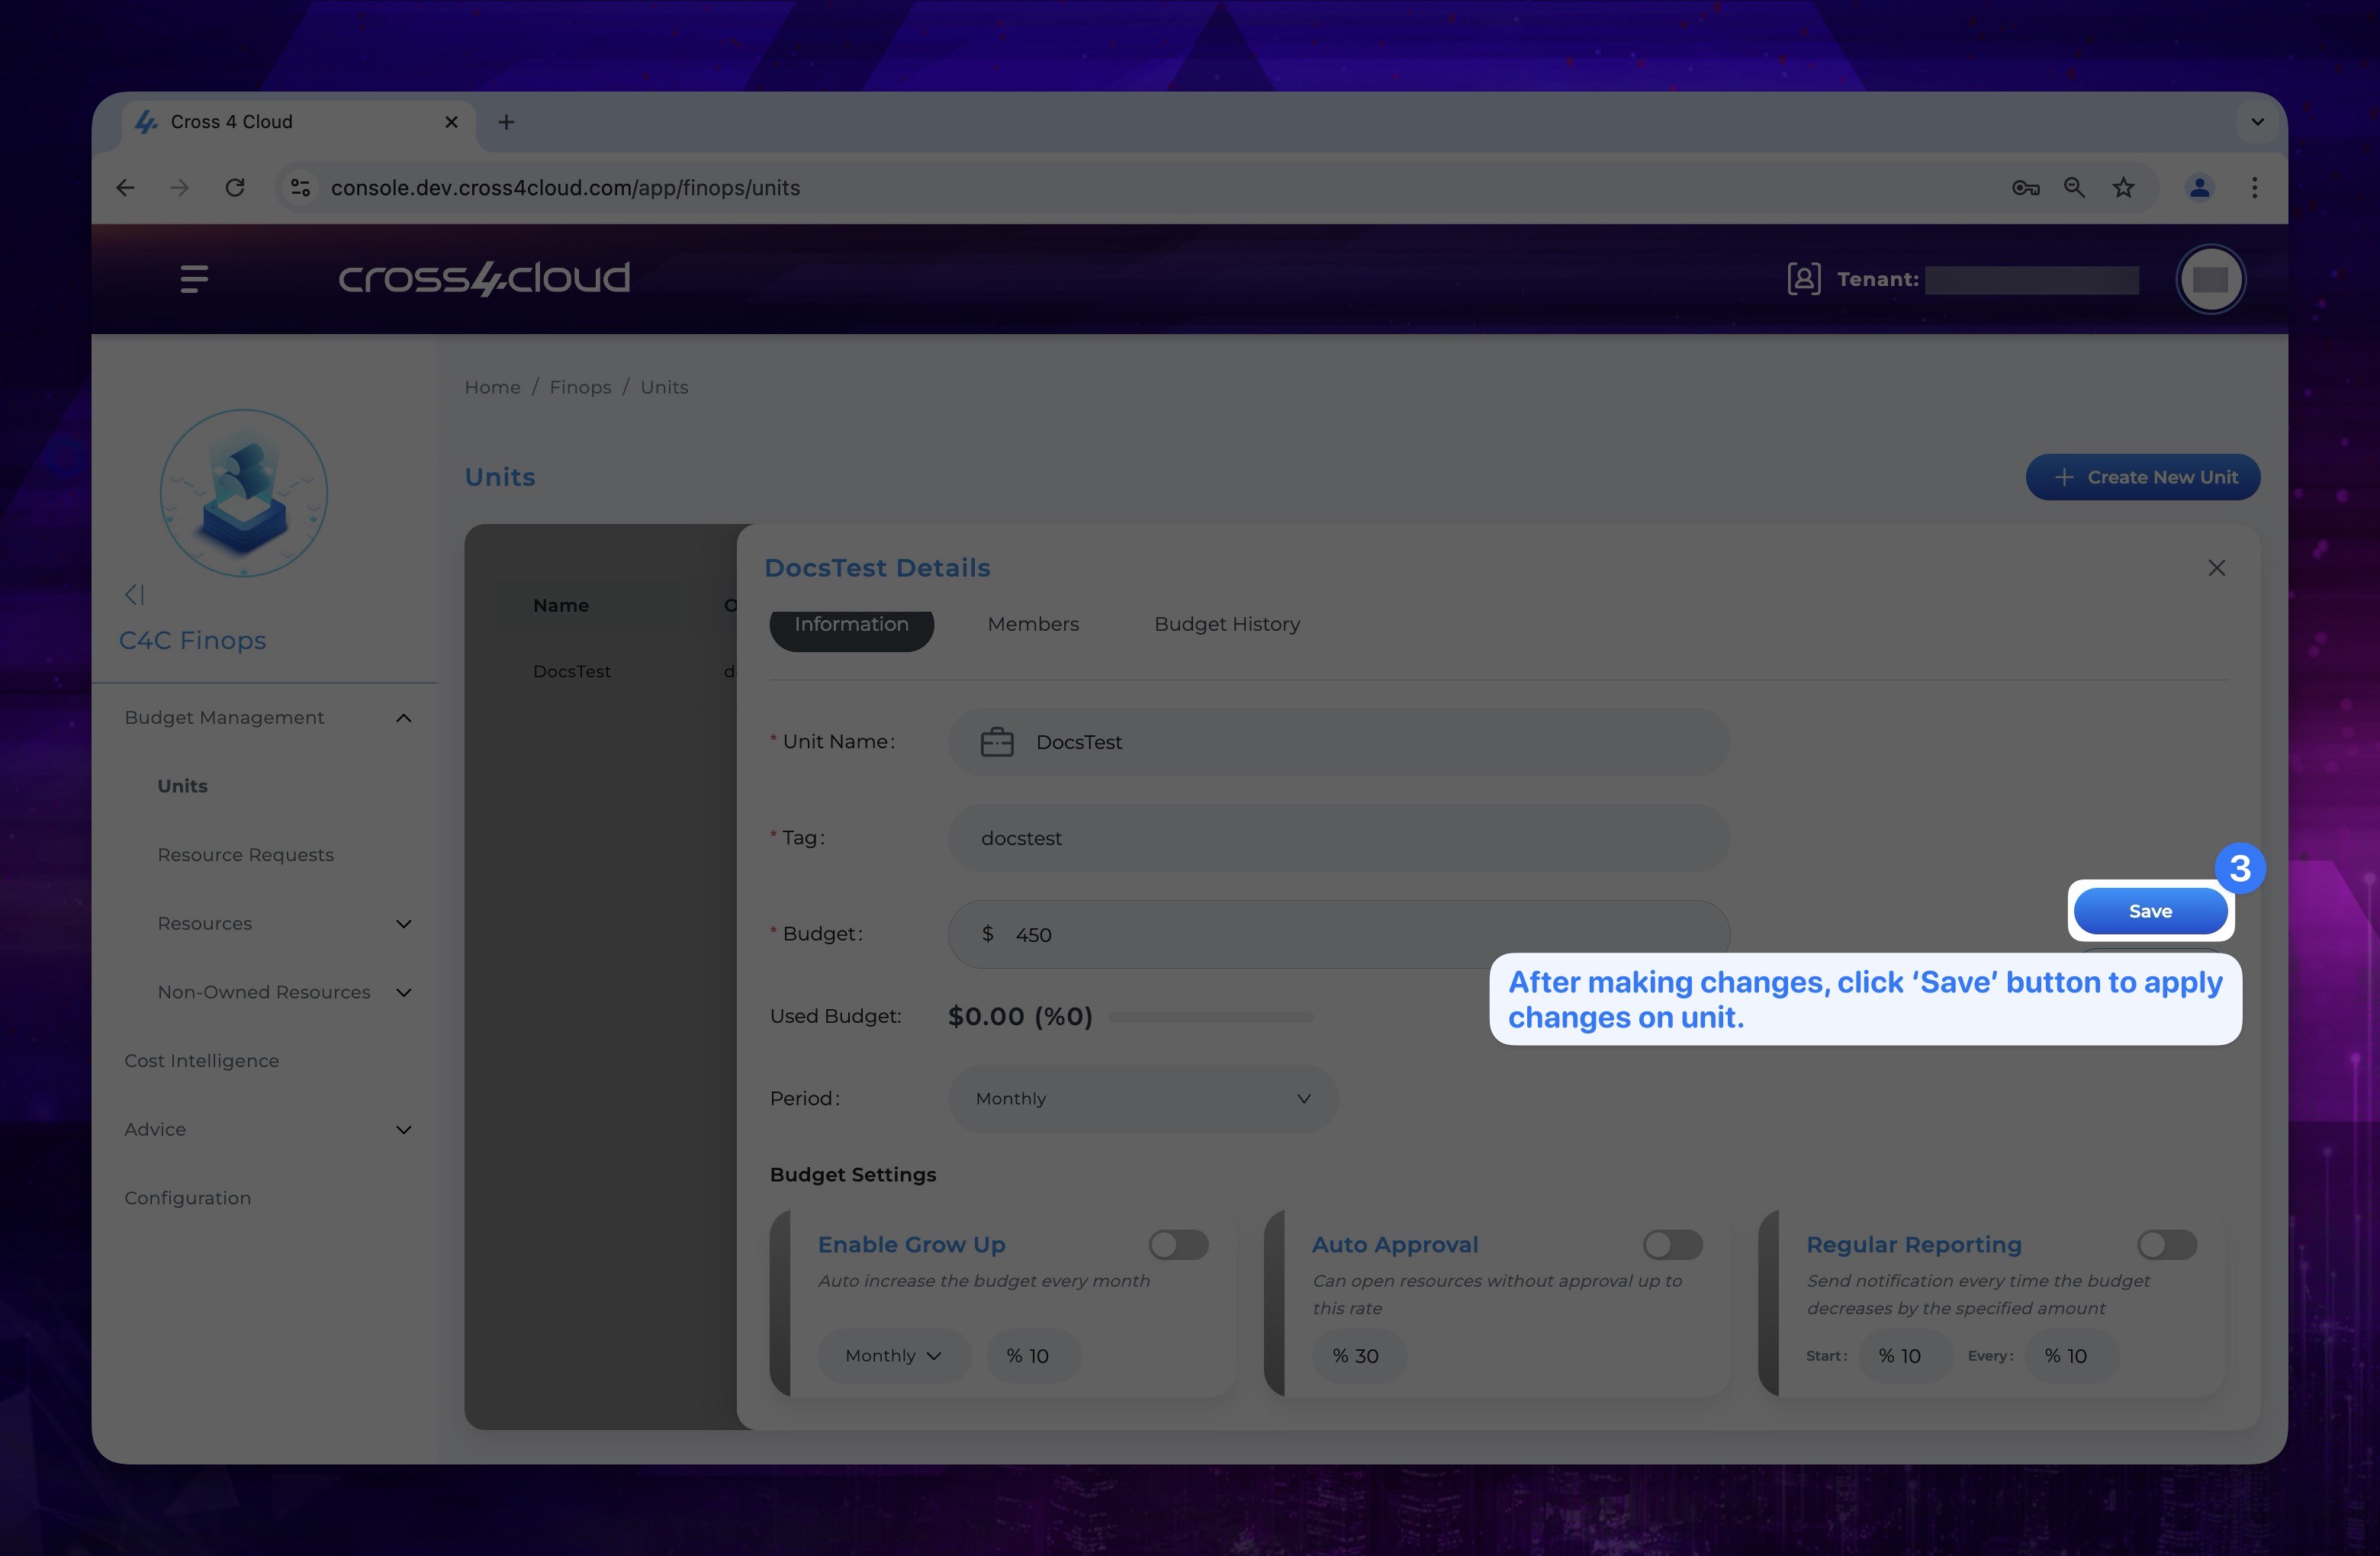
- After changed the unit settings as you prefer click Save button.
Show the instruction with images
To edit units, you must have either an Admin or FinOps Manager role assigned to your account.
Unit Deletion
You can easily remove a unit and its related settings by clicking the Remove button next to the unit you wish to delete in the unit list located at the bottom of the Units page.
Resource Requests
On the Resource Requests page,as a Admin or FinOps Manager of the account you will find a comprehensive list of incoming requests from your units. You have the authority to approve or reject these requests. Additionally, you can review past requests to keep track of previously approved or rejected resource allocations. For developers you can see the resource requests that you ask for.
This page helps streamline the process of managing resource demands within your organization.
Resource Requesting
Developers registered within a unit under a tenant can request resources from authorized personnel, based on the needs of their teams or themselves. For requesting a resource:
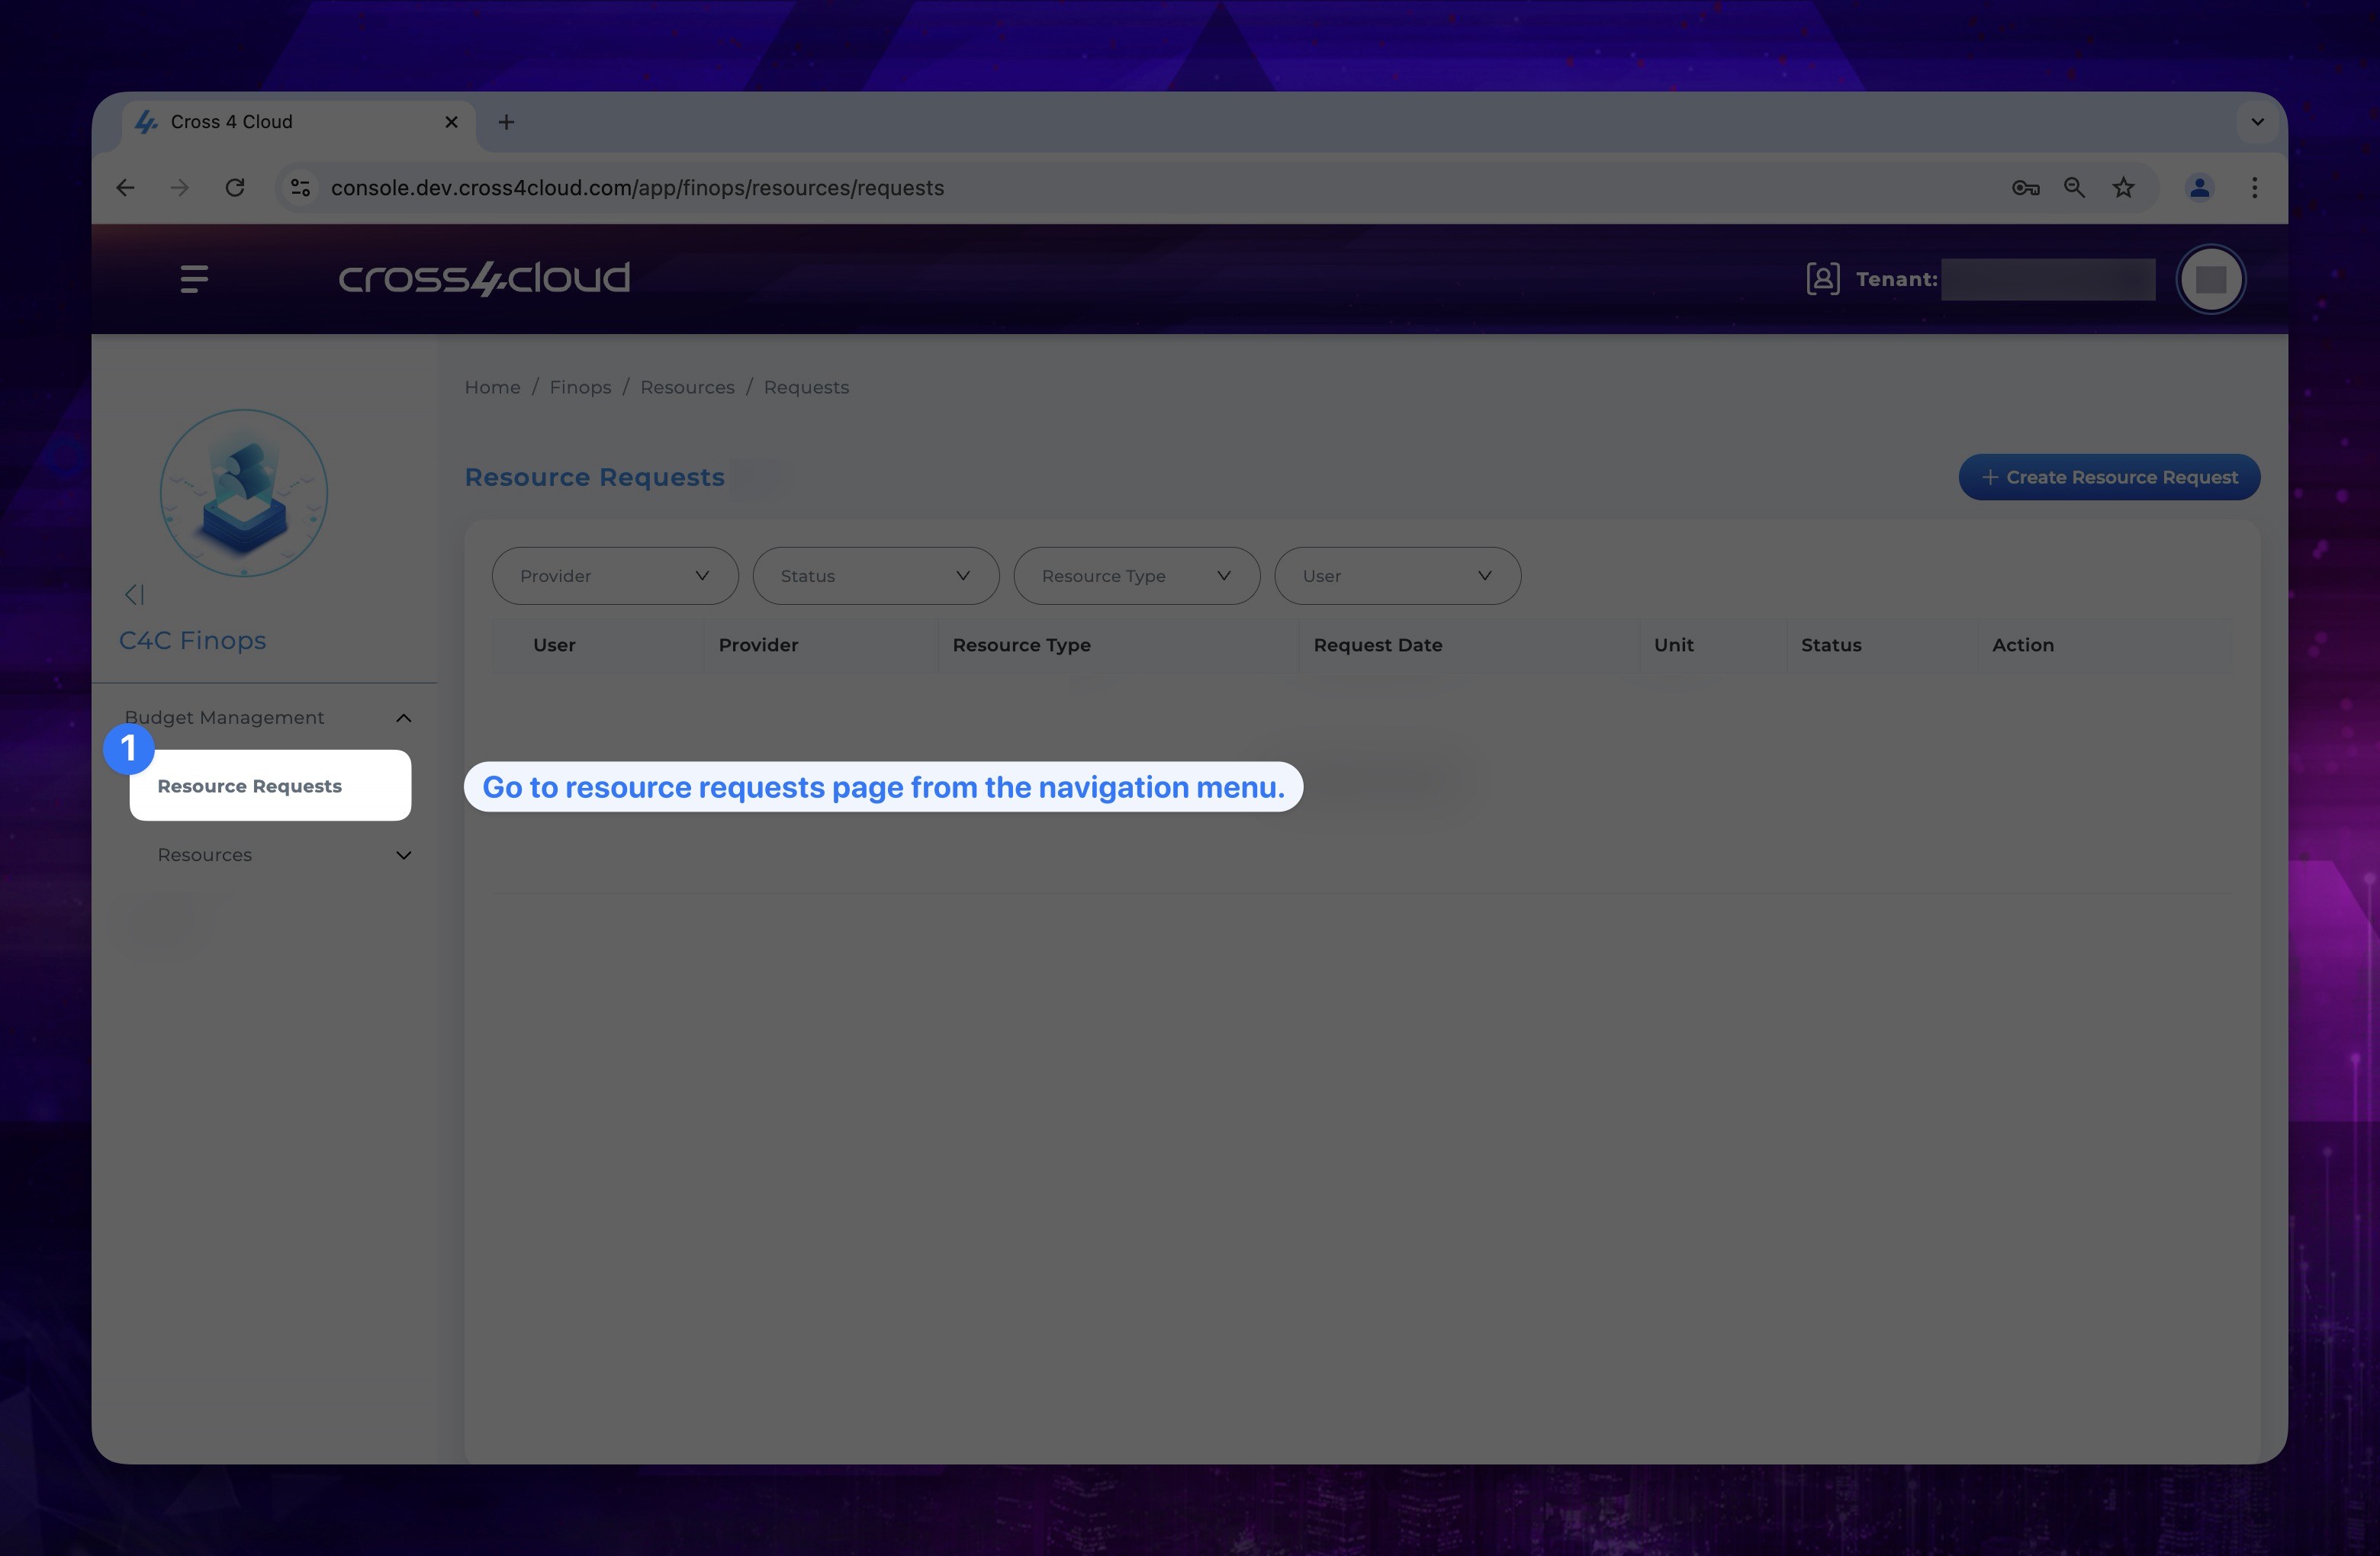
- Go to Resource Requests page from the navigation menu.
Show the instruction with images
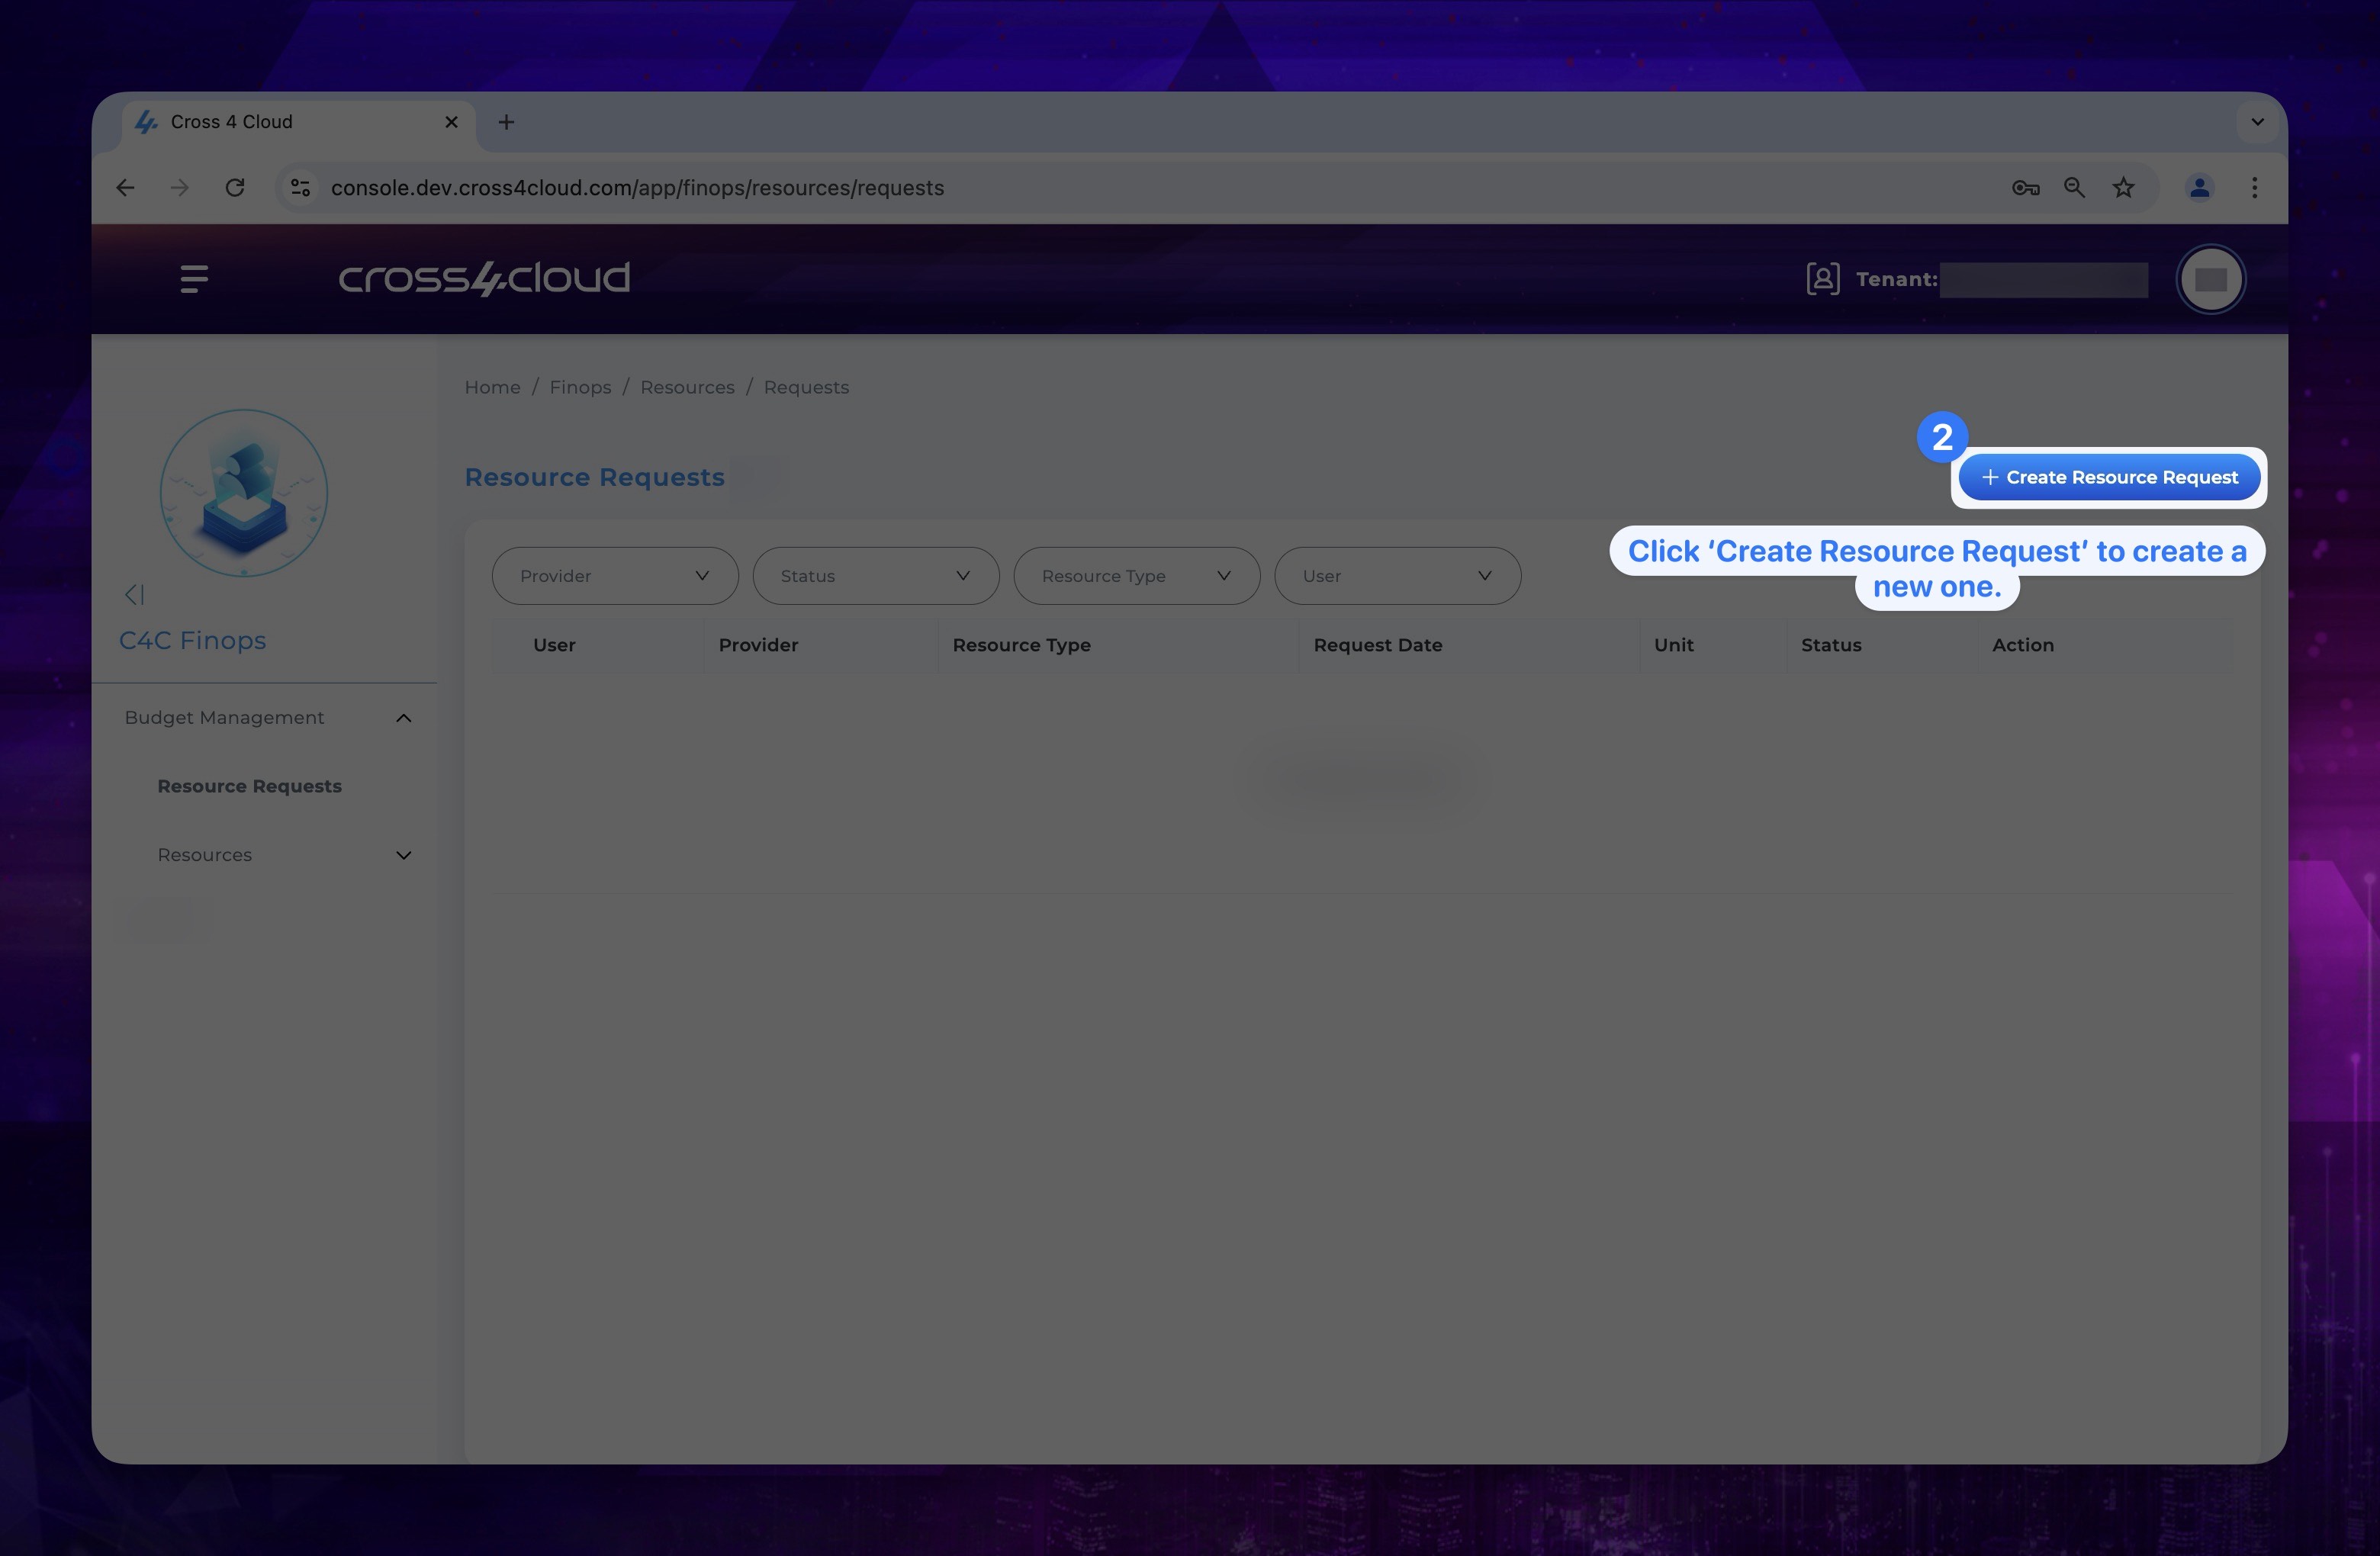
- Click the Create Resource Request button at the top right of the page.
Show the instruction with images
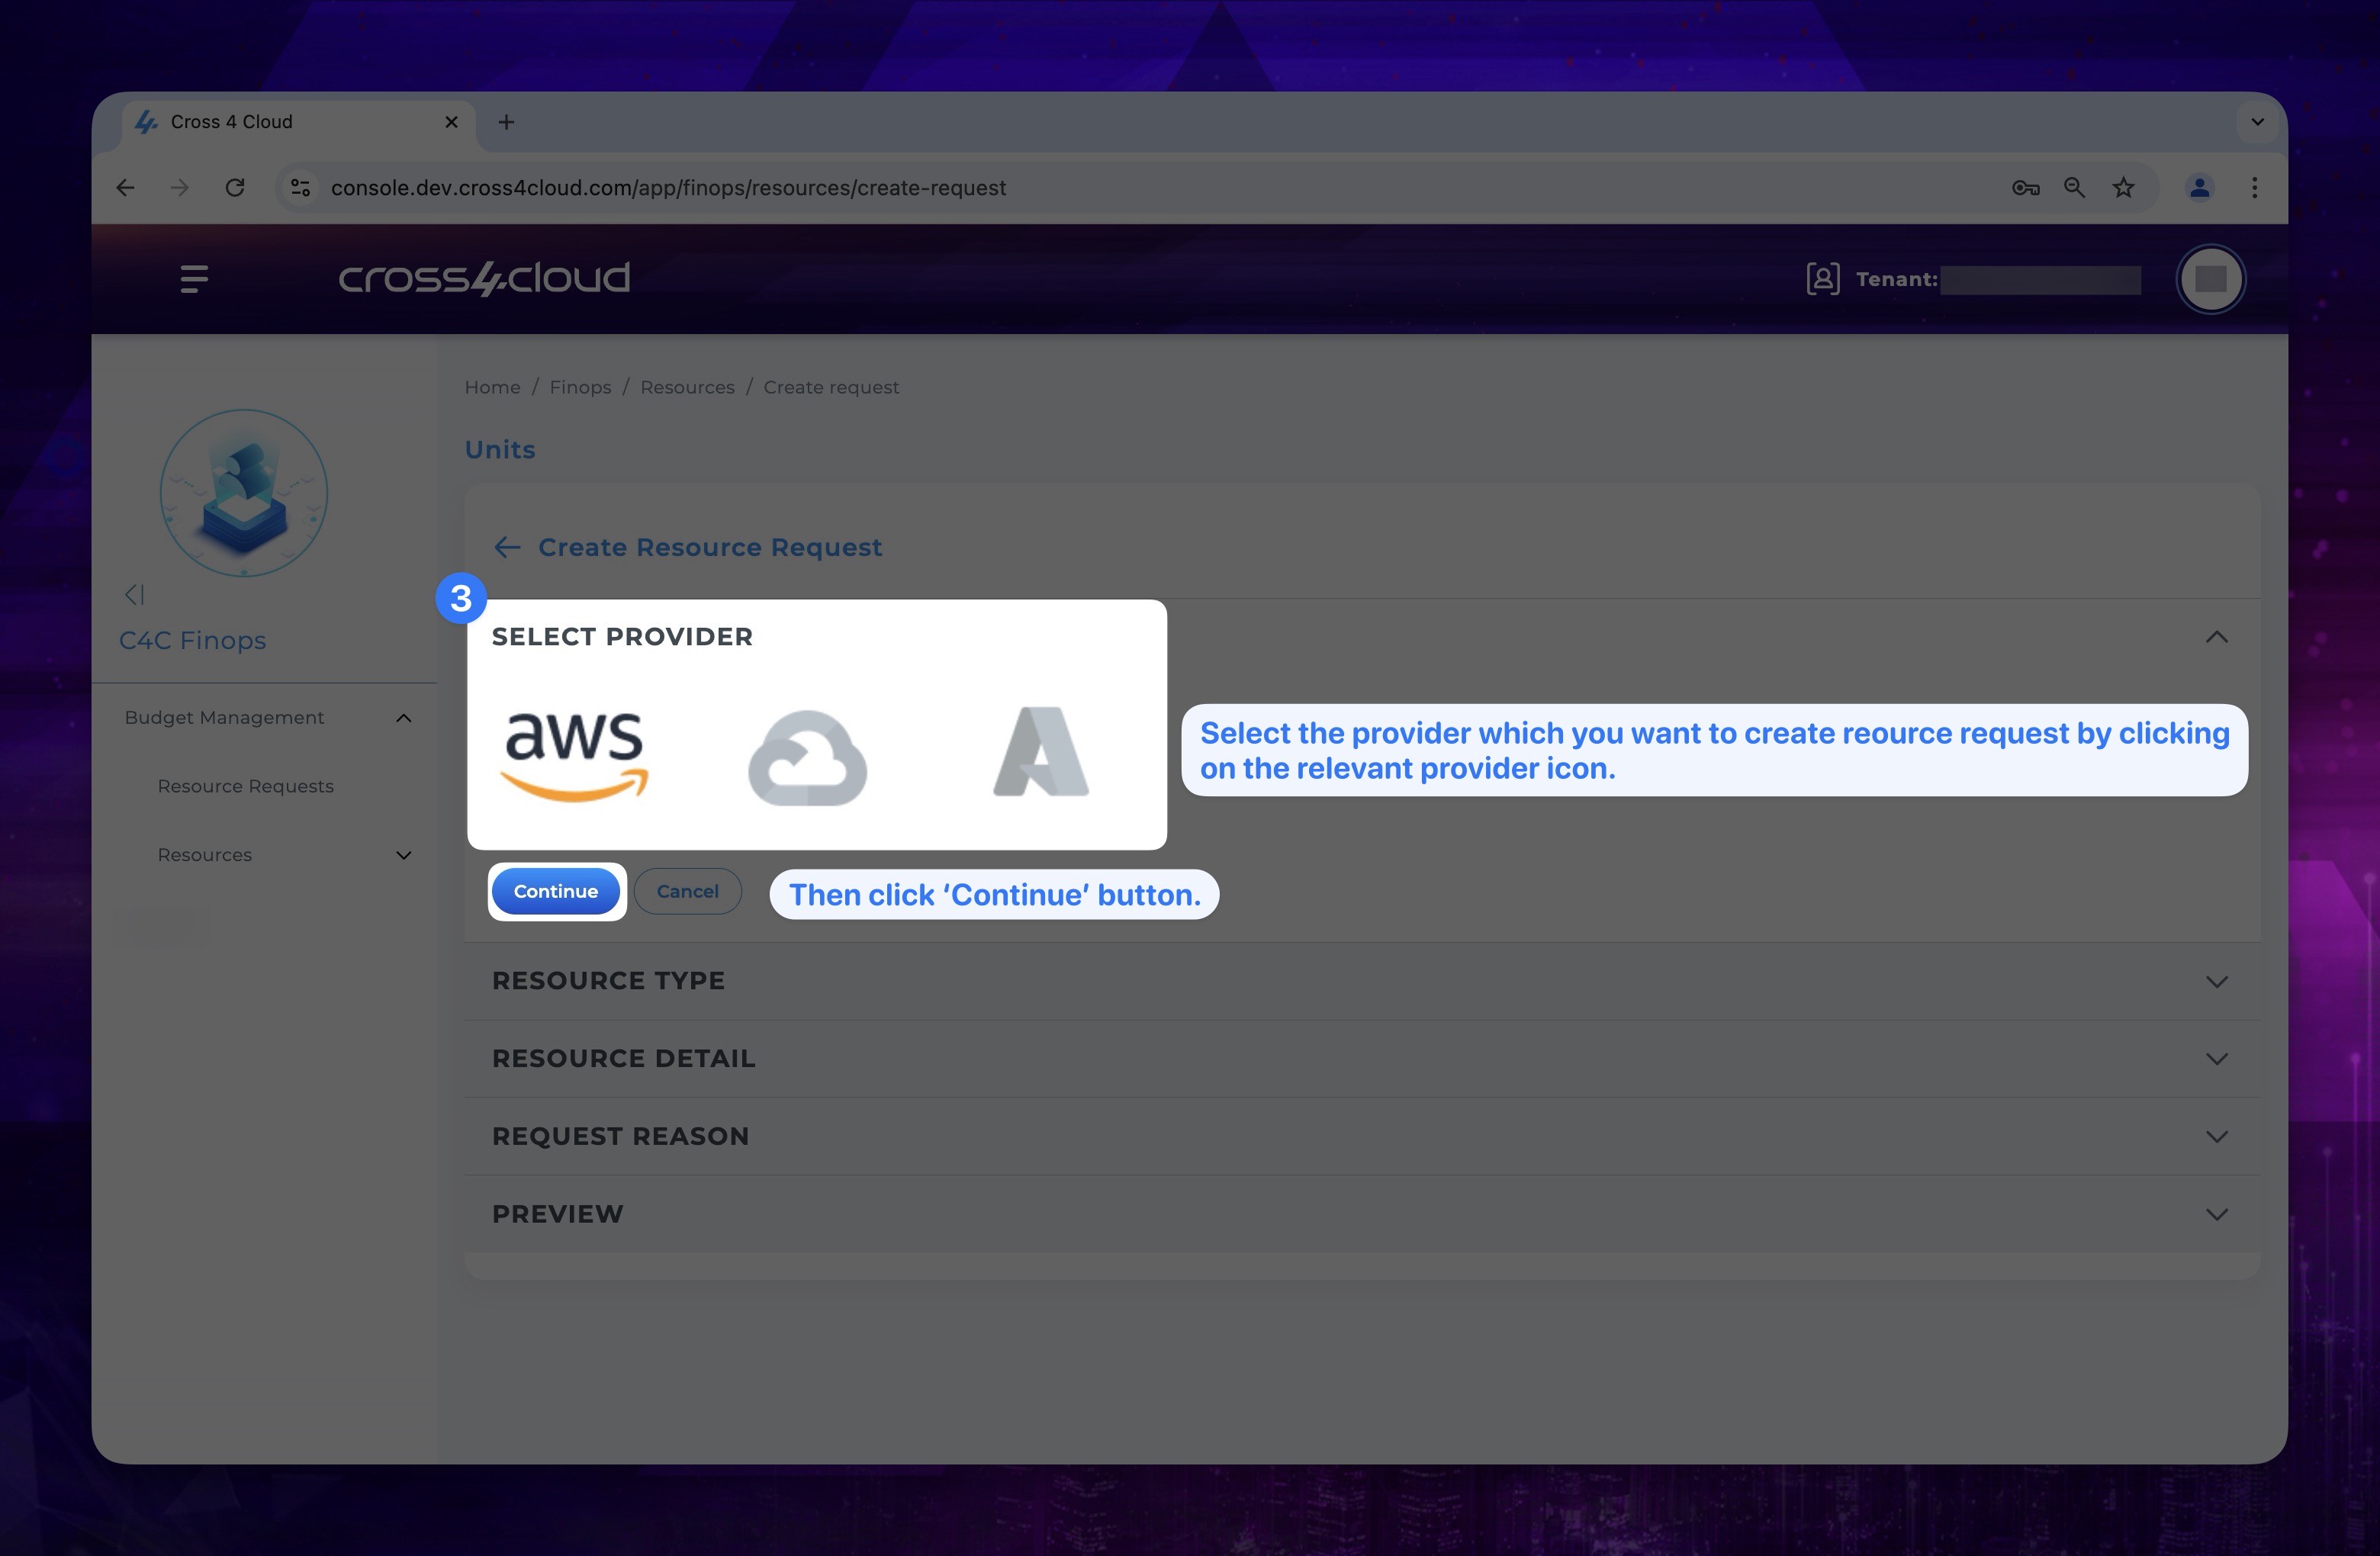
- Click the relevant provider icon to select the provider where the resource request will be created and after that click continue button.
Show the instruction with images
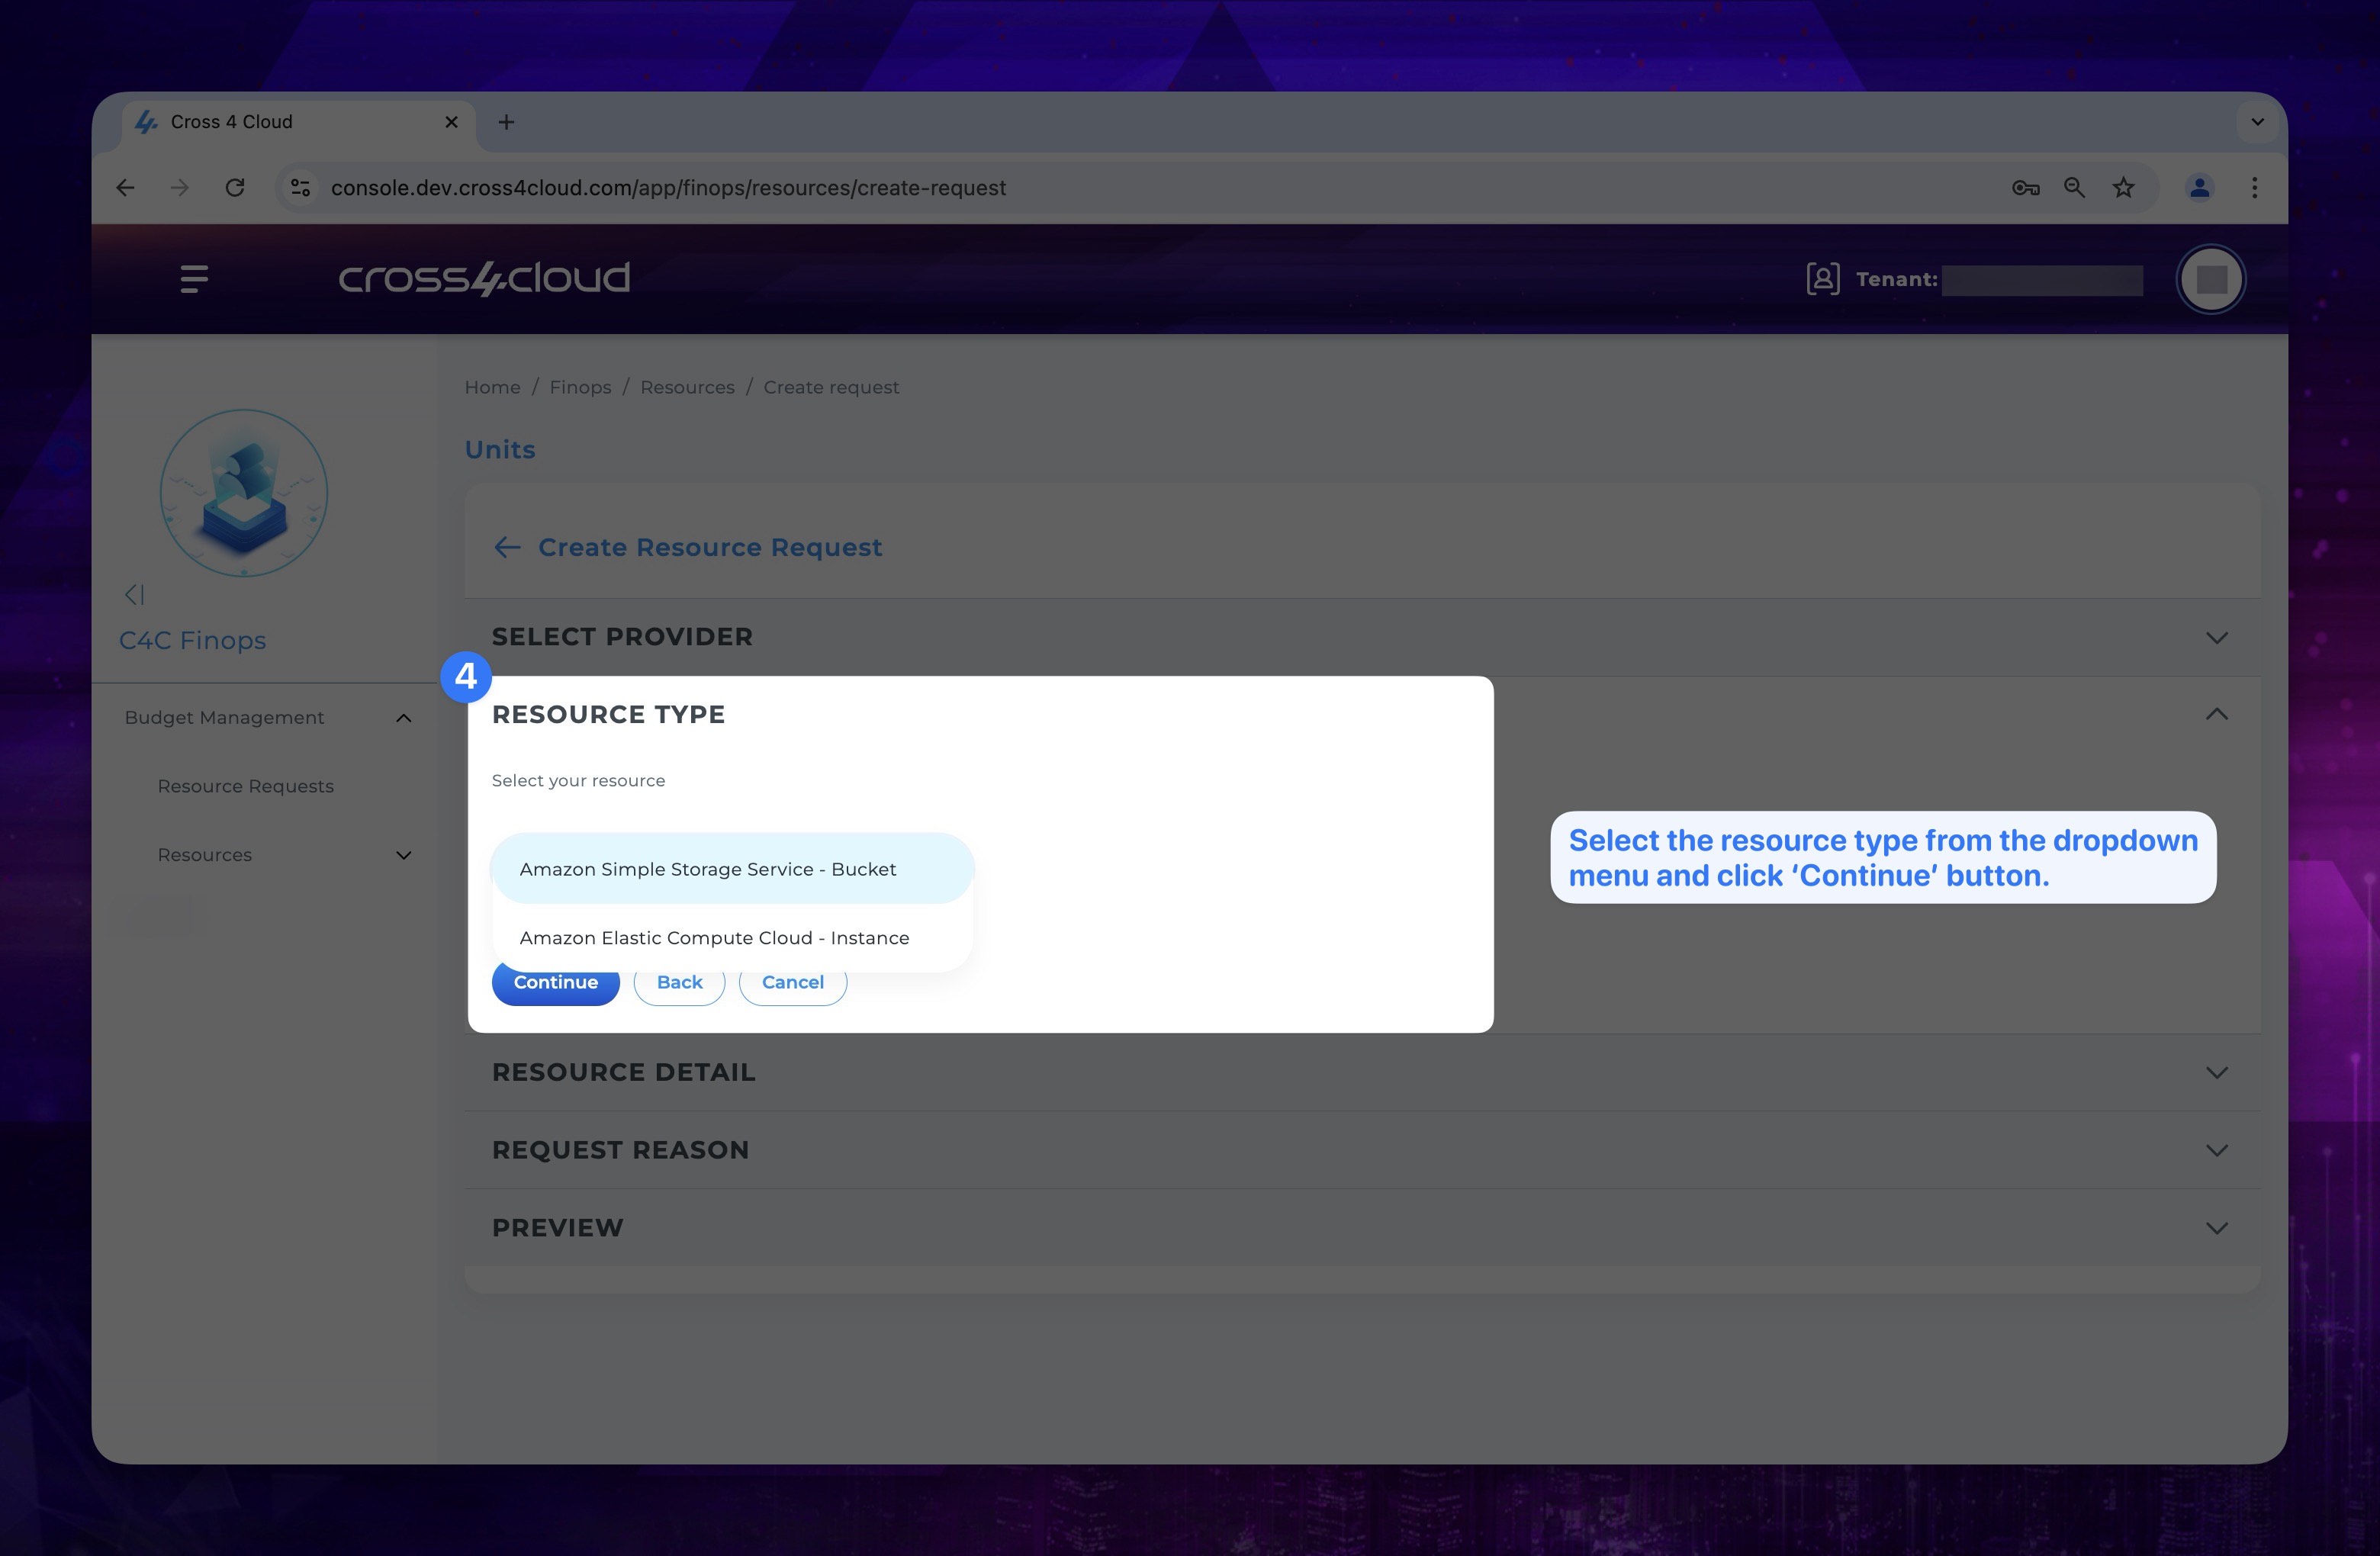
- Select resource type from dropdown menu for your needs and click continue button.
Show the instruction with images
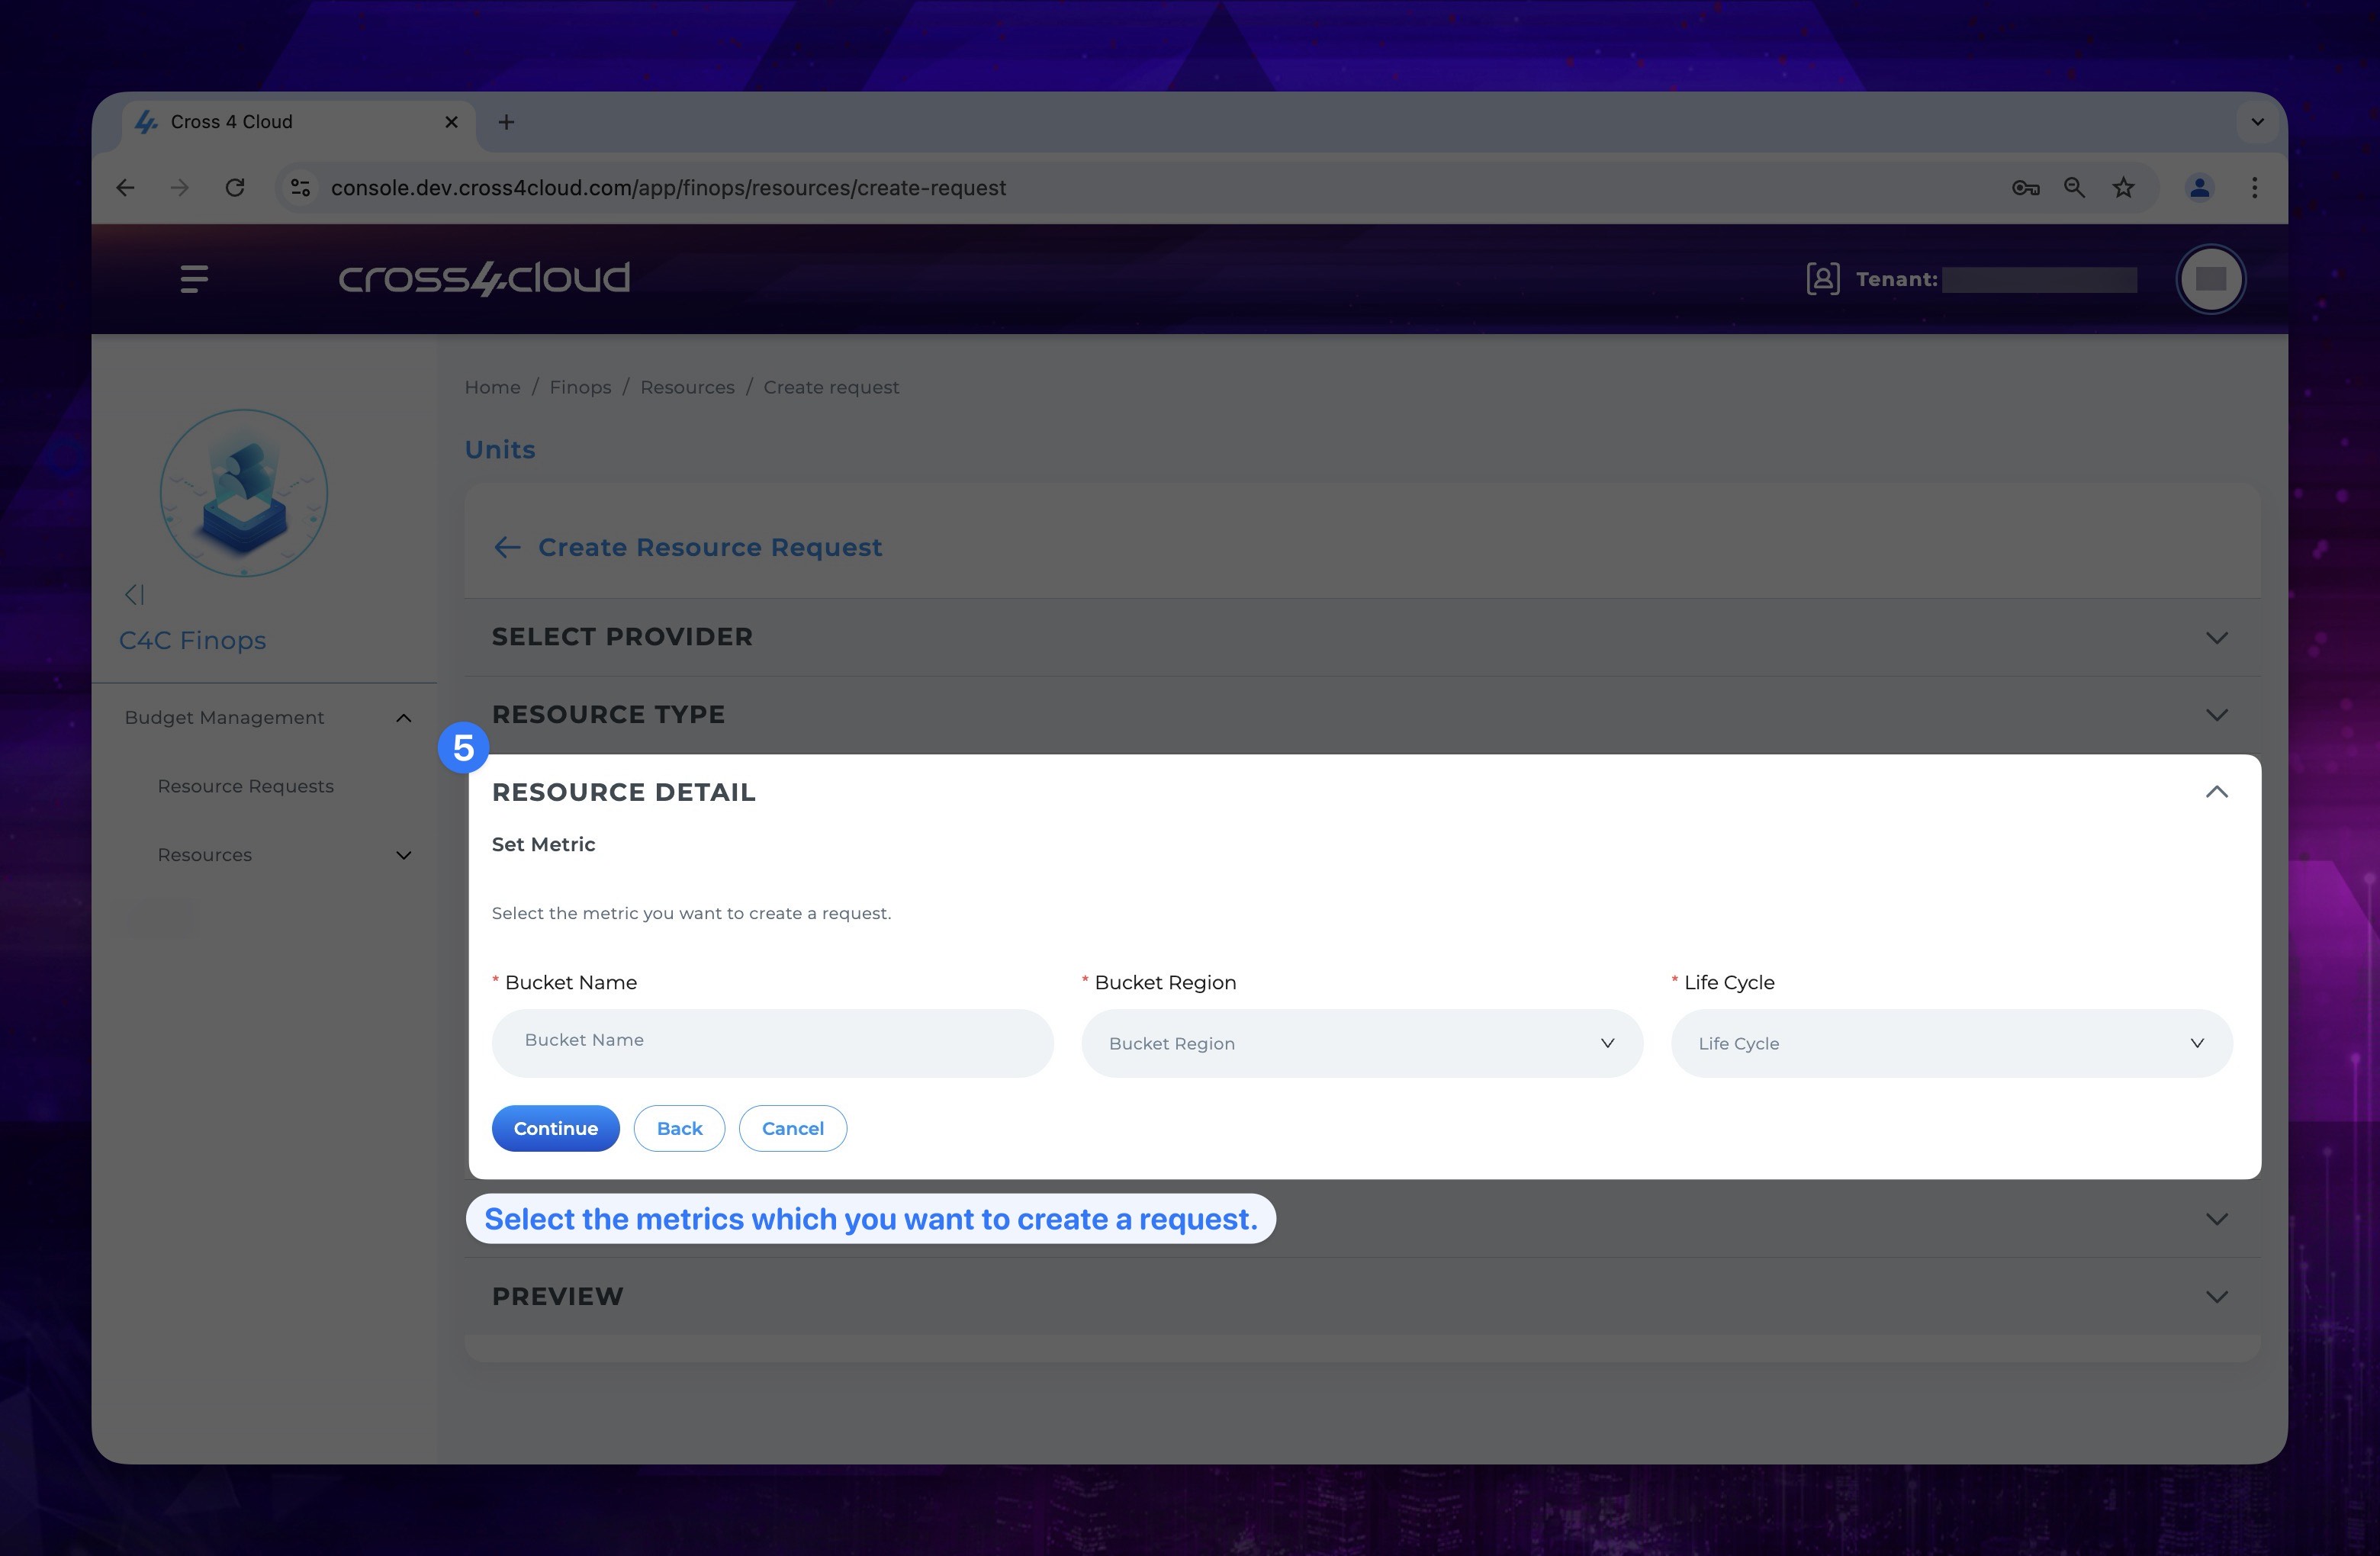
- Select the relevant metrics based on the resource type you've chosen, then click the Continue button.
Show the instruction with images
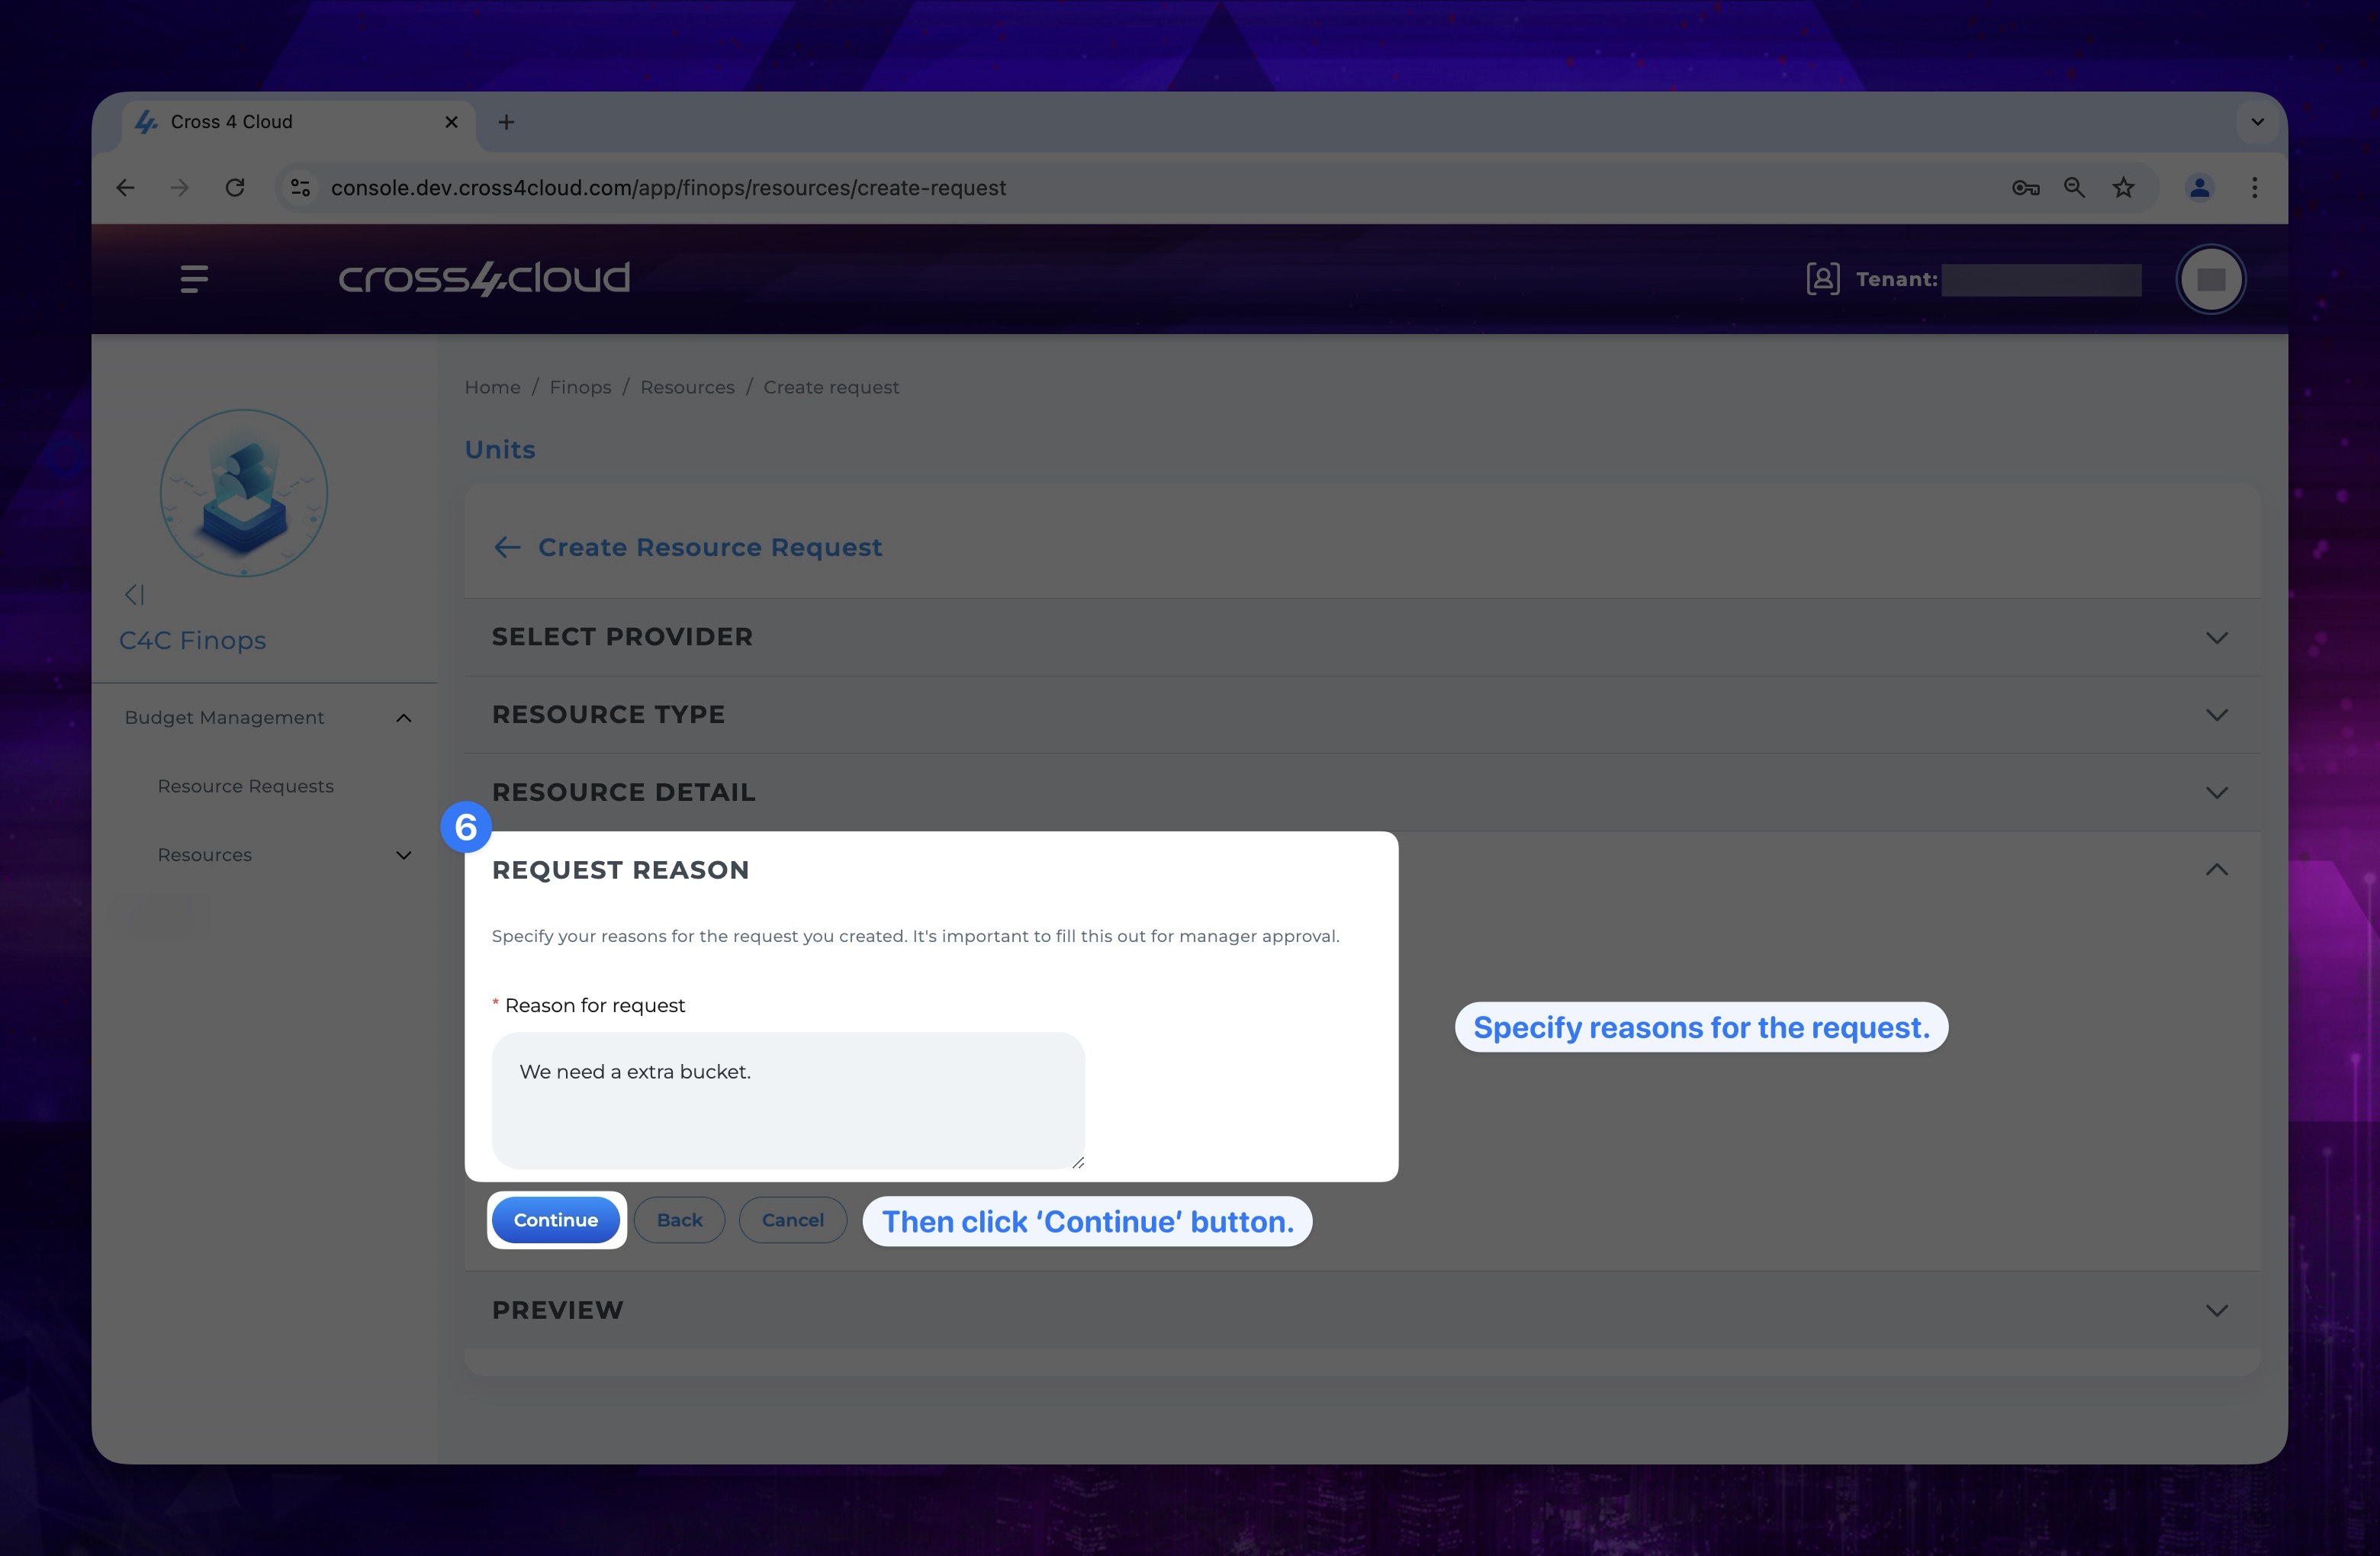
- Specify your reasons for the request you created in request reason section. After fill it out click continue button.
Show the instruction with images
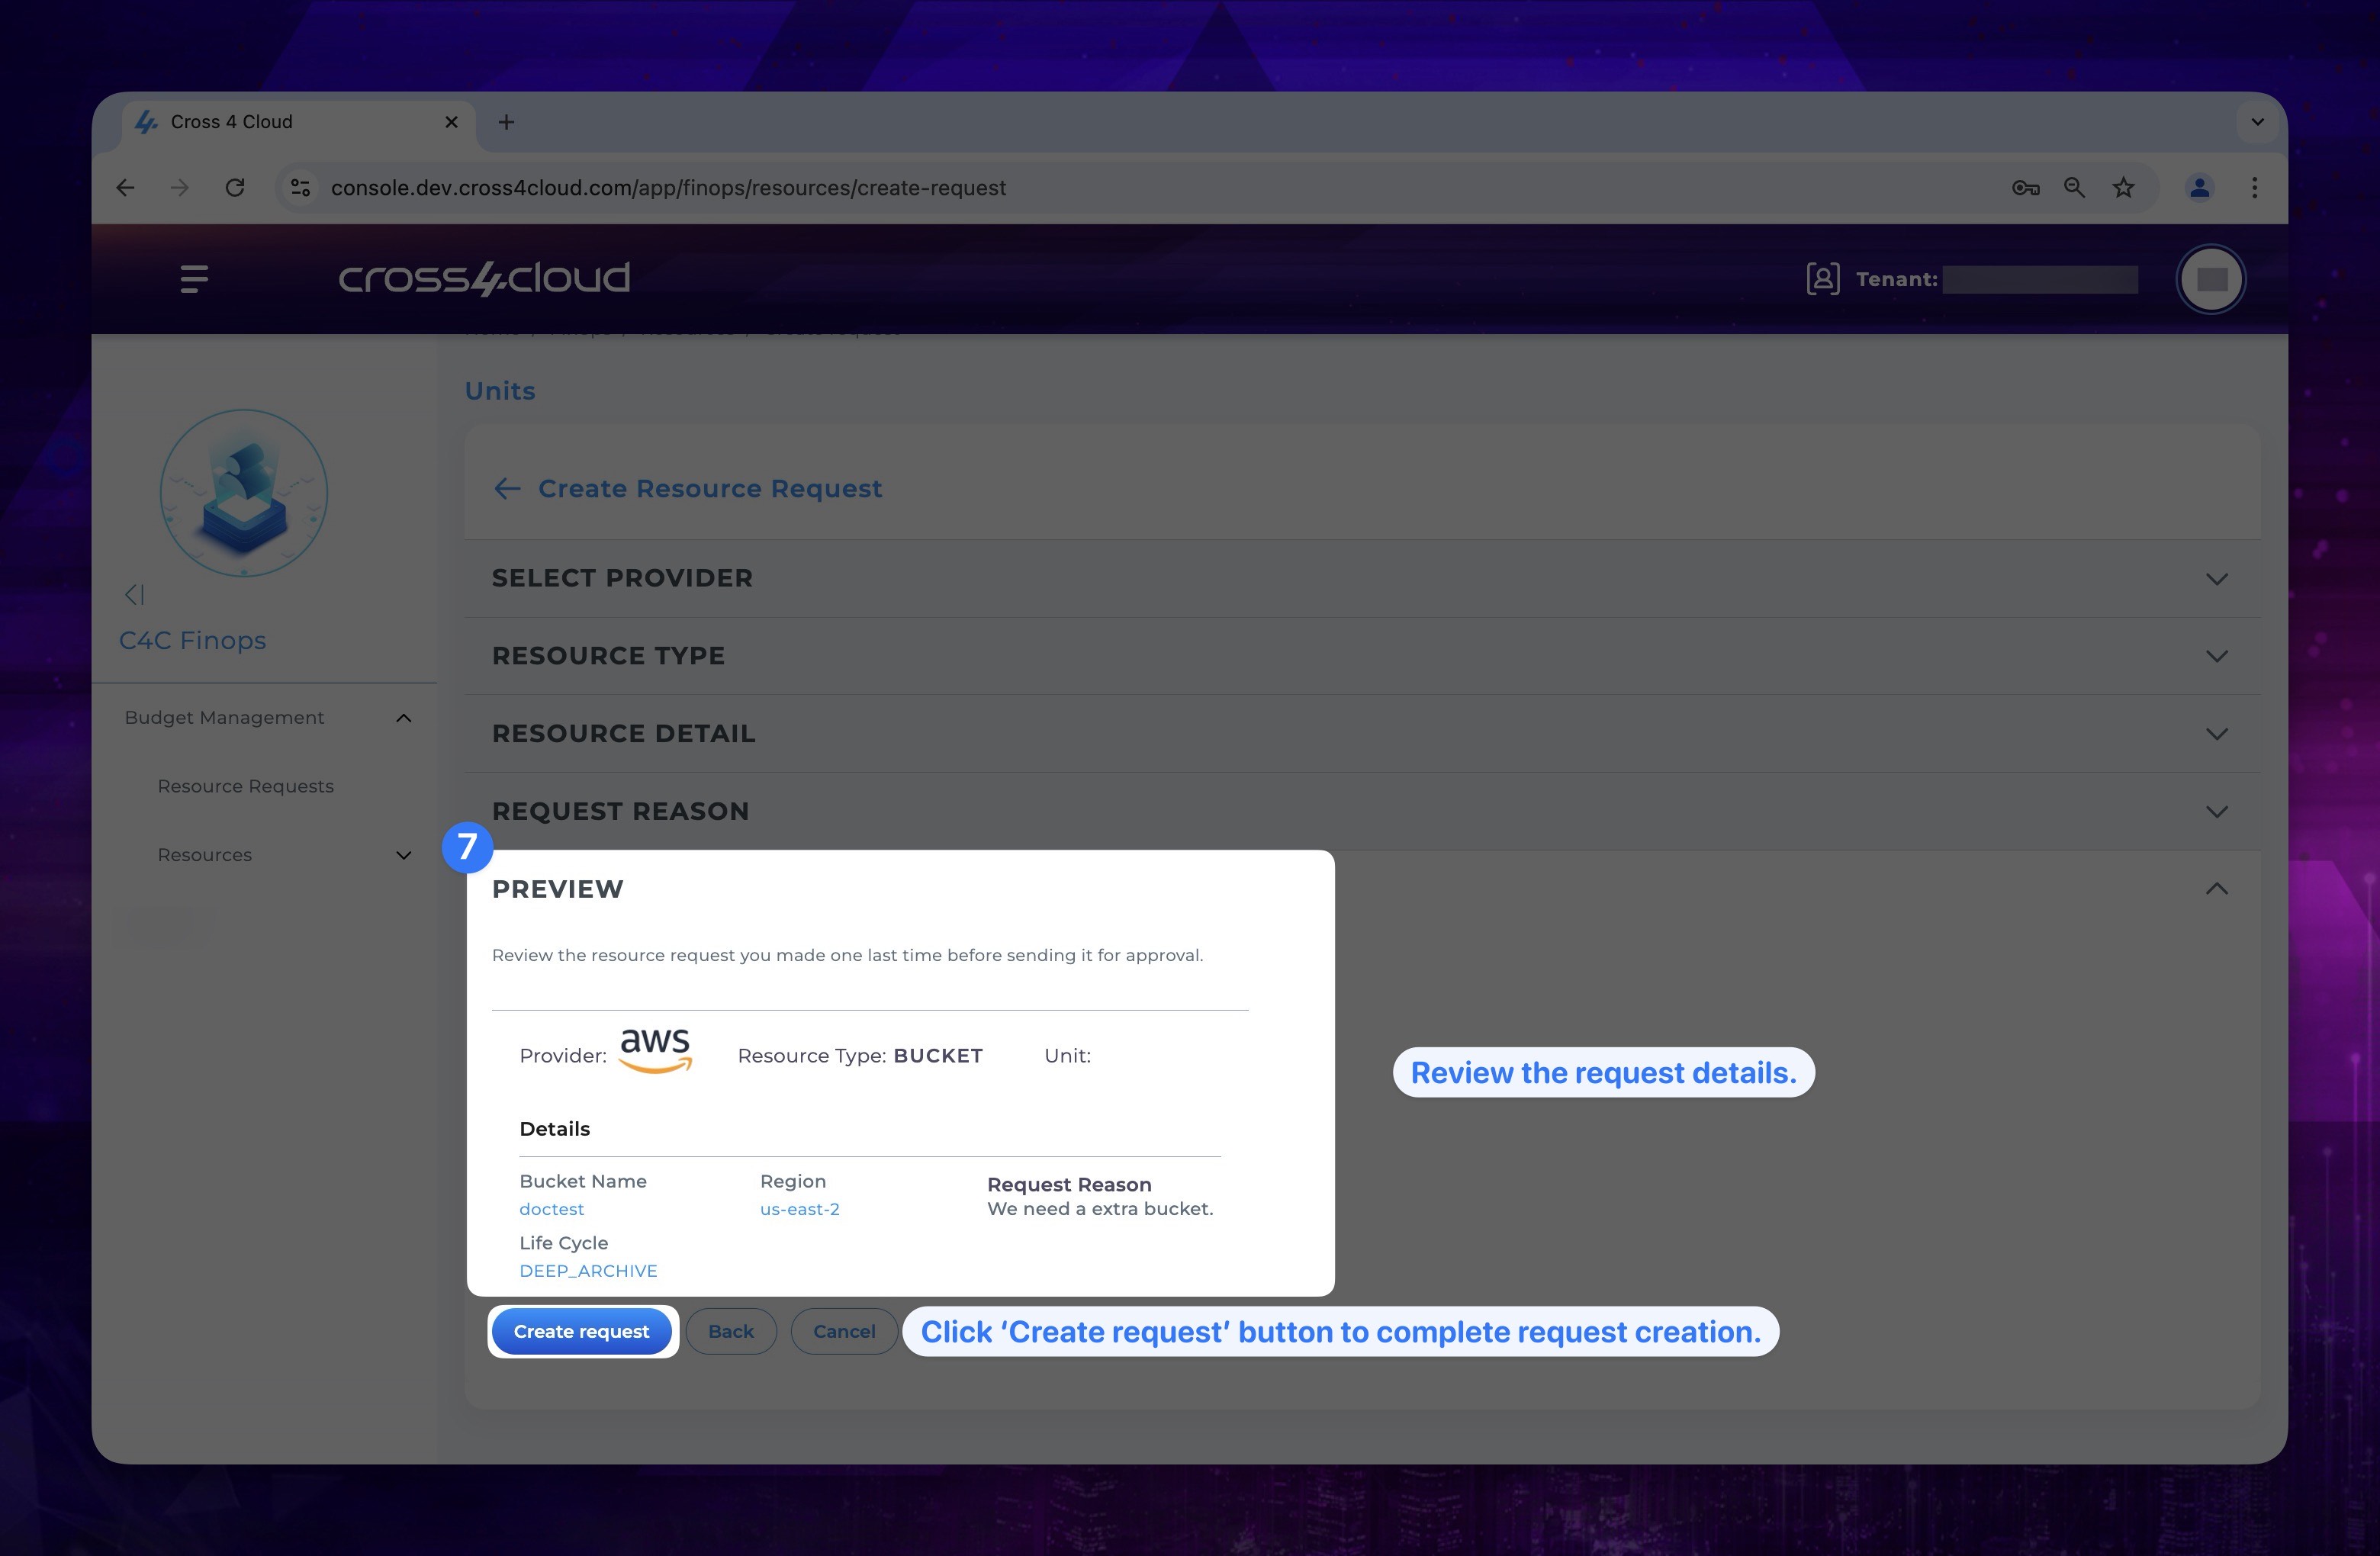
- In the preview section, review the details of the request. If any changes are needed, use the Back button to make adjustments. Once you are satisfied with the configuration, click the Create Request button to successfully create the request.
Show the instruction with images
Resource Approve/Reject
On the Resource Requests page, you can view all incoming requests and take actions such as approving or rejecting them. When a request is approved, a task is automatically opened in your organization's Jira instance, enabling your DevOps team to provision the requested resource.
To approve/reject any request:
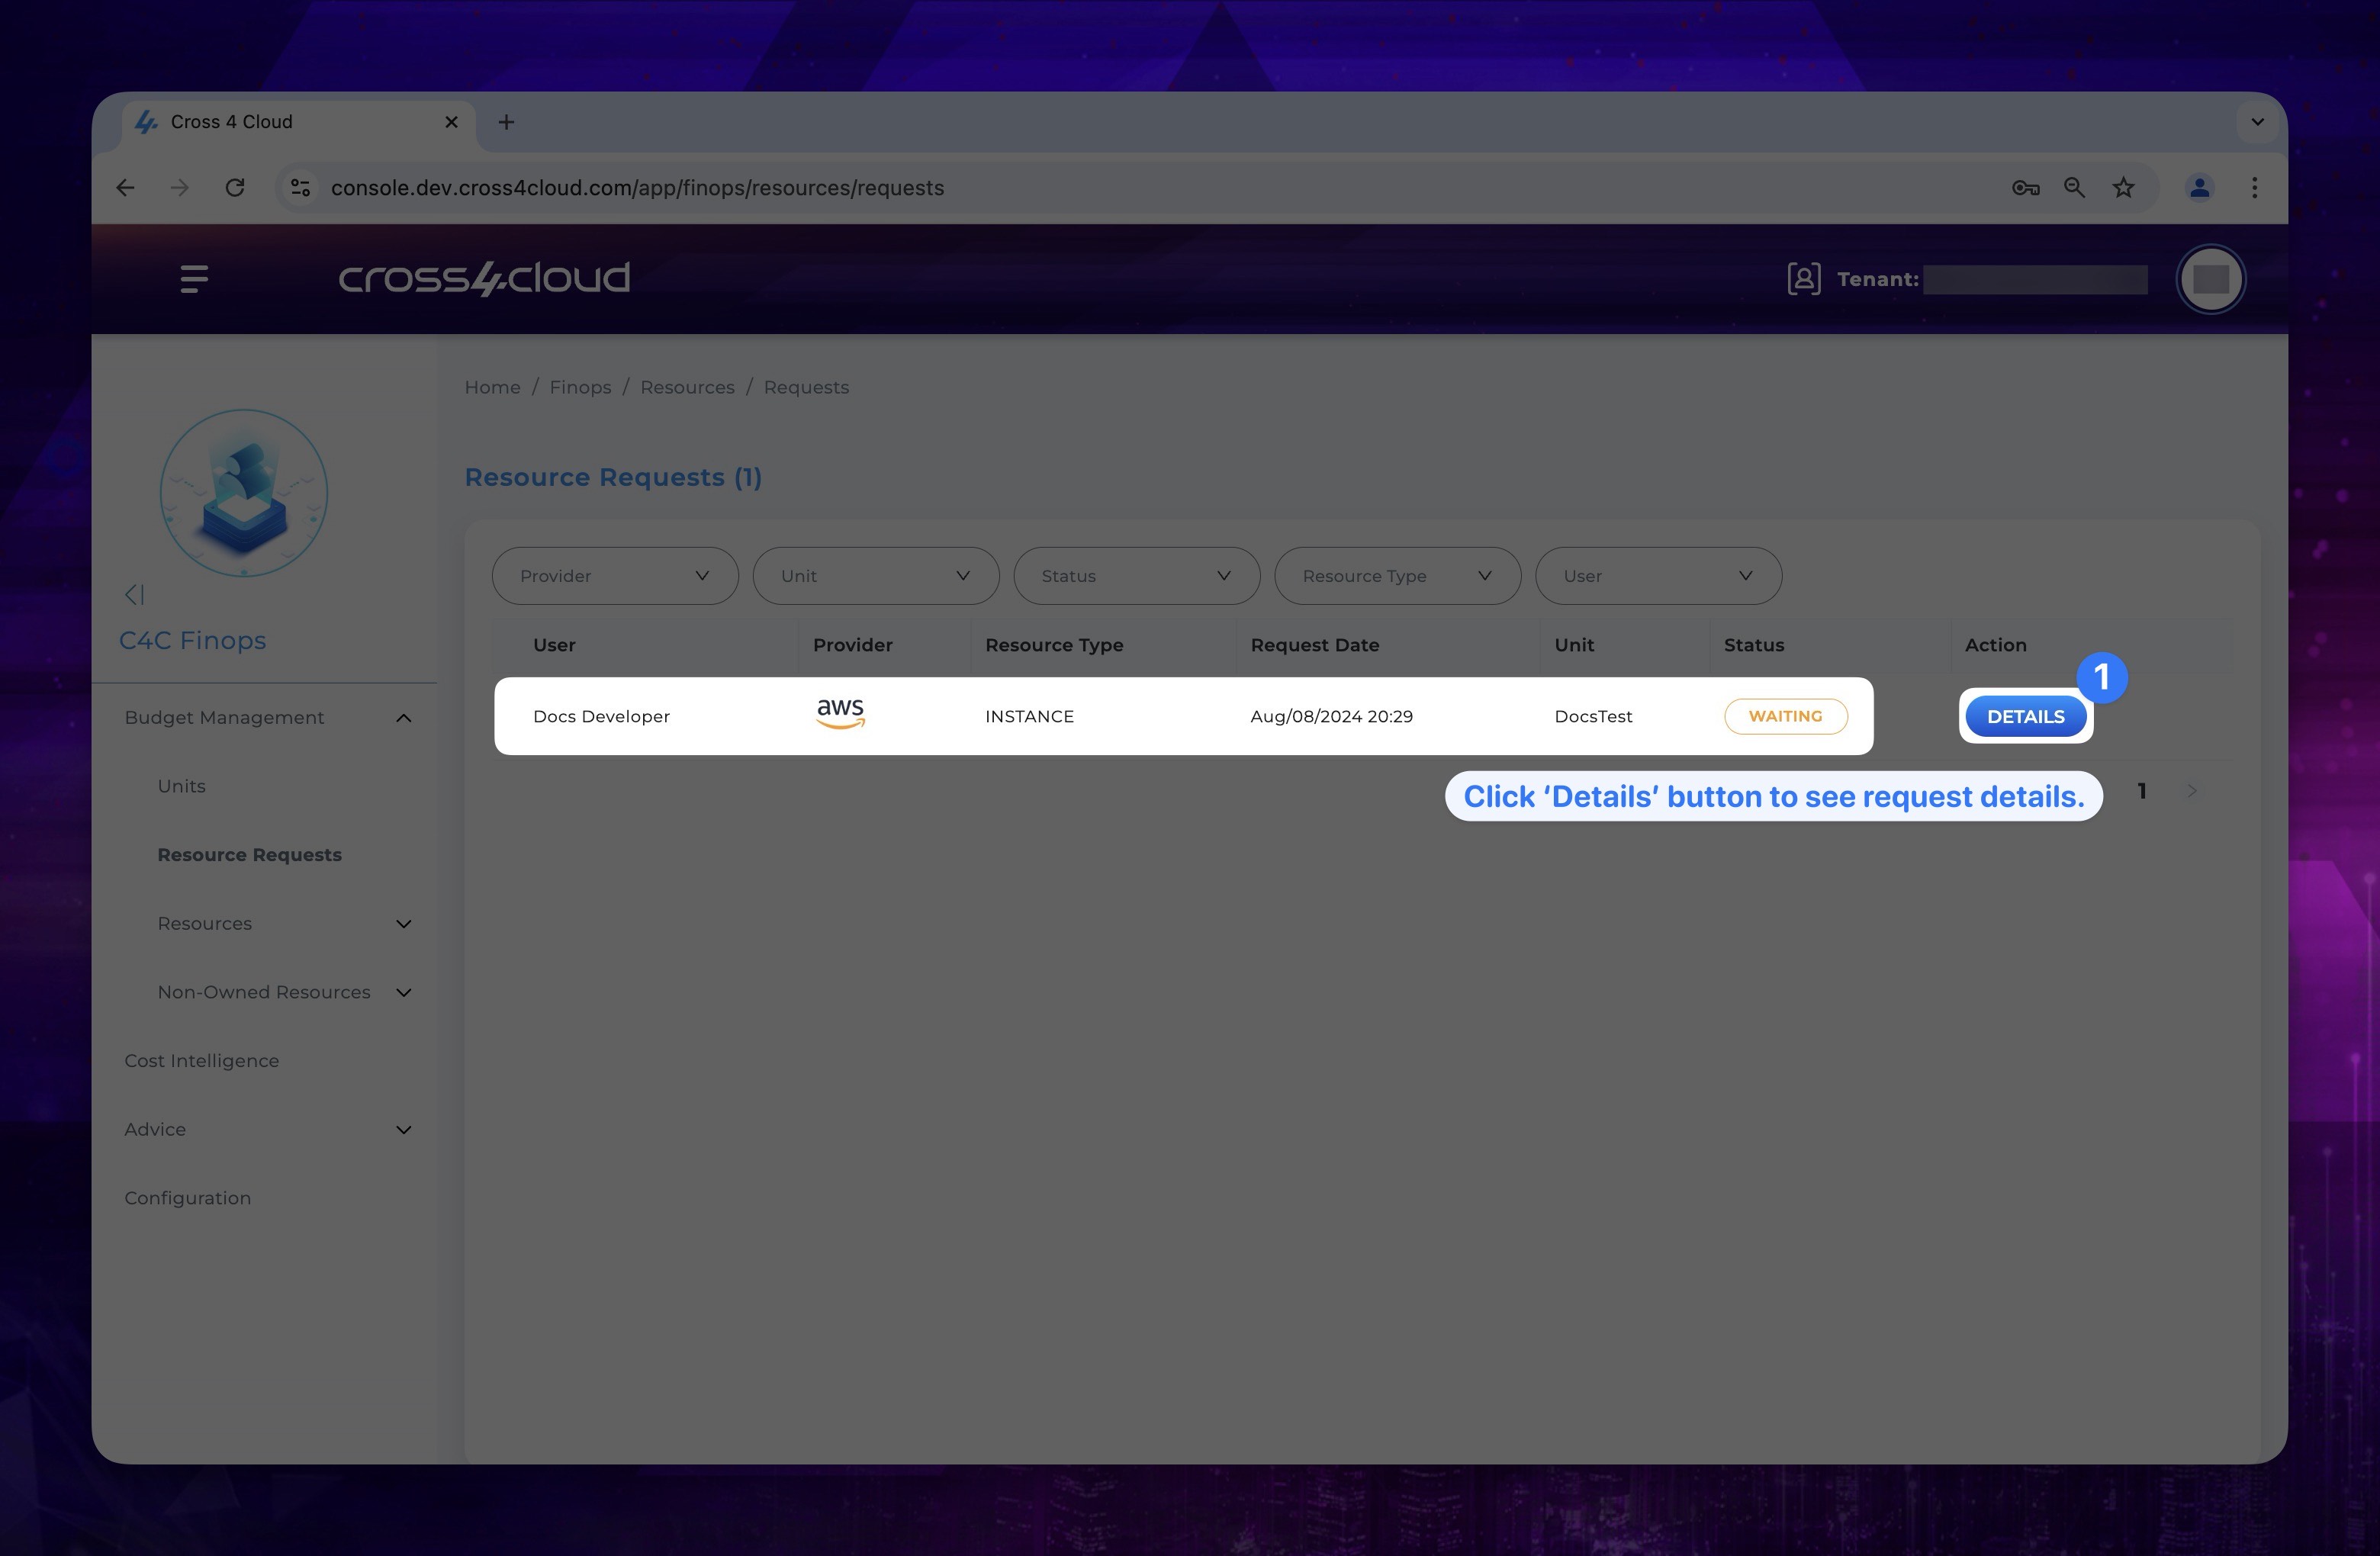
- Click on the Details button next to the request for which you want to take action on the Resource Requests page.
Show the instruction with images
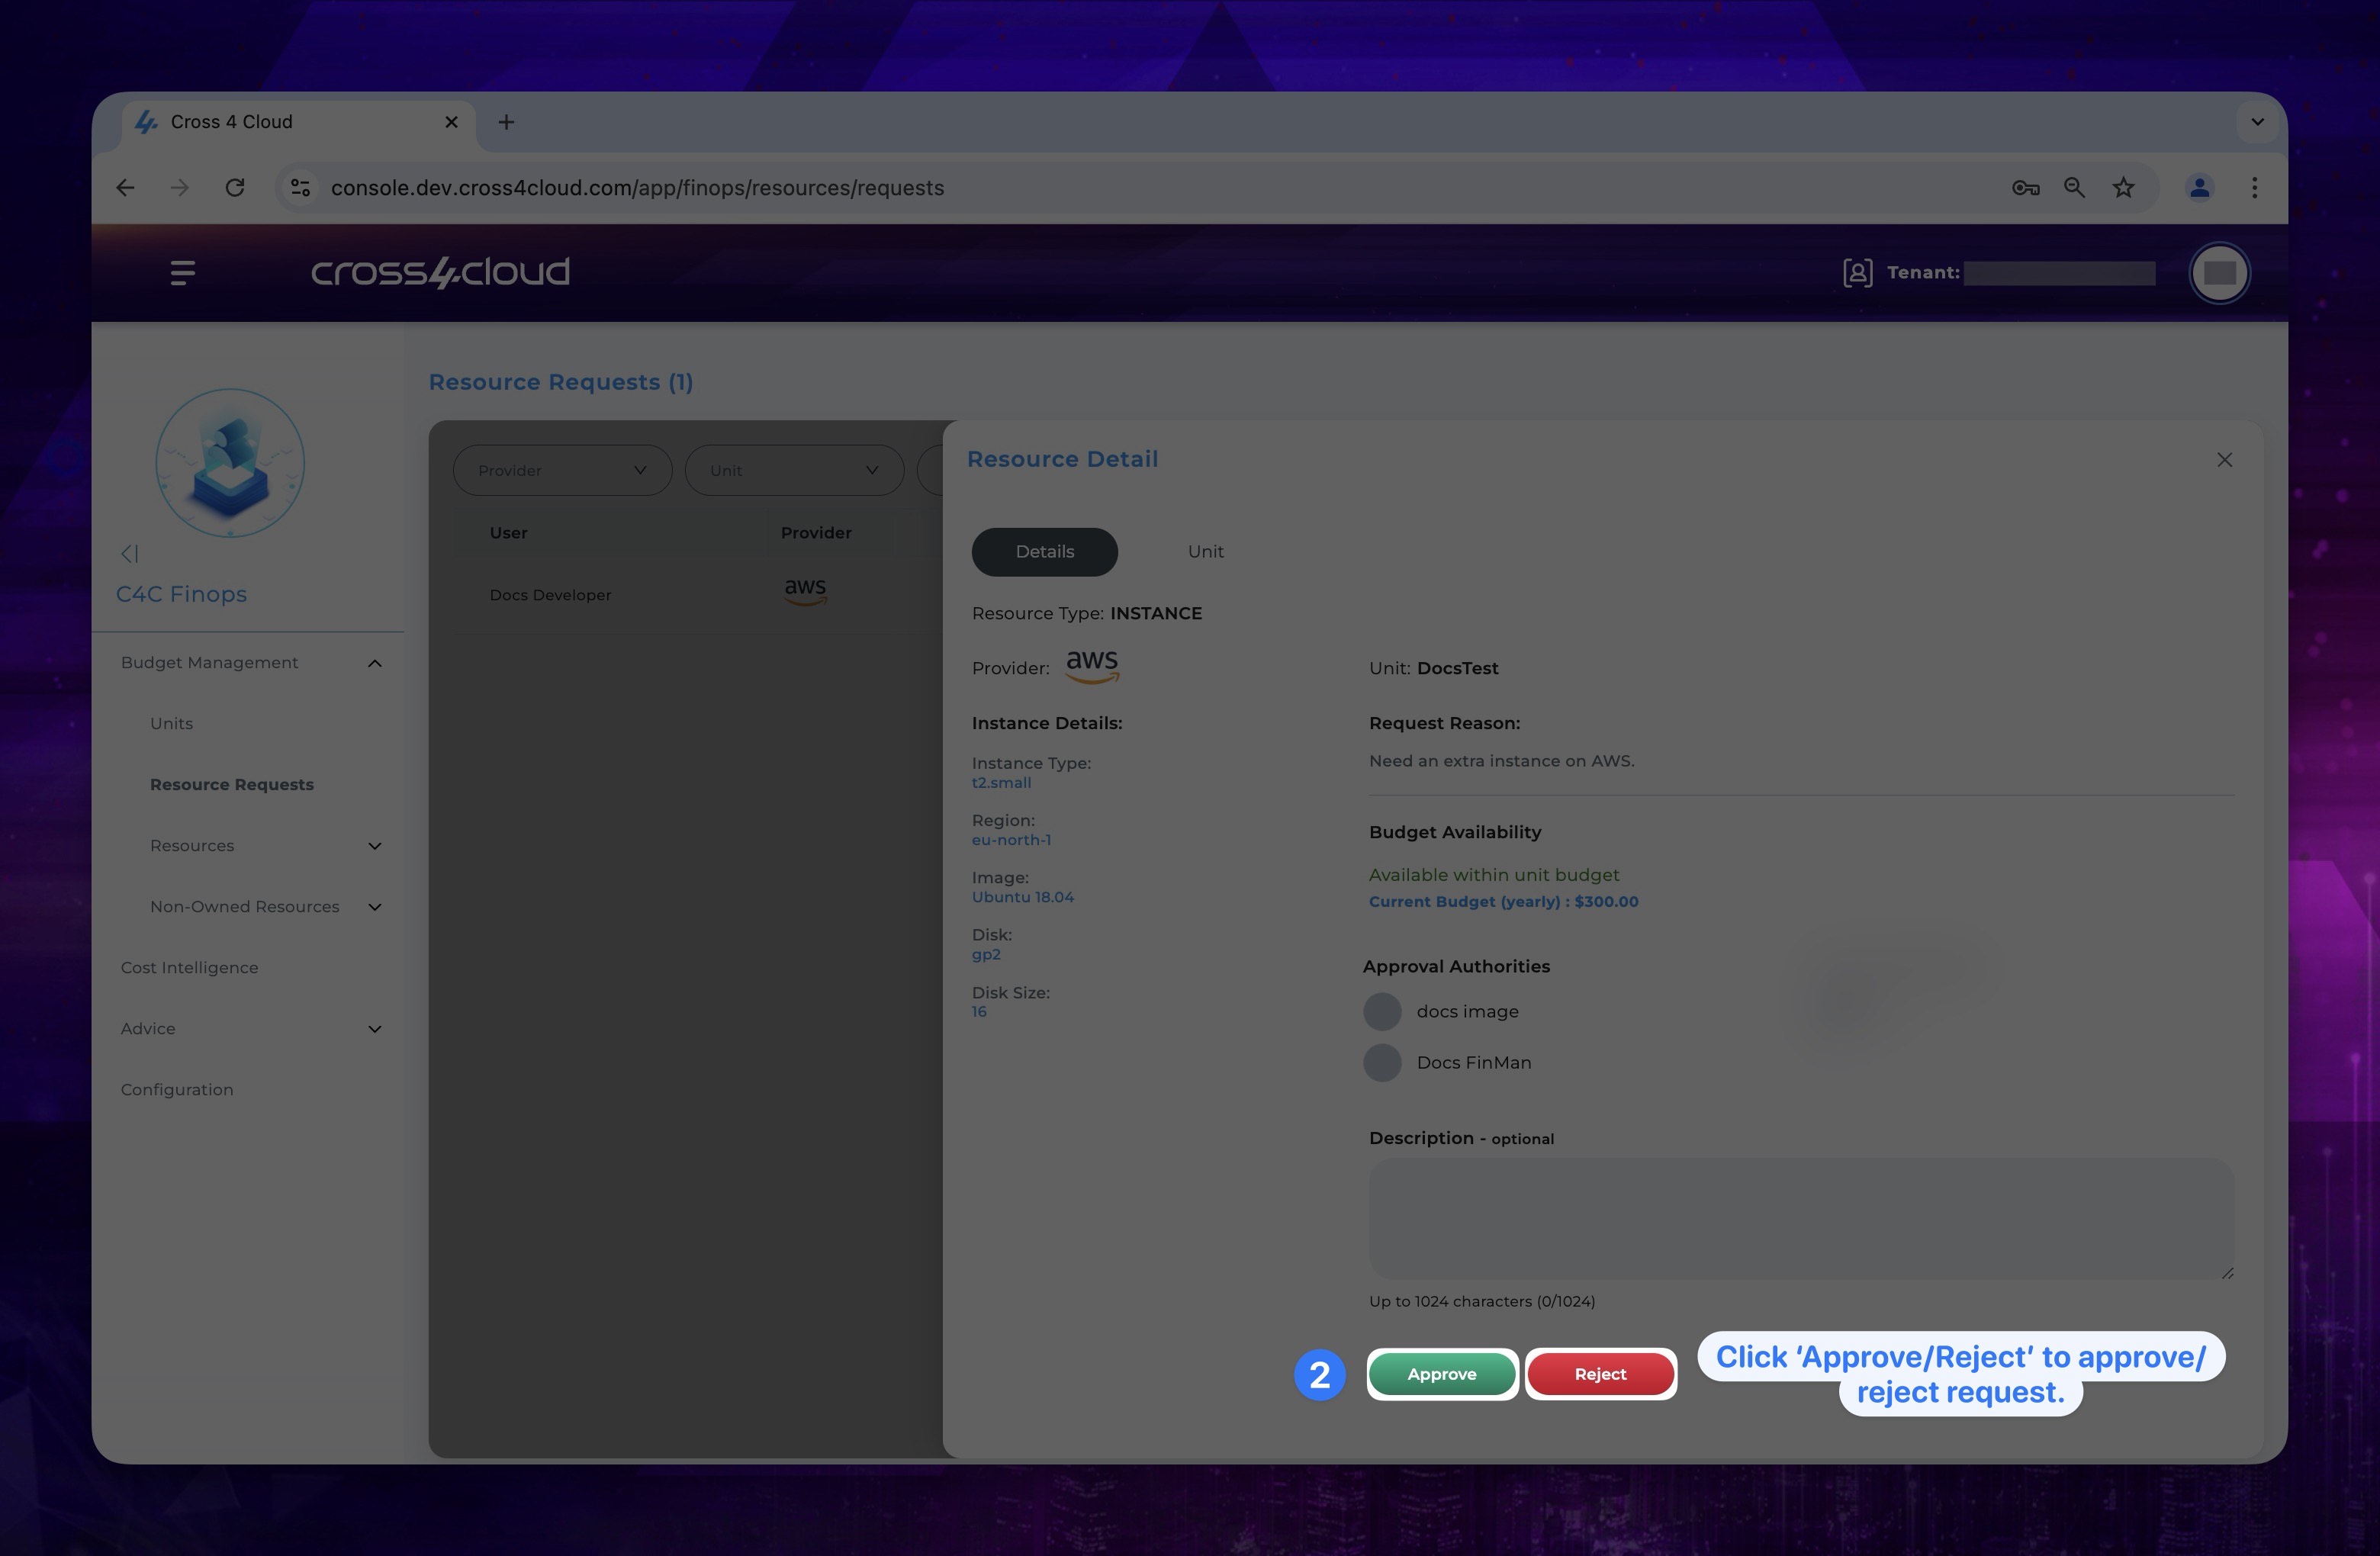
-
In the opened section, you can view details about the request, including which unit made the request.
tipYou can also add a note in the Description section (e.g., "Rejecting because it's not necessary.") and communicate with individuals in your organization.
To approve/reject the request click approve/reject button at the bottom.
Show the instruction with images
Resource Request Status
Request Status shows you which approval stage the request is currently in. A created request can be in Approved, Rejected, or Waiting status. These mean the following:
- Approved: The request has been approved; authorization has been granted for the requested resource.
- Rejected: The request has been rejected; authorization has not been granted for the requested resource.
- Waiting: The request is pending; no decision (approval or rejection) has been made yet or the second approve is waiting.
Resources
The Resources page is designed to provide a centralized view of all instance and buckets associated with your account for configured providers. This page allows you to; see a comprehensive list of your instance and buckets that have been assigned to a unit, access detailed information about each resource in one place.
This centralization ensures that you can efficiently monitor all your resources without needing to navigate through multiple pages.
Non-Owned Resources
The Non-Owned Resources page displays resources that are not assigned to any unit along with their technical specifications.
Non-Owned Resources Assignation
- Inside the Non-Owned Resources page, determine the which resource you want to add owner. After that, click the Add Owner button next to the relevant resource.
Show the instruction with images

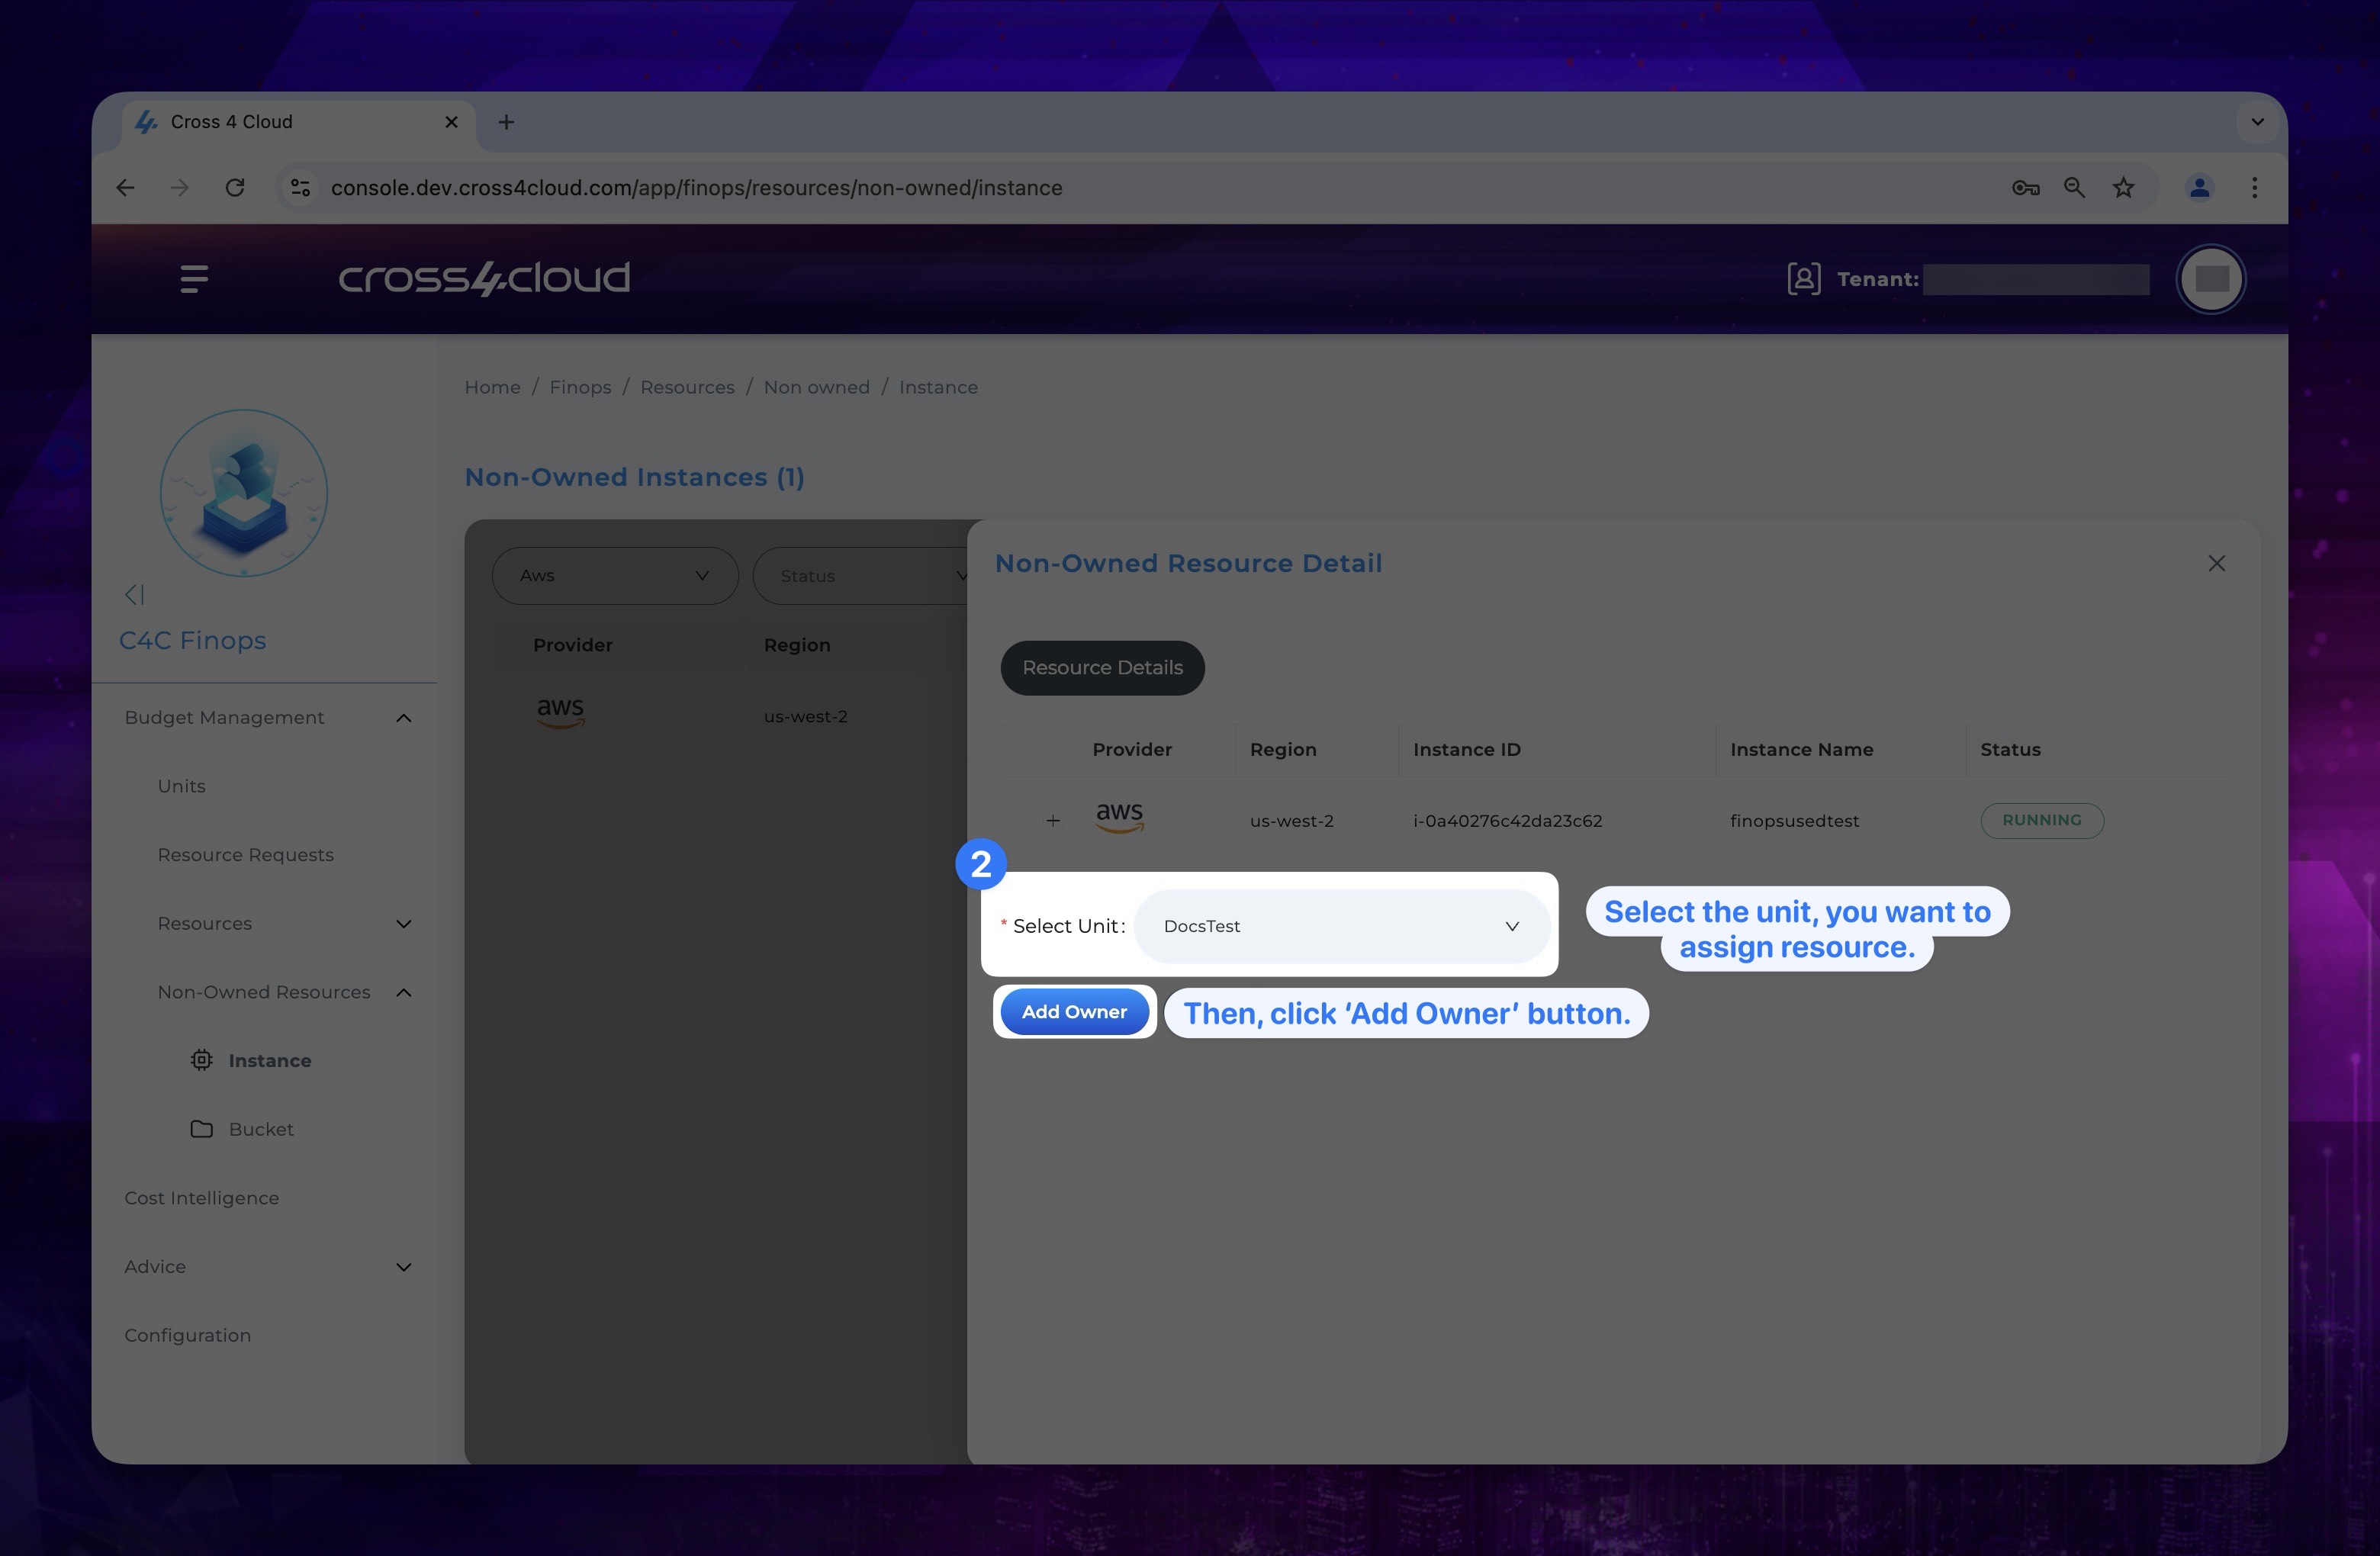
- Select the unit from the list and click the Add Owner button again to confirm the assignment.
Show the instruction with images
Also you can assign multiple resource in once to a unit too.
-
Top of the Non-Owned resources page, actıve the Multiple Select.
-
Select the resources you want to assign from the list by clicking the checkbox near the all resources.
-
Click Add Bulk button.
-
Select the unit from the list and click the Add Bulk Owner button again to confirm the assignment.
This process ensures that each resource is properly allocated to the appropriate unit.
Cost Intelligence
This page allows you to monitor your resources and their estimated costs for last 48 hours as well as present you with lastest info.
The cost information on this page is provided for guidance purposes. Some price differences may occur due to the long delays in updates from providers. C4C monitors adjustments for the past 48 hours and presents you with the latest information. For the most accurate details, please refer to your provider's billing page.
- If you would like to get more general information about your cost estimation, you can navigate to the Cost Intelligence page from the menu on the left side of the FinOps service page. There, you can access and review the dashboard.
Show the instruction with images
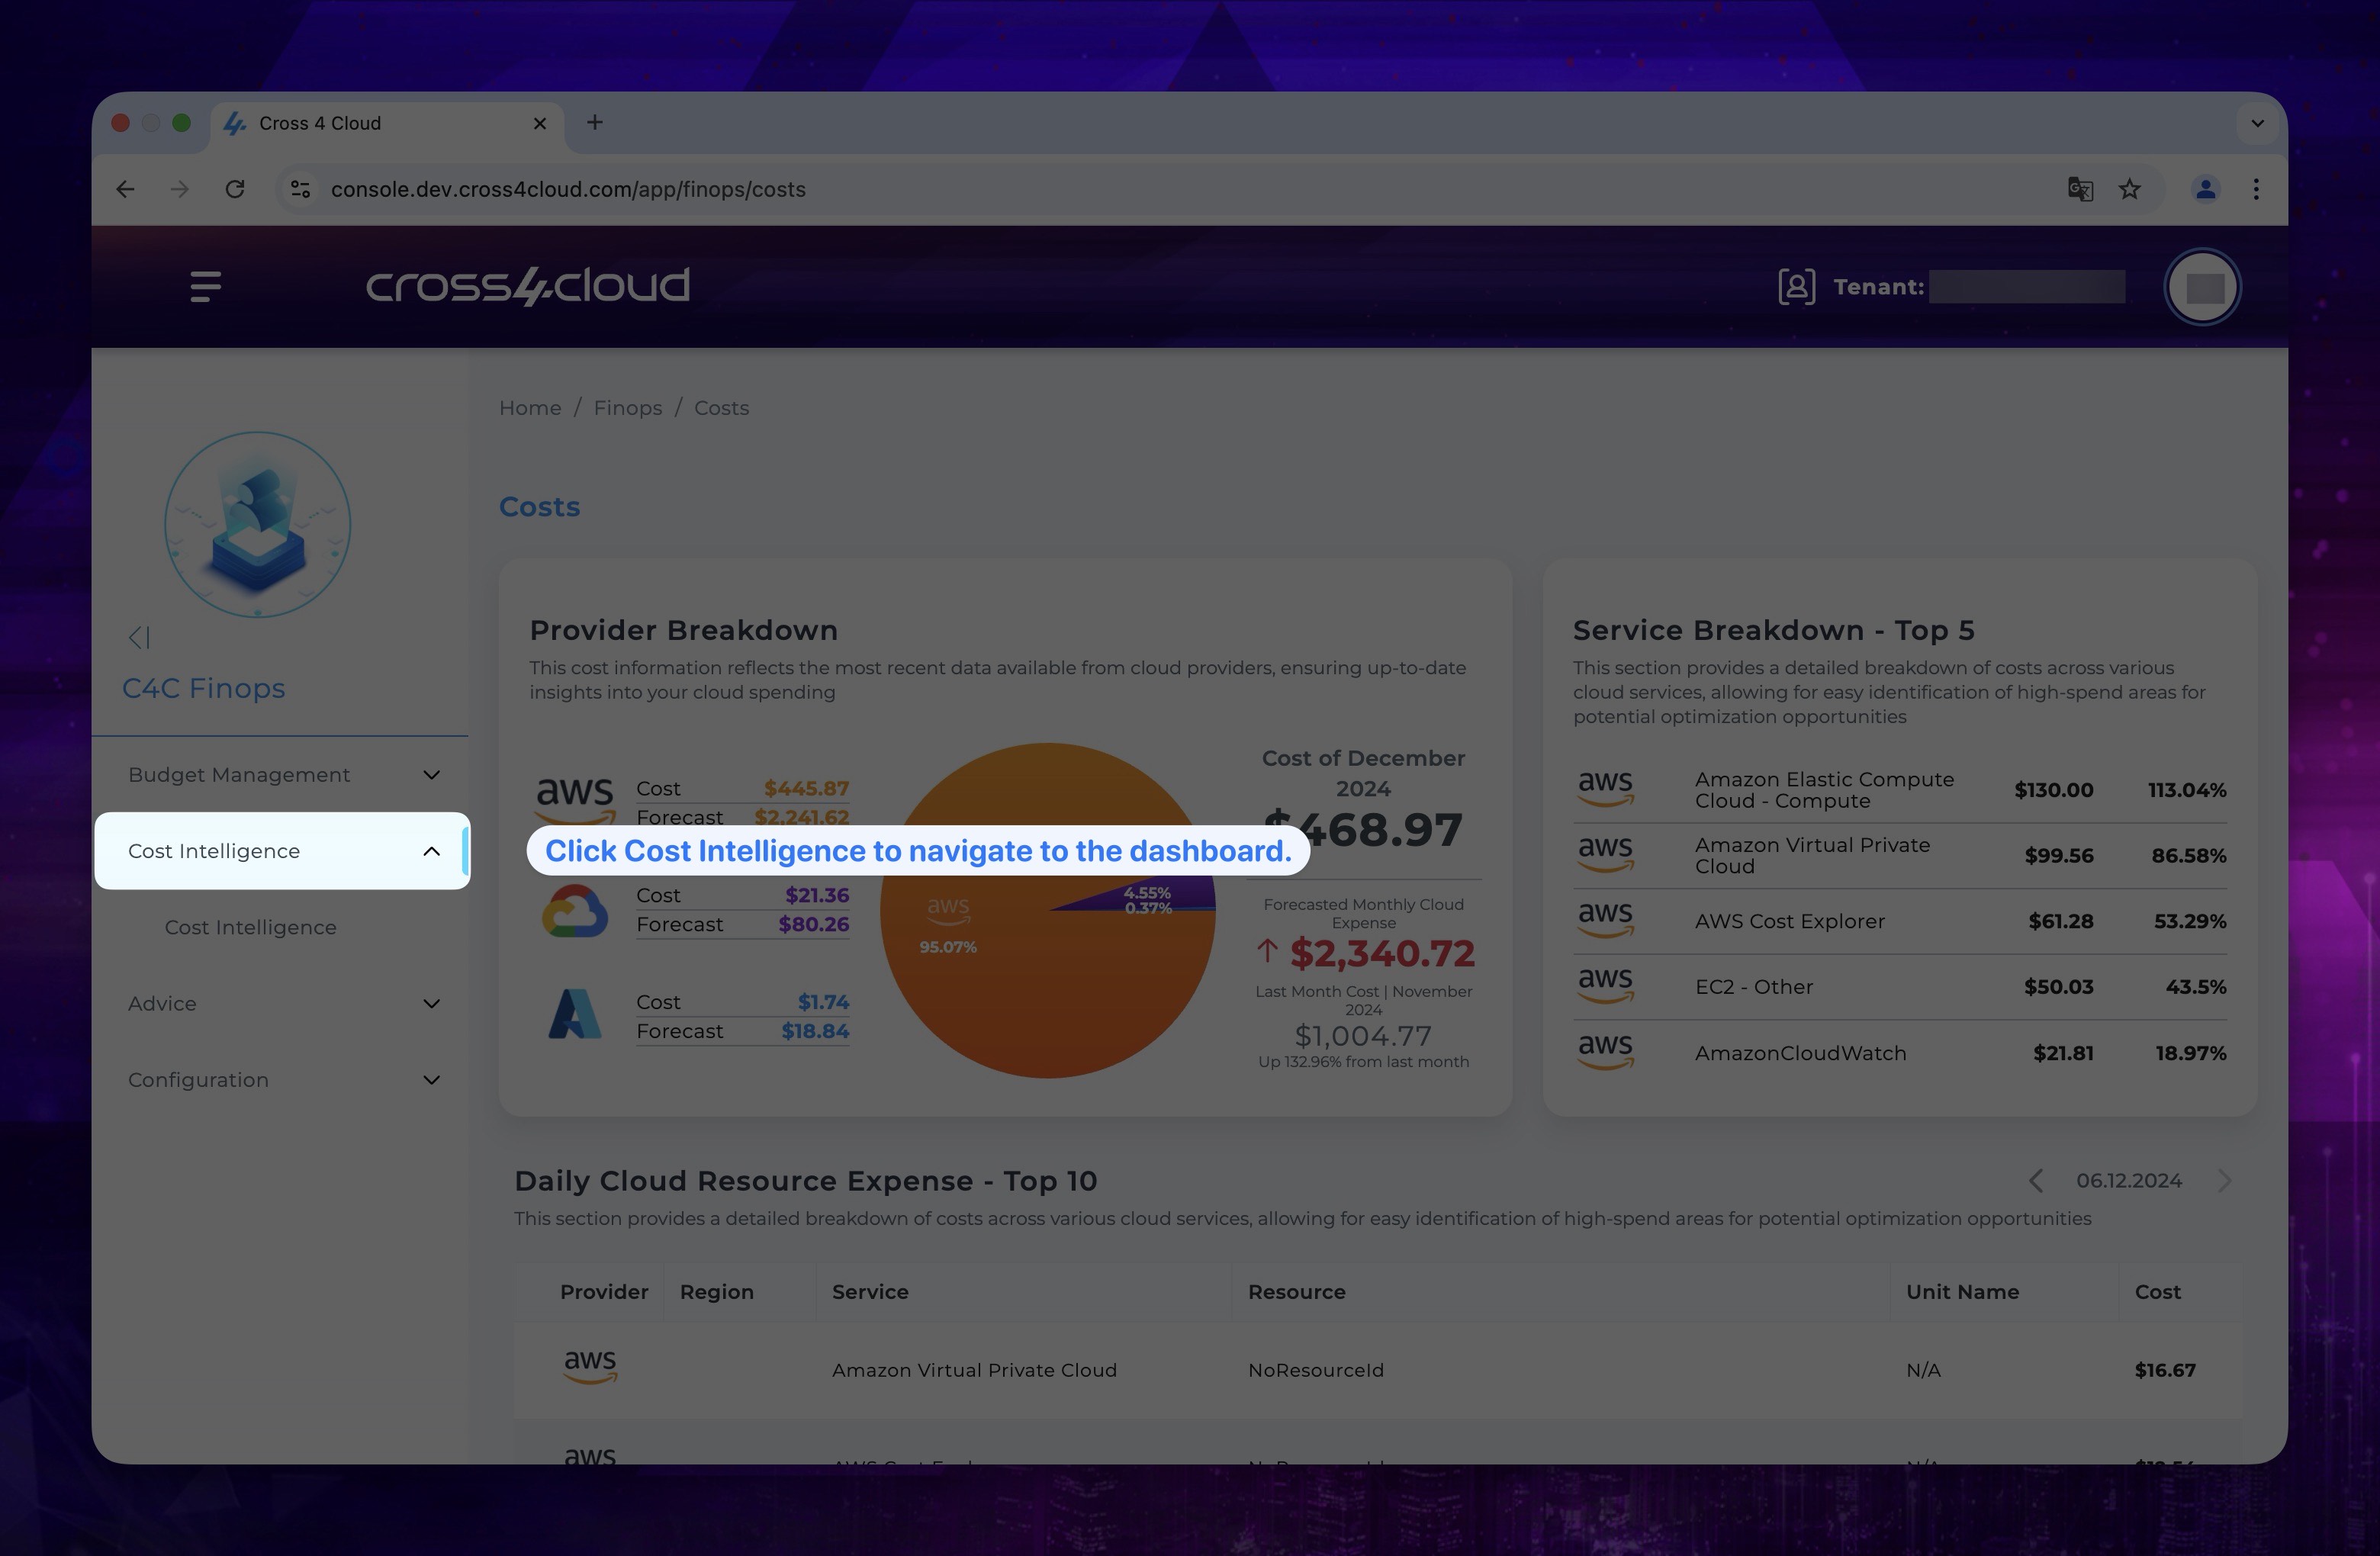
- Click Cost Intelligence on the left menu.
Show the instruction with images
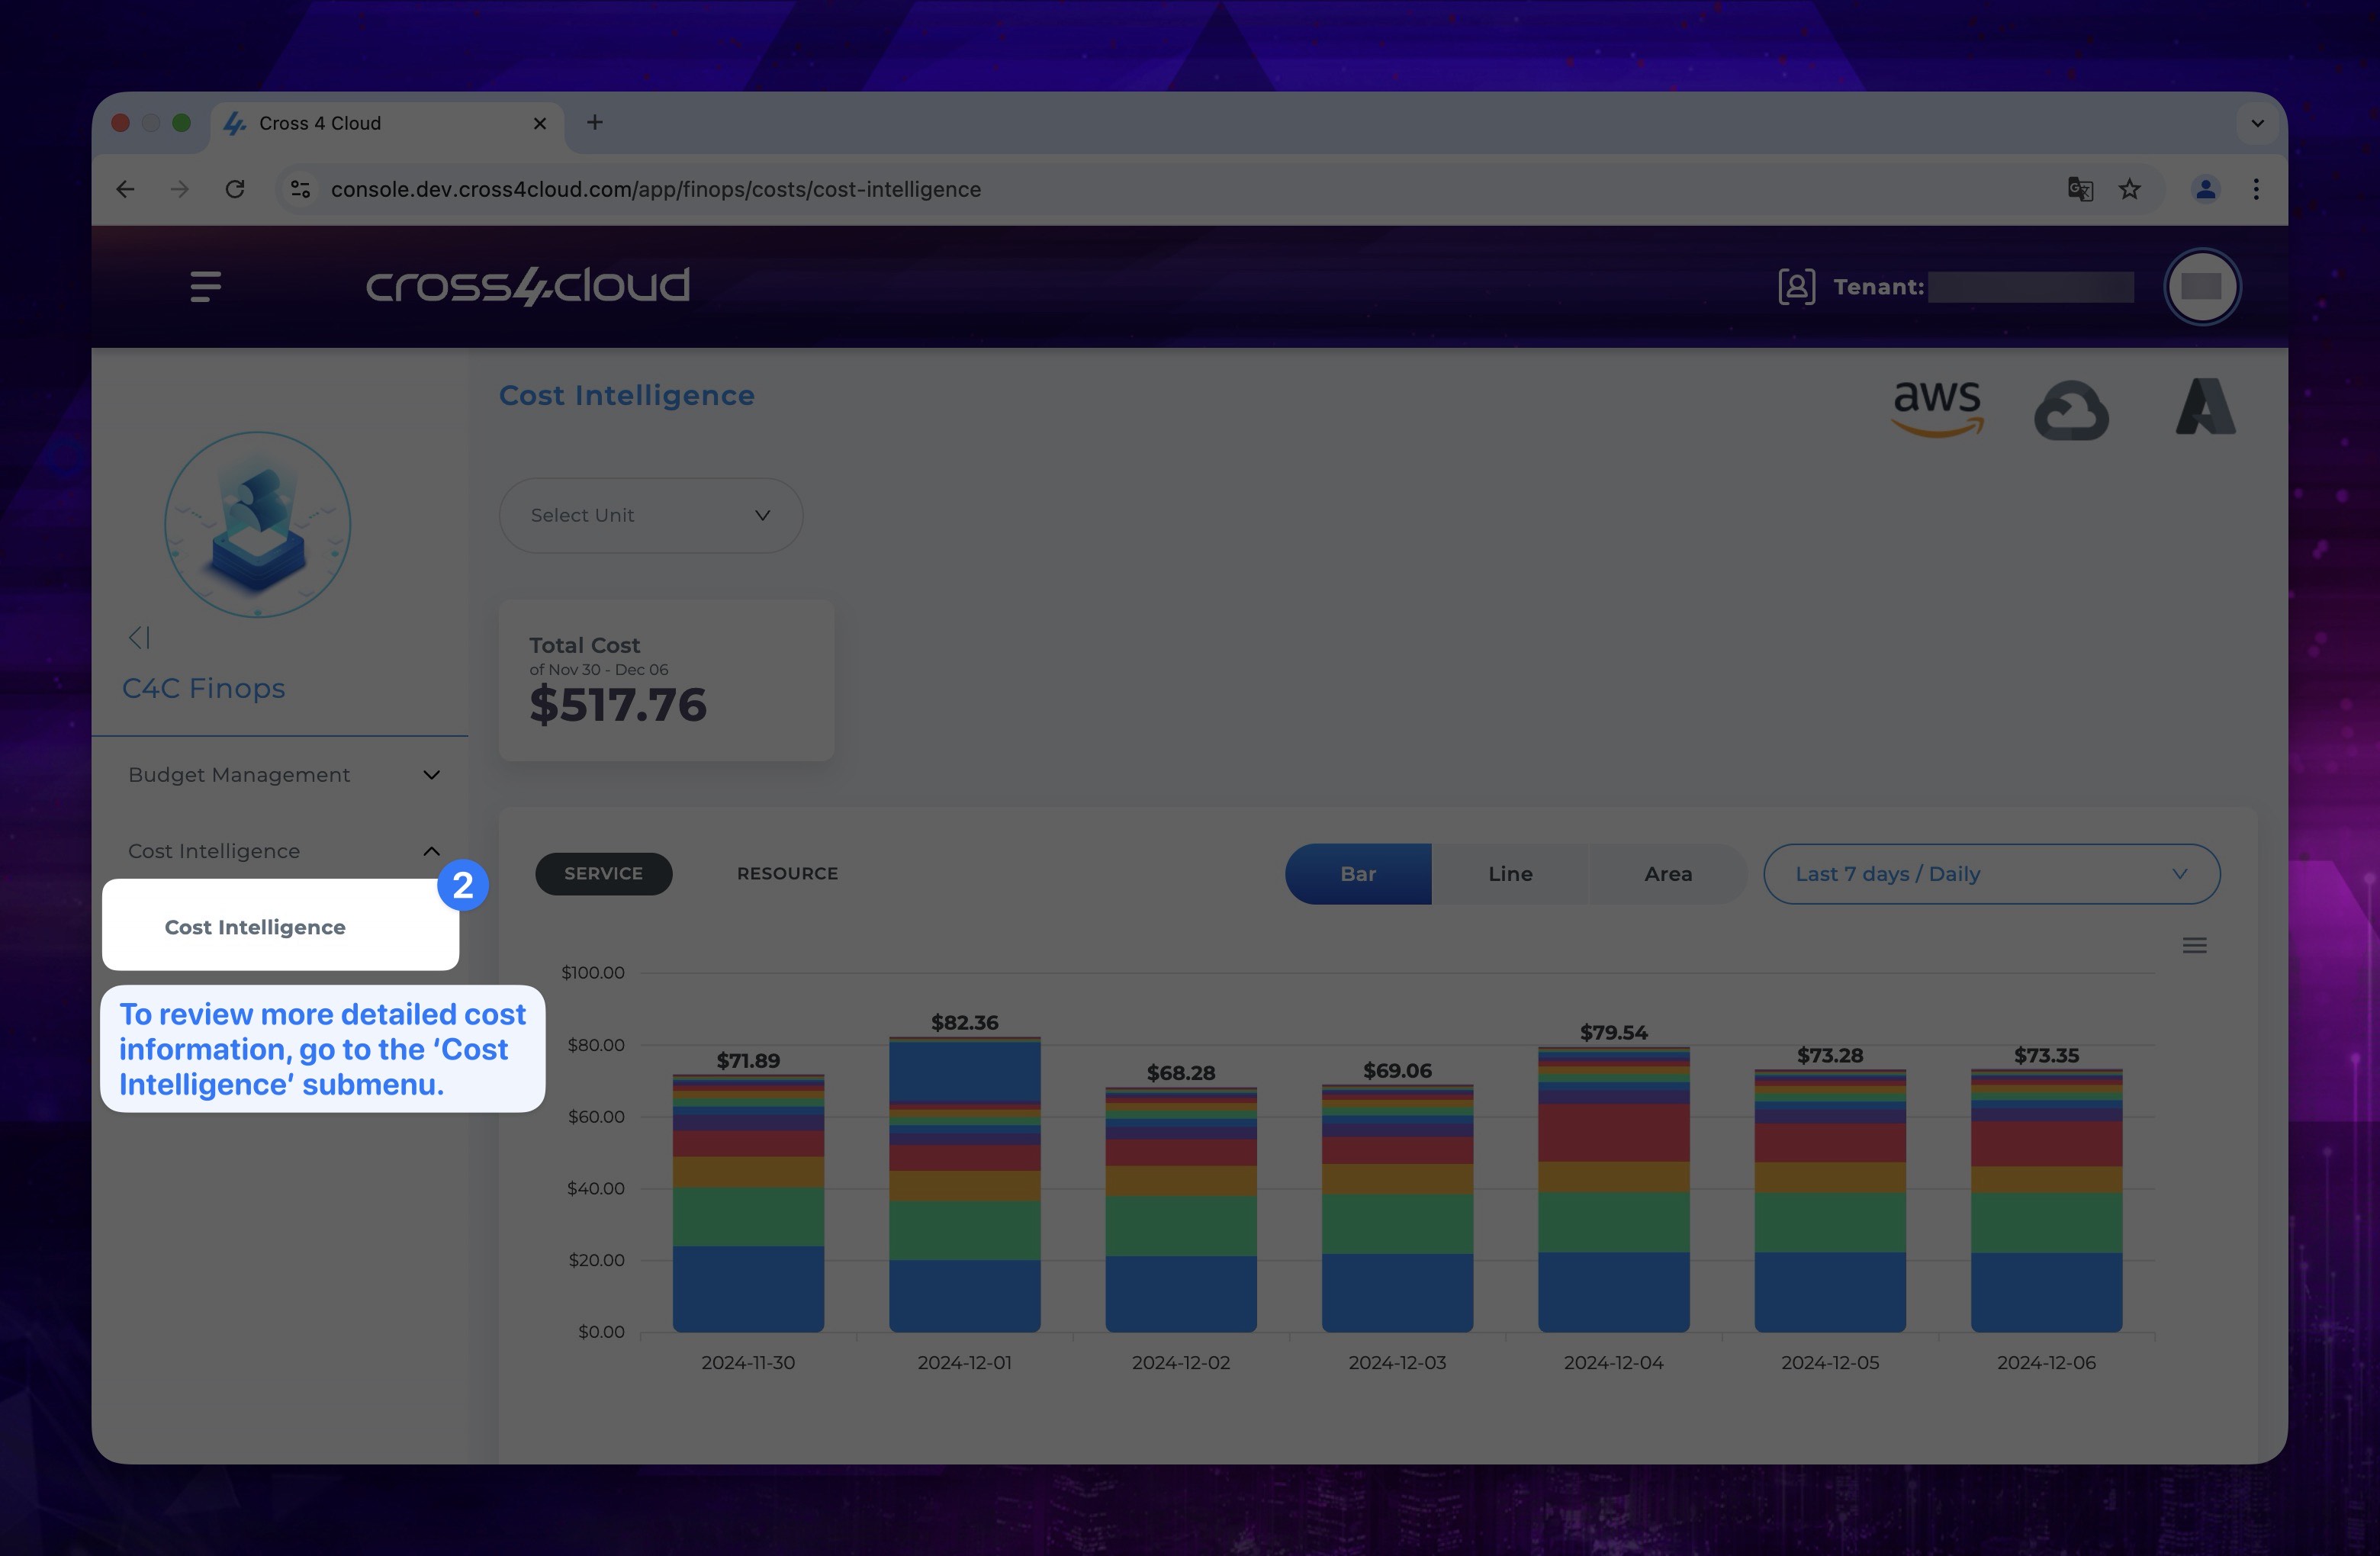
- On the page that shows up, you are able to see your cost informations.
- You can select a unit or provider that you want to monitor. You can also specify time period in graph on the right top.
Show the instruction with images
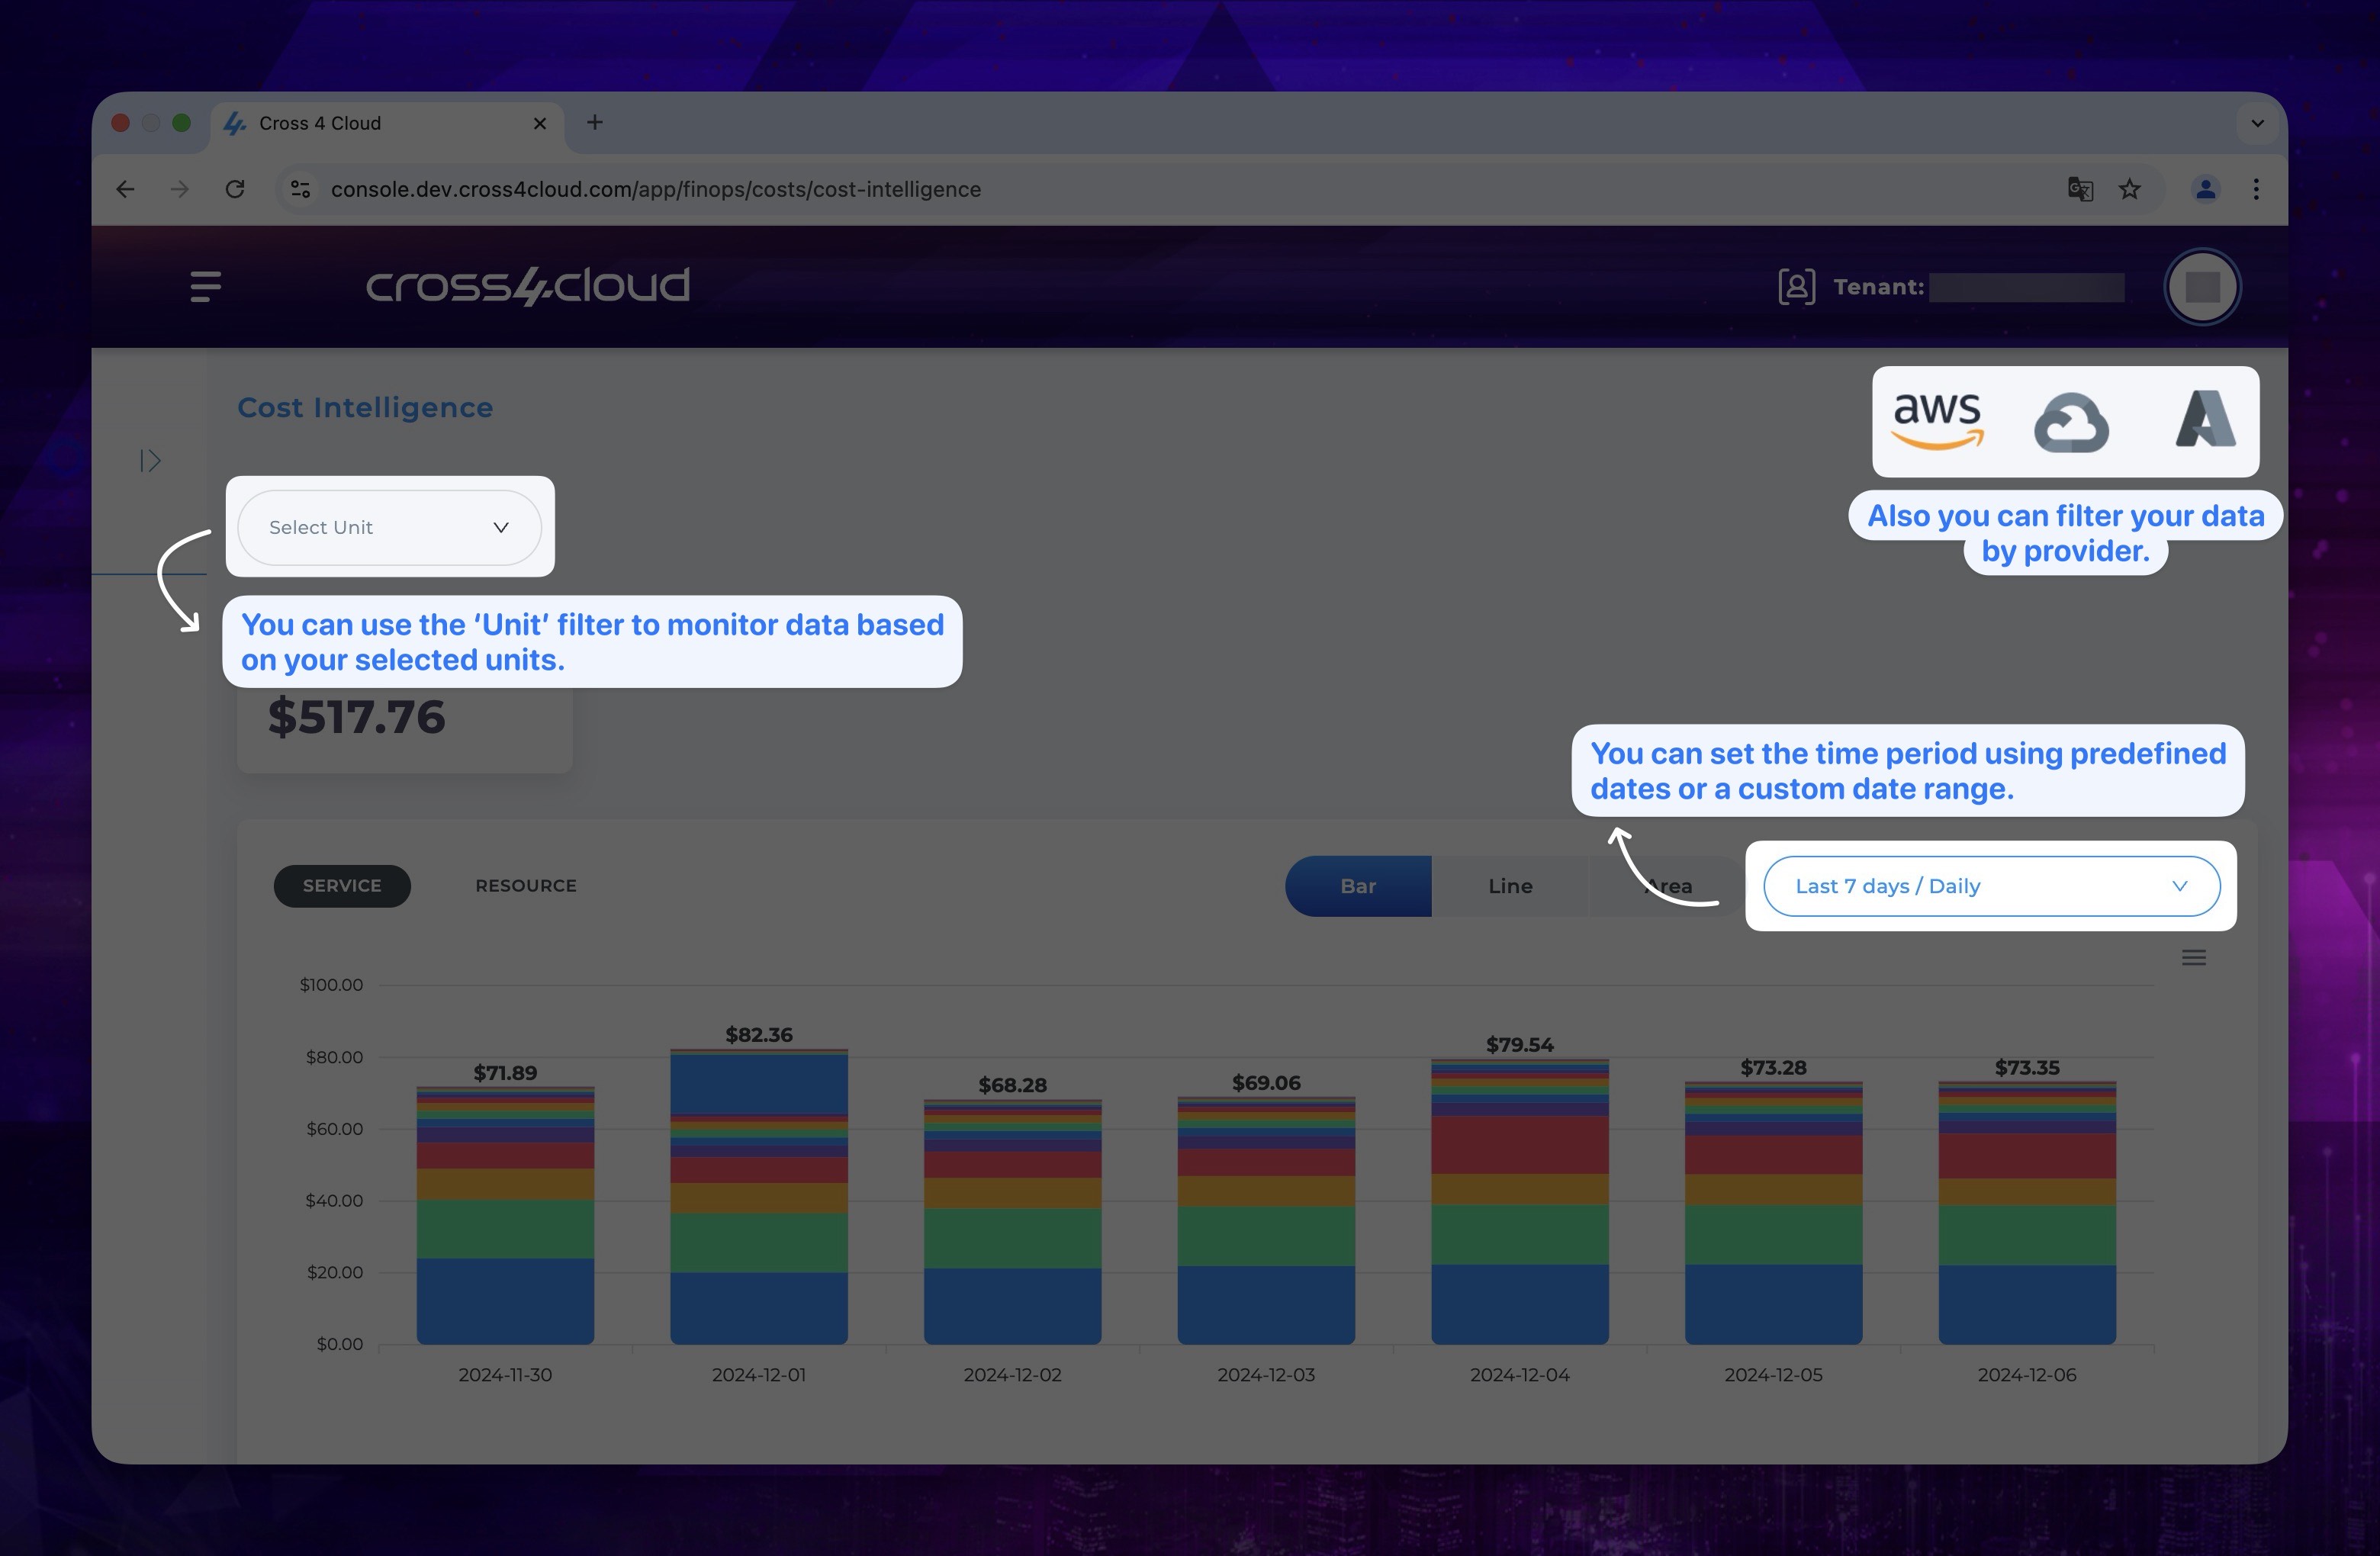
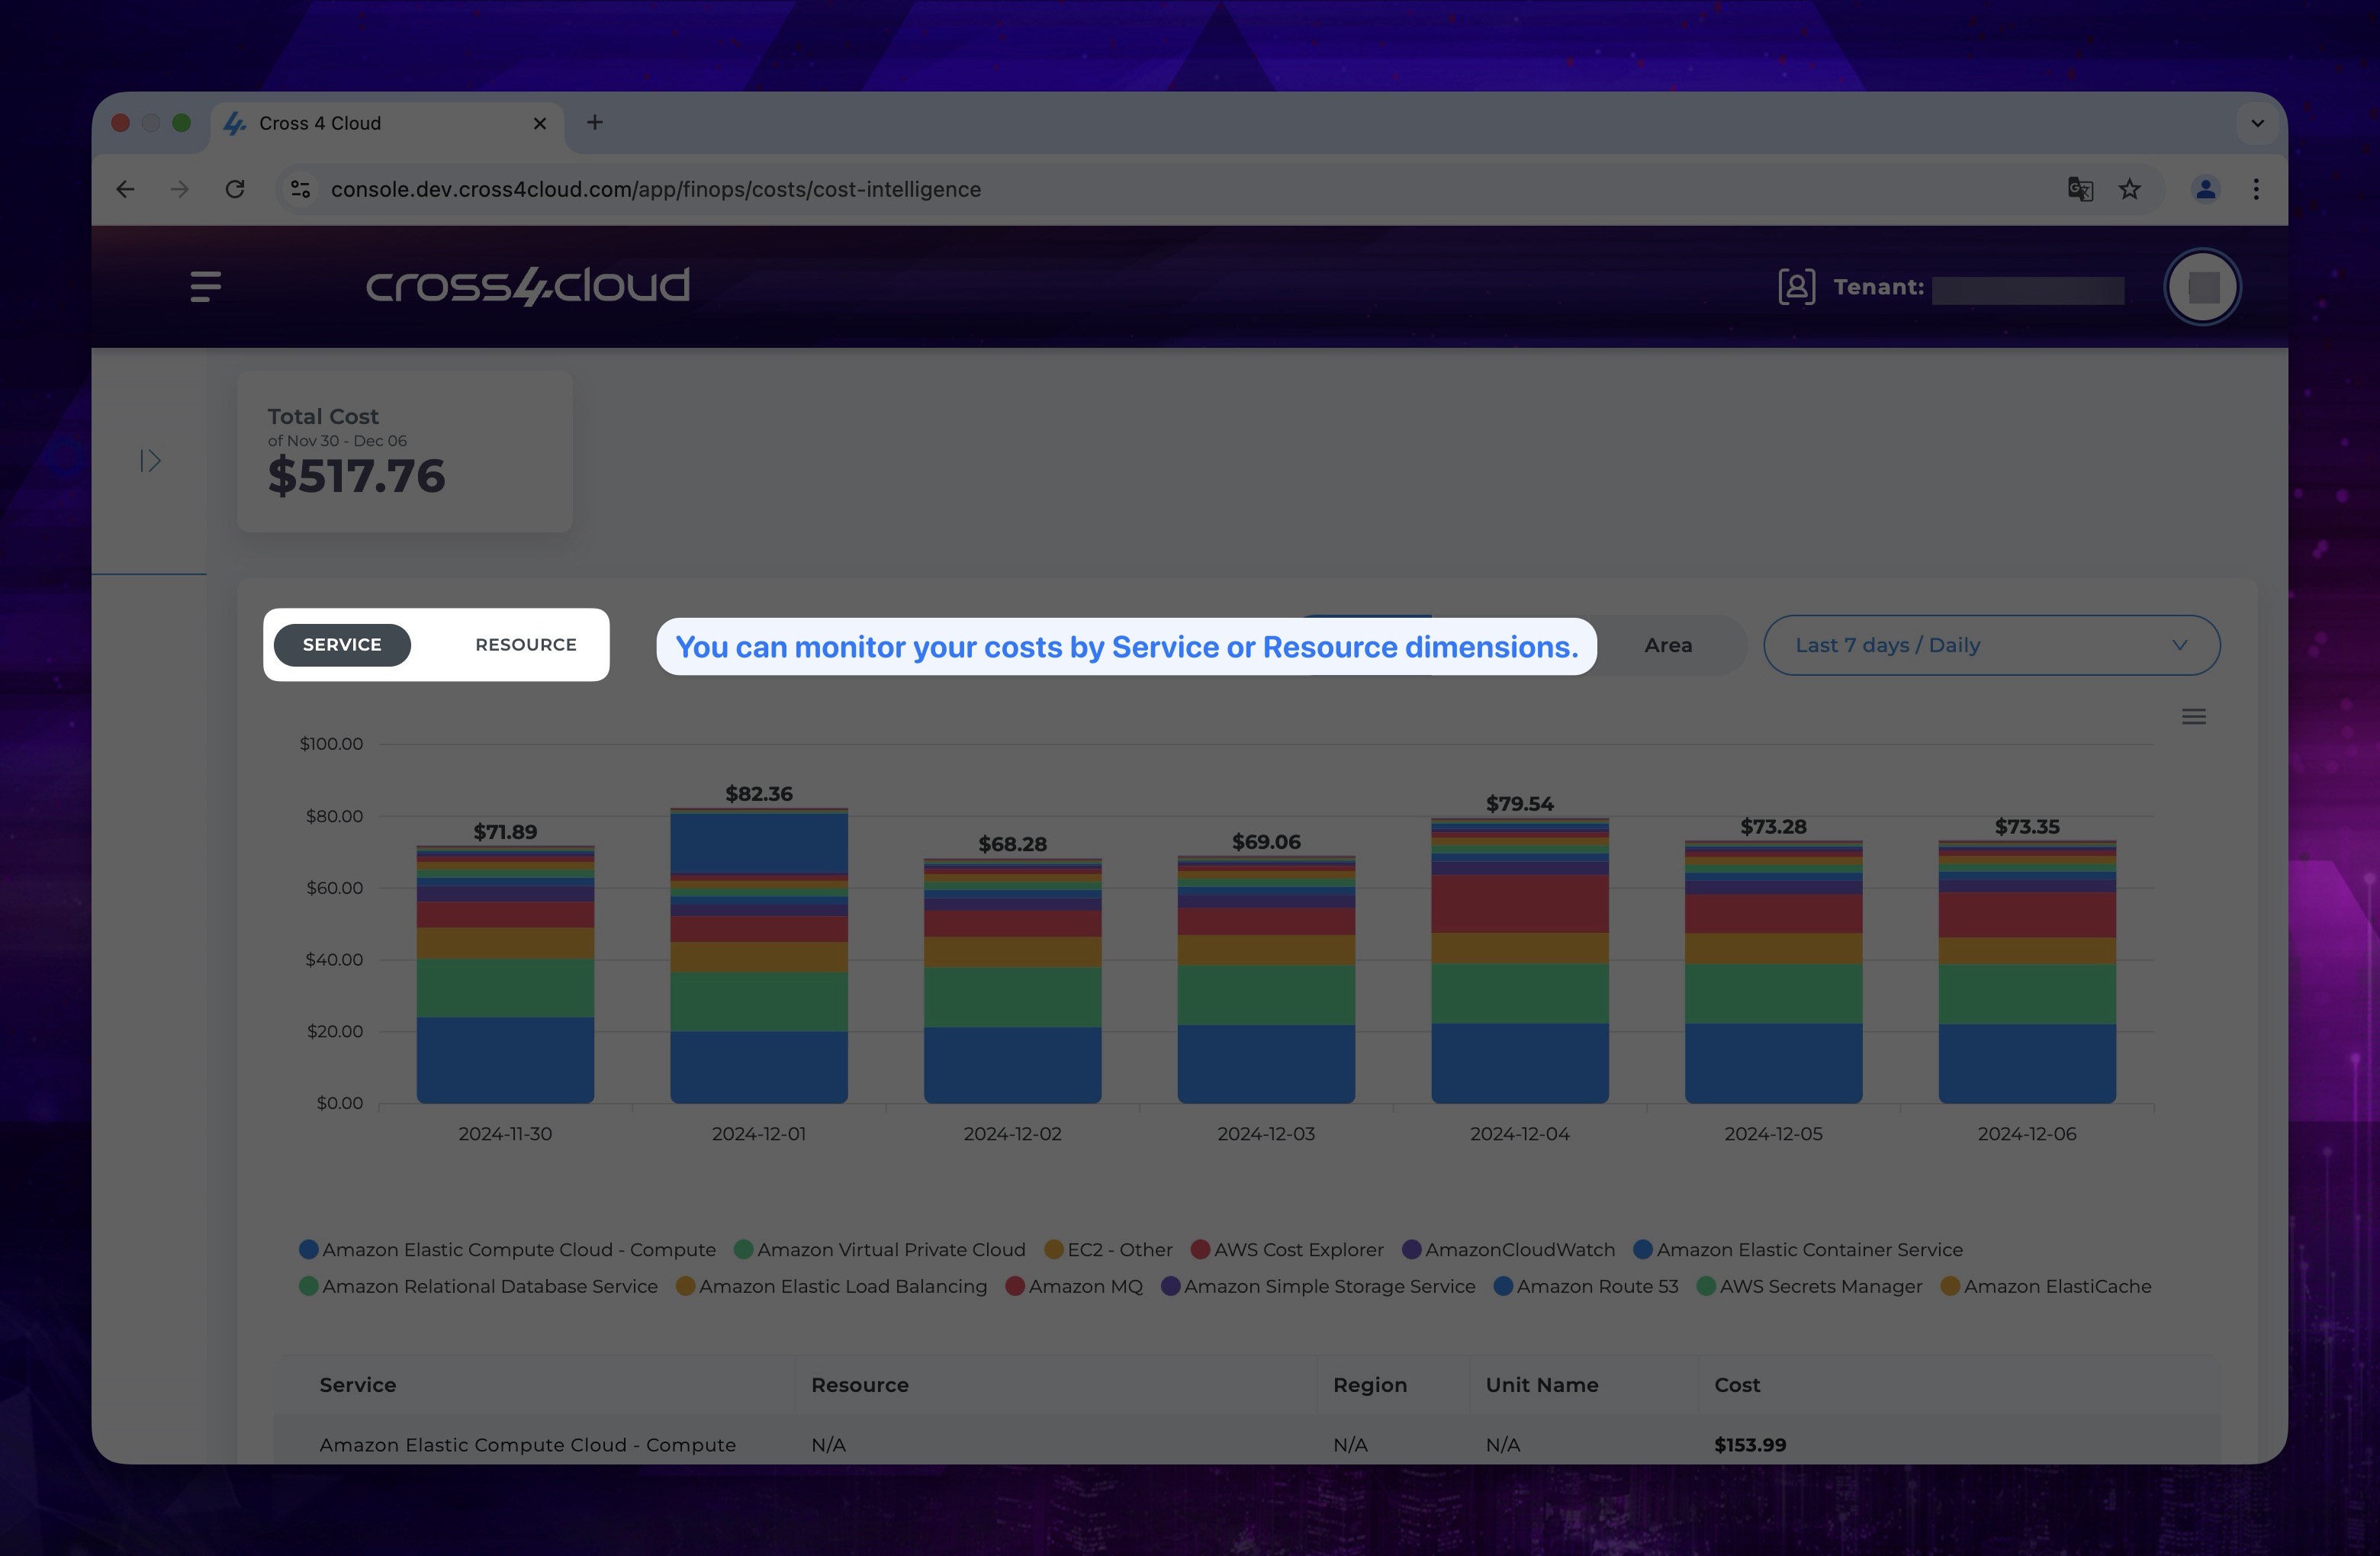
- You can set graph for SERVICE or RESOURCE.
Show the instruction with images
- You can see information in table below as well as graph.
Configuration
On this page, you can configure the provider to be used under the related service by using the credentials obtained from providers. Alternatively, you can edit previously used credentials from this page.