Getting Credentials for Cross4Compute
To integrate the Google Cloud Provider (GCP) provider to use the Cross4Compute service you are required to perform some operations in GCP. The images attached below will guide you. Please follow the instructions below.
1. Project Creation
If you do not have any GCP project, please create a one firstly. Otherwise, you can skip this section.
-
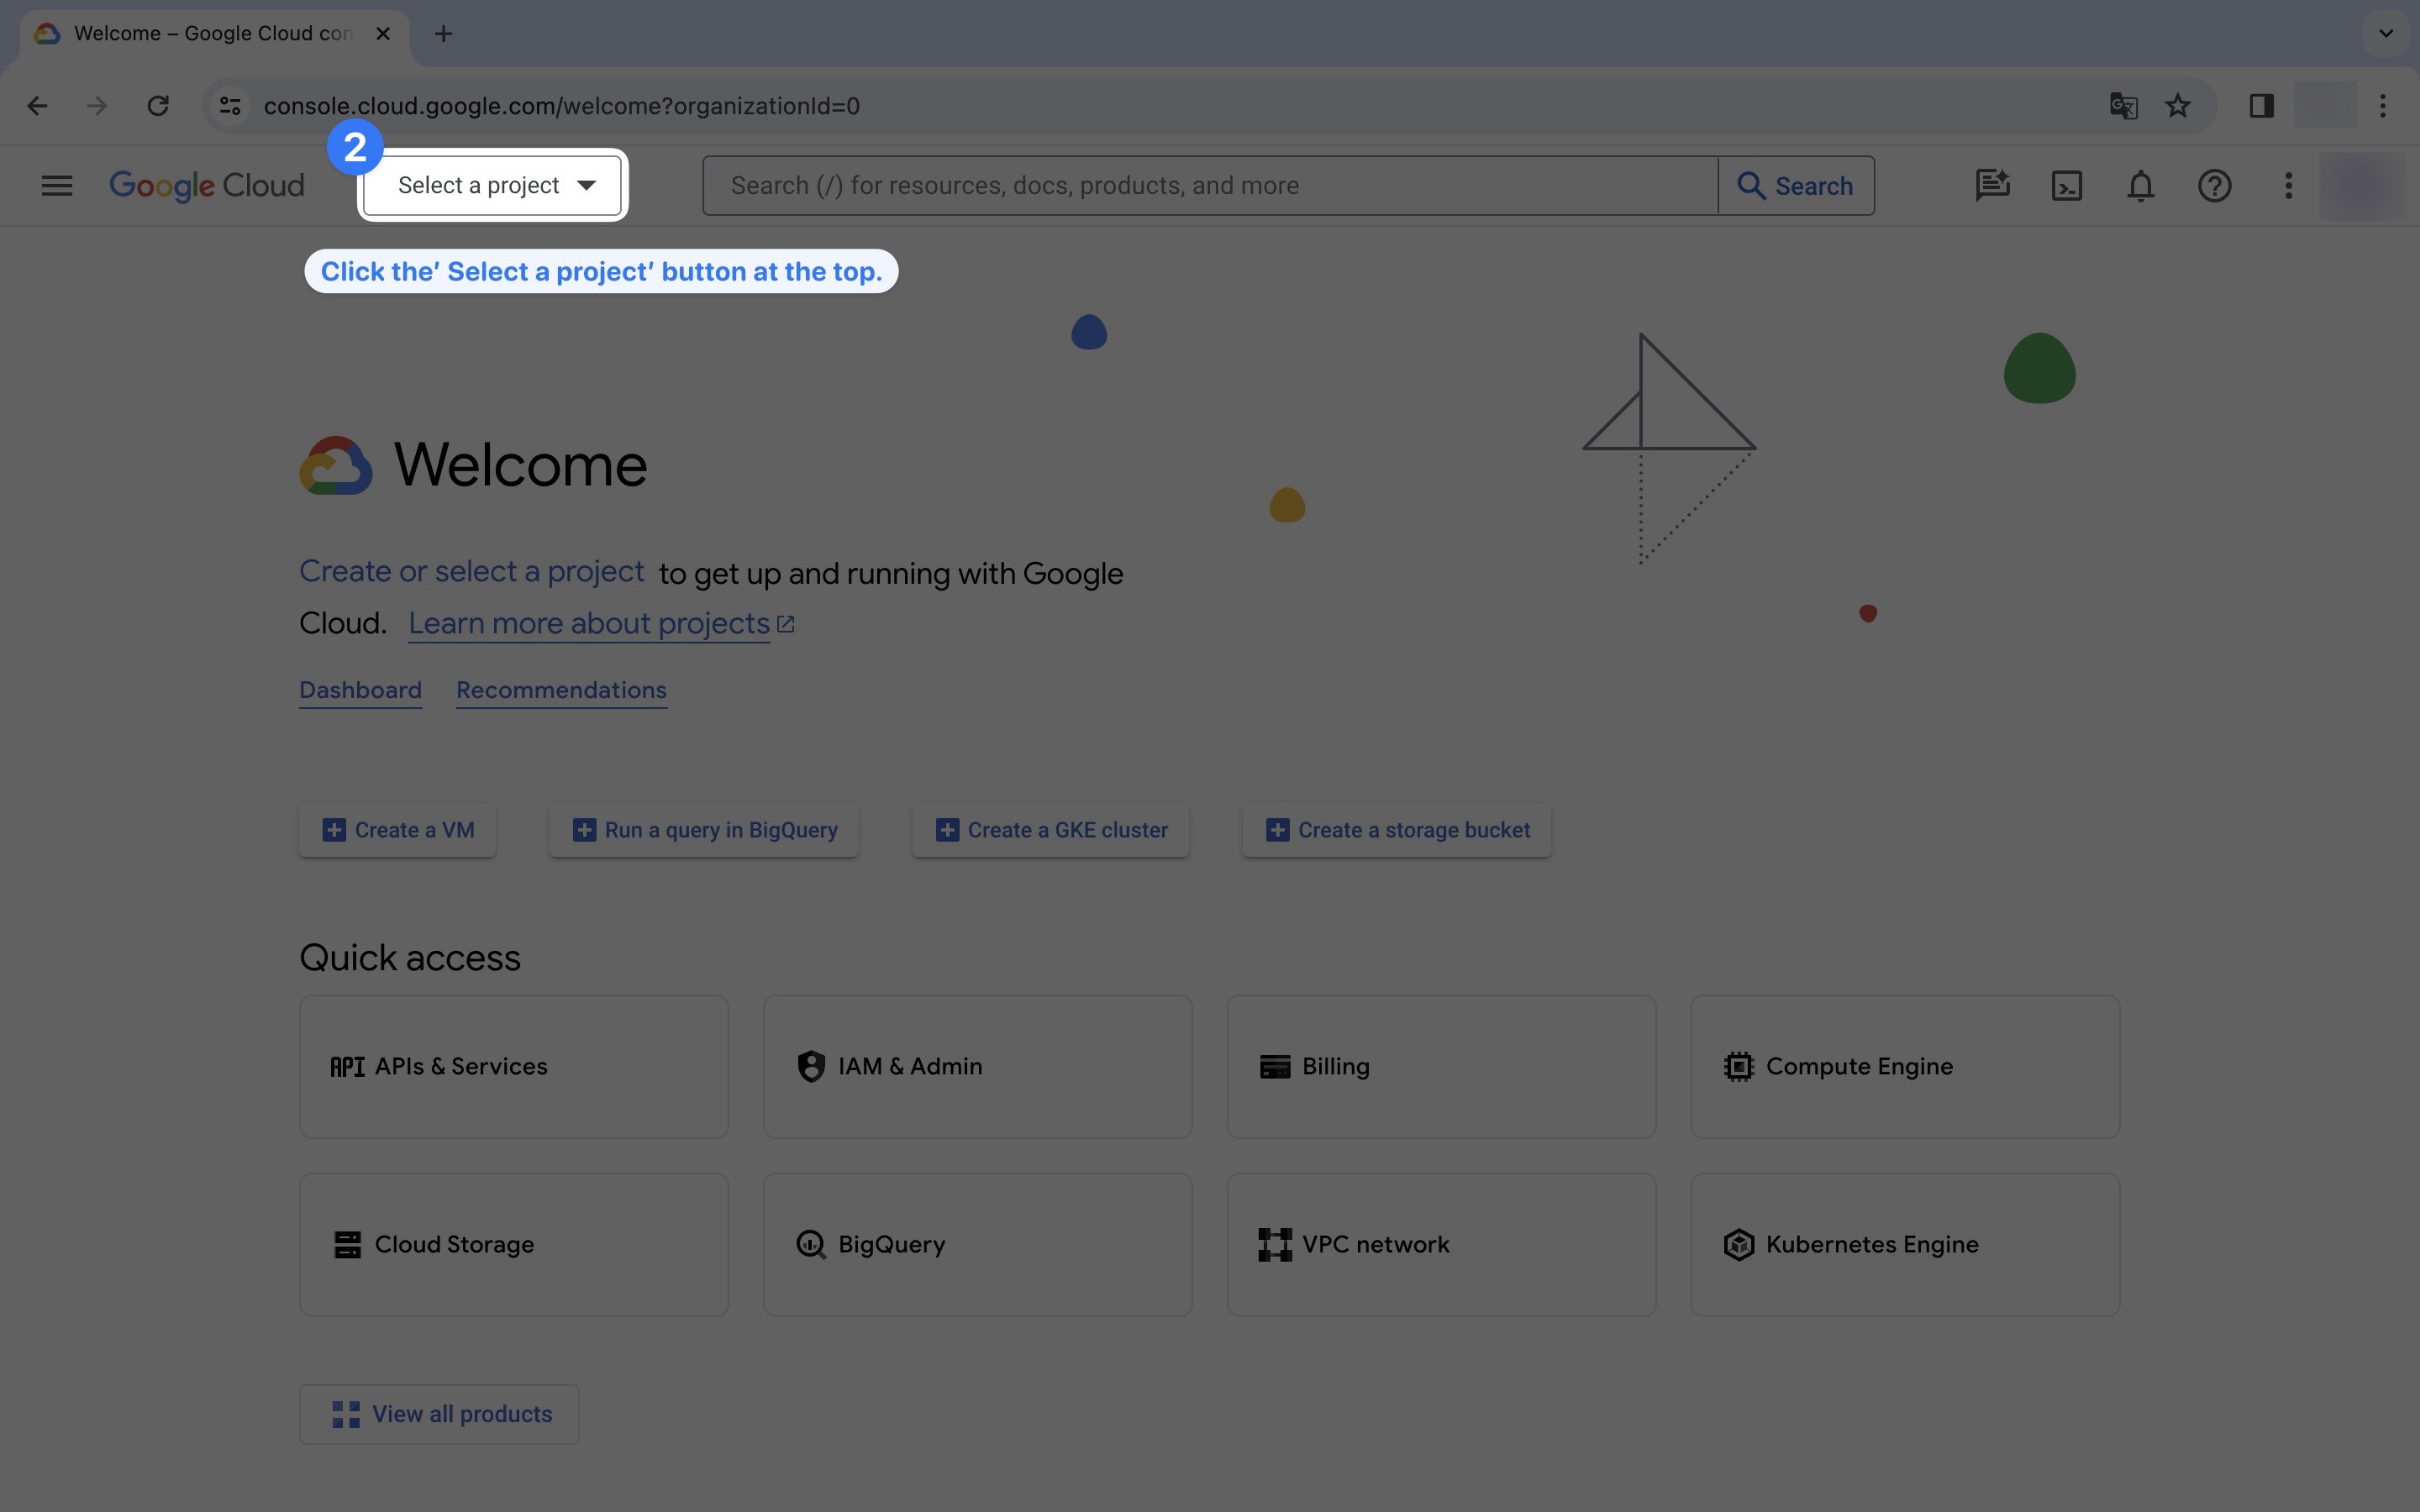
Go to GCP Console and log in to your account.
-
Click the Select Project button top of the page.
Show the instruction with images
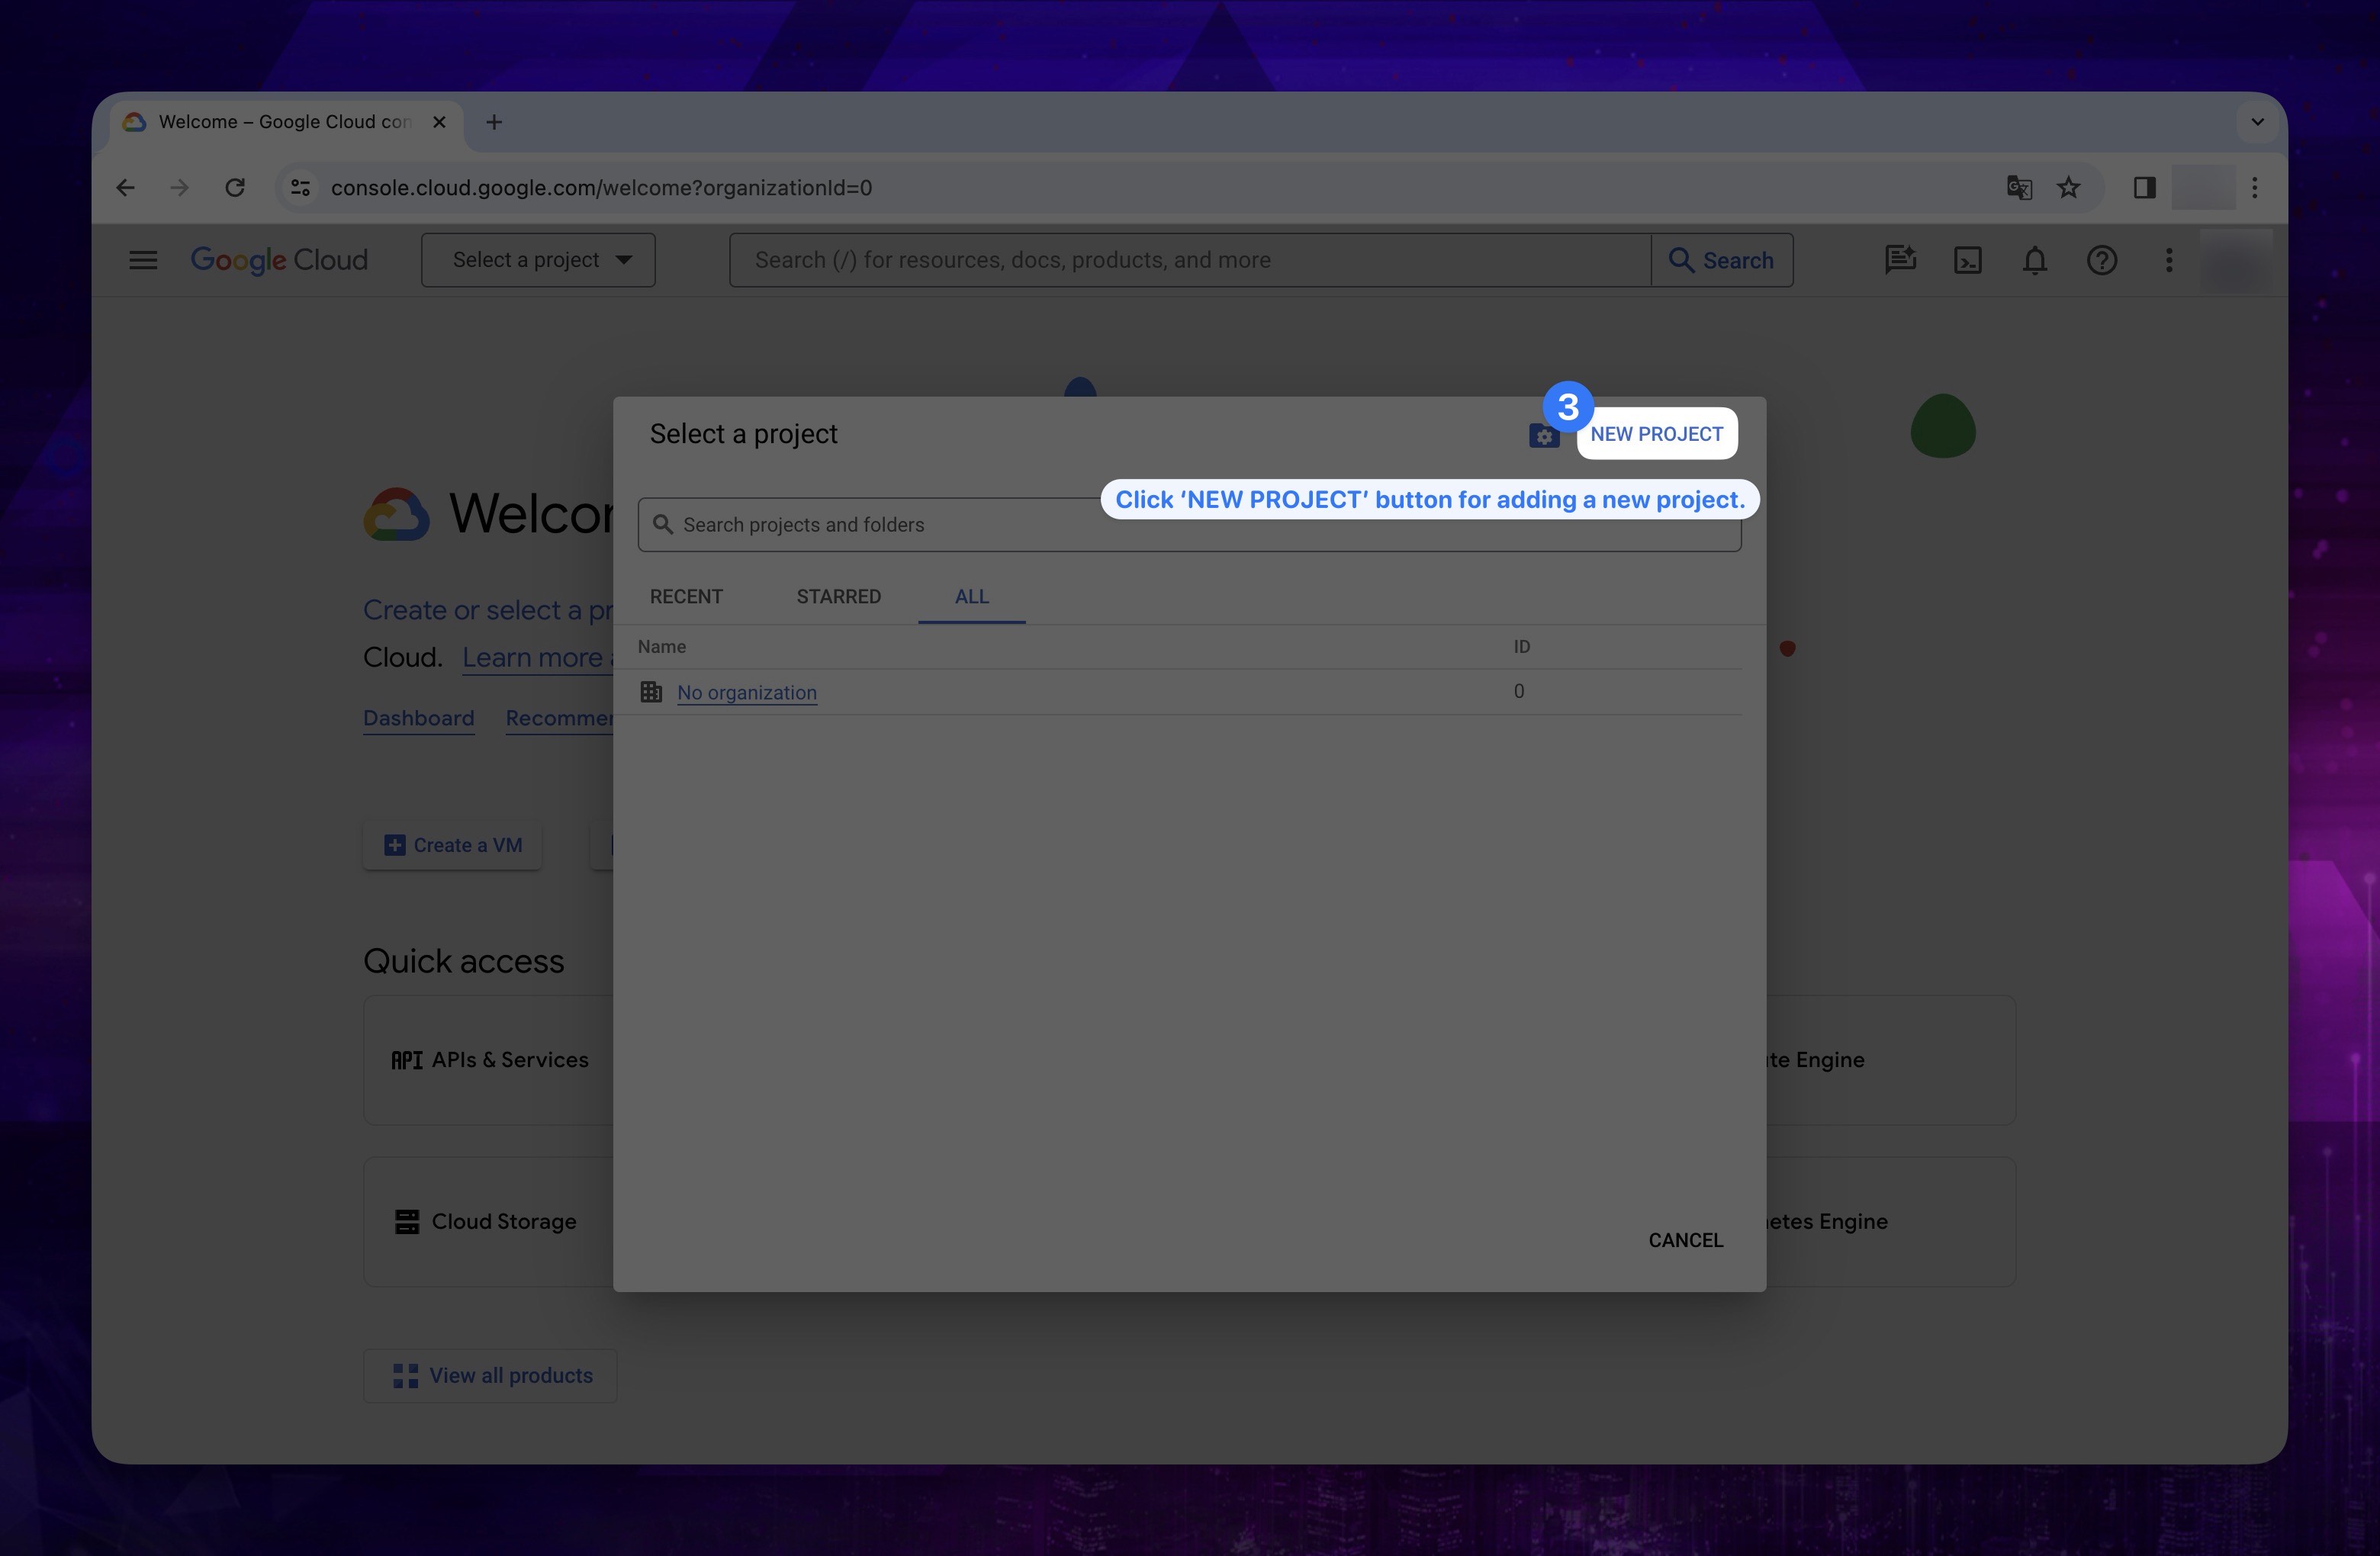
- Click on the New Project button located in the upper-right corner of the opened section.
Show the instruction with images
-
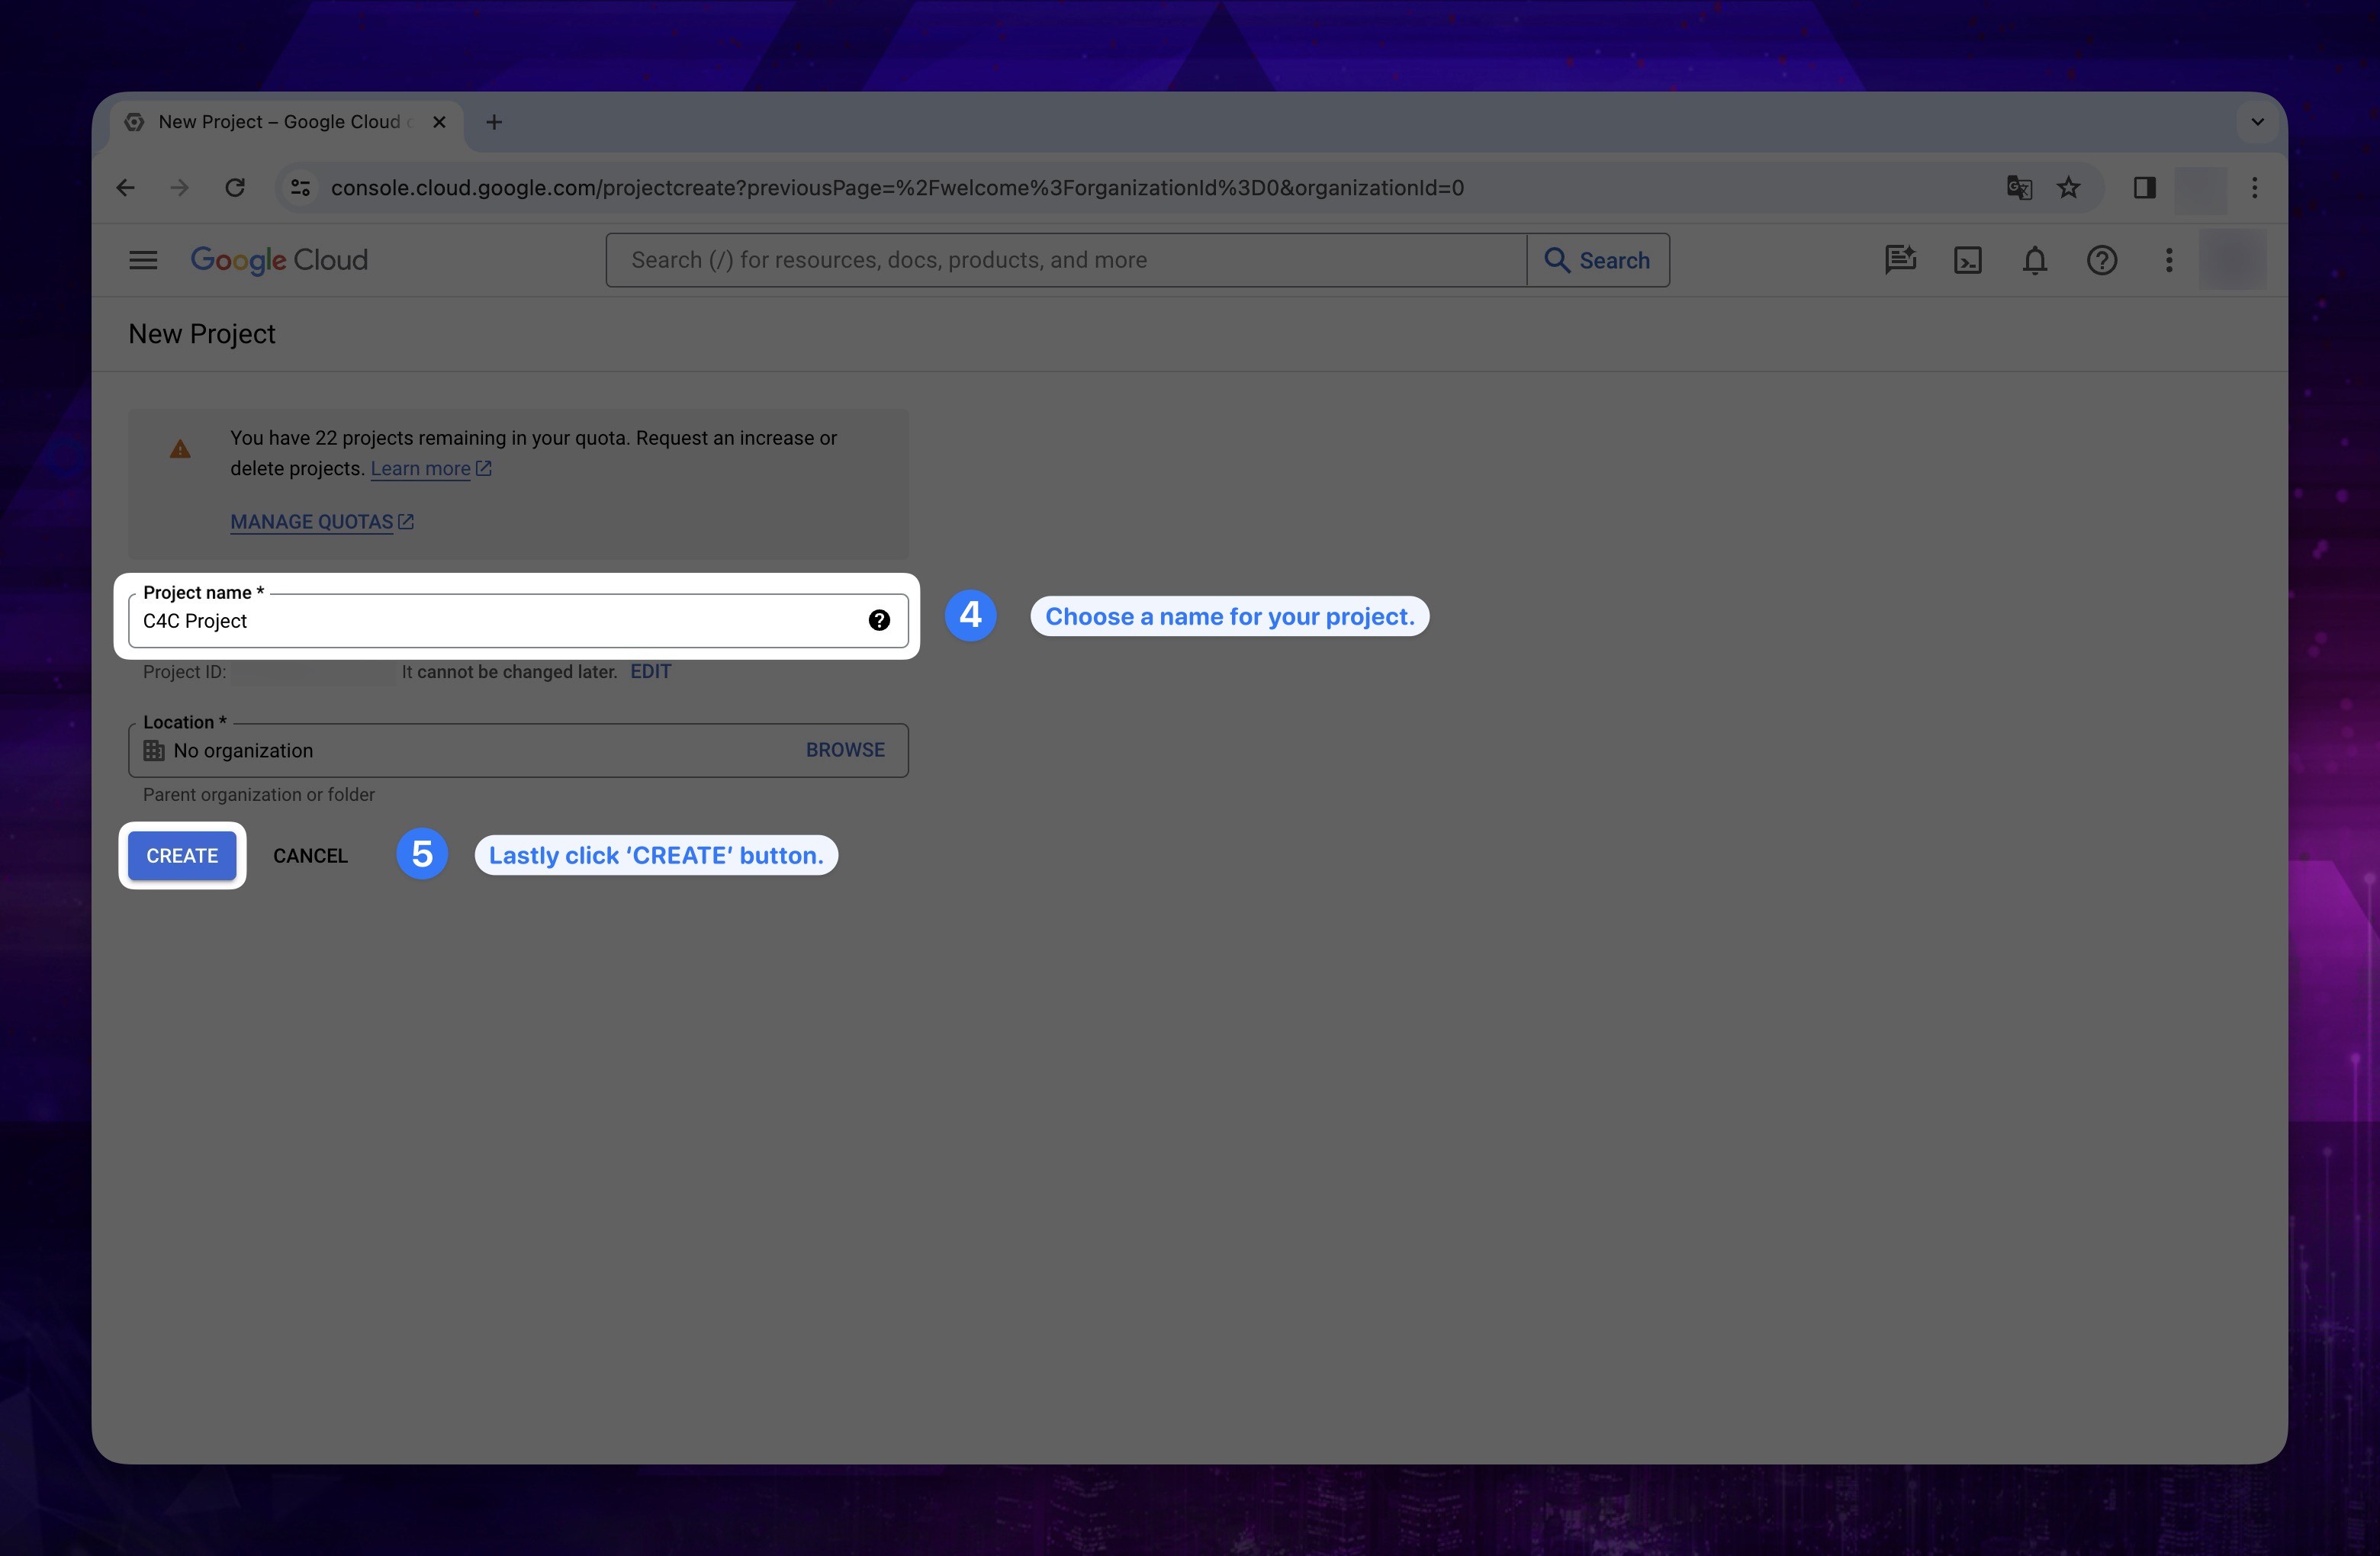
On the next page, you can define the desired Project name for the project.
-
Finally, click the Create button.
Show the instruction with images
2. Enabling APIs
This section, ensures that the necessary APIs are enabled in your GCP account. Check whether these APIs are active in your account.
- Lists of APIs that need to be enabled:
- BigQuery API
- Cloud Resource Manager API
- Cloud Monitoring API
- Compute Engine API
- Identity and Access Management (IAM) API
If the APIs are not active, you can enable them by following the steps below.
-
Go to GCP Console and log in to your account.
-
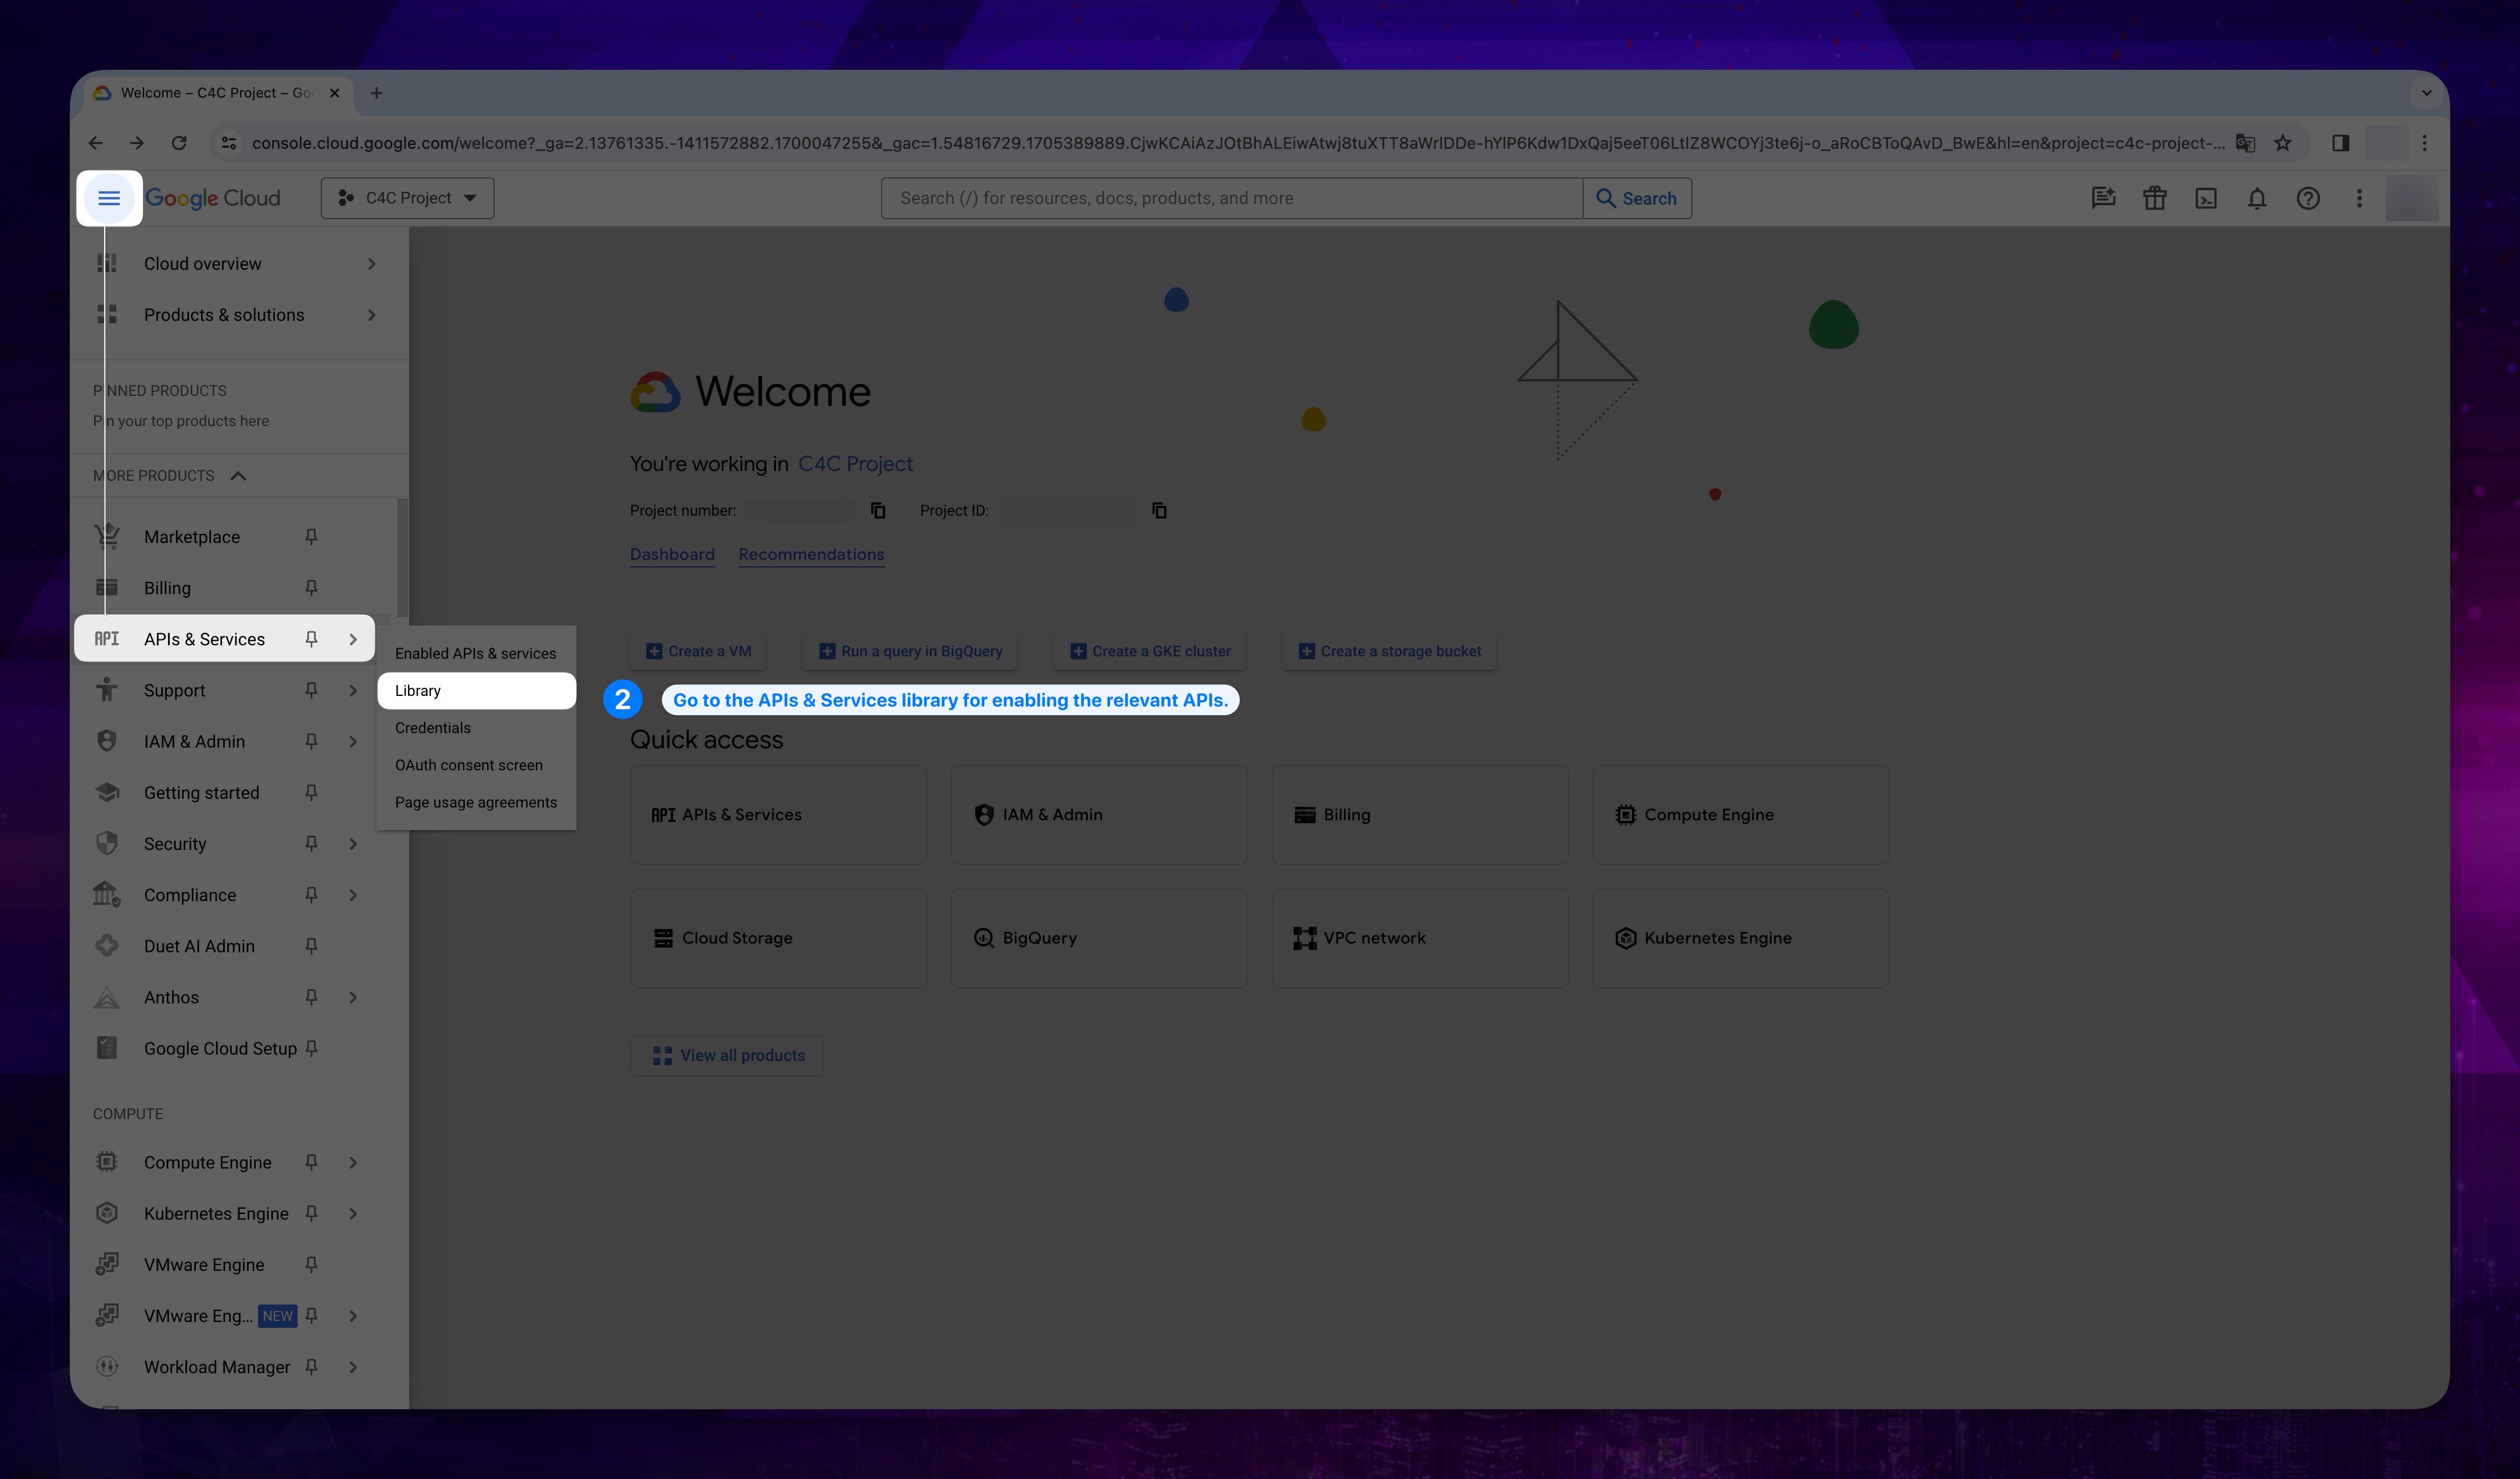
Navigate to the project you will use in our platform. Open the Navigation Menu by clicking on the icon in the top left corner of the page. Hover over APIs and Services in the navigation menu that appears and click on the Library section.
Show the instruction with images
-
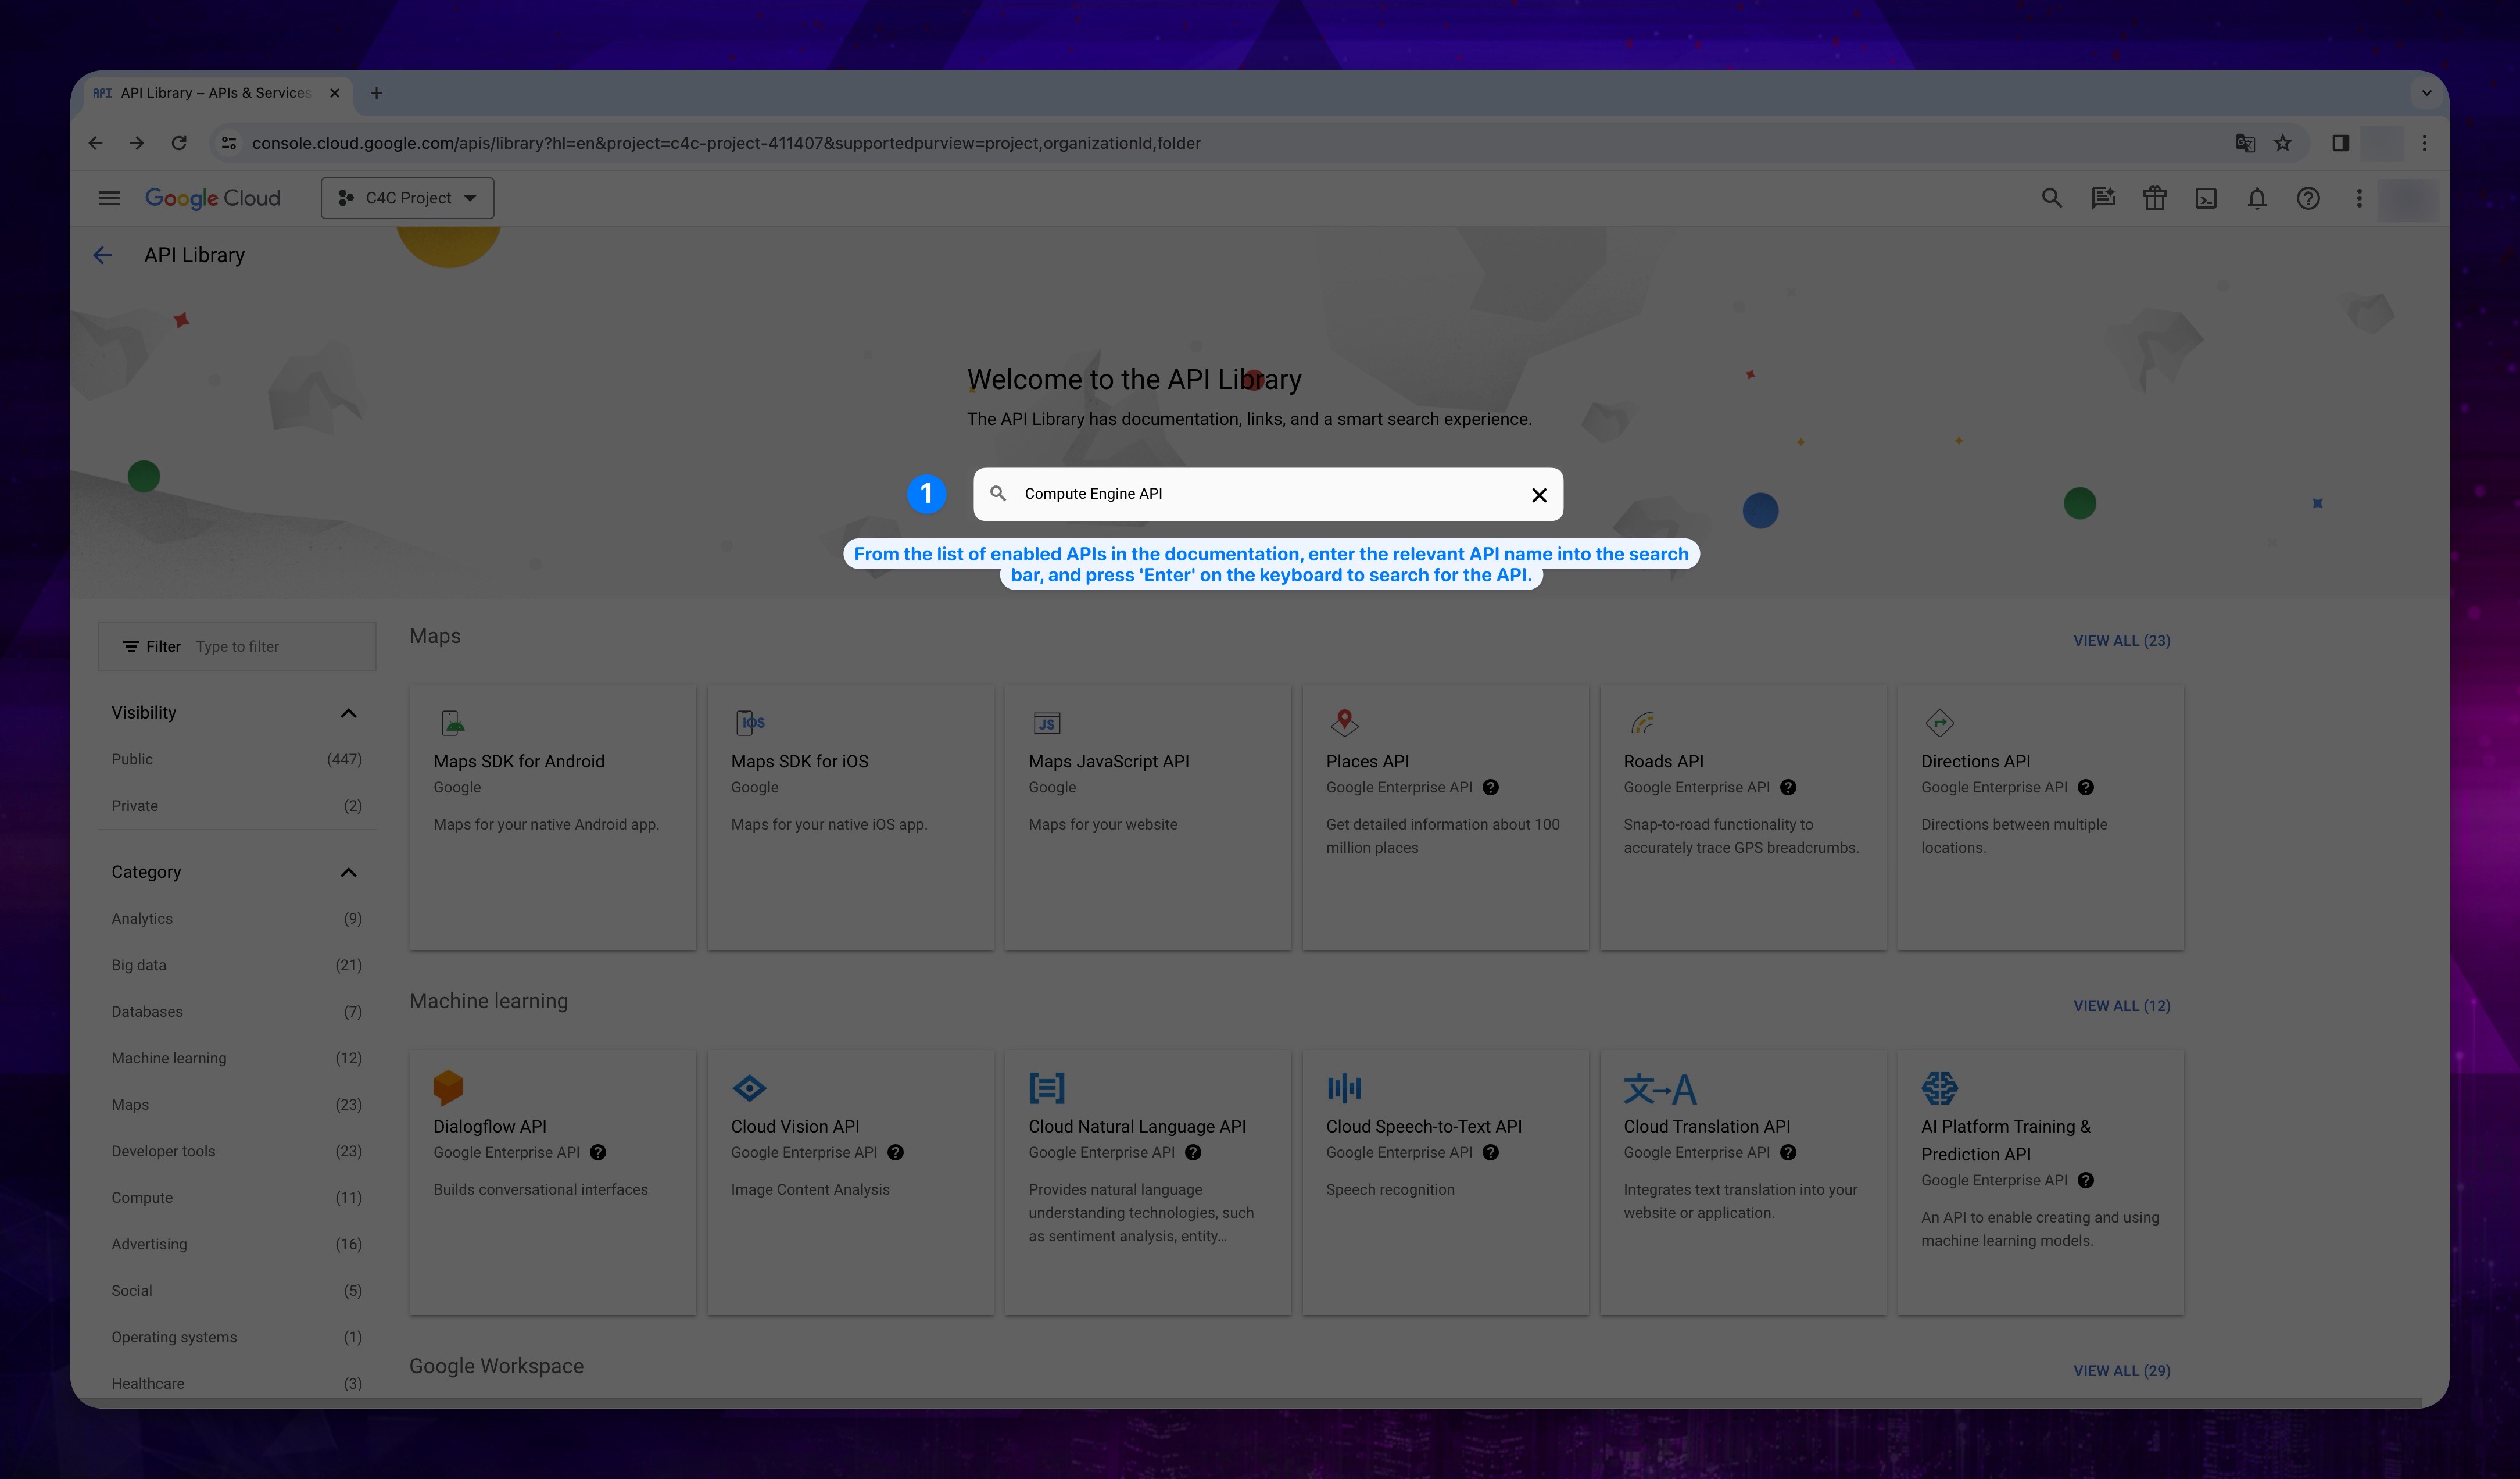
Repeat the steps below for all APIs listed in the Enabled APIs List mentioned above.
- Type one of the API names mentioned above into the search bar.
Show the instruction with images
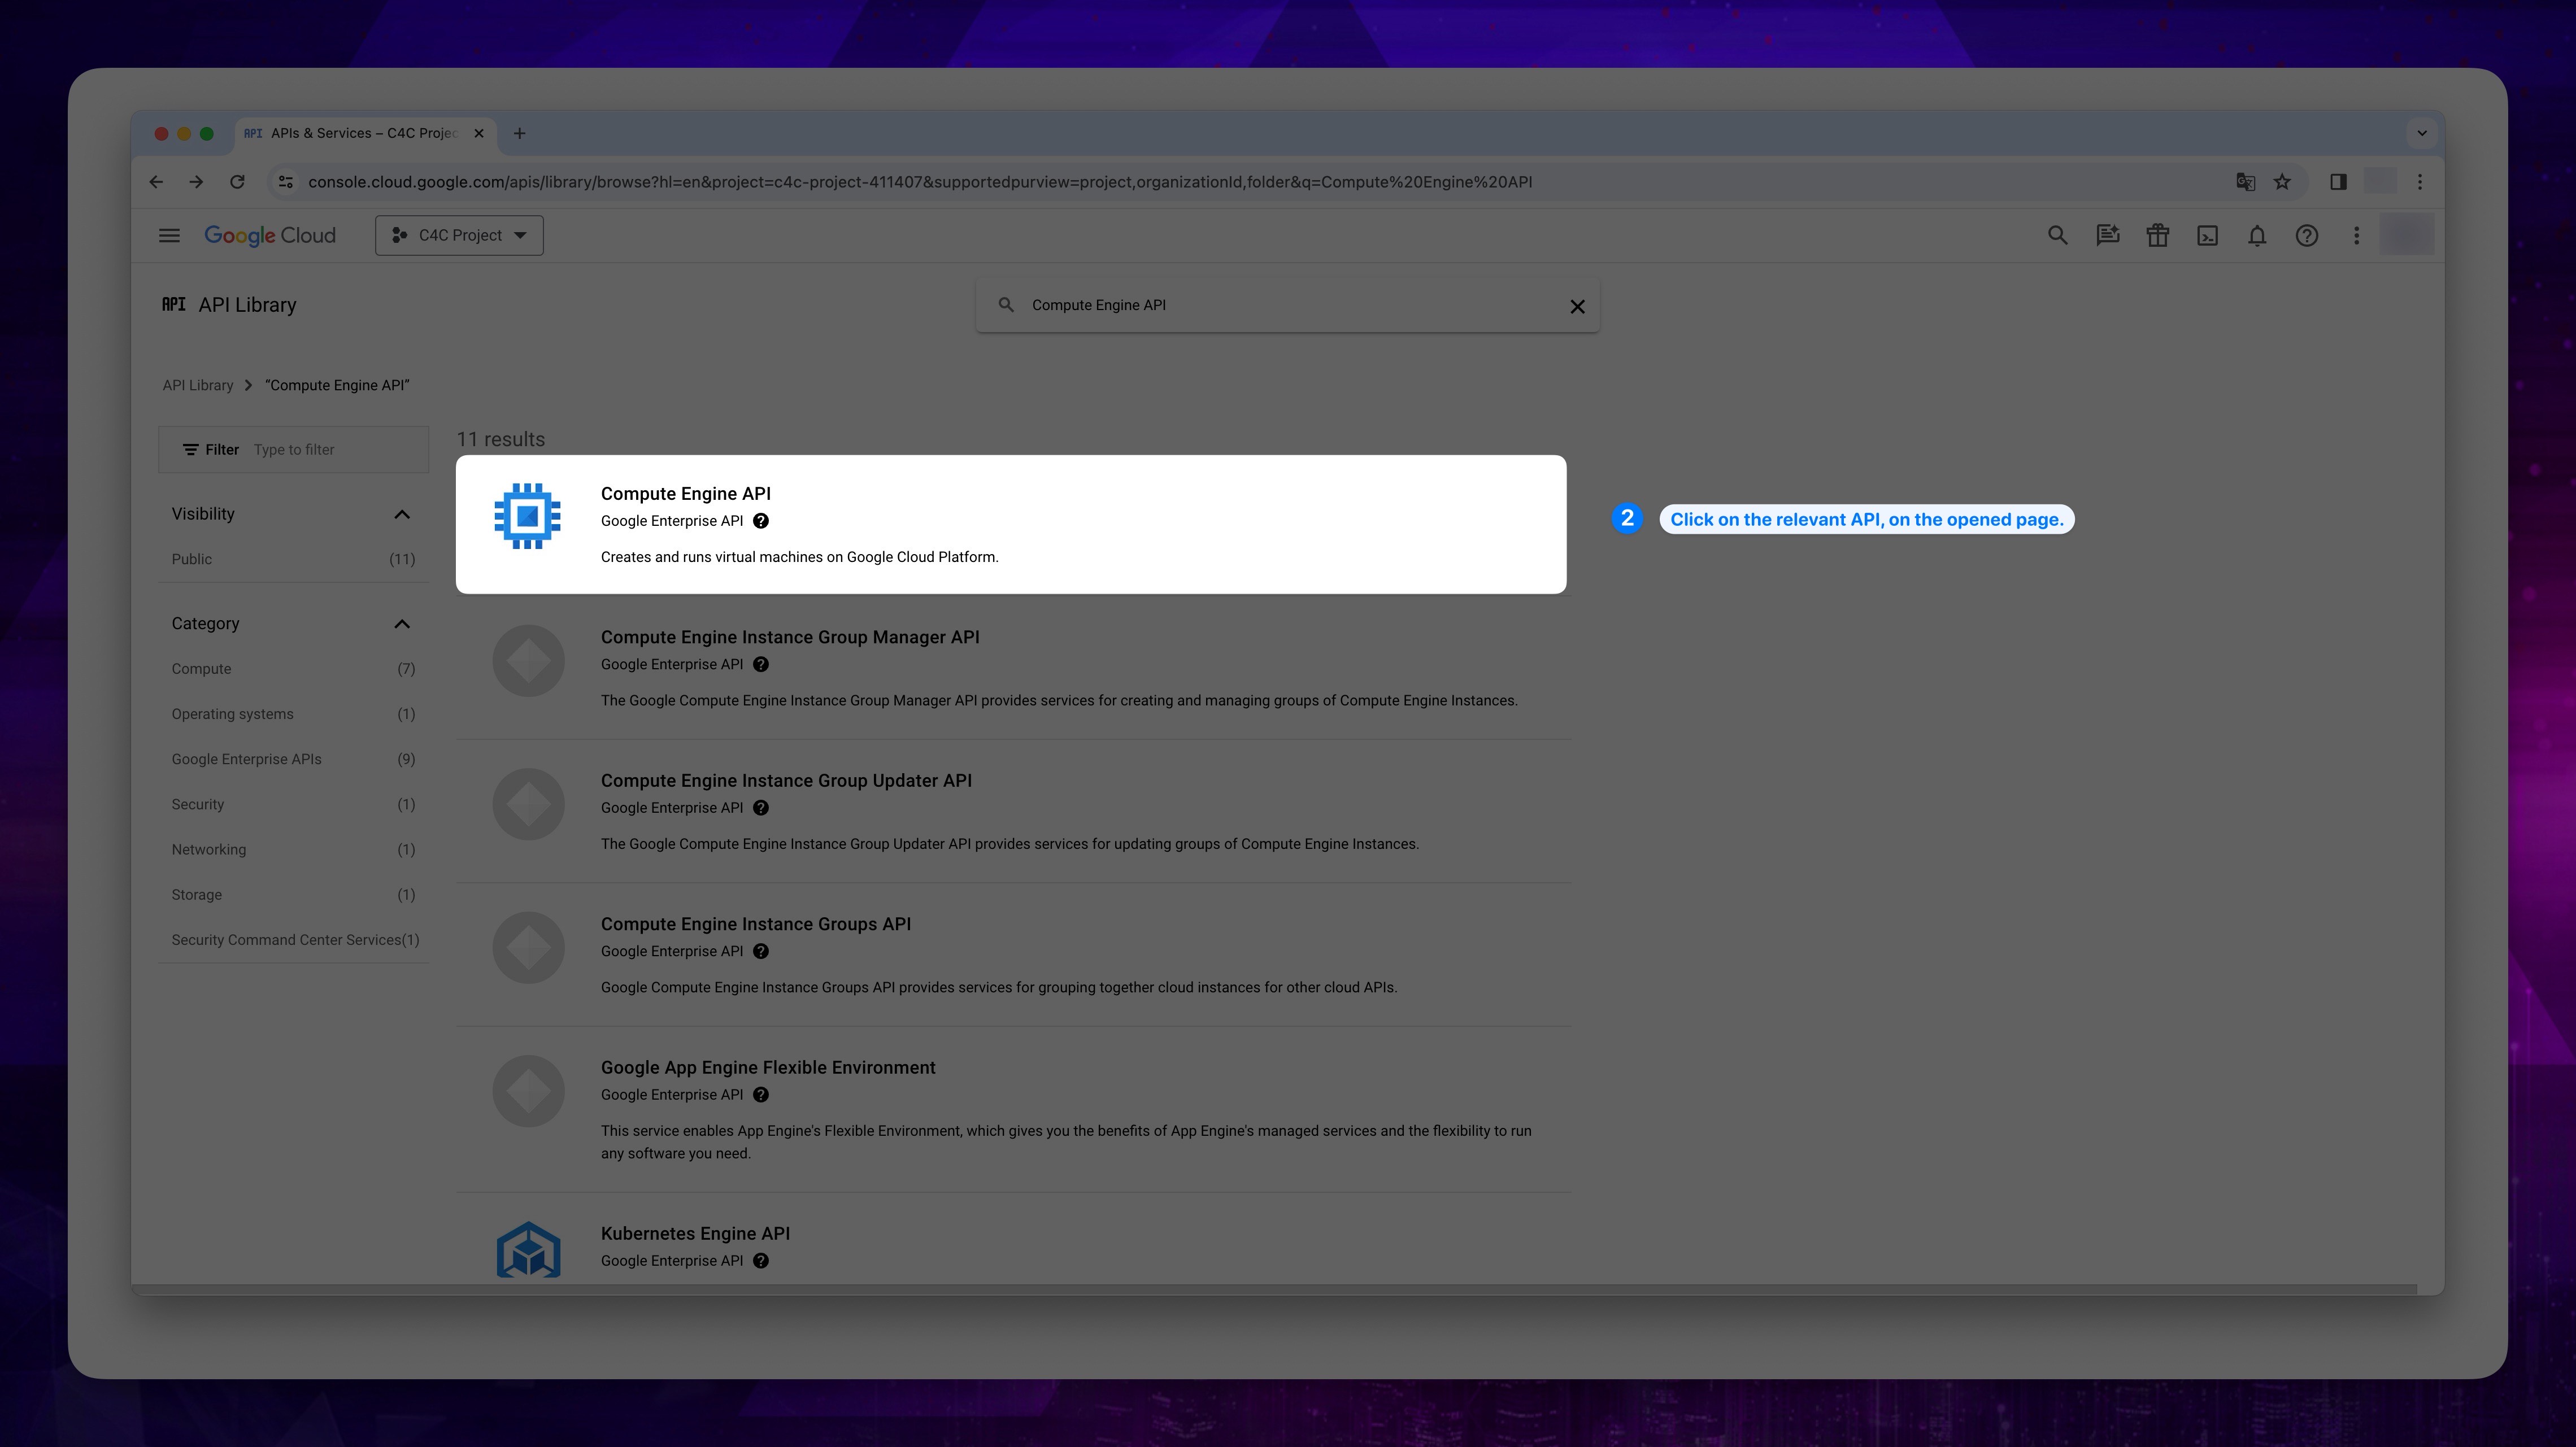
- Locate the relevant API on the opened page and click on it.
Show the instruction with images
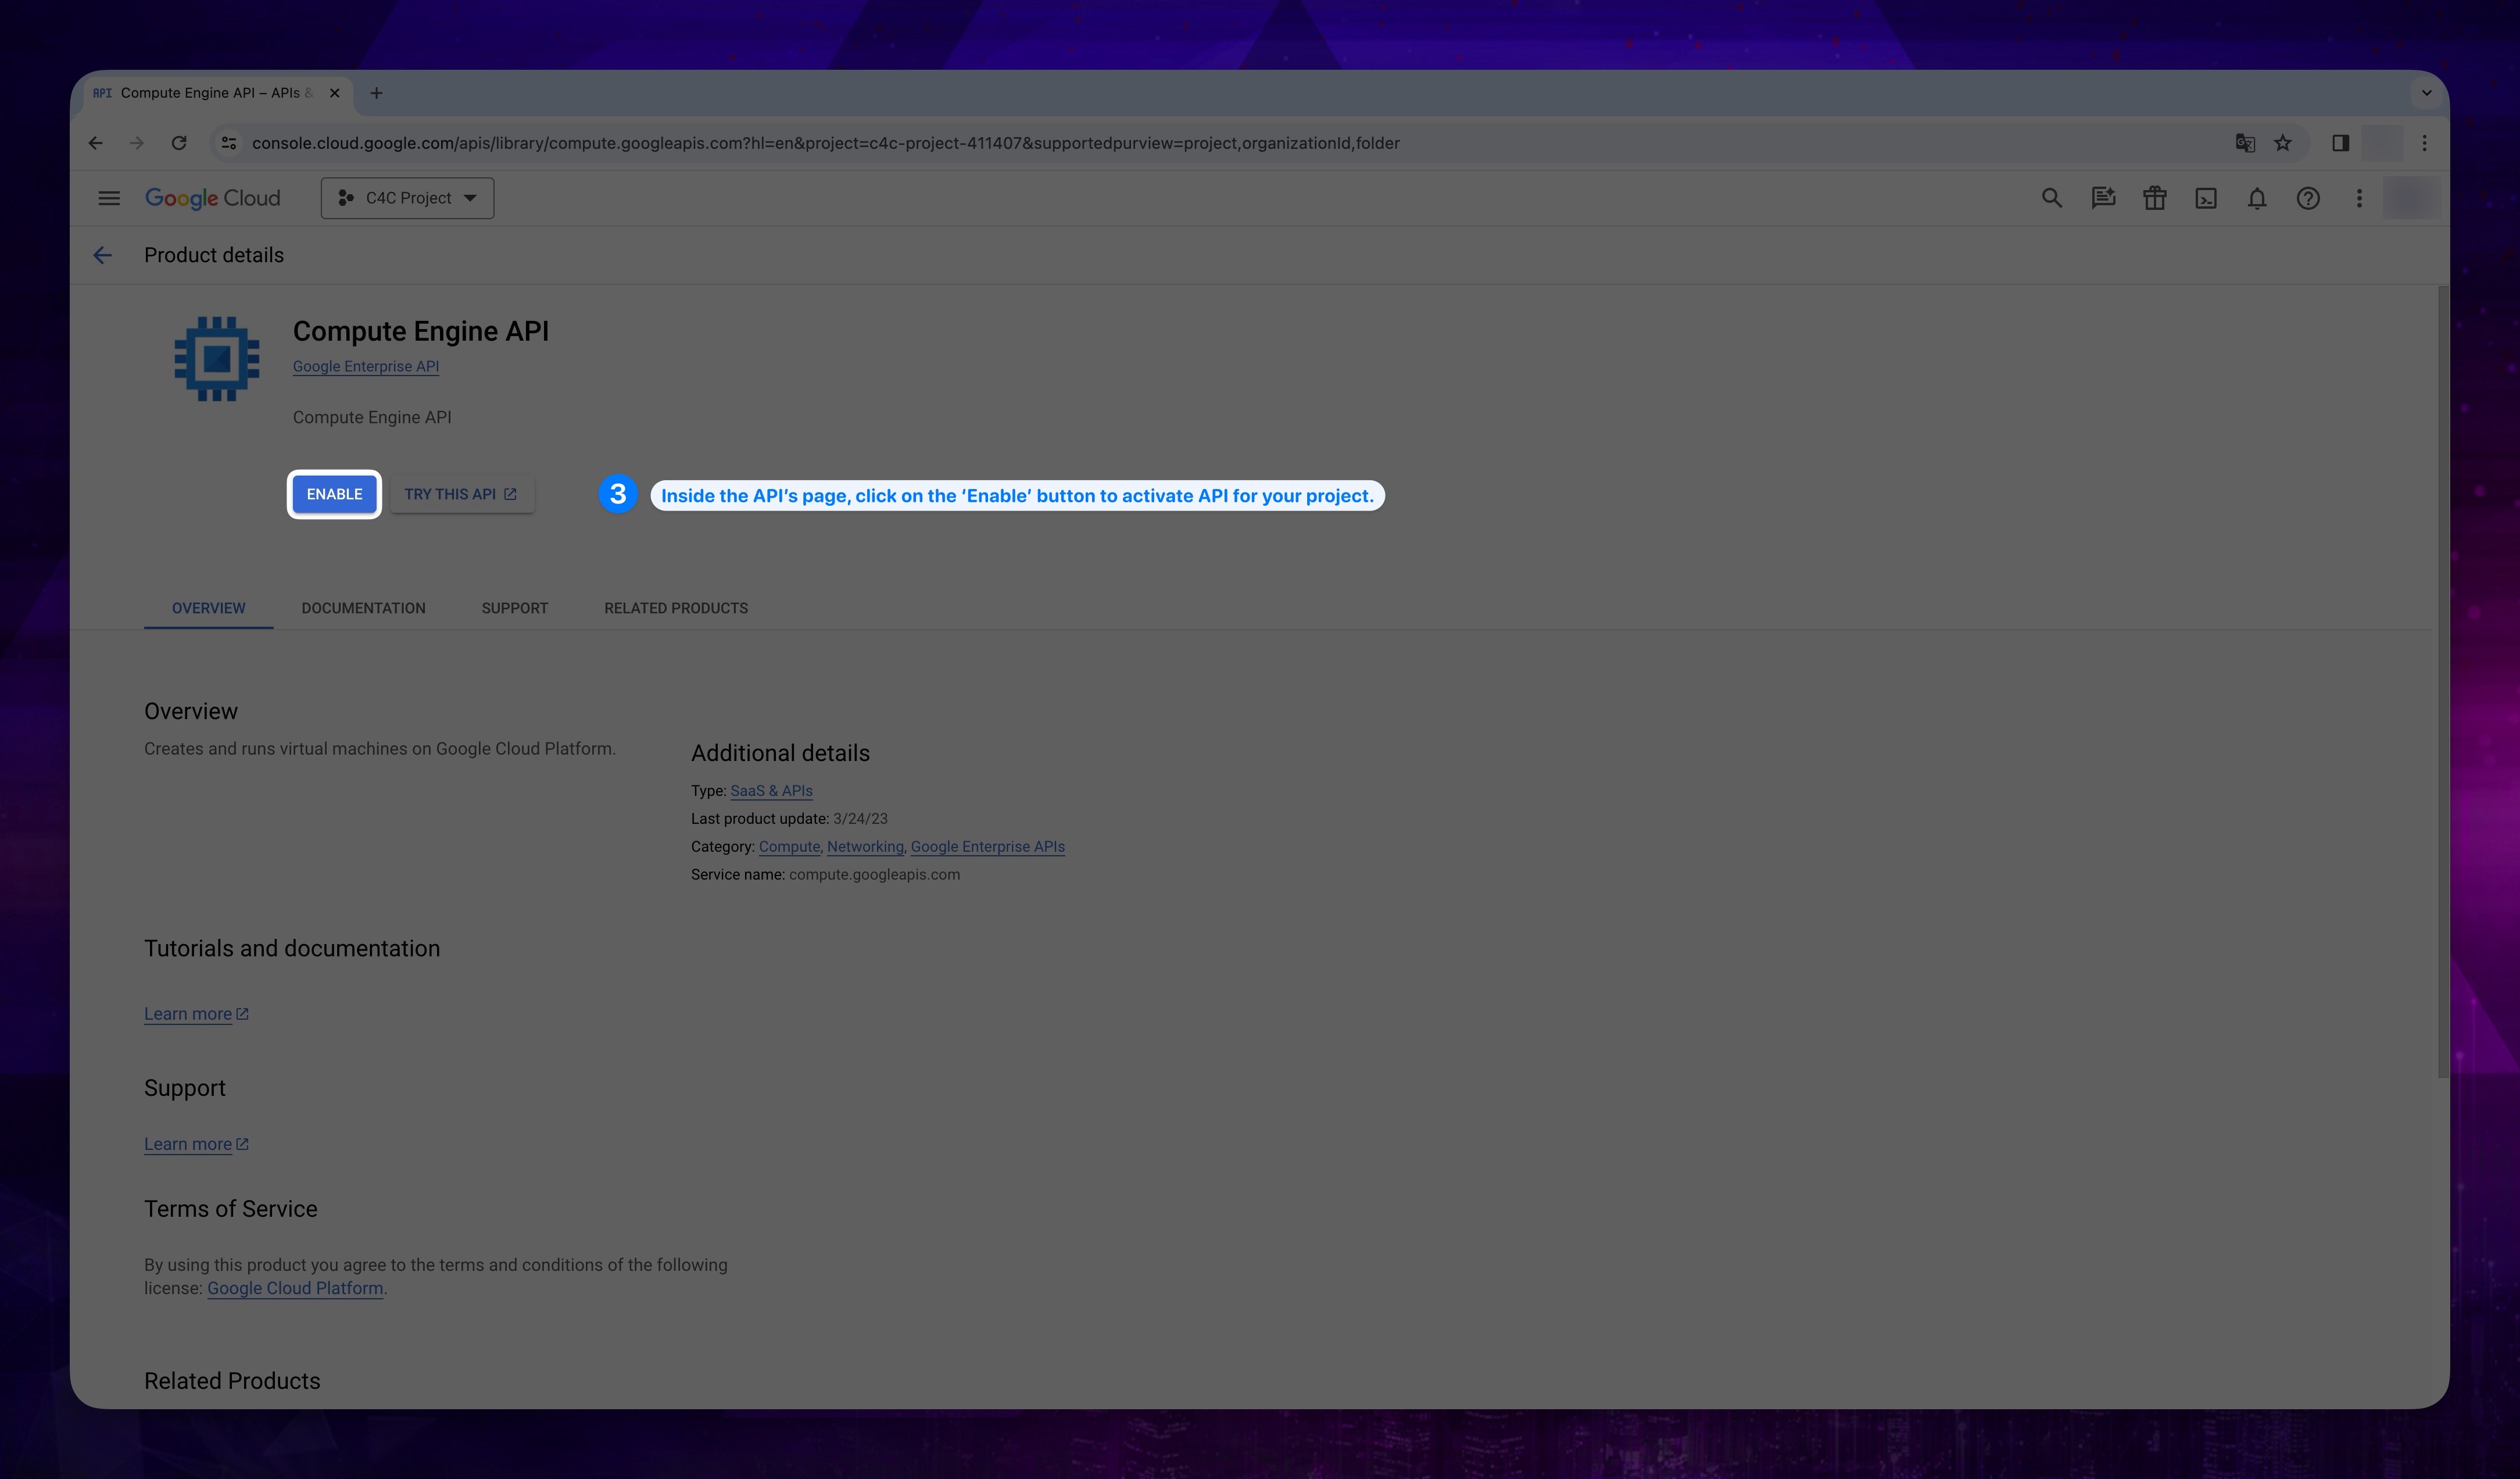
- After reaching the API's page, click on the Enable button to activate the required API.
Show the instruction with images
Compute Engine API and Certificate Manager API requires a project with a billing account and for that configuration you must be an administrator of any billing accounts. You can create a new billing account or contact with your administrator to enable billing for you.
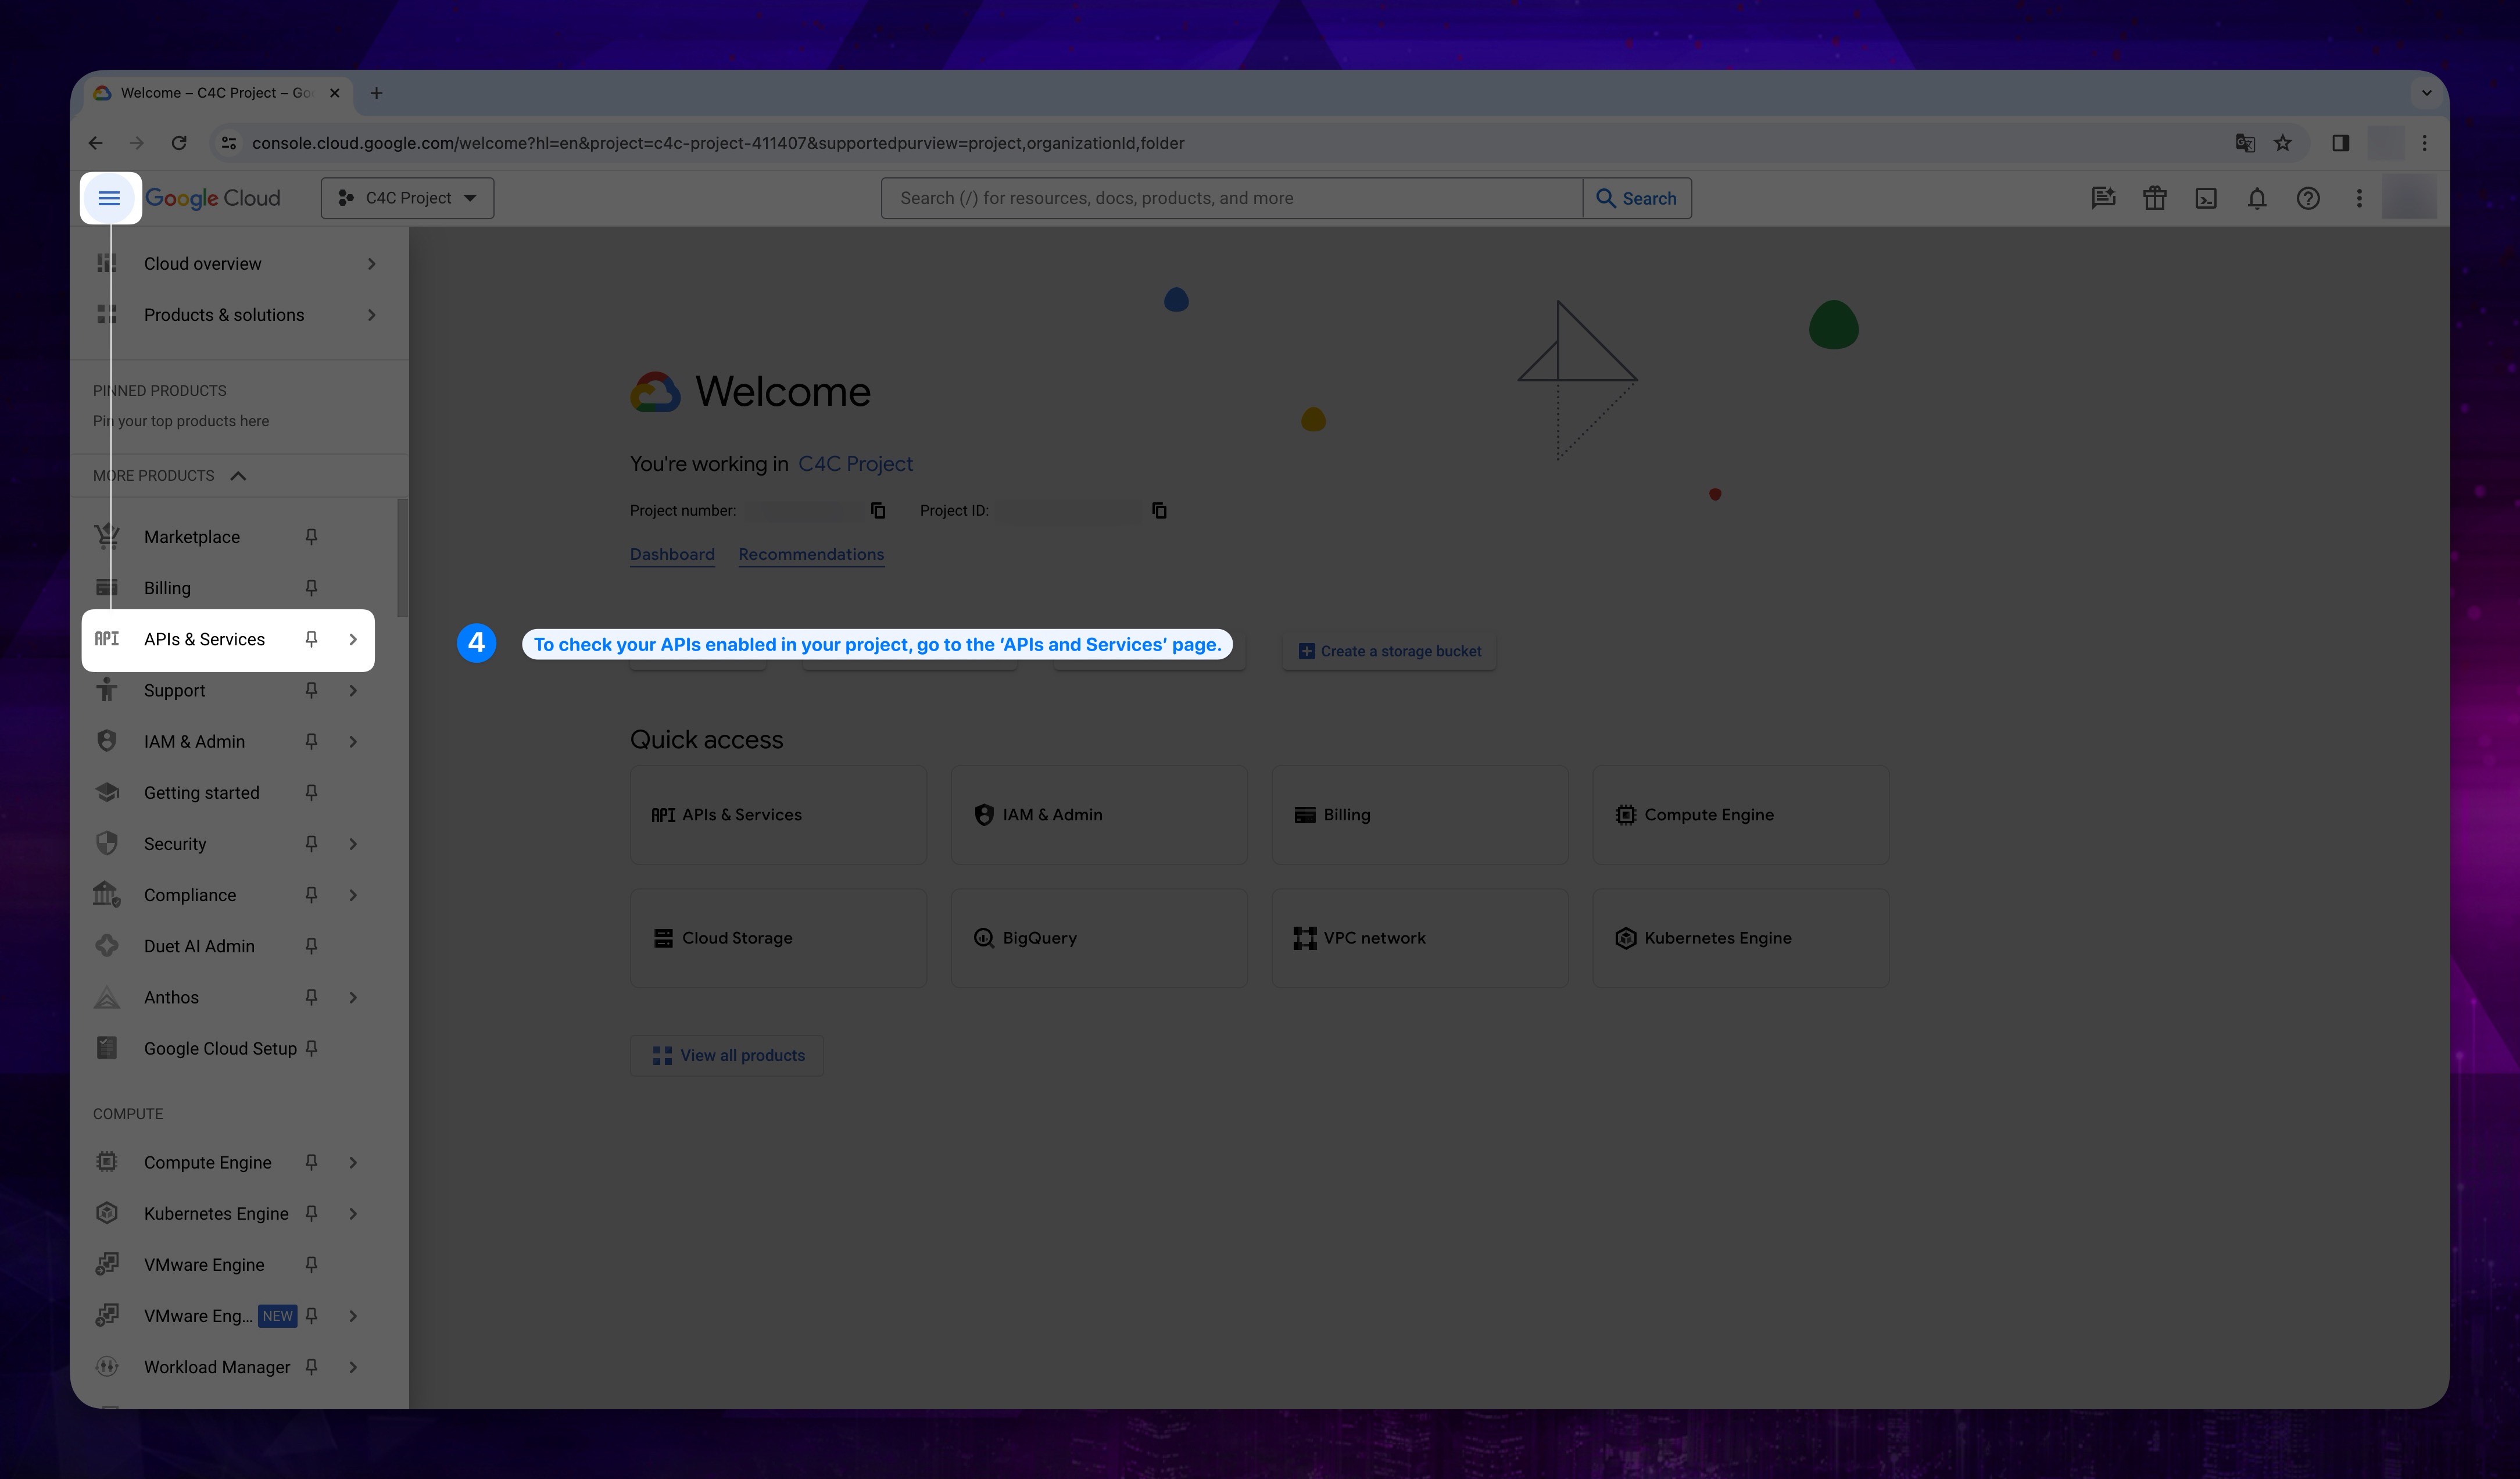
- To check if the necessary APIs are enable in our project, click on the APIs & Services section in the navigation menu.
Show the instruction with images
- On the opened page, scroll down to see the list of enabled APIs.
Show the instruction with images
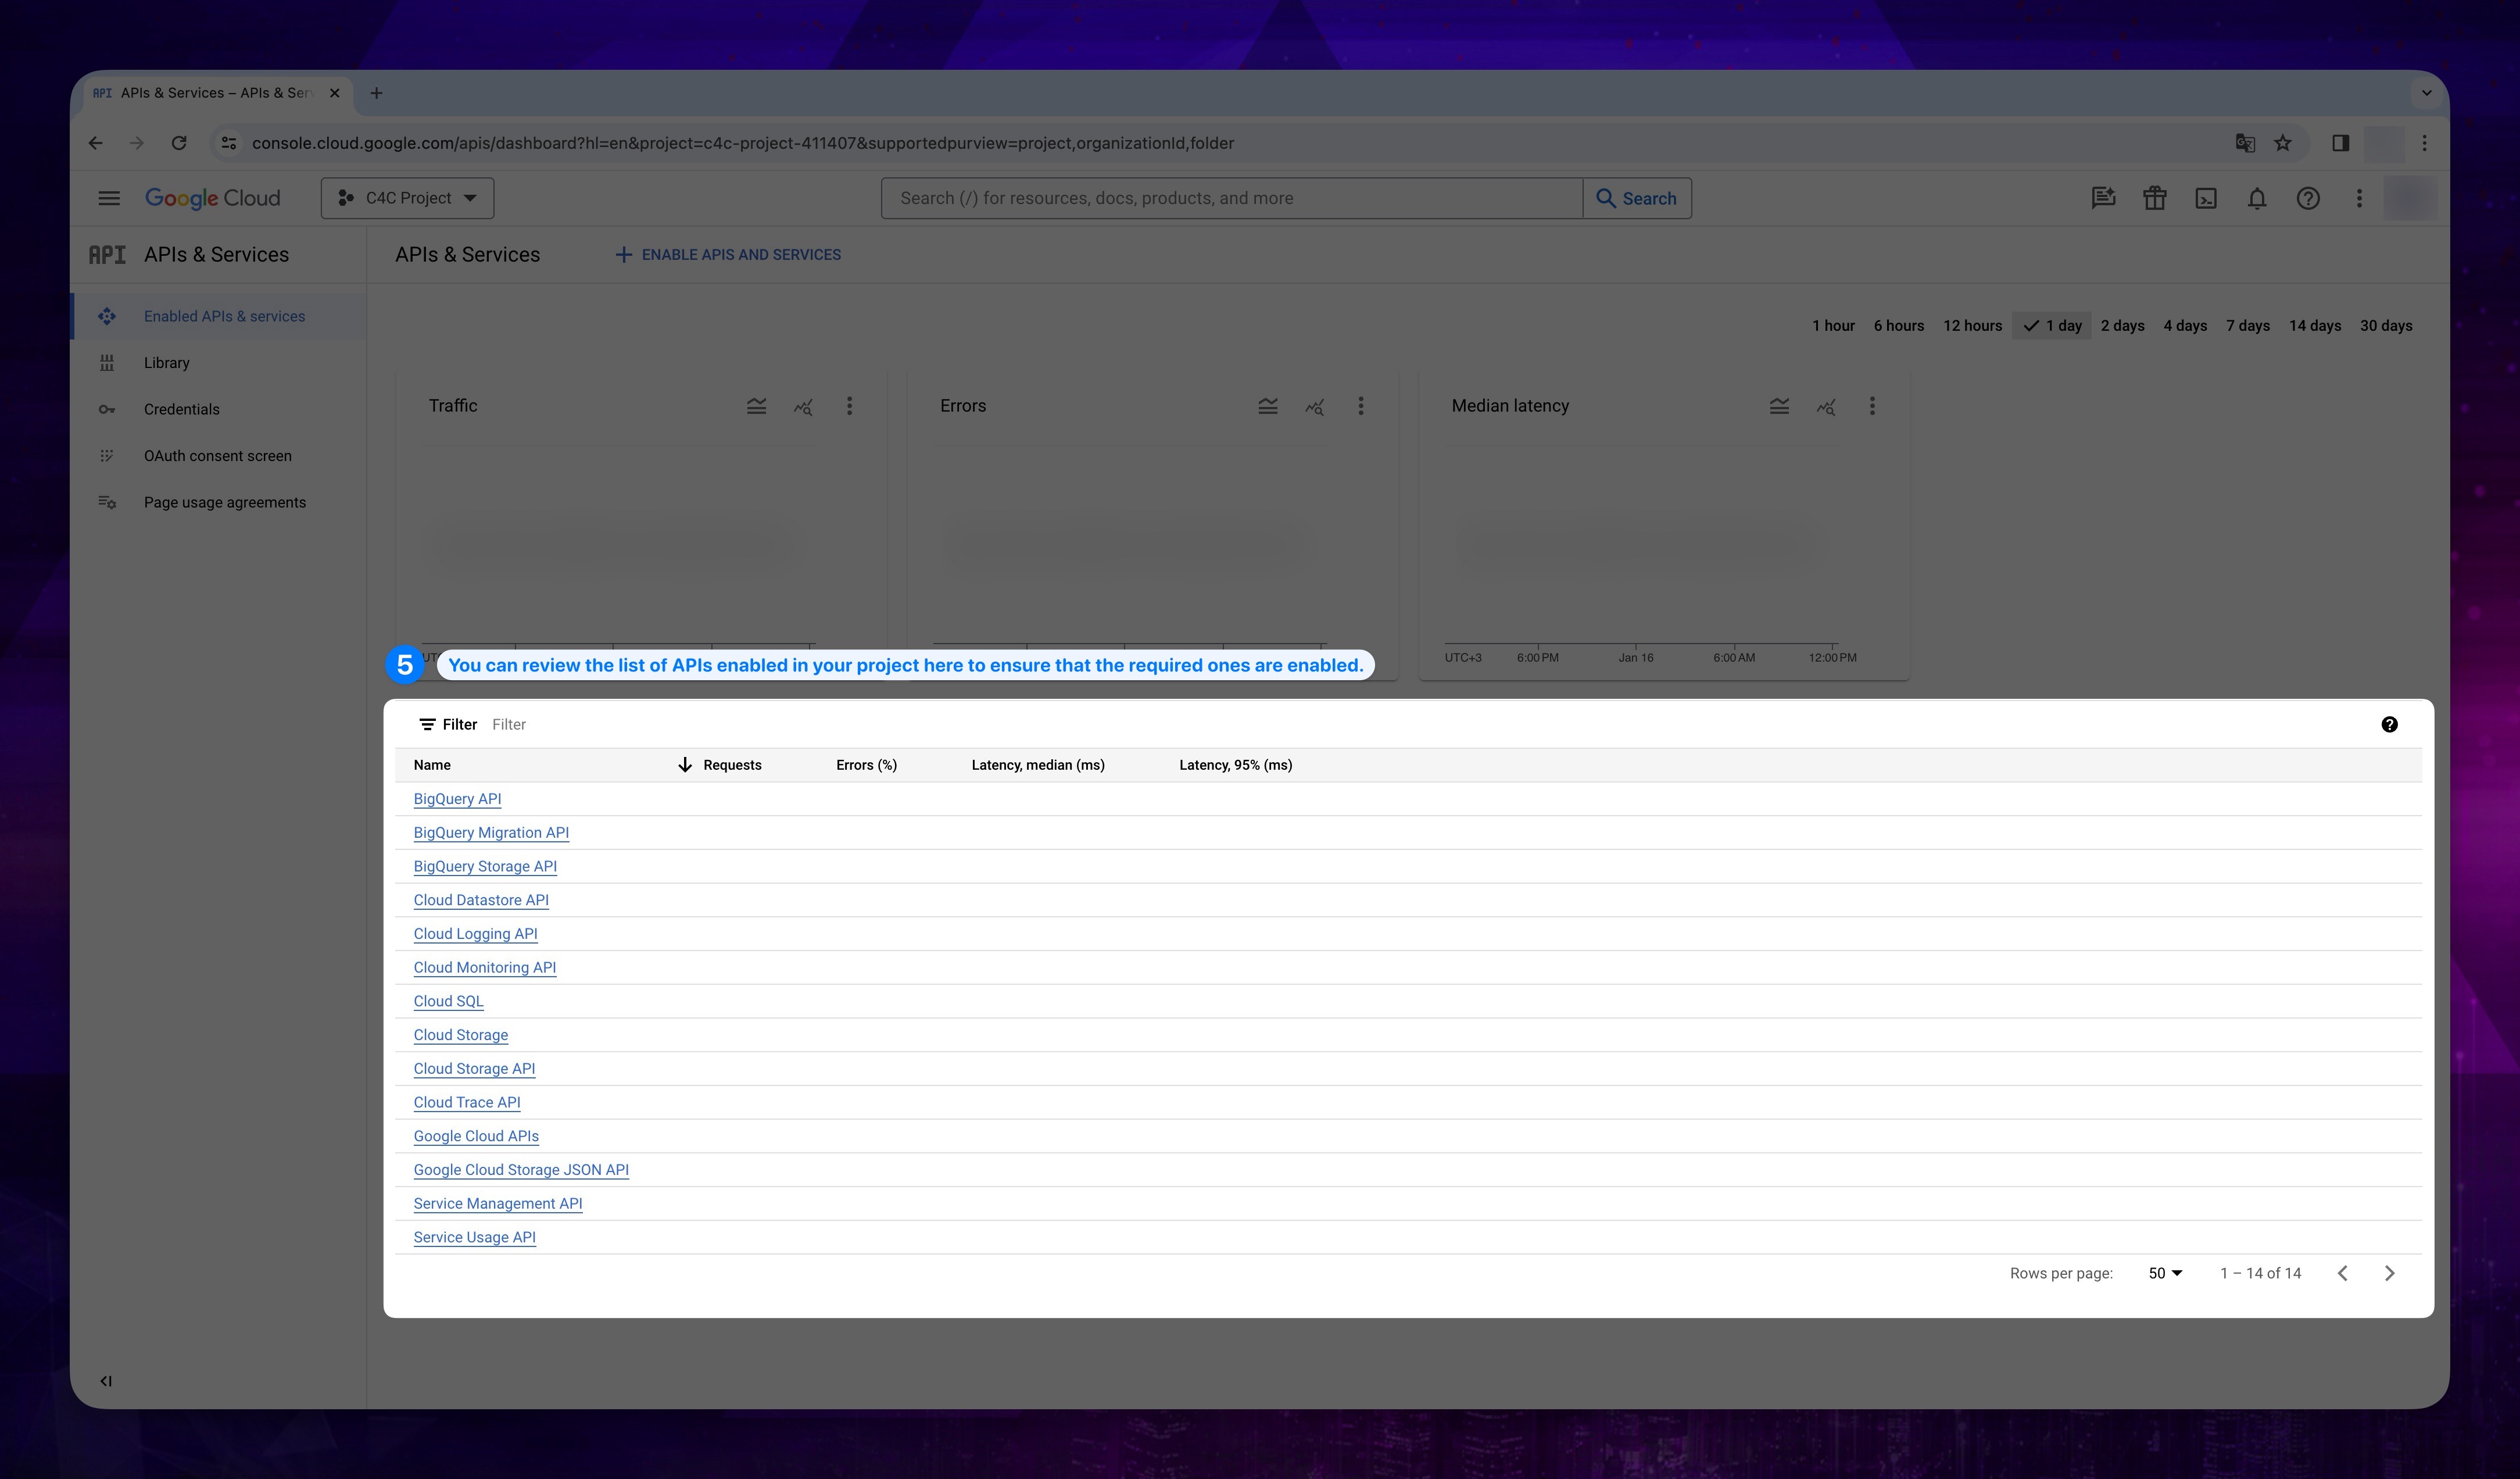
After ensuring that the required APIs are enabled in our project, you can proceed with the next steps.
3. C4C Custom Role Creation
- Go to GCP Console and log in to your account.
Firstly, we need to create a role with the necessary permissions for our product to have the required authorizations.
You can do this in one of two ways: Manual and gcloud CLI.
The Manual method provides you with the entire permission list, and you need to add them one by one from the list.
The gcloud CLI method offers a code block and a file containing all the required permissions. Running this code block in gcluoud CLI automatically creates a role.
You can proceed by selecting your preference.
- Manuel
- gcloud CLI
If you wish to proceed with this method, please follow the steps below.
-
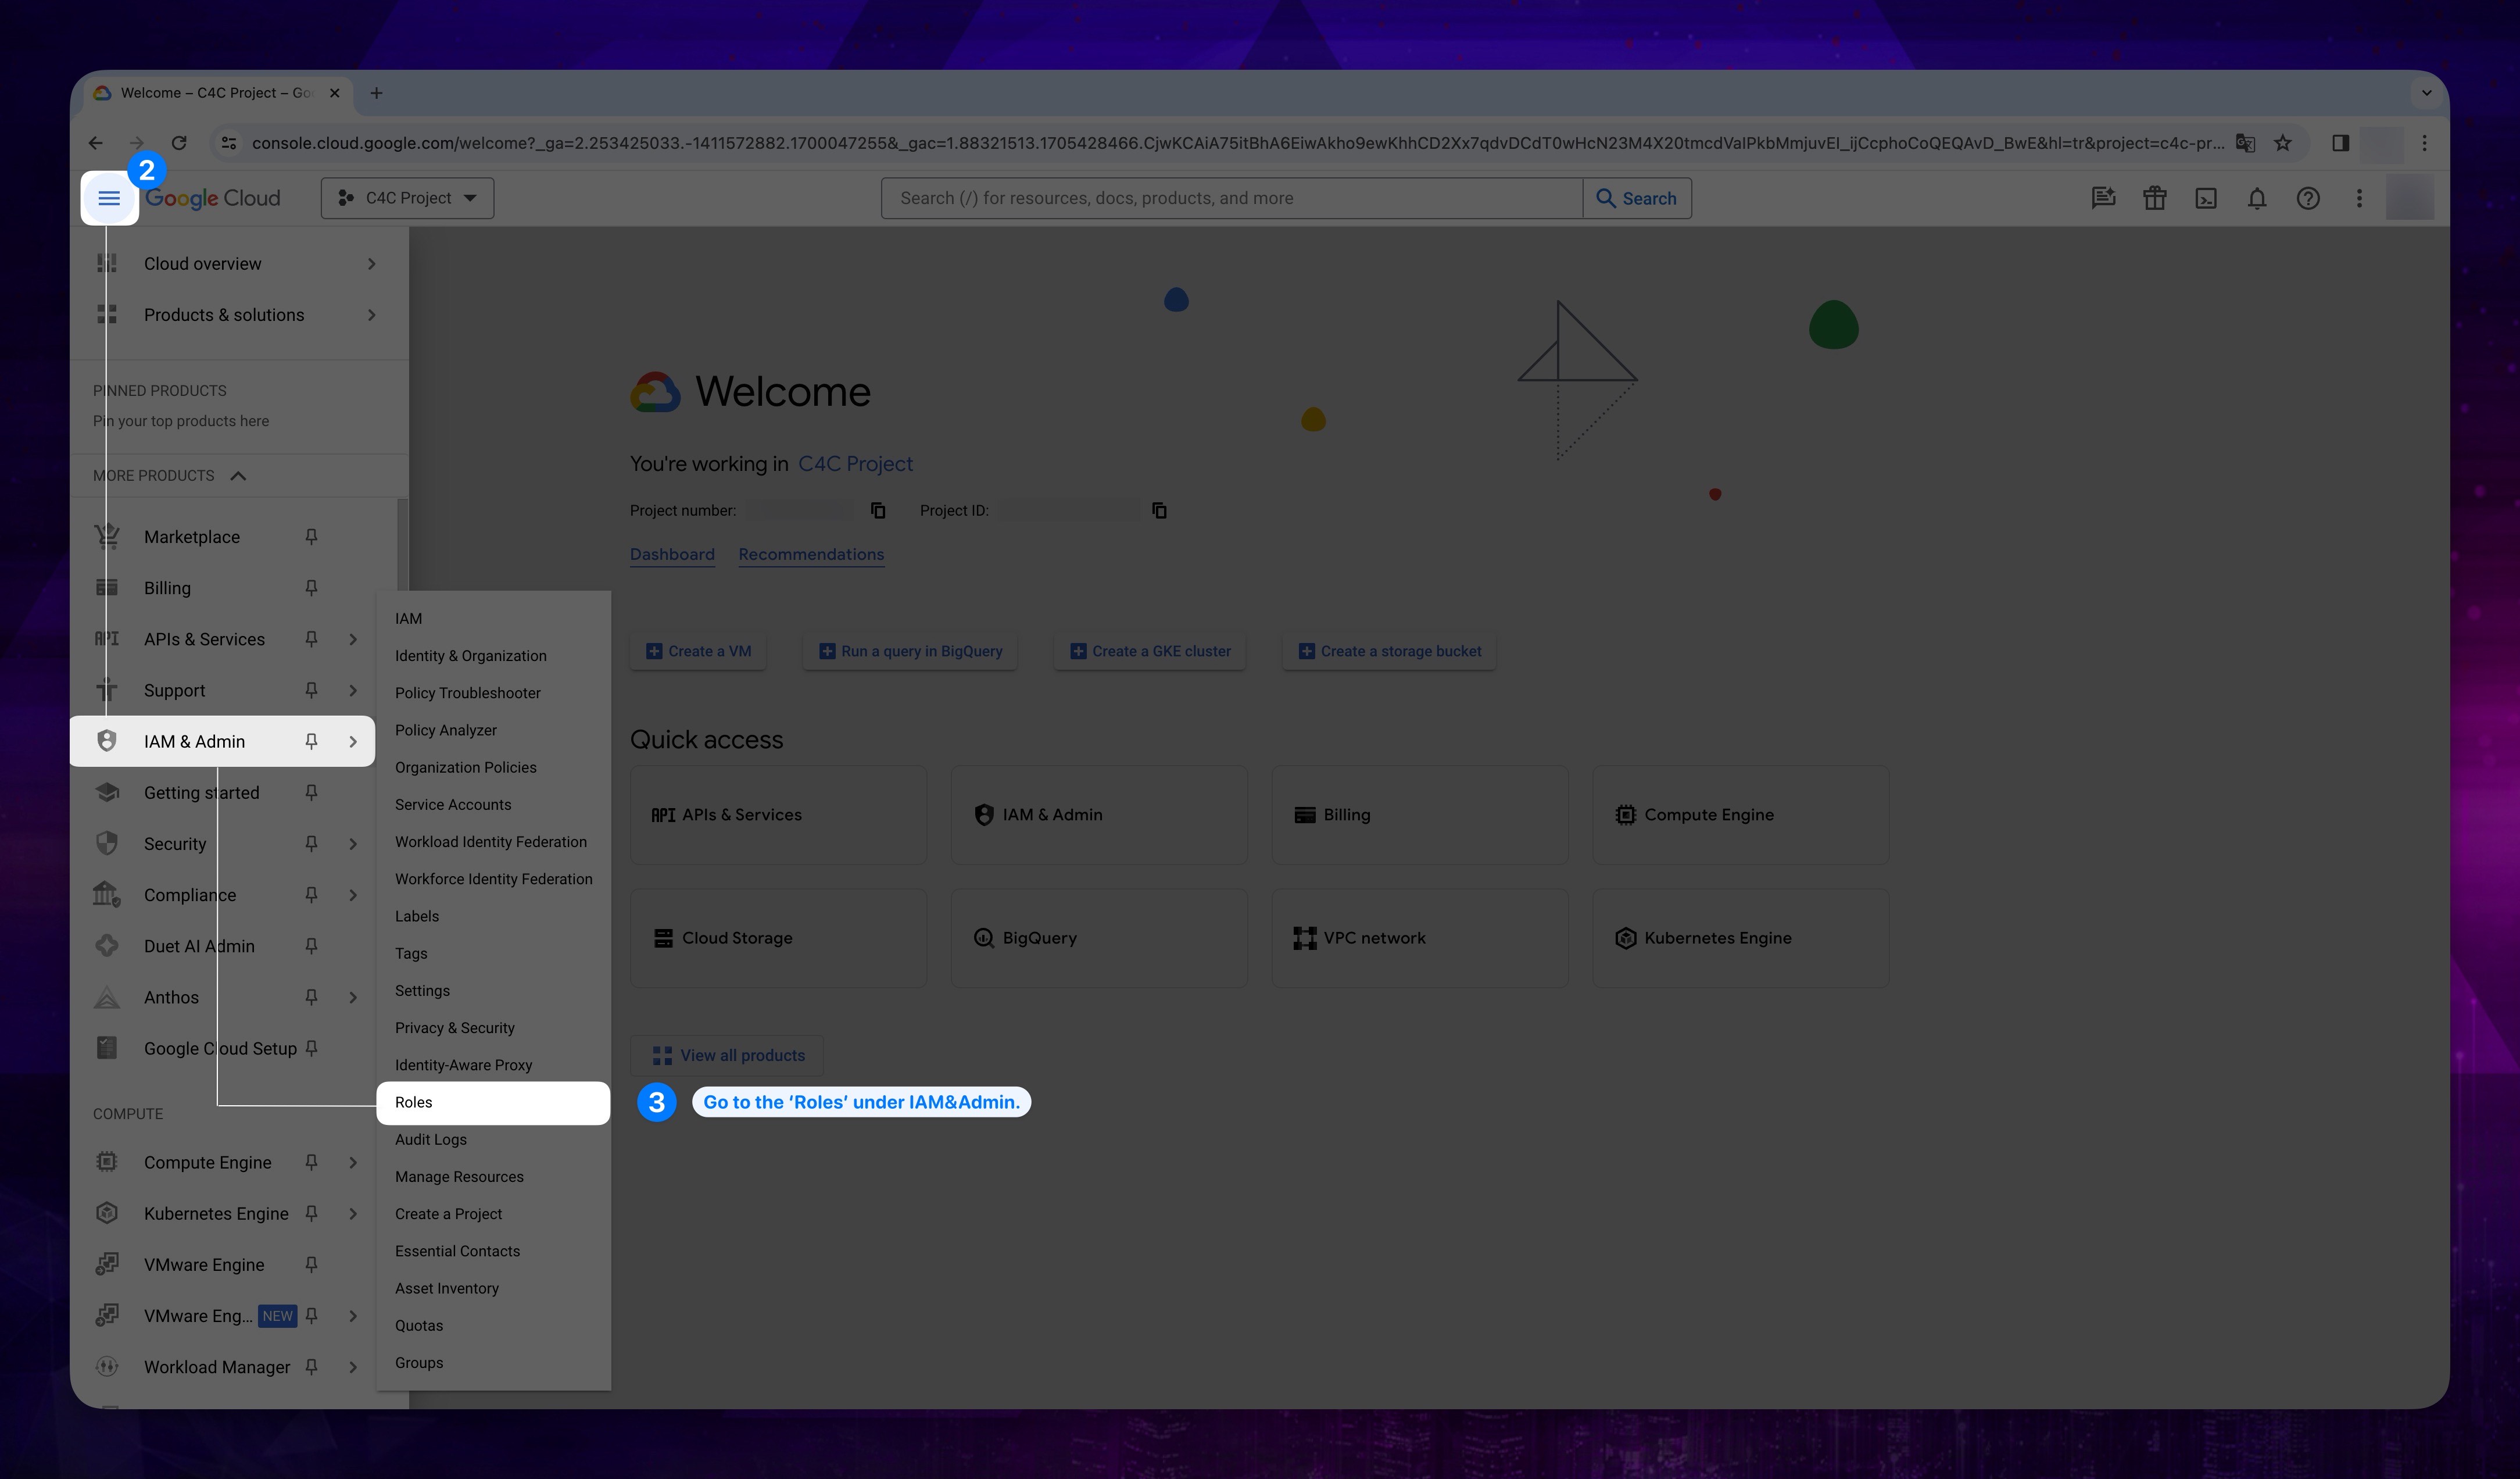
Click the MENU icon on the very left side.
-
Click on Iam & Admin section, and select Roles from the opened menu.
Show the instruction with images
- Then click CREATE ROLE button on the top.
Show the instruction with images

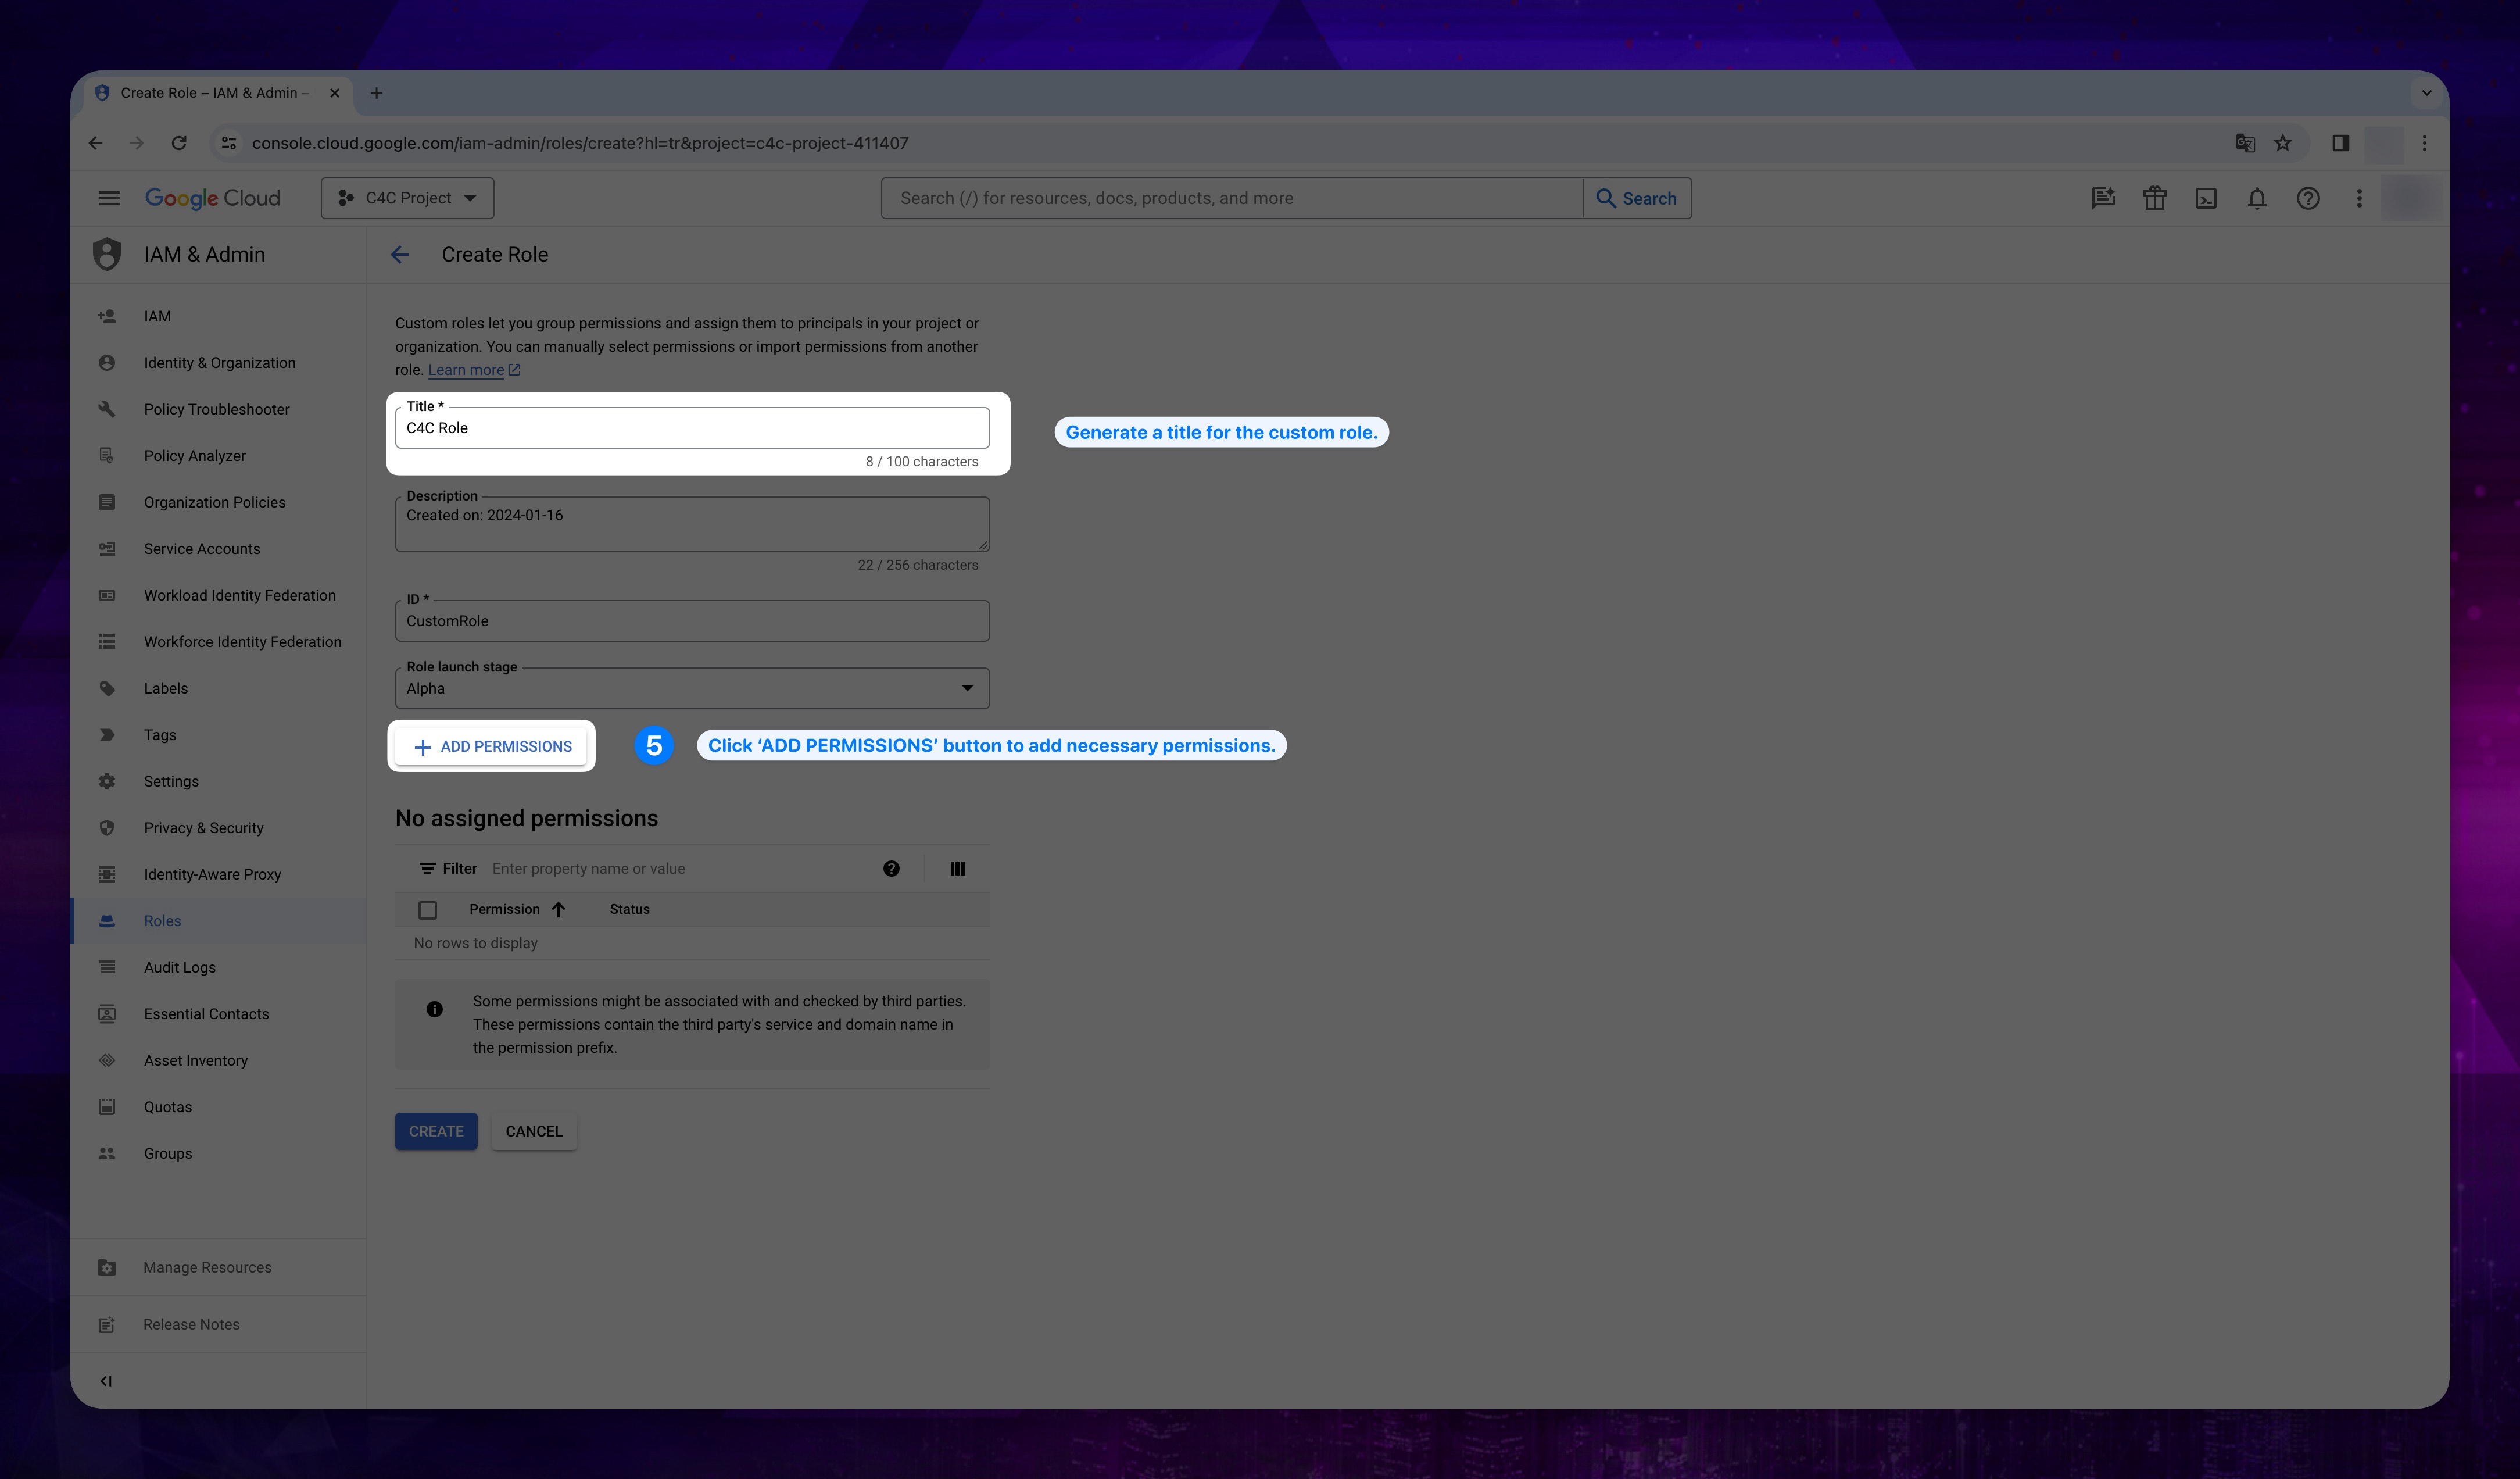
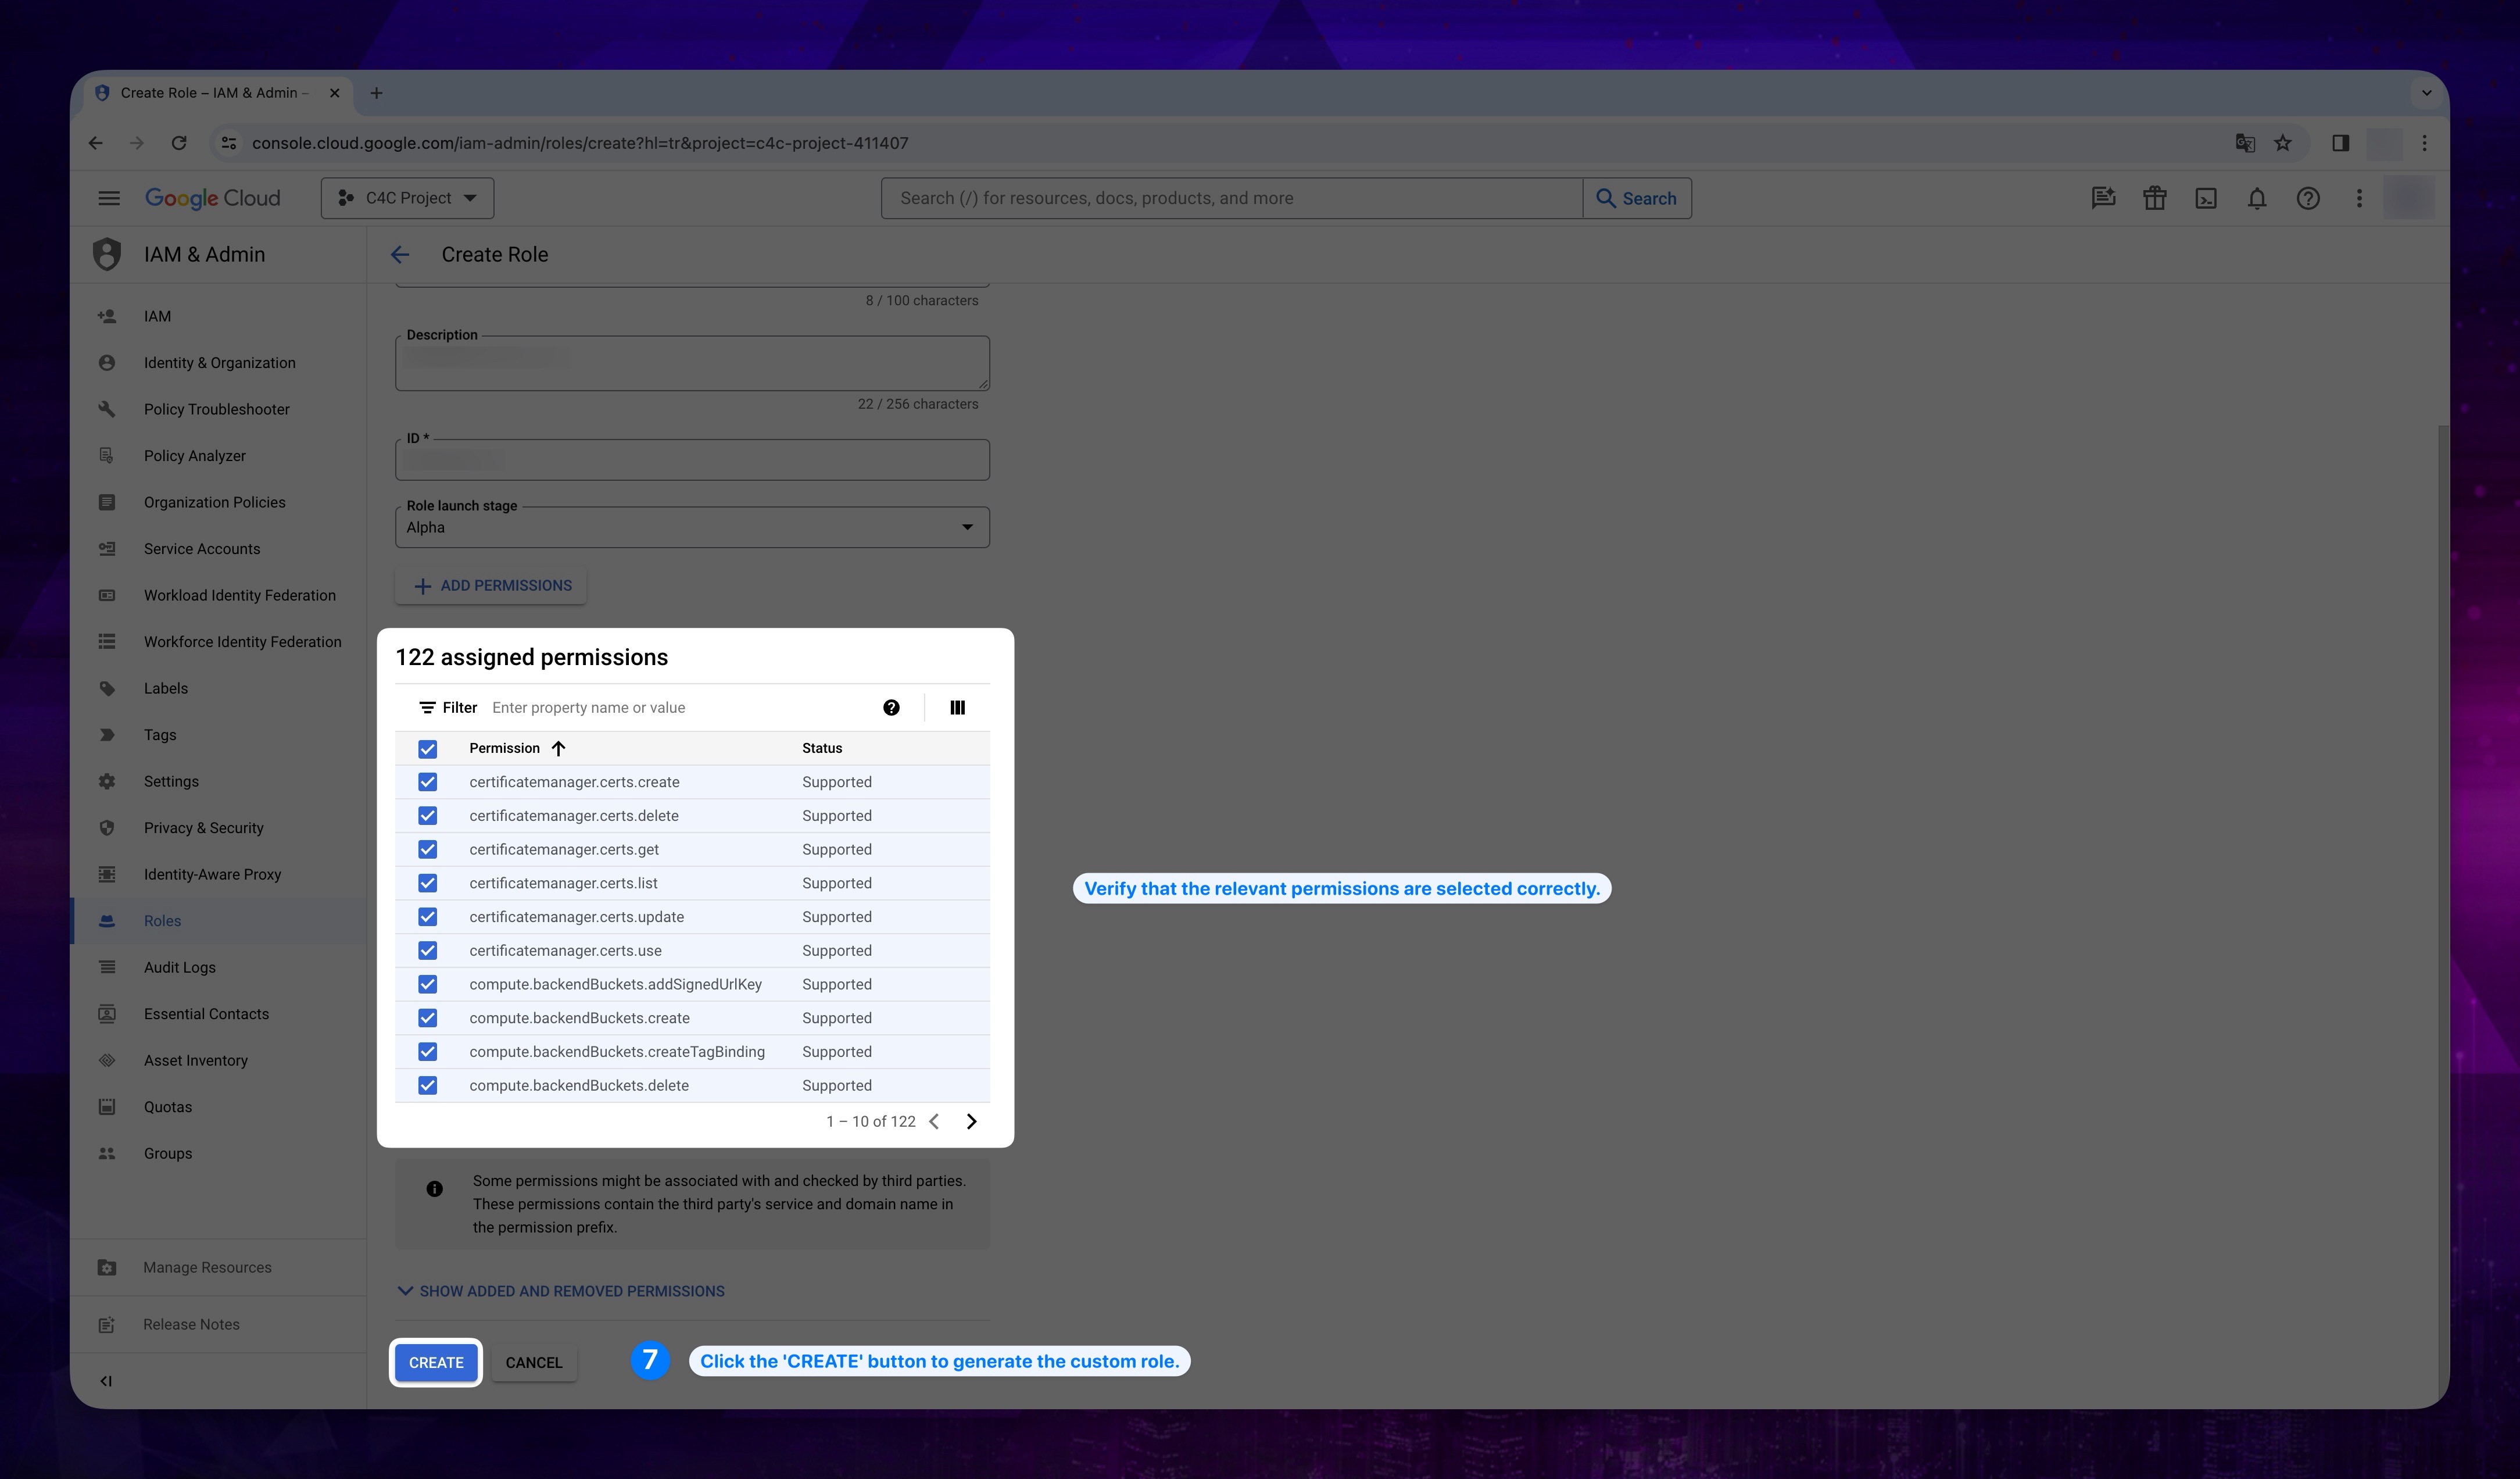
- Enter your Title, then Click ADD PERMISSIONS button on the bottom.
Show the instruction with images
-
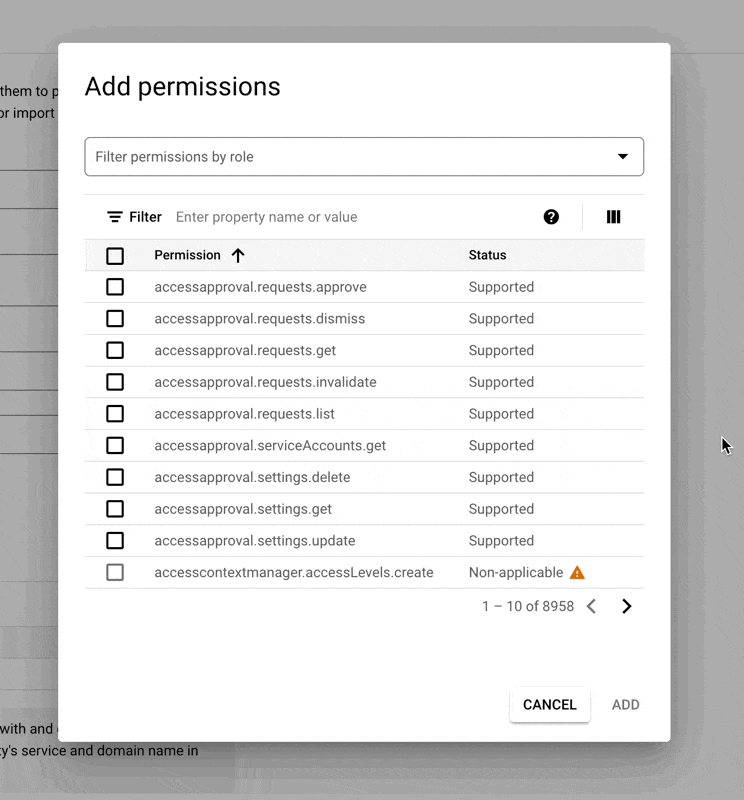
After ensuring that the following items are selected from the opened permissions list, click the Add button.
Show the required permission names.
- compute.instances
- compute.instances.delete
- compute.instances.get
- compute.instances.list
- compute.instances.reset
- compute.instances.start
- compute.instances.stop
- compute.regions.list
- iam.roles.get
- monitoring.timeSeries.list
- resourcemanager.projects.getIamPolicy
- compute.instances
Show the instruction with images
-
After confirming that all the permissions in the table have been added, click the Create button located at the bottom of the page.
warningPlease be sure, all required permission are selected.
Show the instruction with images
If you wish to proceed with this method, please follow the steps below.
-
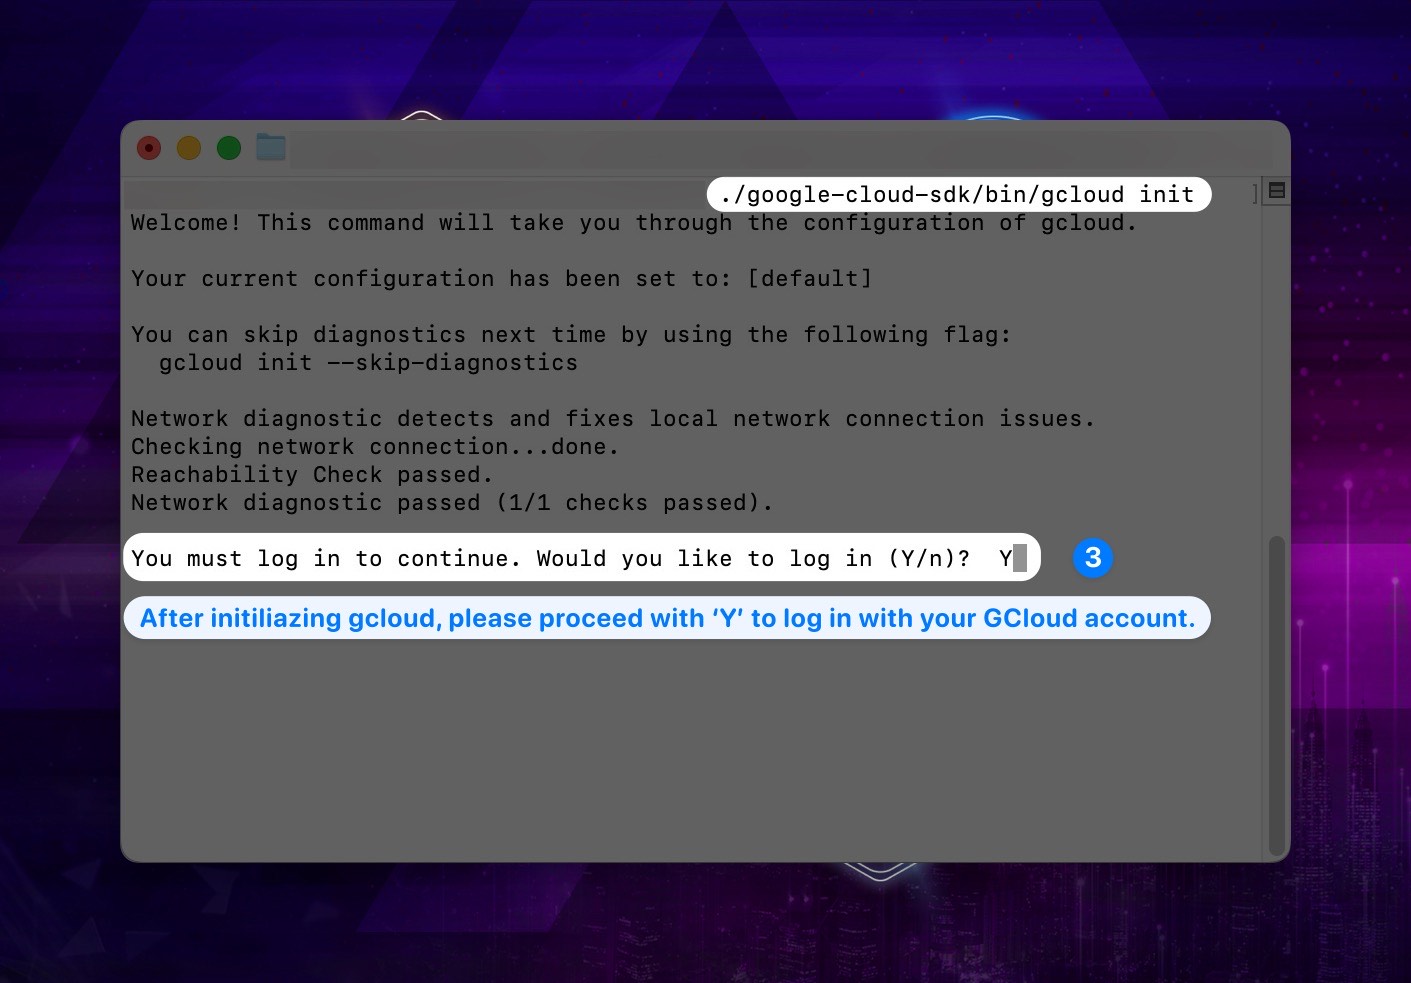
At first, you need to install the gcloud CLI. Please follow the steps outlined in the documentation.
-
After initializing gcloud, the terminal will prompt you to log in to your GCP account. Please contine with 'Y'.
Show the instruction with images
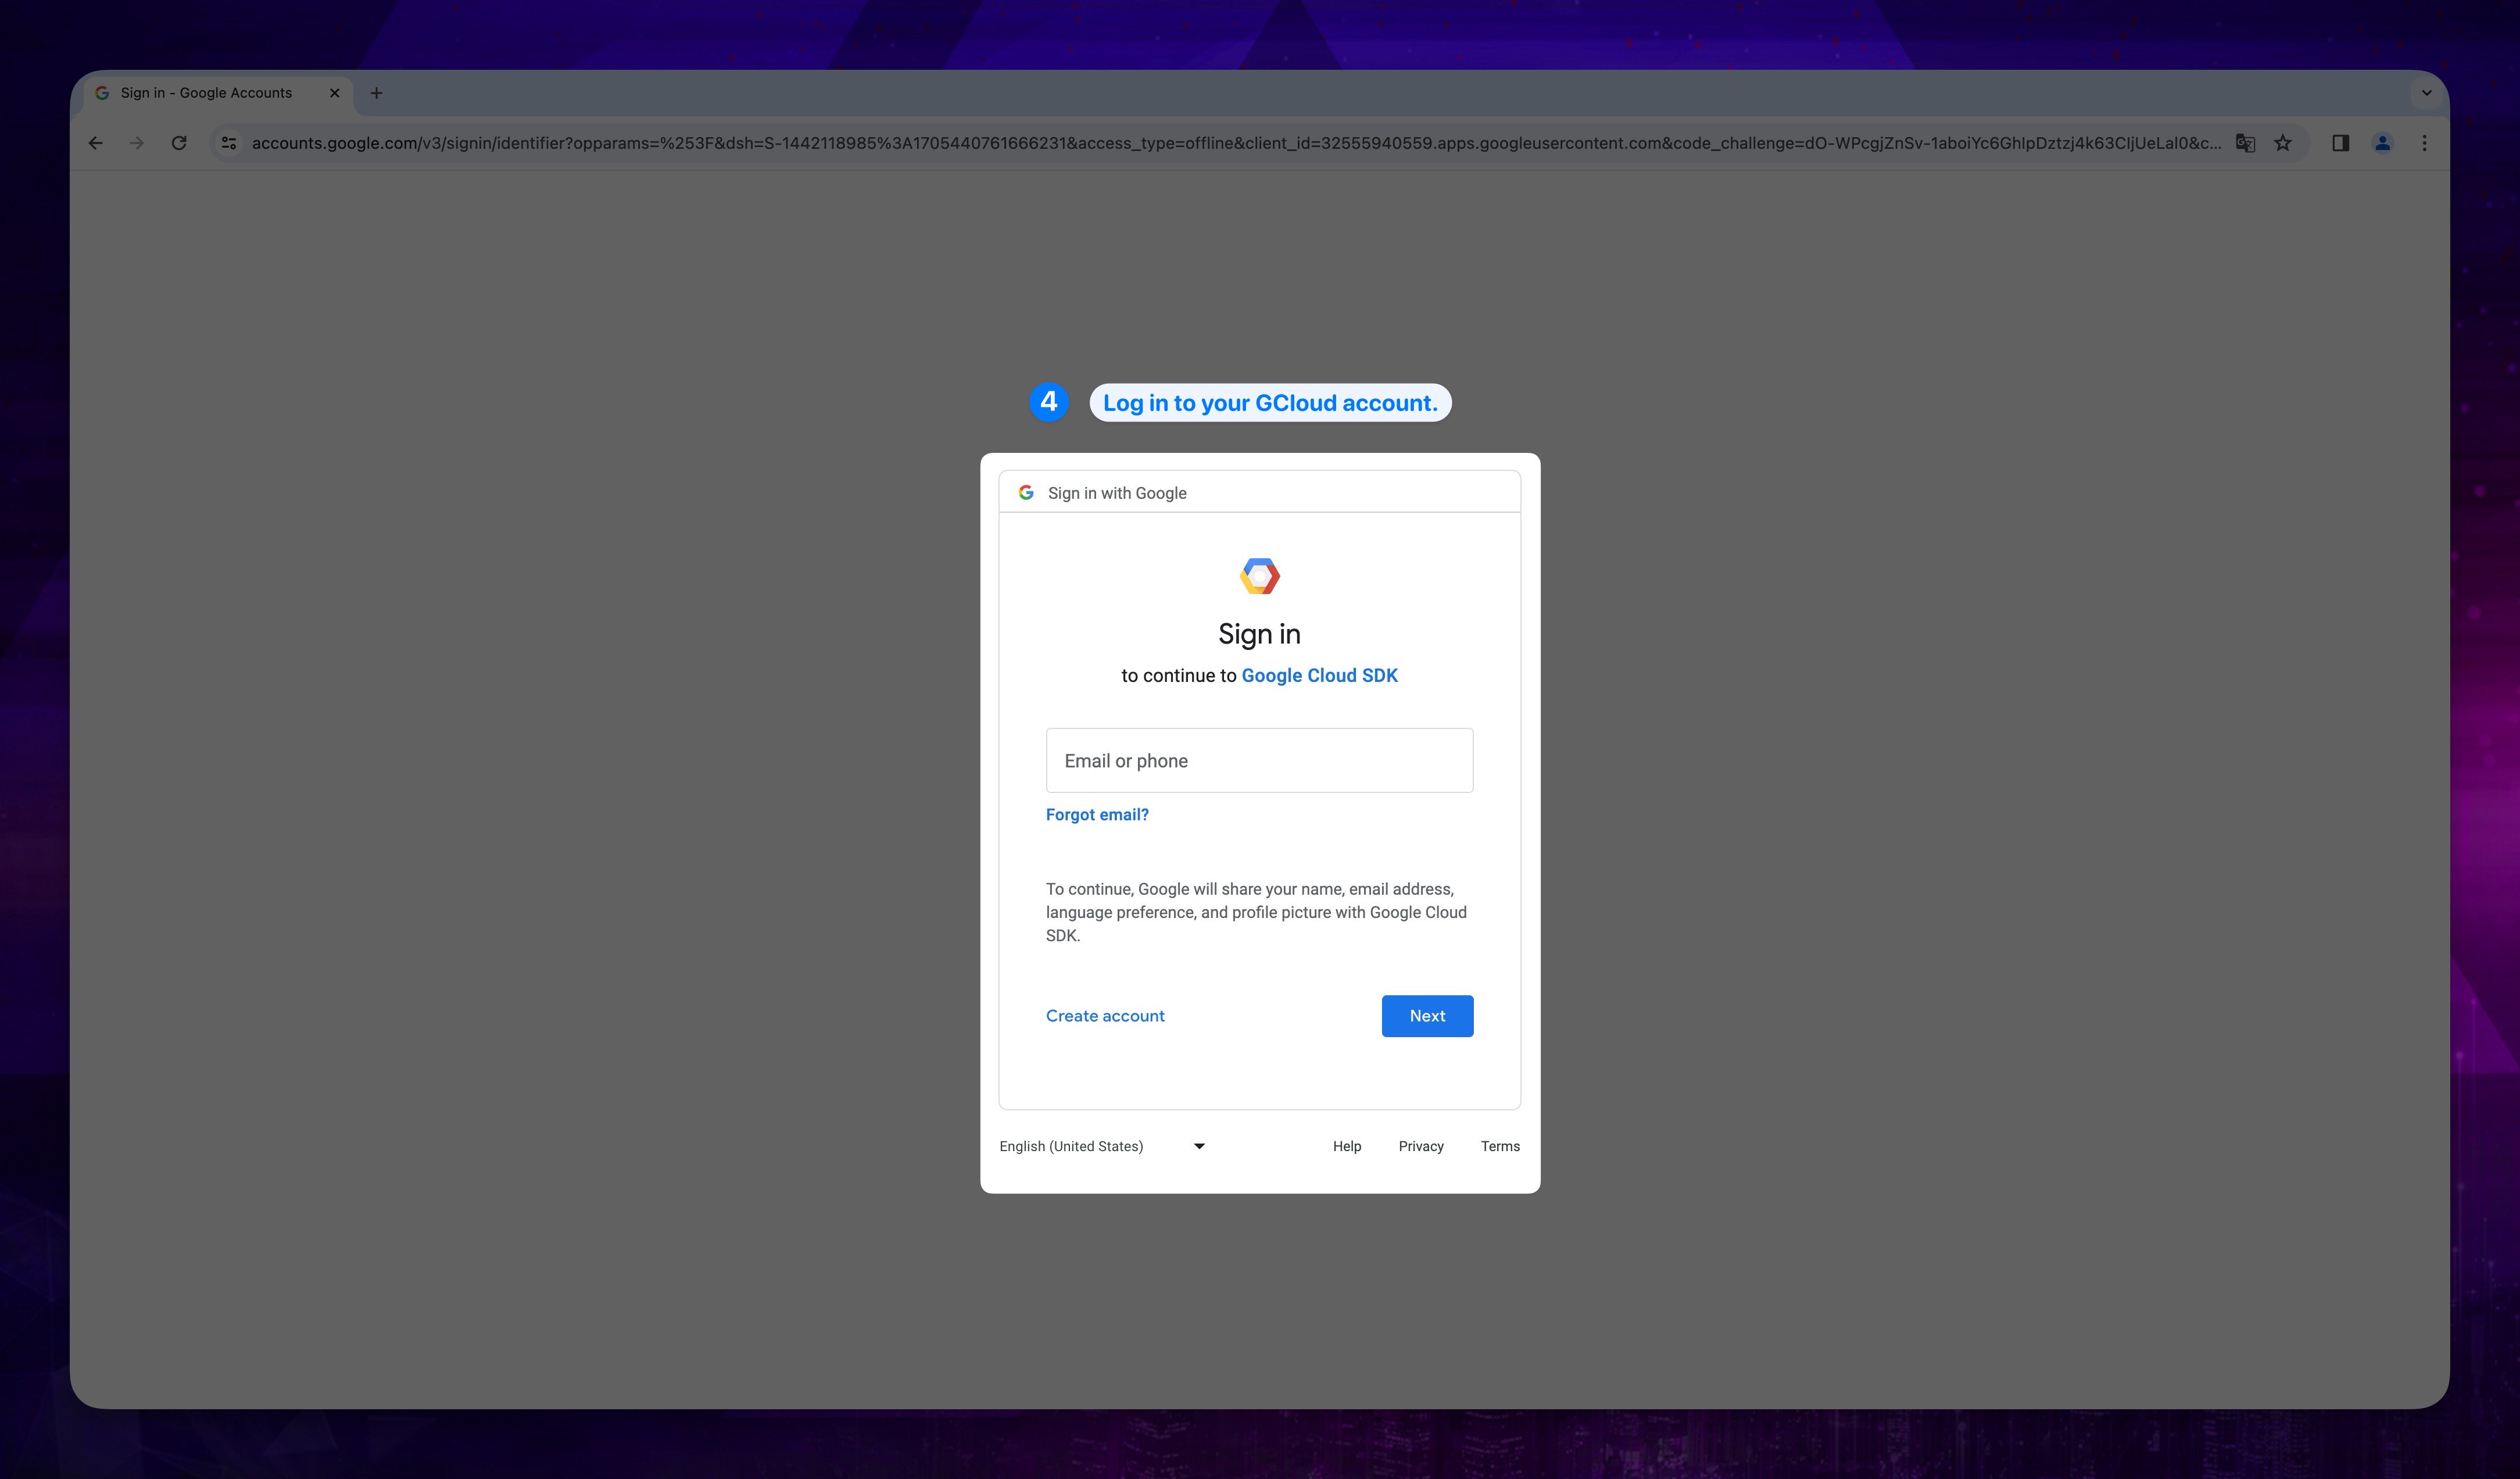
- After entering 'Y' in the terminal, the gcloud login page will automatically open in your browser. Please log in to your account.
Show the instruction with images
If the initialization process does not prompt you to log in to your GCP account, please run the following command in the terminal:
gcloud auth login
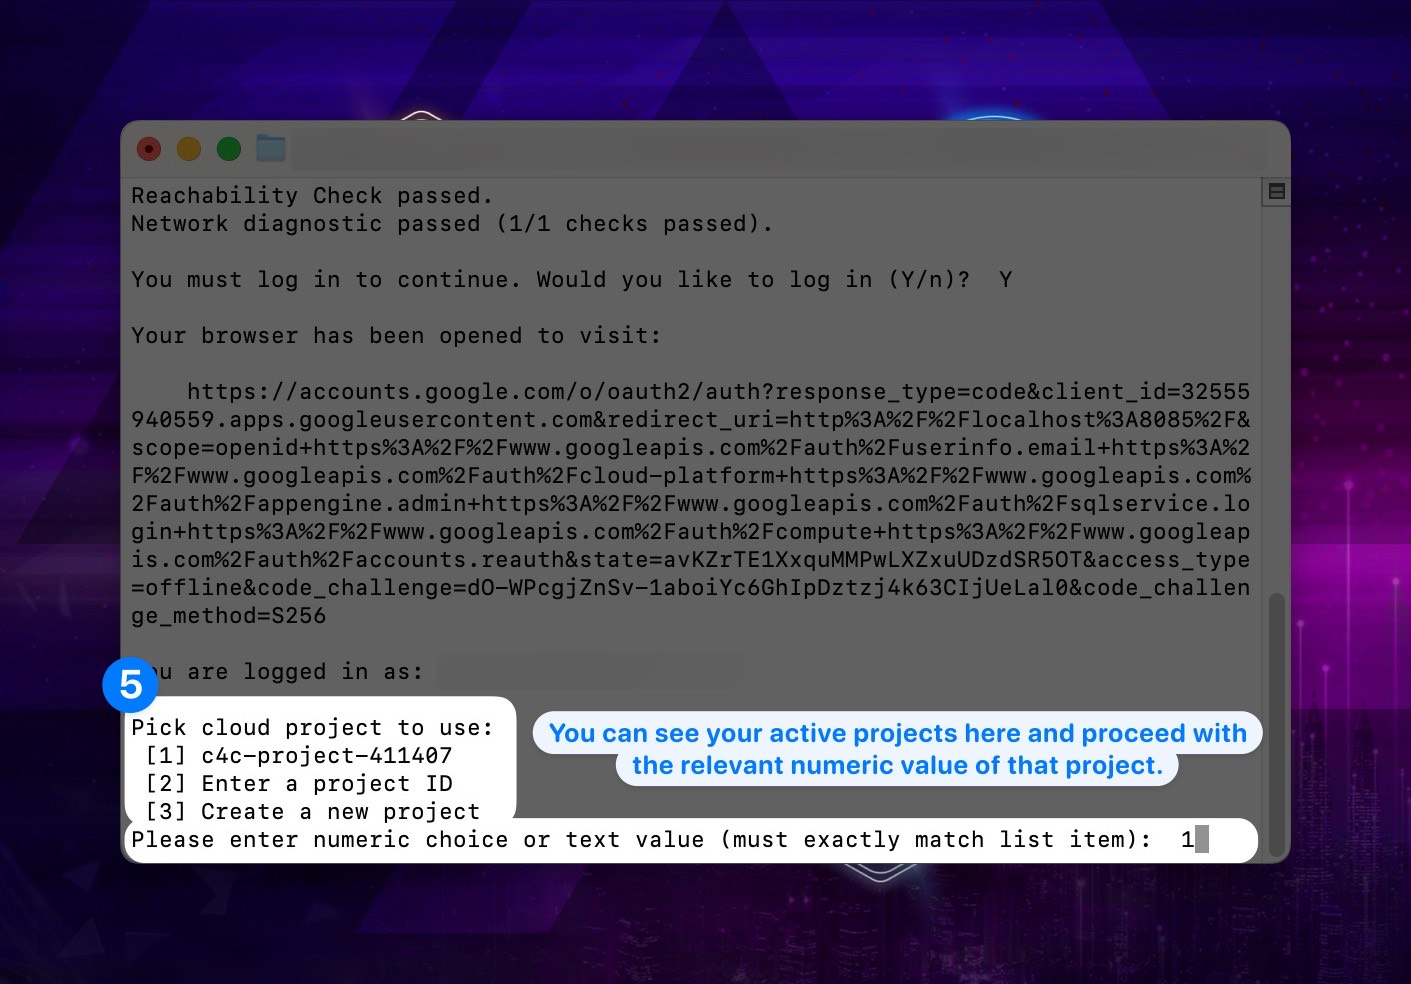
- Then go back to terminal, it will prompt you to select your Google Cloud project. Locate your project from the list and enter its numeric or text value in the terminal. Now we are in our project. (Please do not close your teminal.)
To facilitate your access to our service, we have created a file containing the necessary permissions. Before proceeding to the next step, please download this file.
After downloading the file, it is recommended to rename and abbreviate the file name.
Show the instruction with images
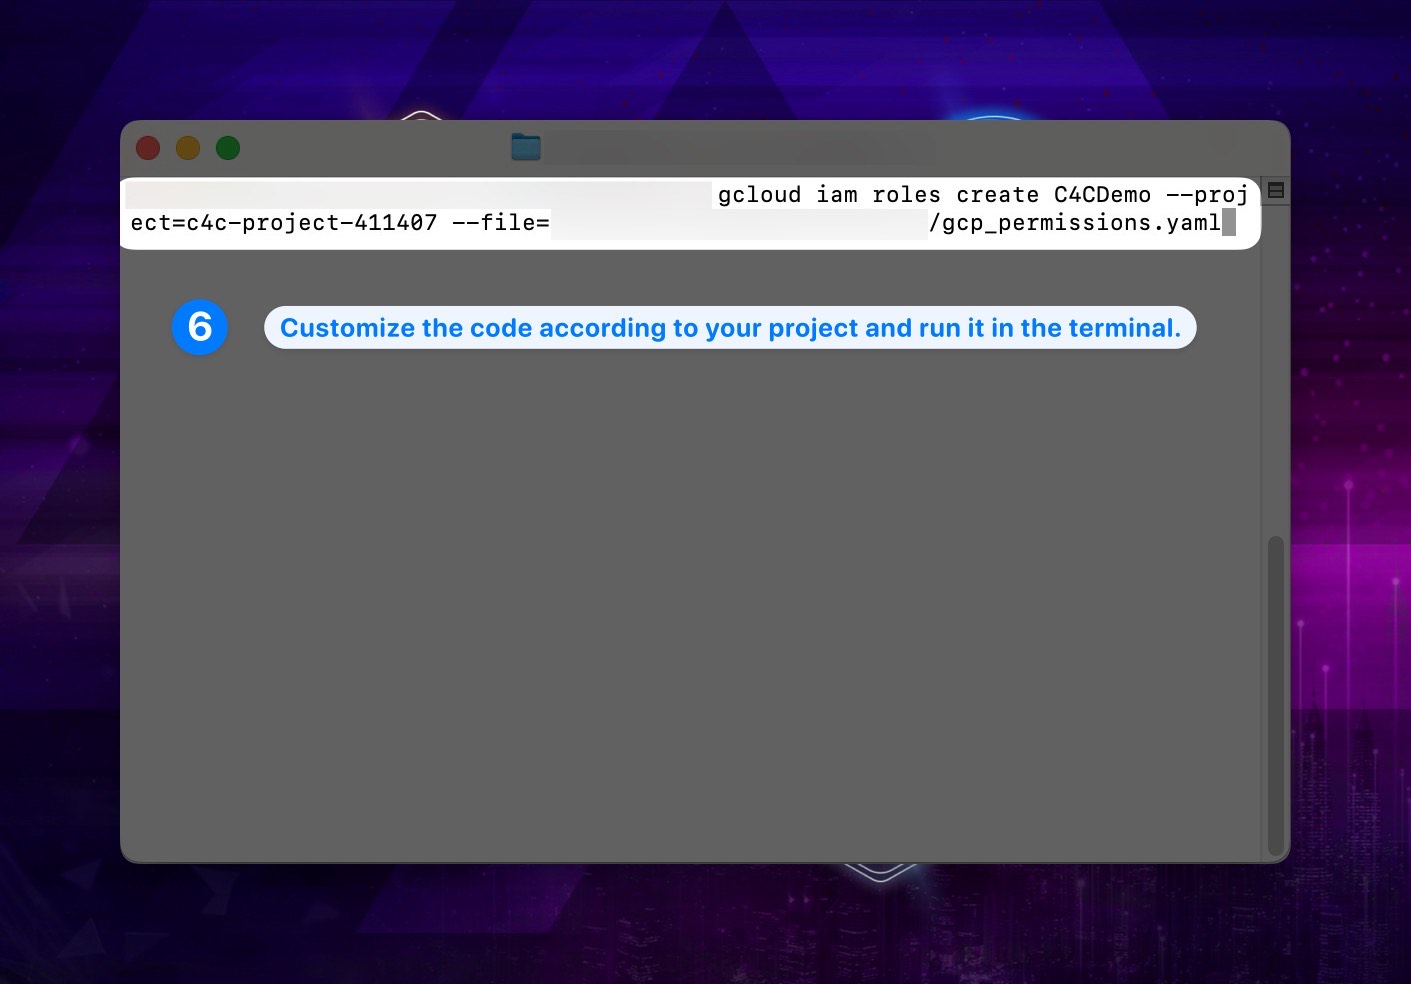
- Customize the code below according to your own project and run the code in the terminal.
gcloud iam roles create C4CRoleCompute --project=PROJECT_ID --file=YAML_FILE_PATH
PROJECT_ID, is the ID of your project. To find your Google Cloud Platform (GCP) Project ID, you can follow the steps below:
- Sign in to the Google Cloud Console.
- In the top left corner, click on the project name located at the top of the page. If you haven't created a project yet, click the Select a project button to create a new project or choose an existing one.
- You can view your existing projects and project IDs in the panel that opens.
YAML_FILE_PATH is the path to the location of your YAML file that you downloaded early step.
Show the instruction with images
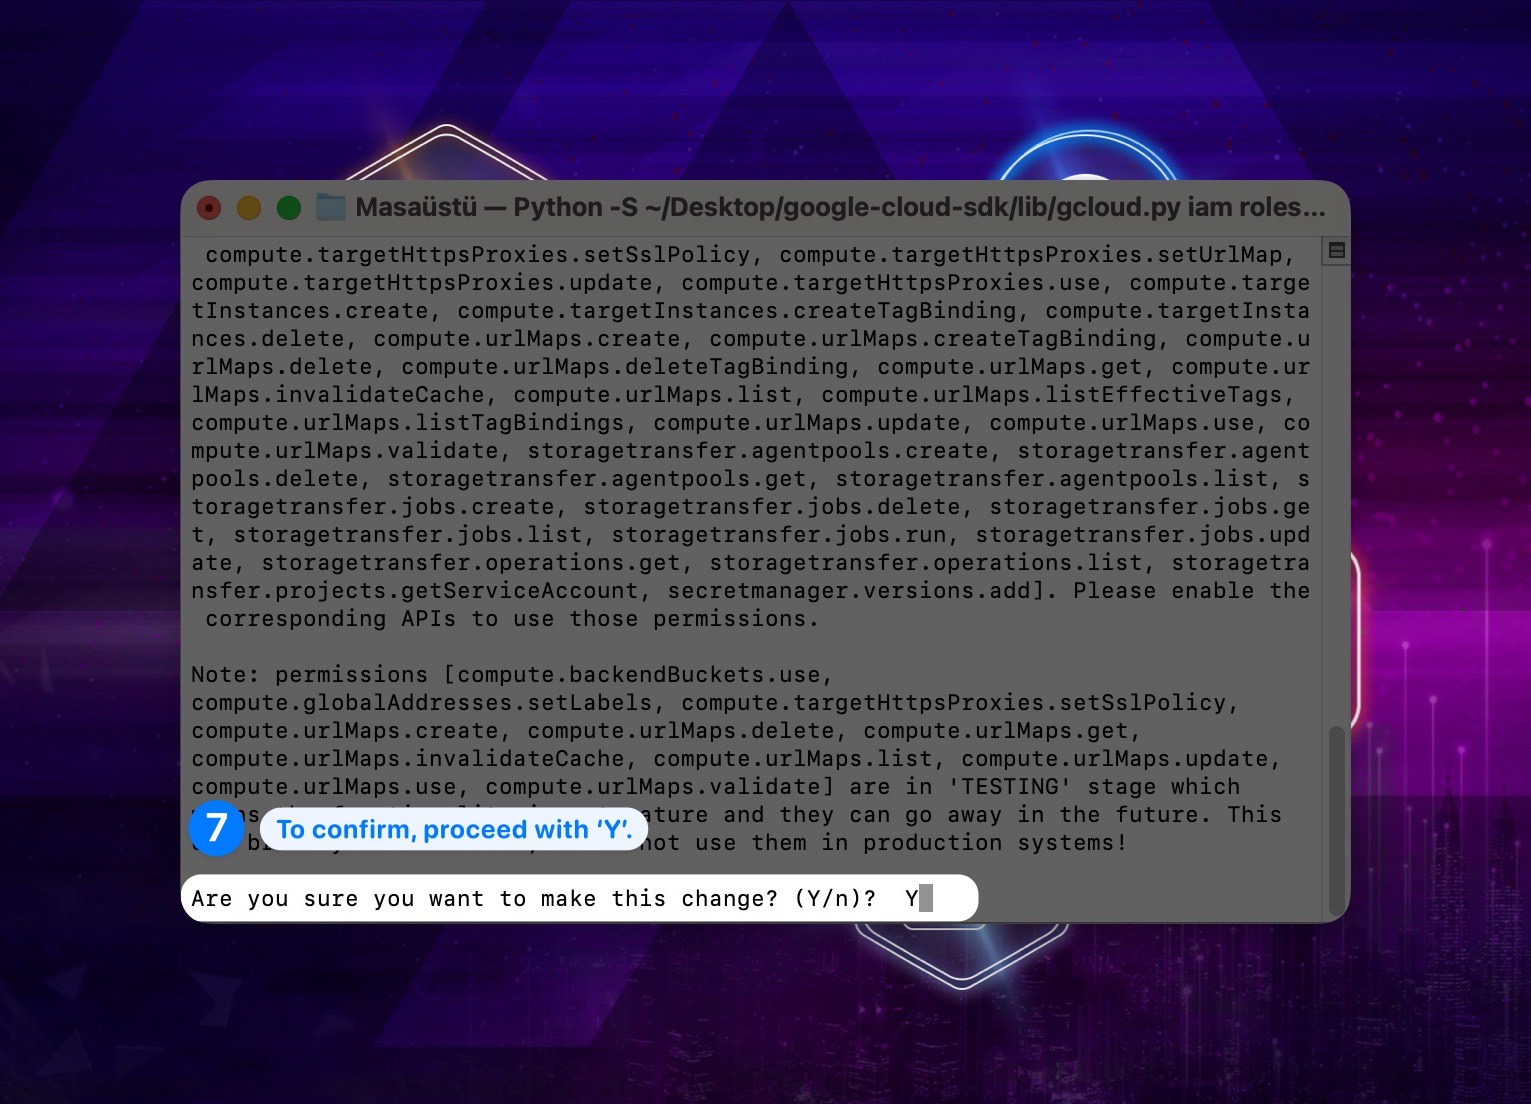
- After running this code in the terminal, it will ask for confirmation due to some permissions being in the testing stage. Please confirm by entering 'Y' into the terminal.
Show the instruction with images
After these steps, you should have successfully created the role with the necessary permissions.
4. Service Account Creation
We have created a role with the necessary permissions; now, we need to create an account to which we will assign this role.
- Go to GCP Console and log in to your account.
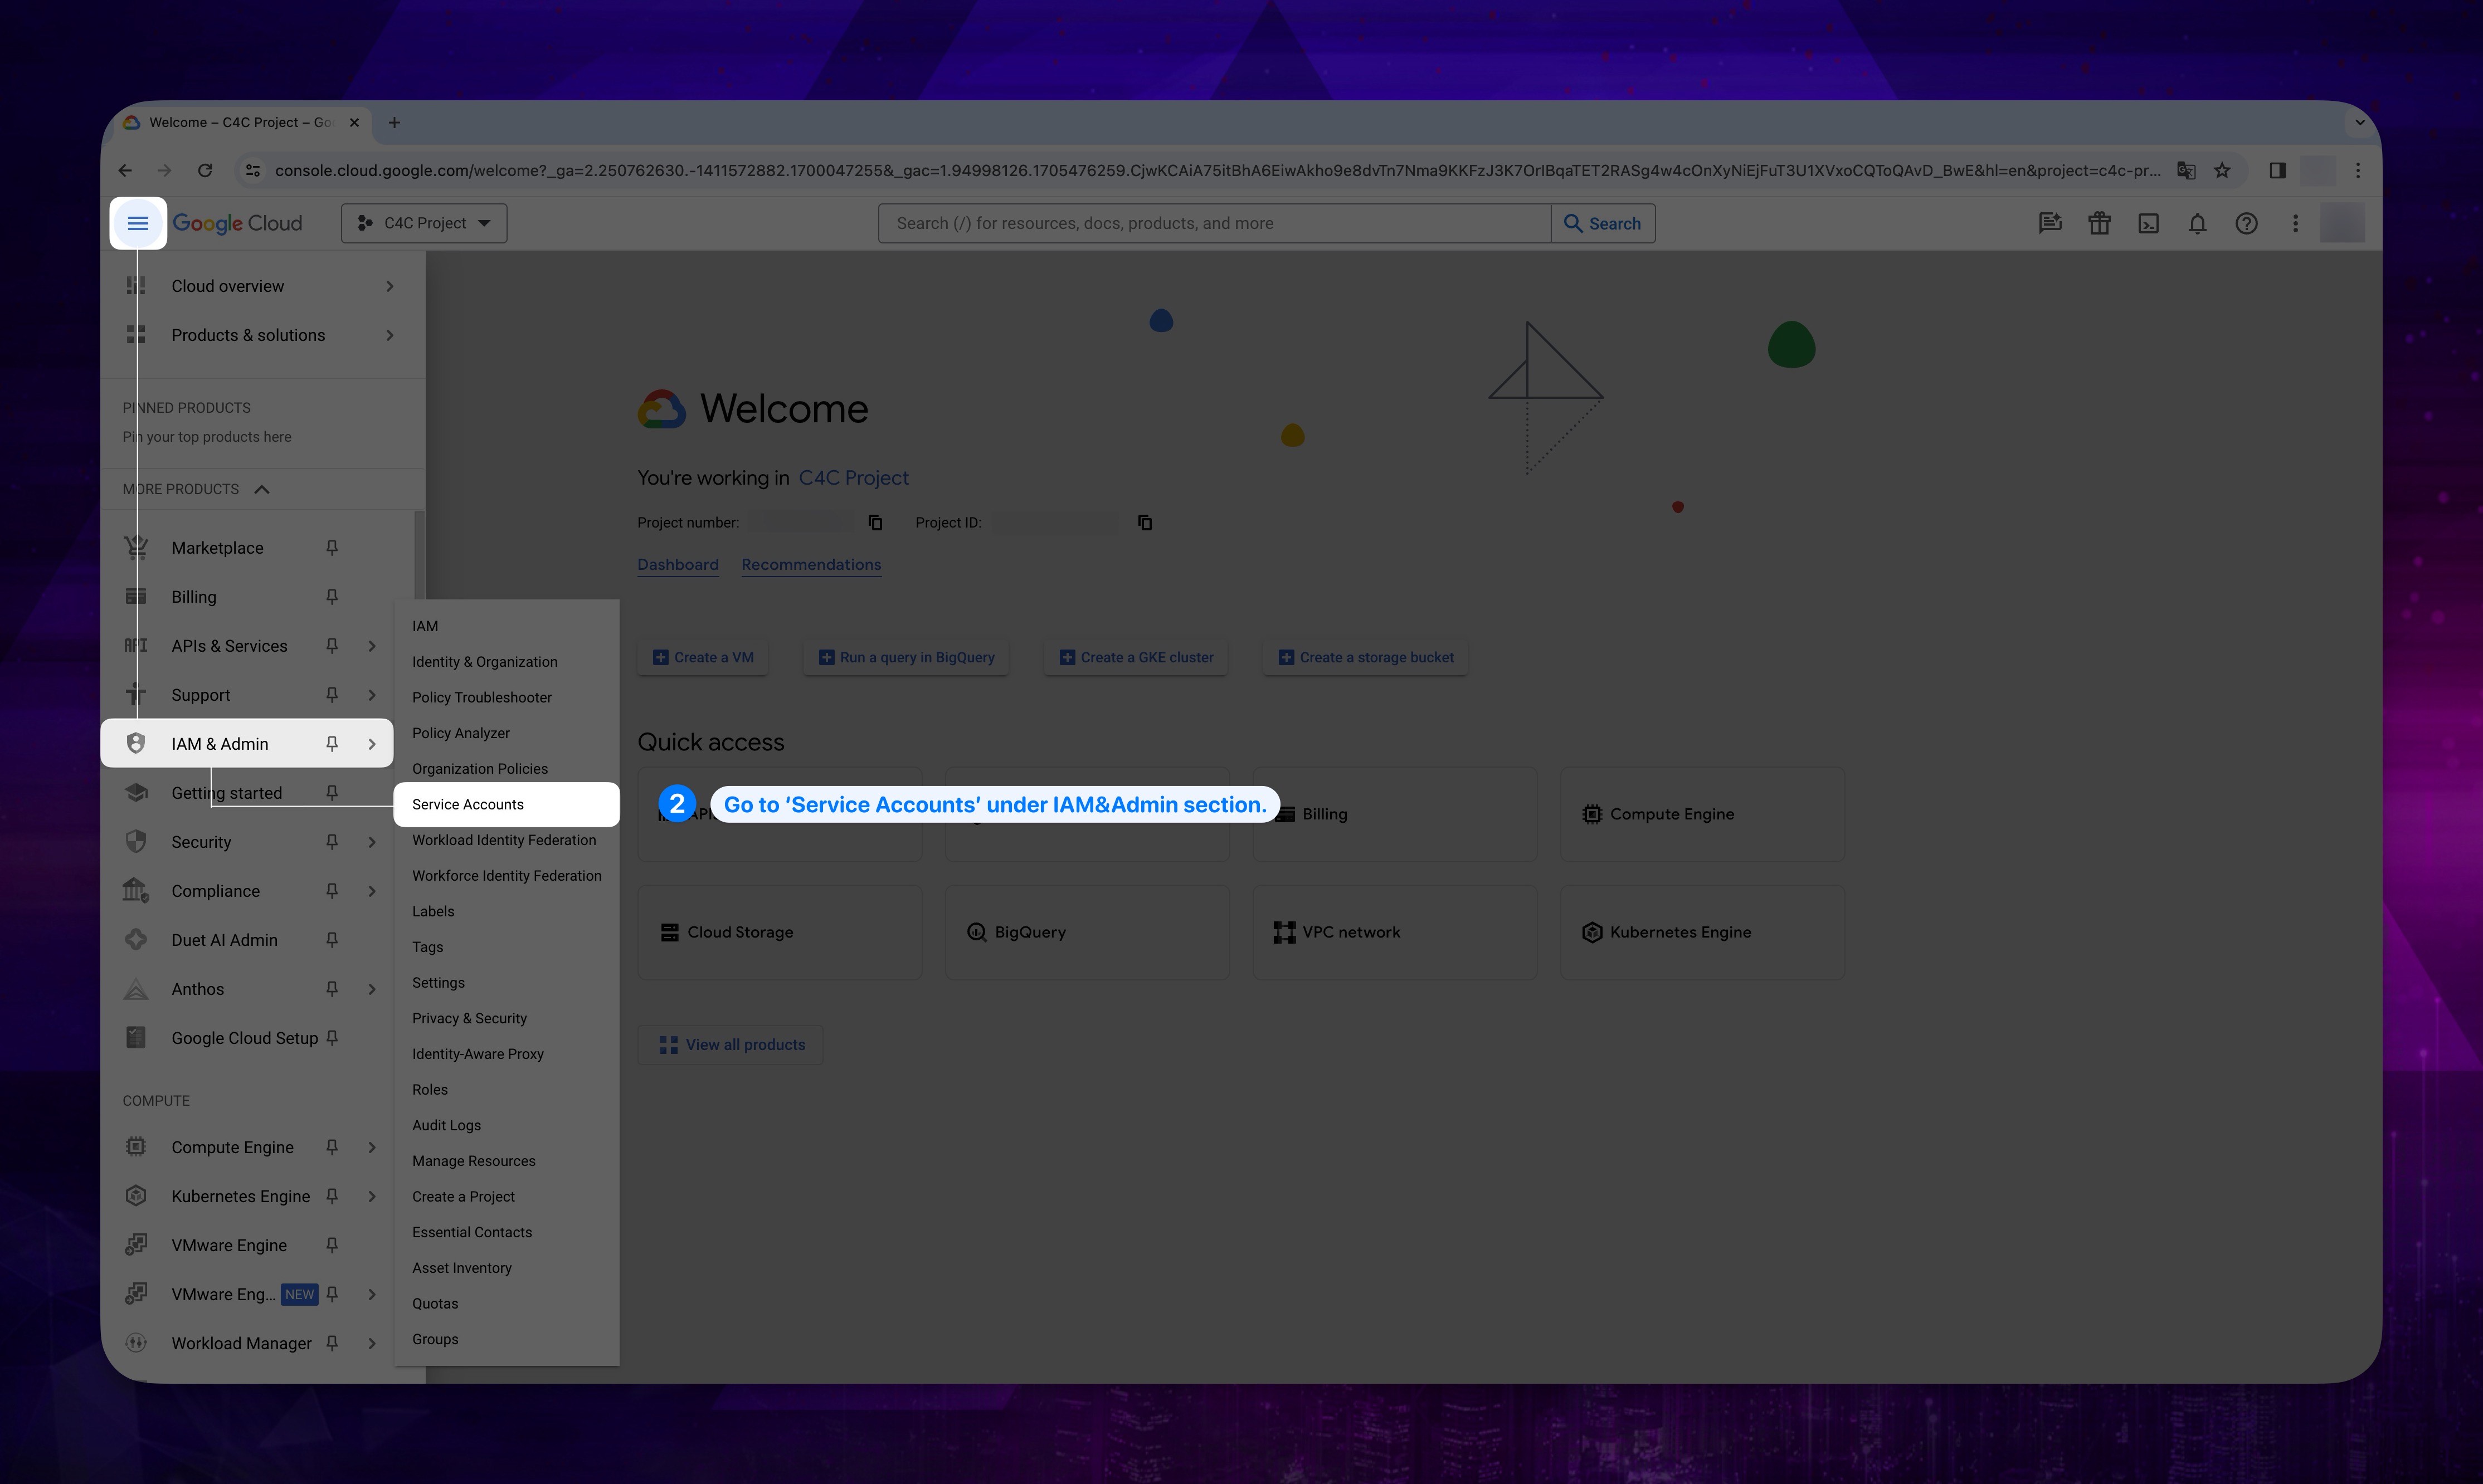
- Go to Service accounts from the left menu, under IAM & Admin.
Show the instruction with images
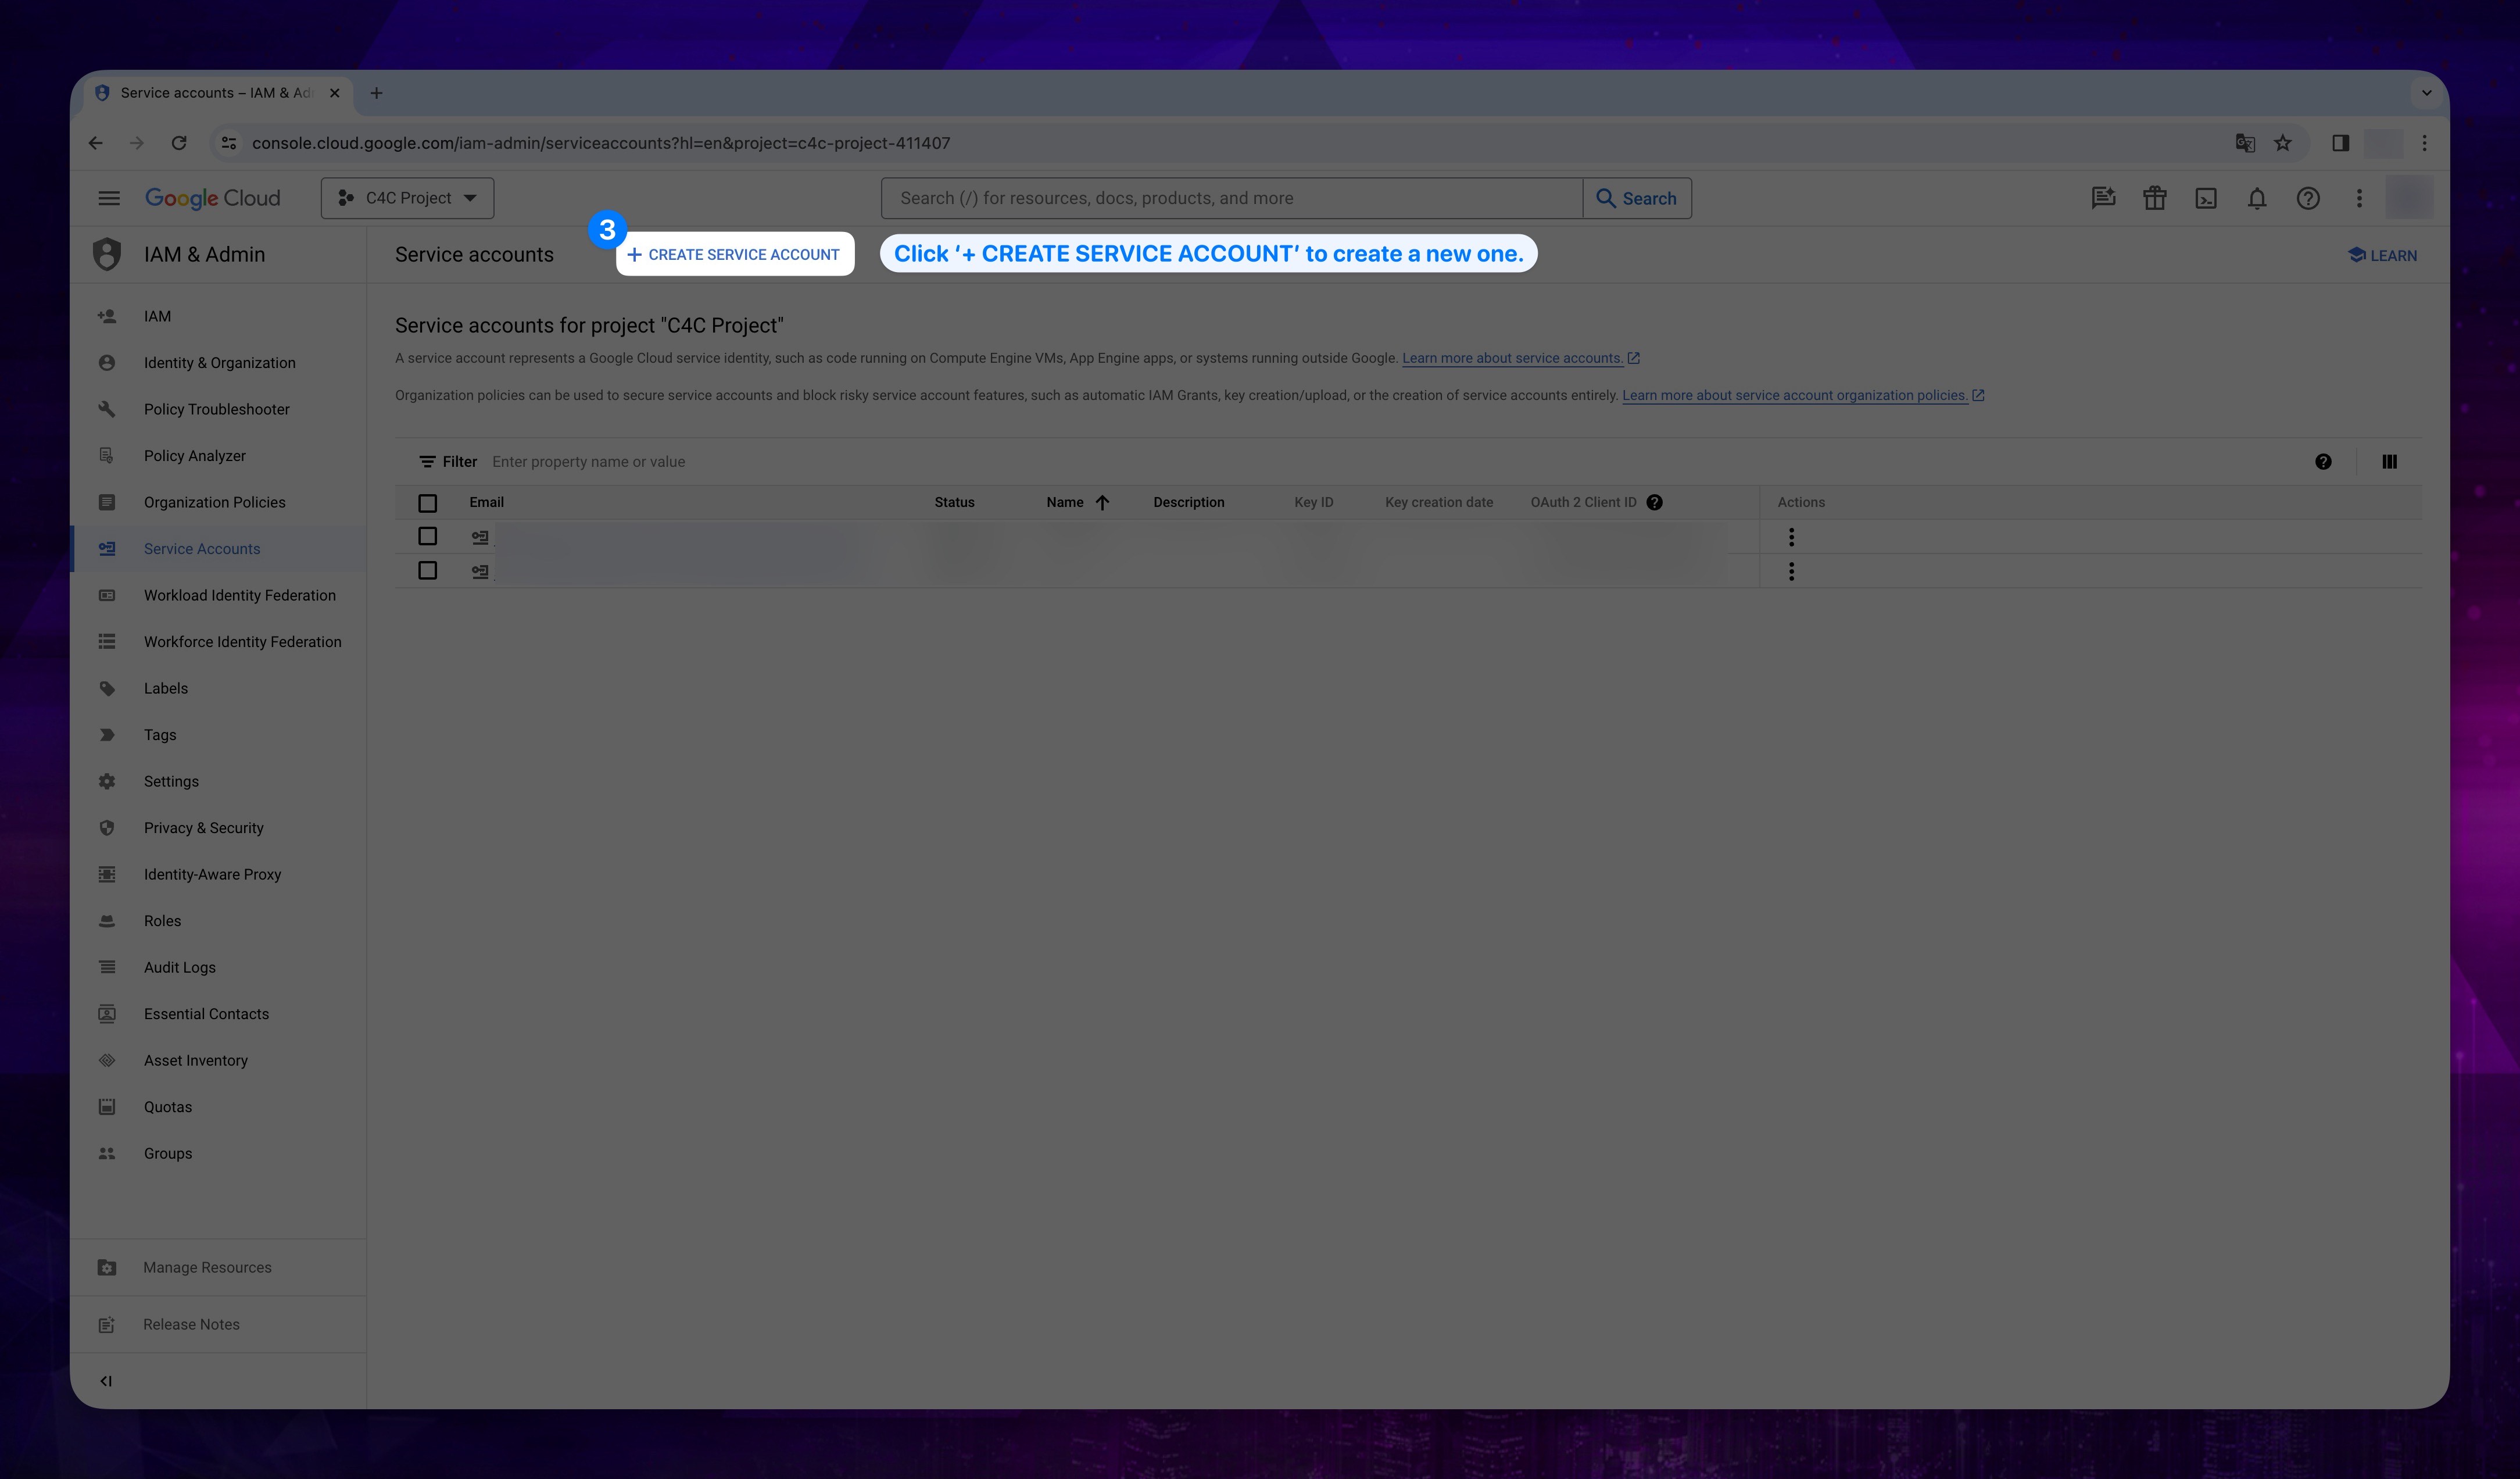
- Click CREATE SERVICE ACCOUNT button on the top.
Show the instruction with images
- Enter your Service account name, and it will generate a service account ID. After that click CREATE AND CONTINUE.
Show the instruction with images
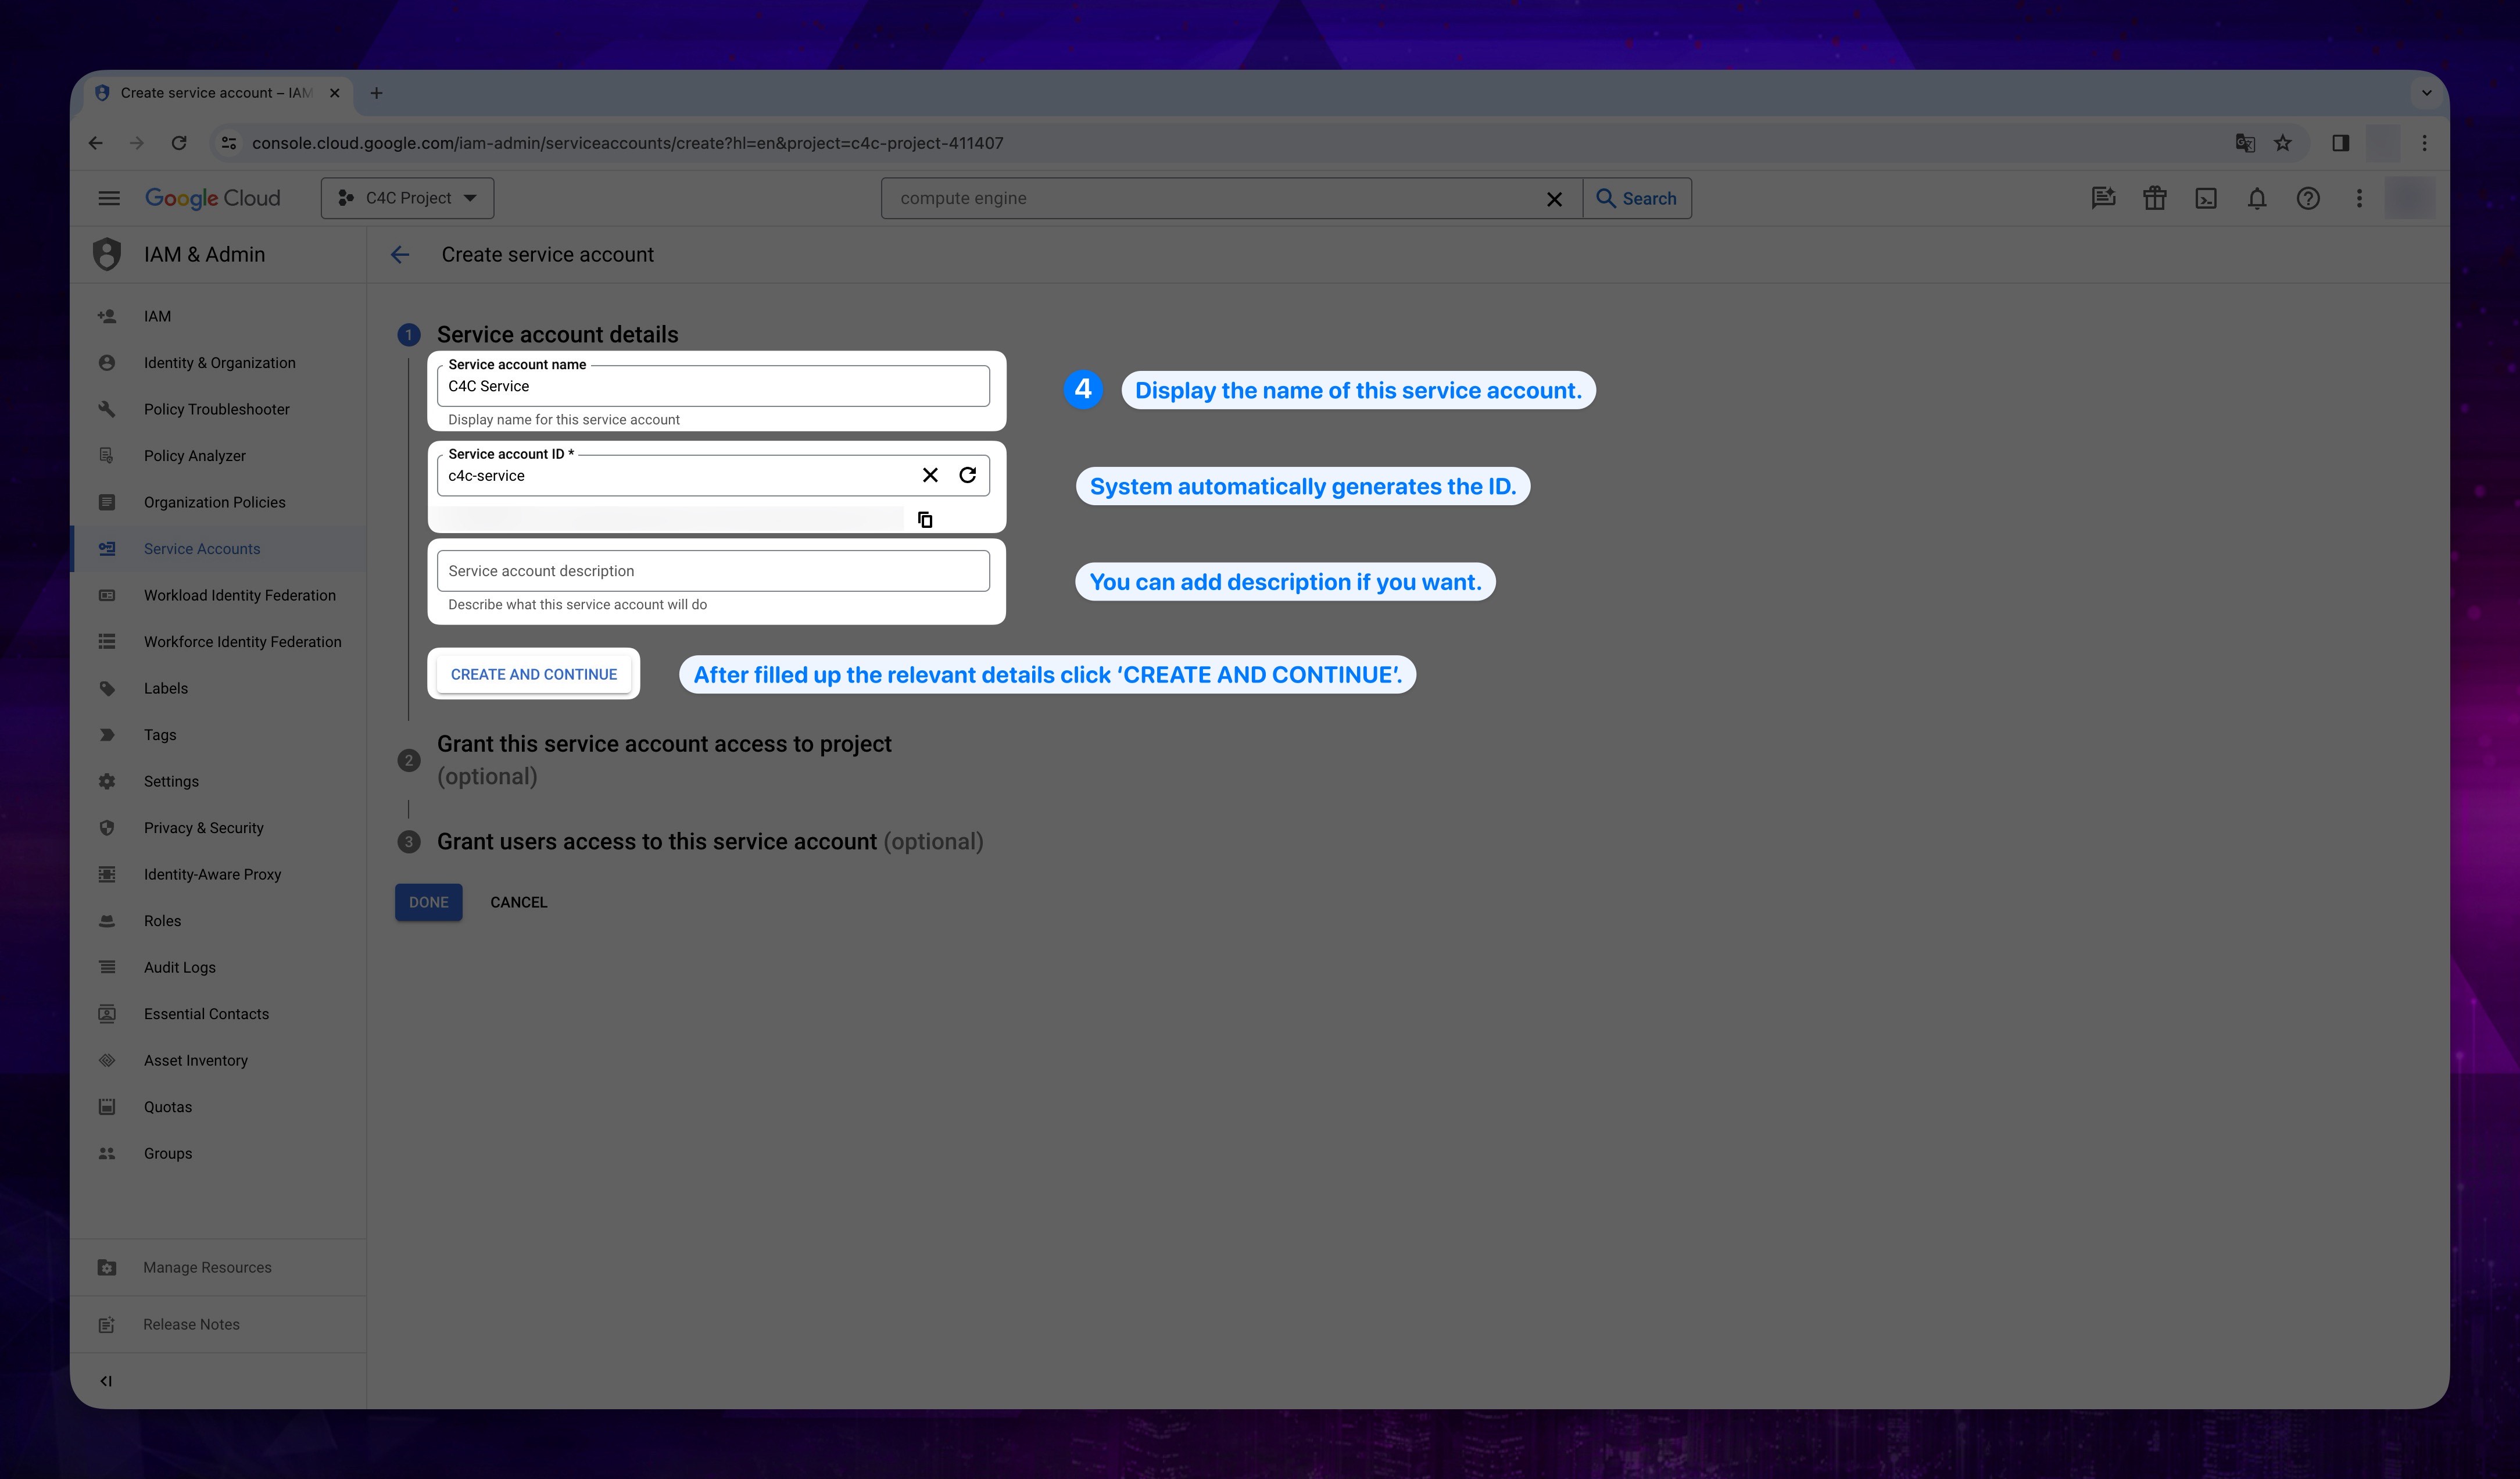
You can enter a description under Service account description to better identify the created account.
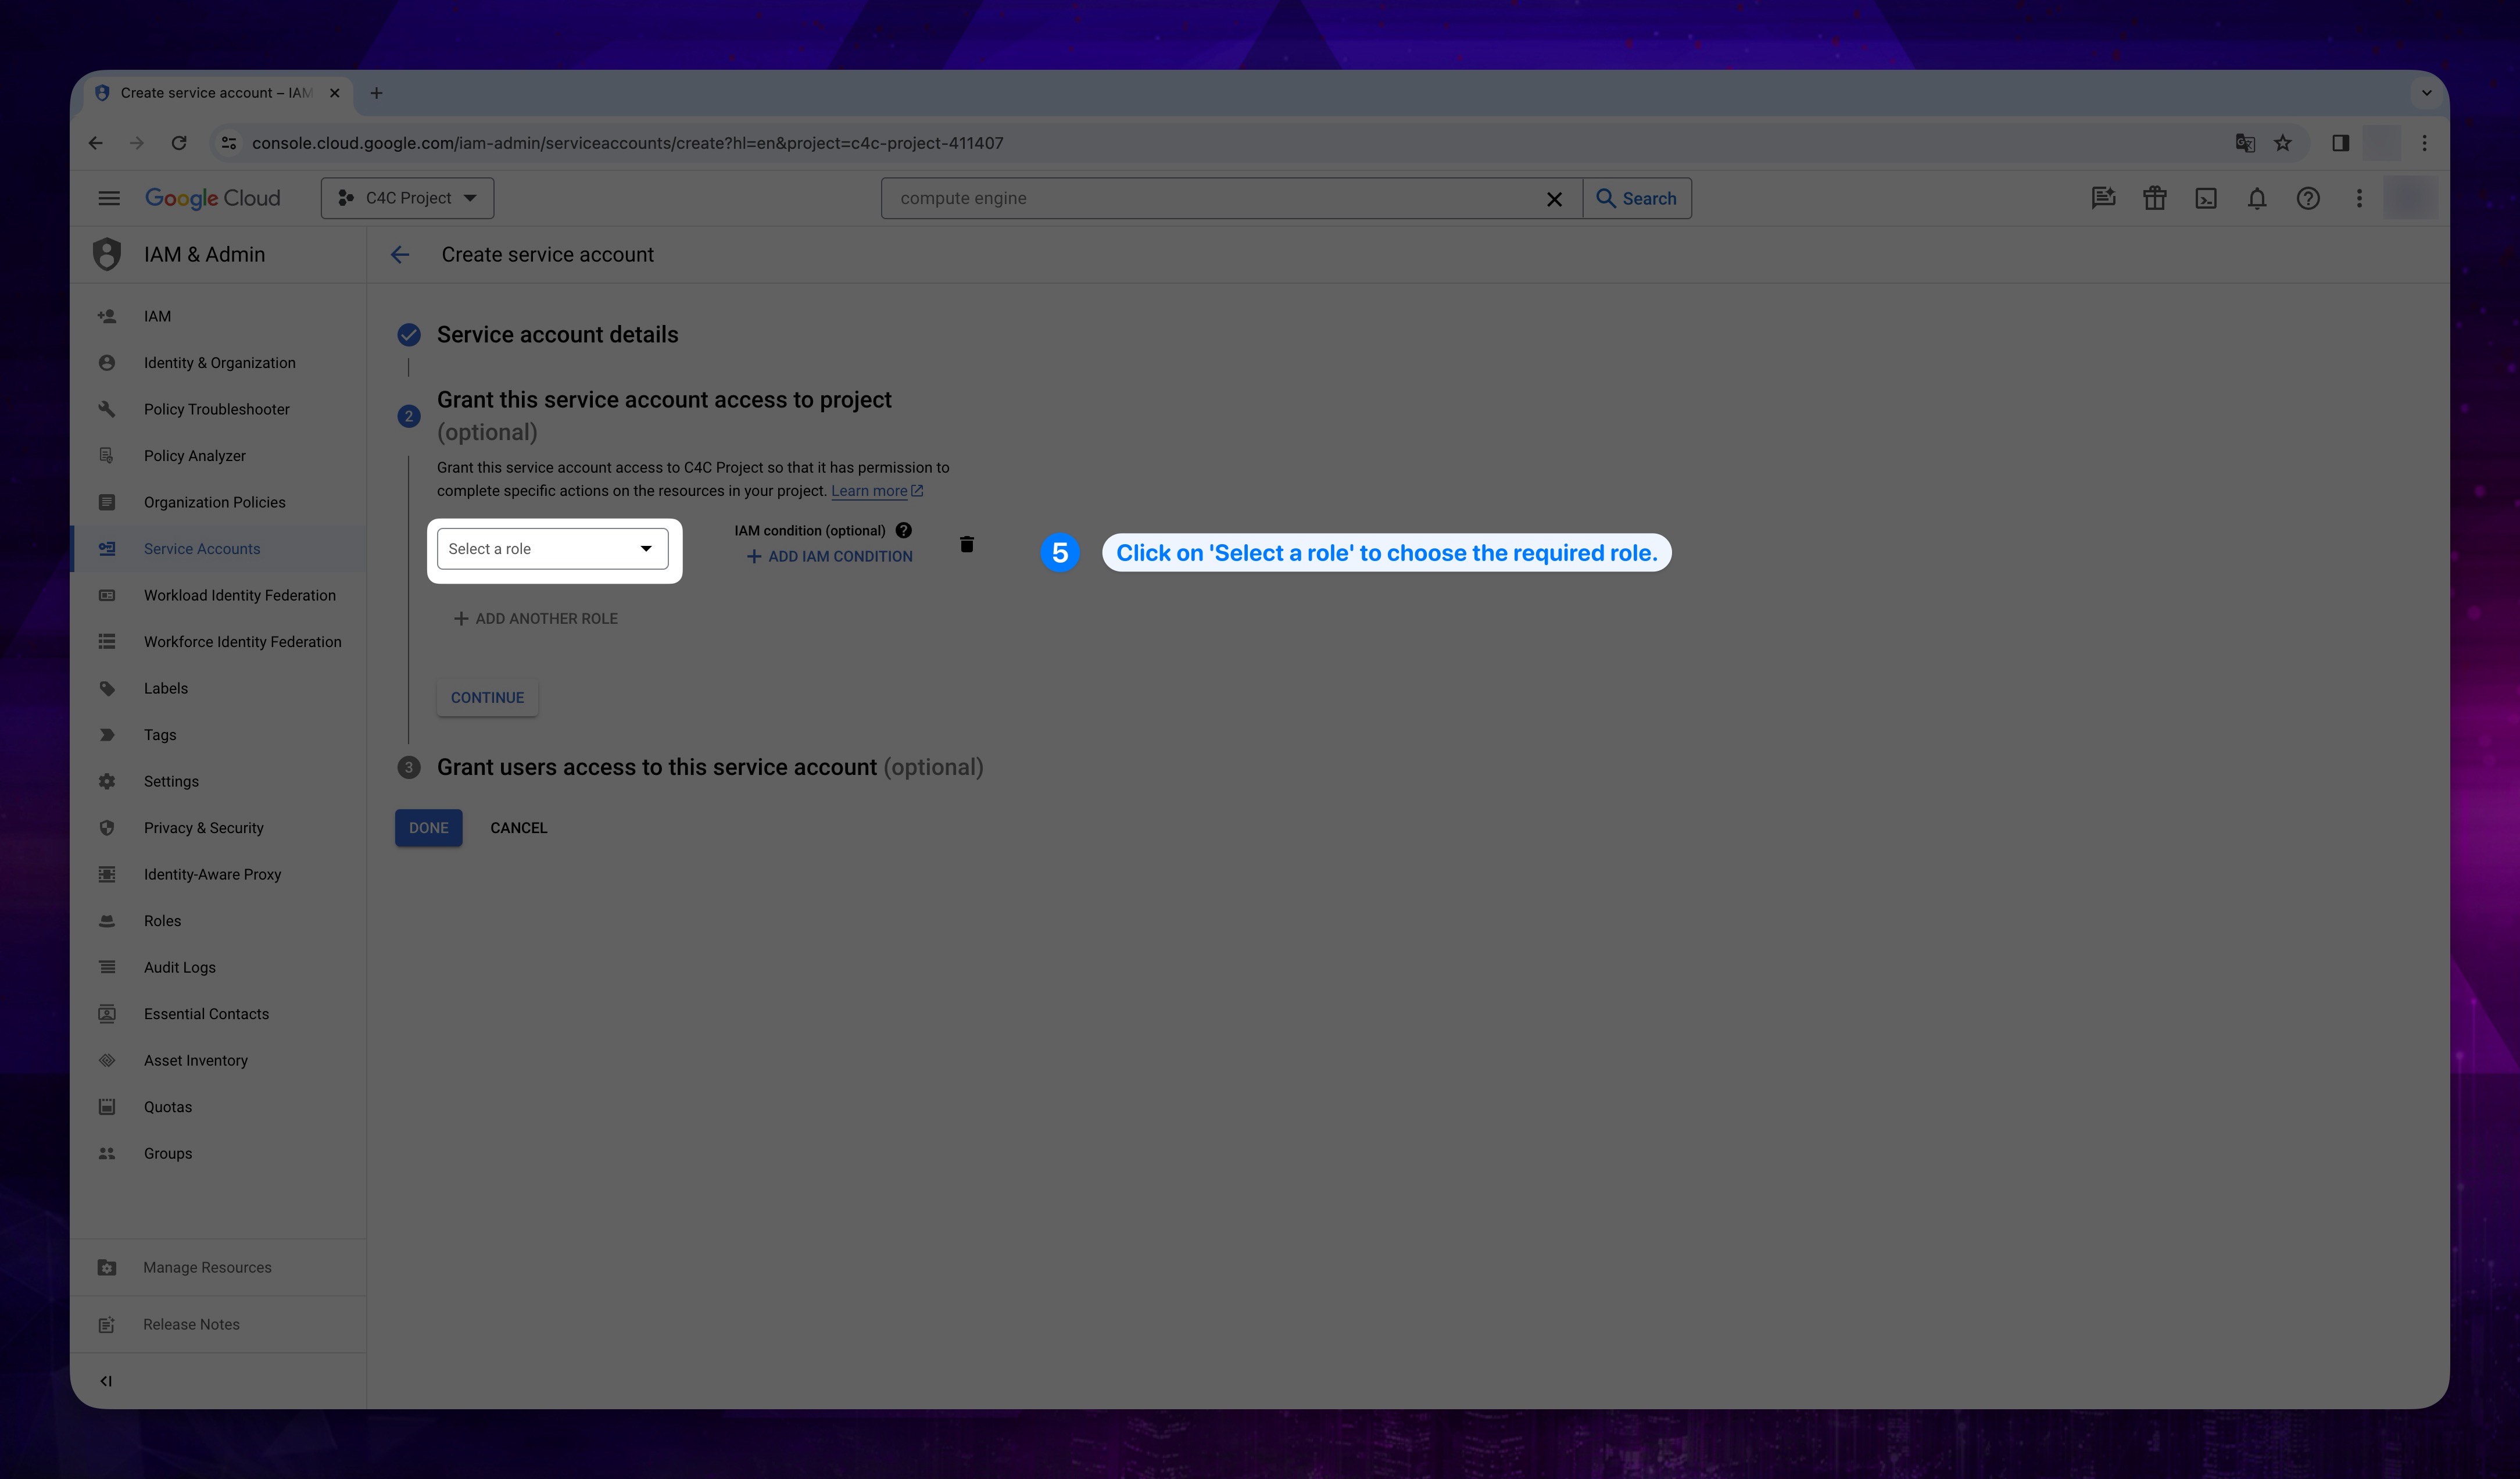
- In the second opened stage, click on Select a role and proceed according to the method you chose when creating the role:
- Manuel
- gcloudCLI
If you chose to continue with Manuel method for creating the role, you should choose the role you created with the title you assign it under the Custom section.
If you chose to continue with gcloud CLI method for creating the role, you should choose C4C Custom Role Compute under the Custom section.
Show the instruction with images
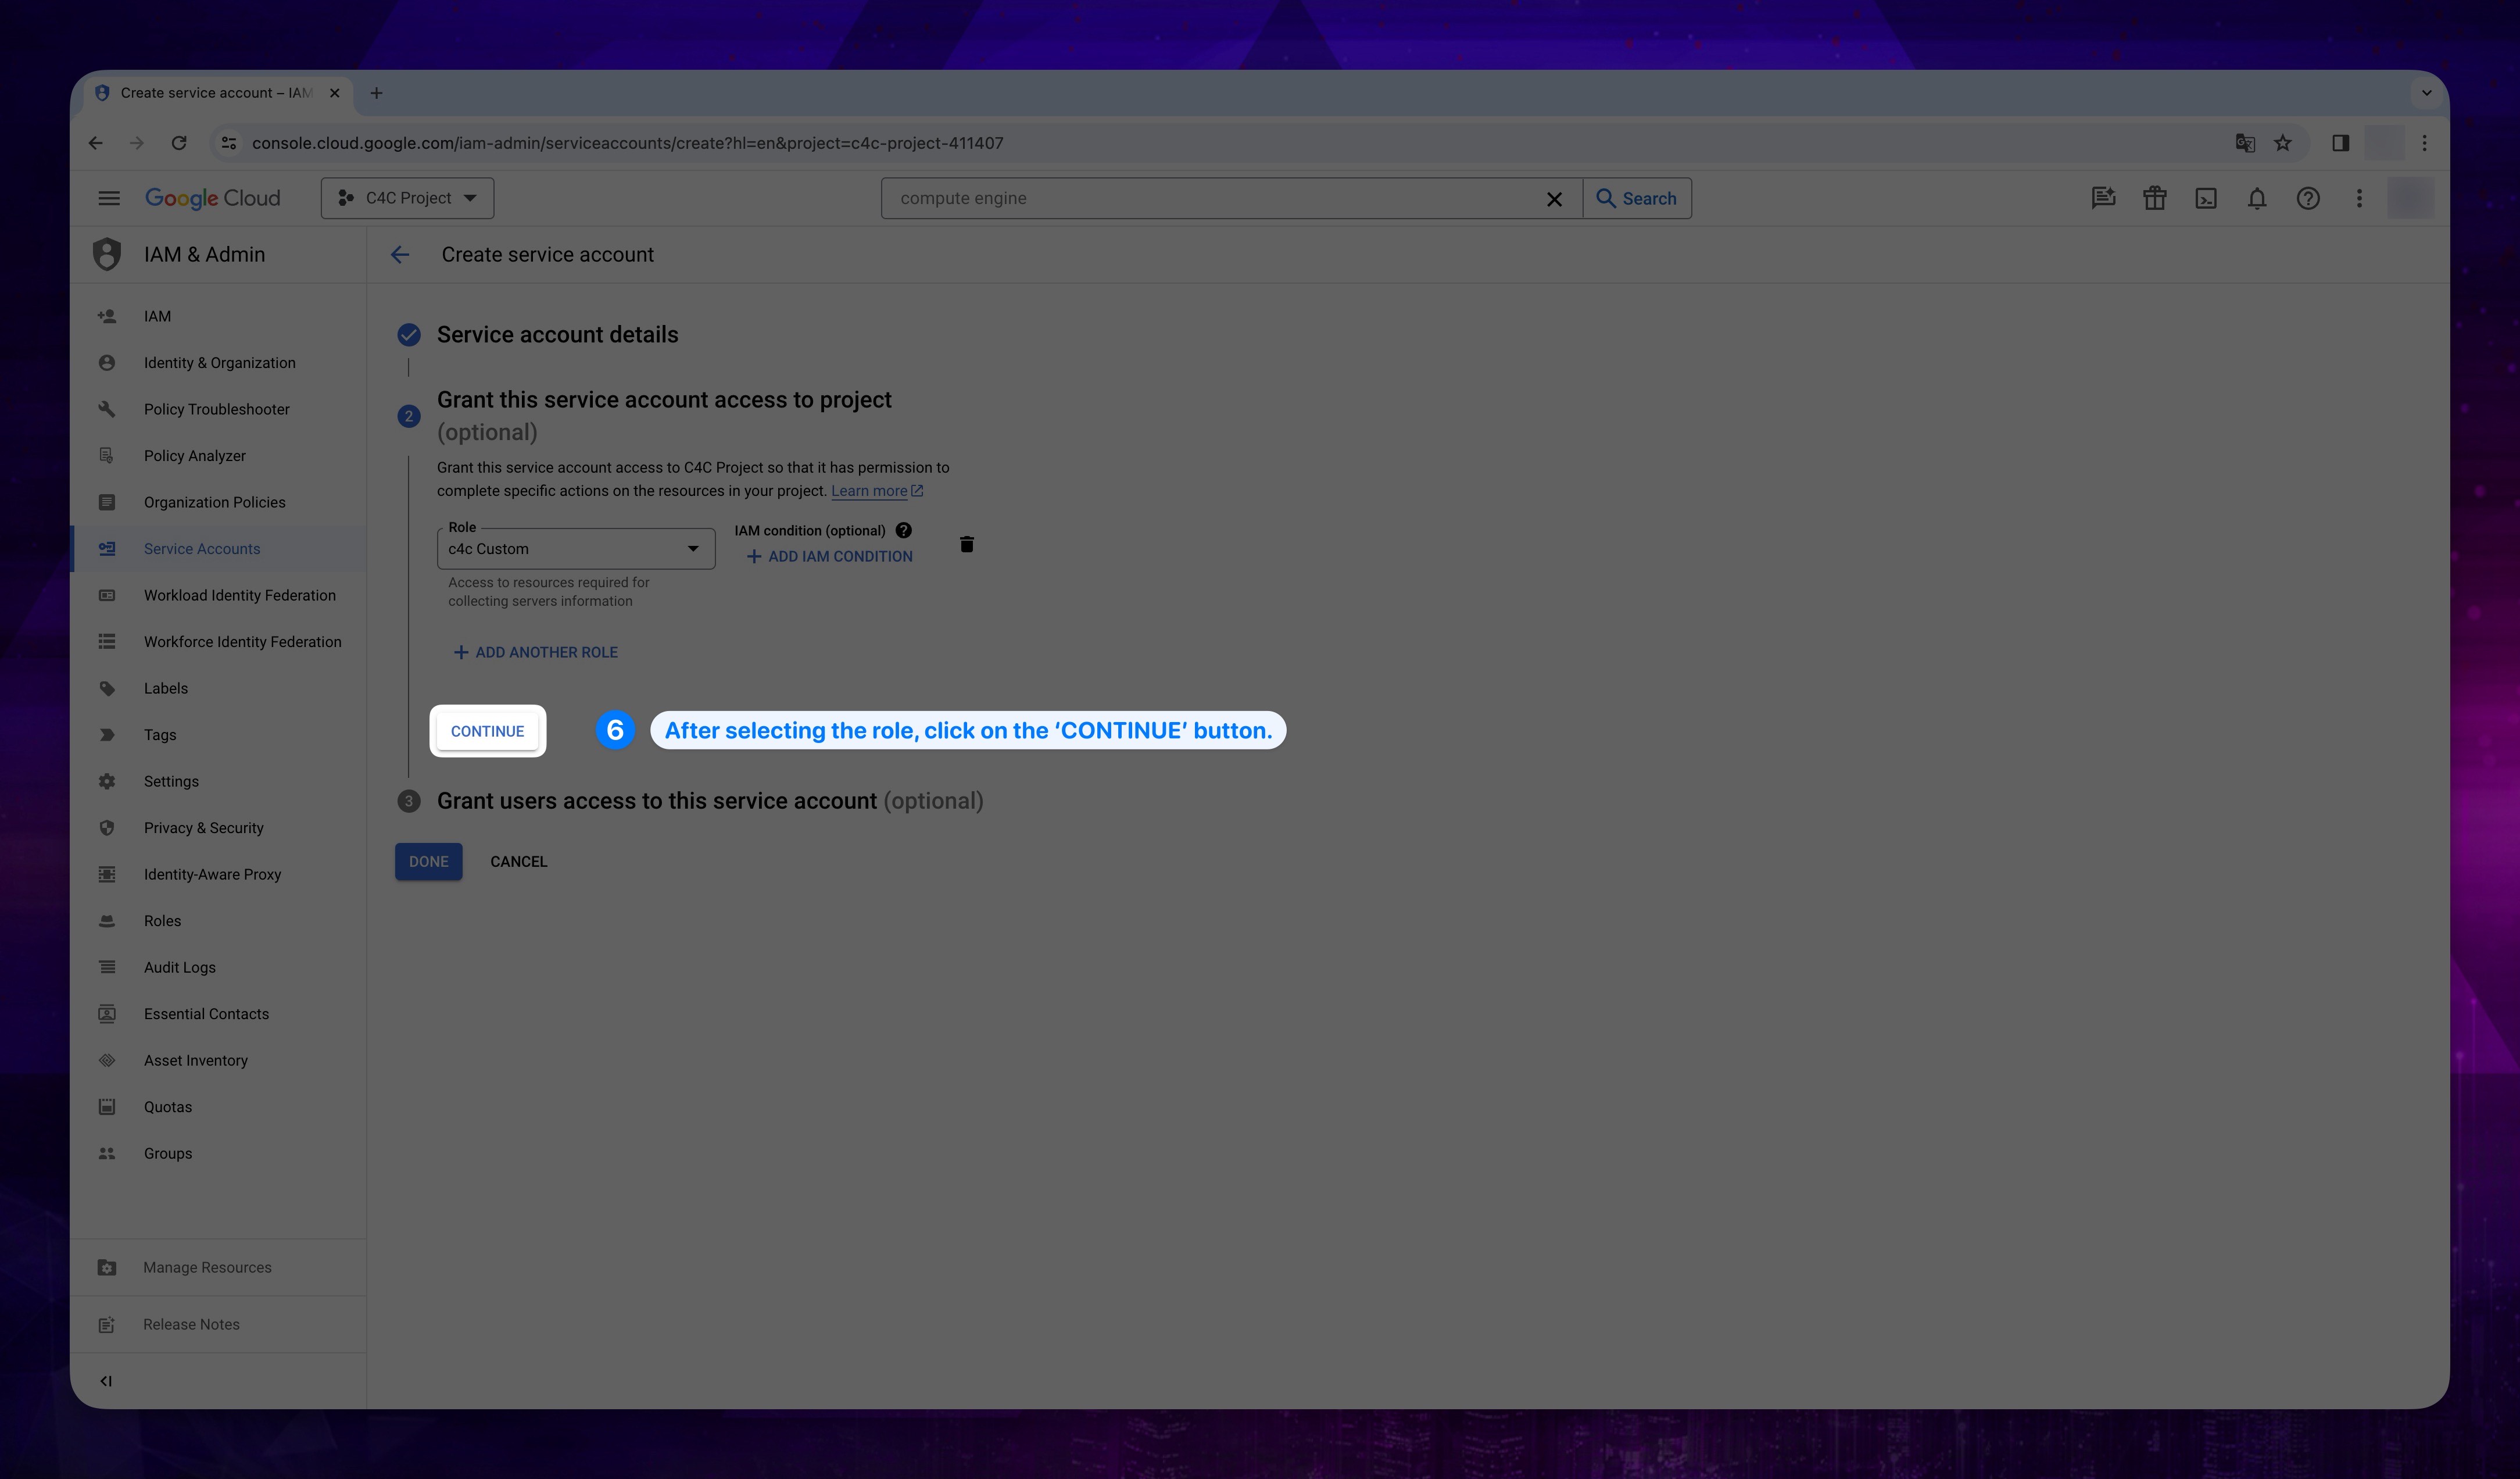
- After selecting the relevant role, click on the CONTINUE button.
Show the instruction with images
-
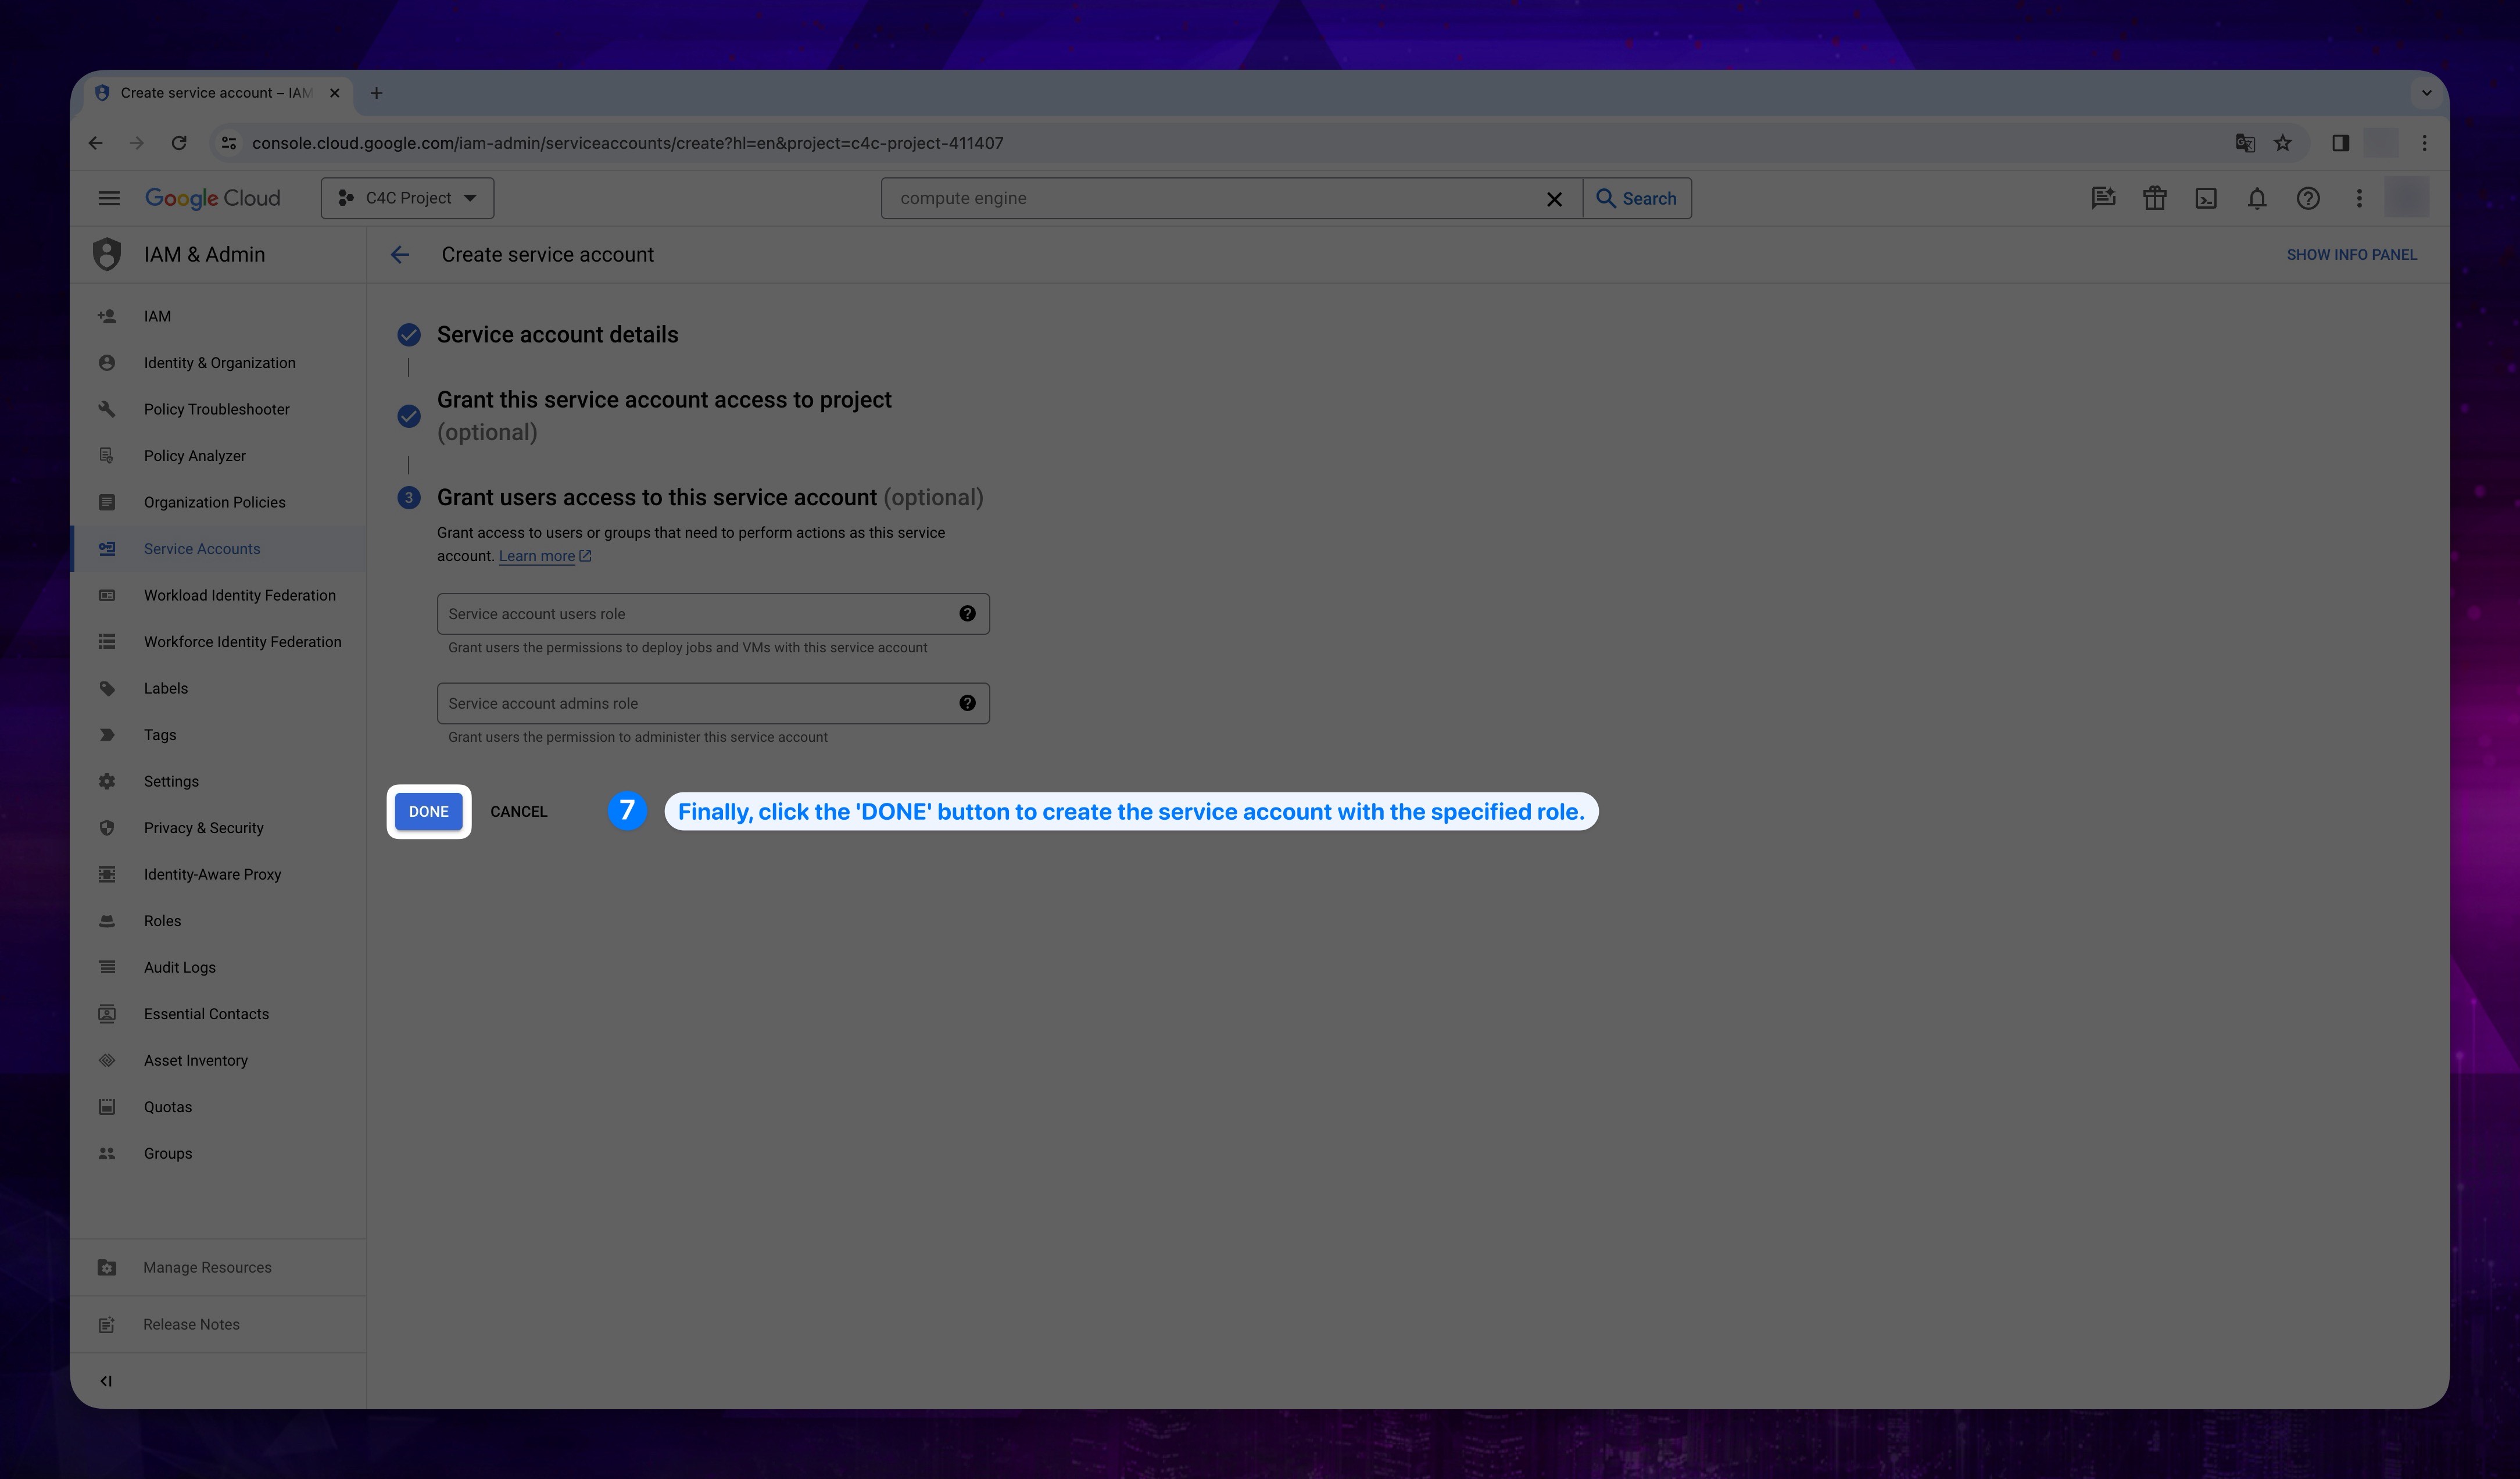
Lastly, click DONE.
tipAfter clicking the Done button, you should find yourself back in the Service Accounts page. However, if you are not, click on the Service Accounts section again from the menu on the left.
Show the instruction with images
Check from the list whether your service account has been created or not.
5. Obtaining Key
In this section, we will create the key file that we need in our platform.
-
Locate the user we created on the Service Accounts page. Navigate to the Actions tab for the respective user, and click on the Three dots(...) button and select Manage keys.
-
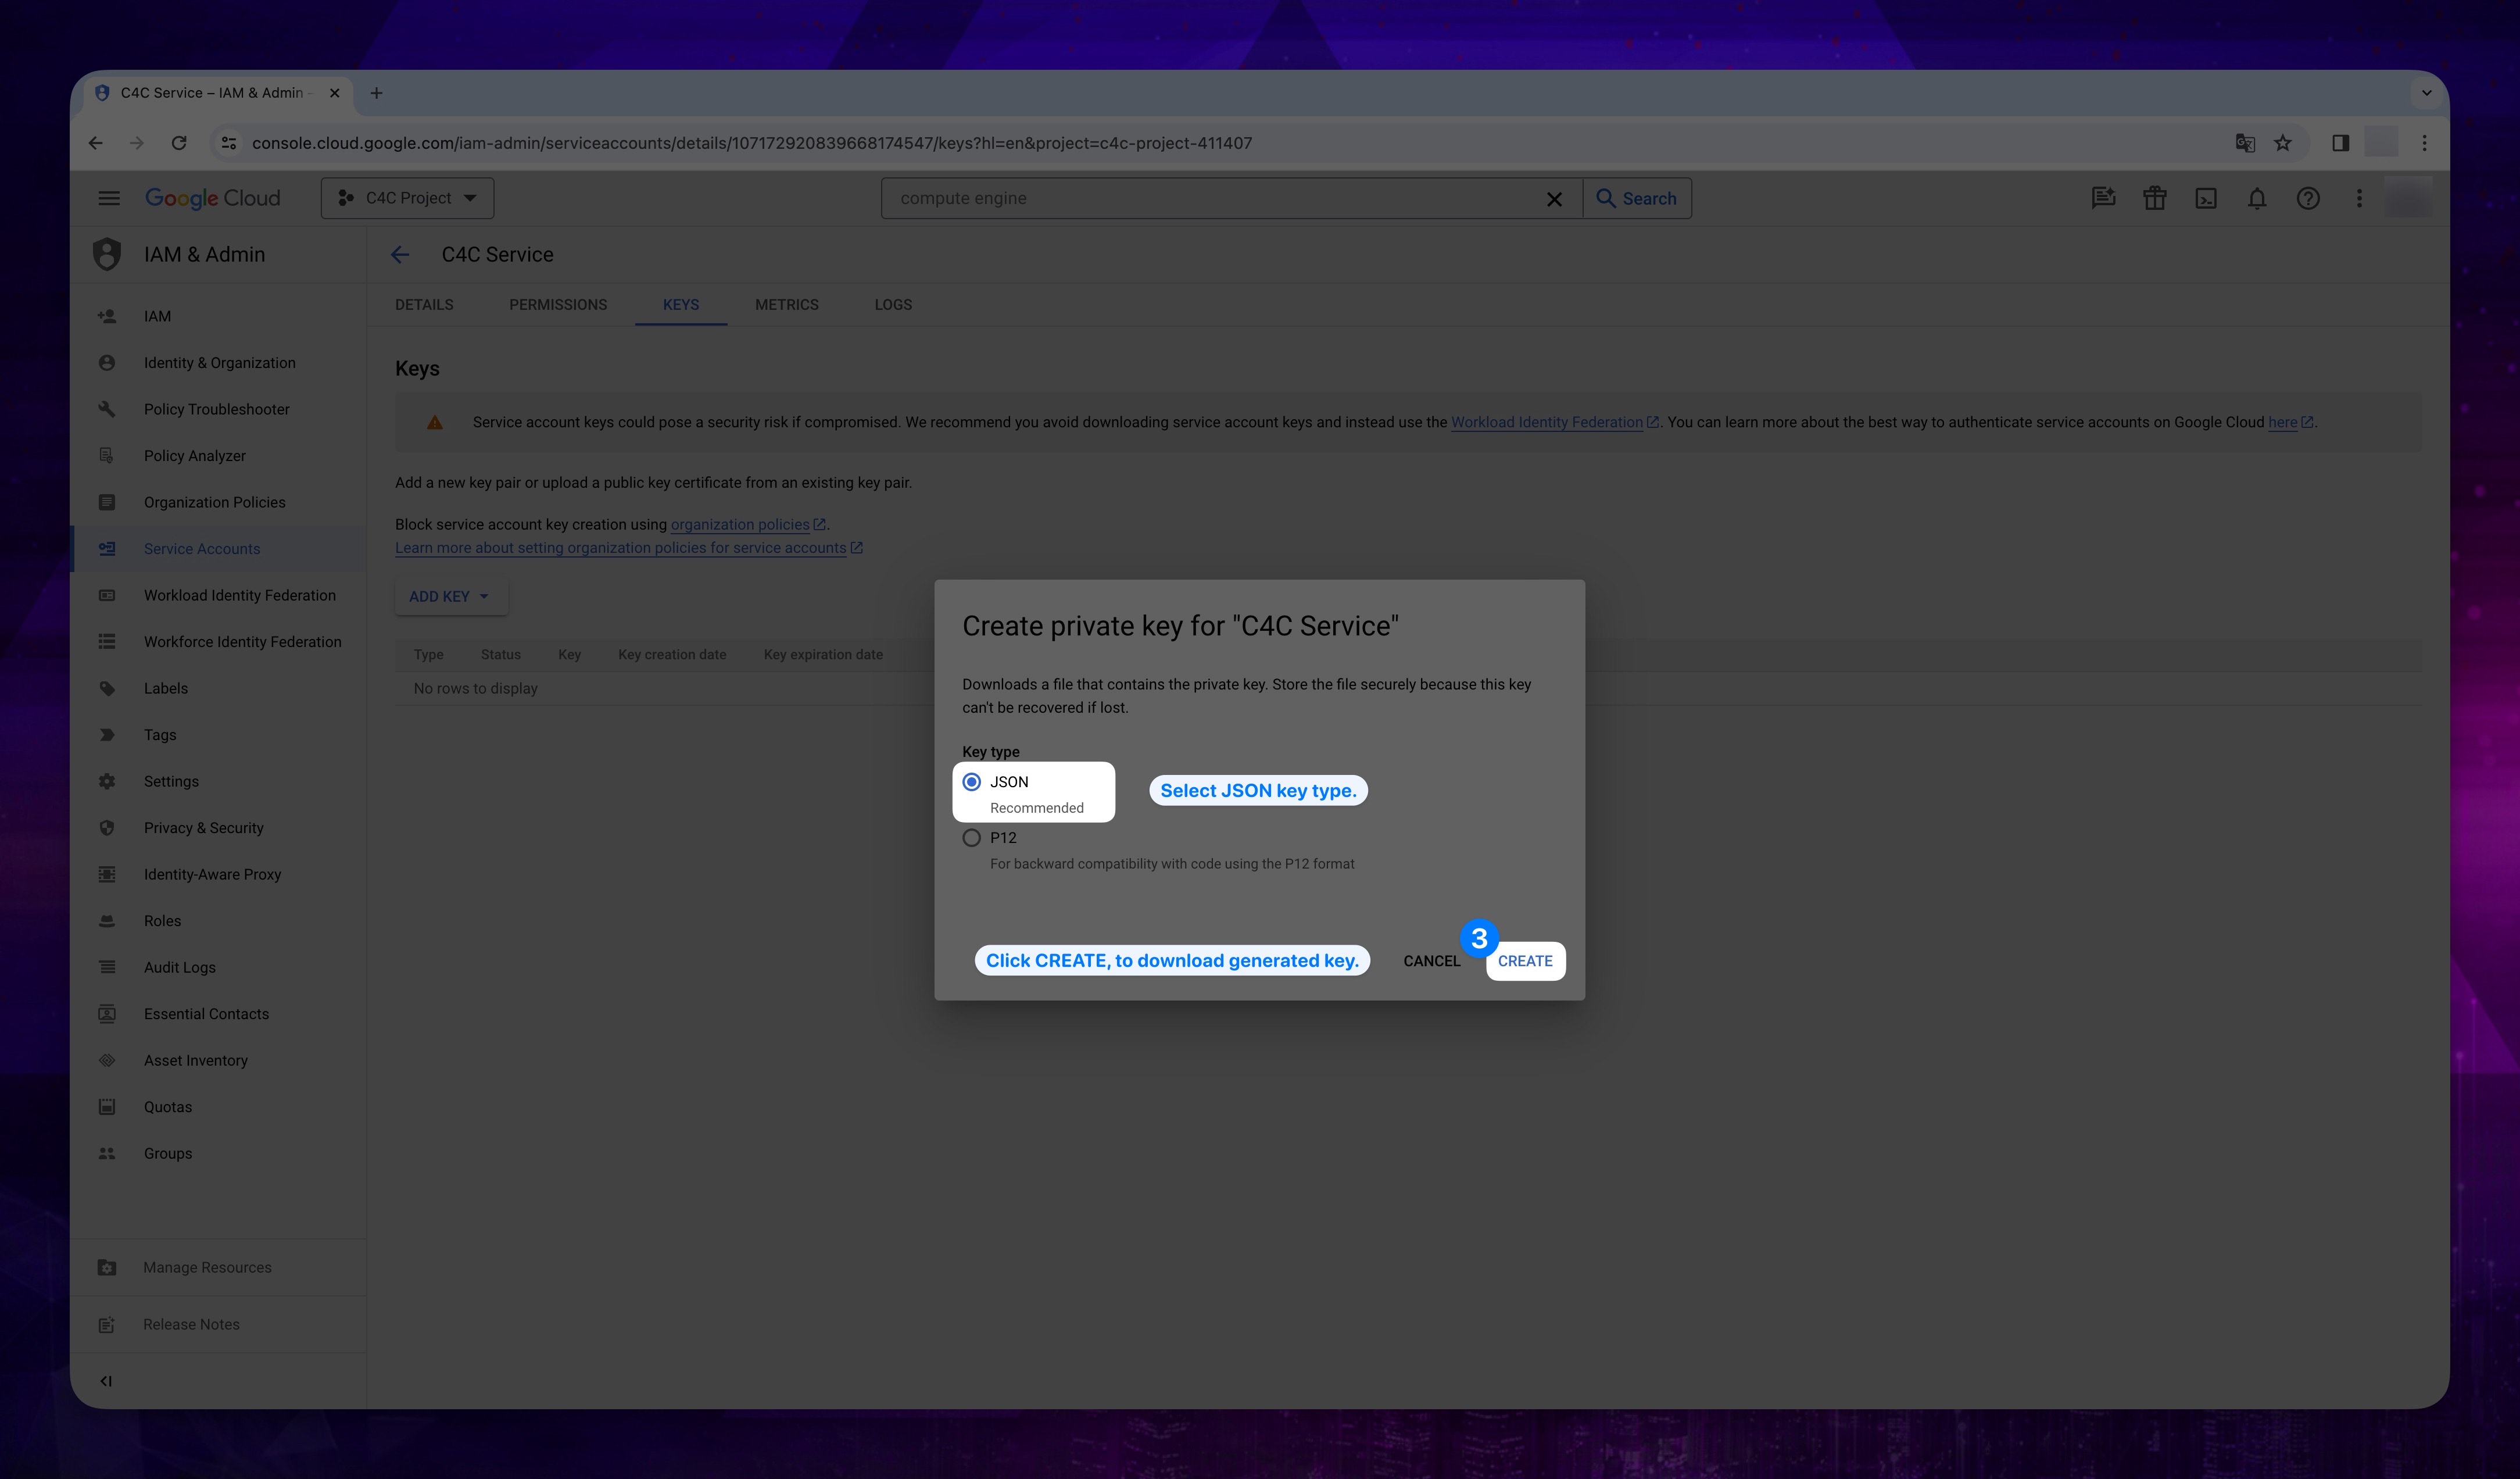
Click on the ADD KEY button on the opened page, and select Create new key.
Show the instruction with images

- When creating credentials, please note that our system currently only accepts credentials in JSON format, so make sure to select the JSON key type. After that, click CREATE, and the generated key will be downloaded to your computer.
Show the instruction with images
Do not forget to check your downloads. Make sure you keep the downloaded credential file in a reachable field.