Getting Credentials for All C4C Services
You are required to perform some operations in Amazon Web Services (AWS) to configure your AWS provider in our system. The images attached below will guide you. Please follow the instructions below.
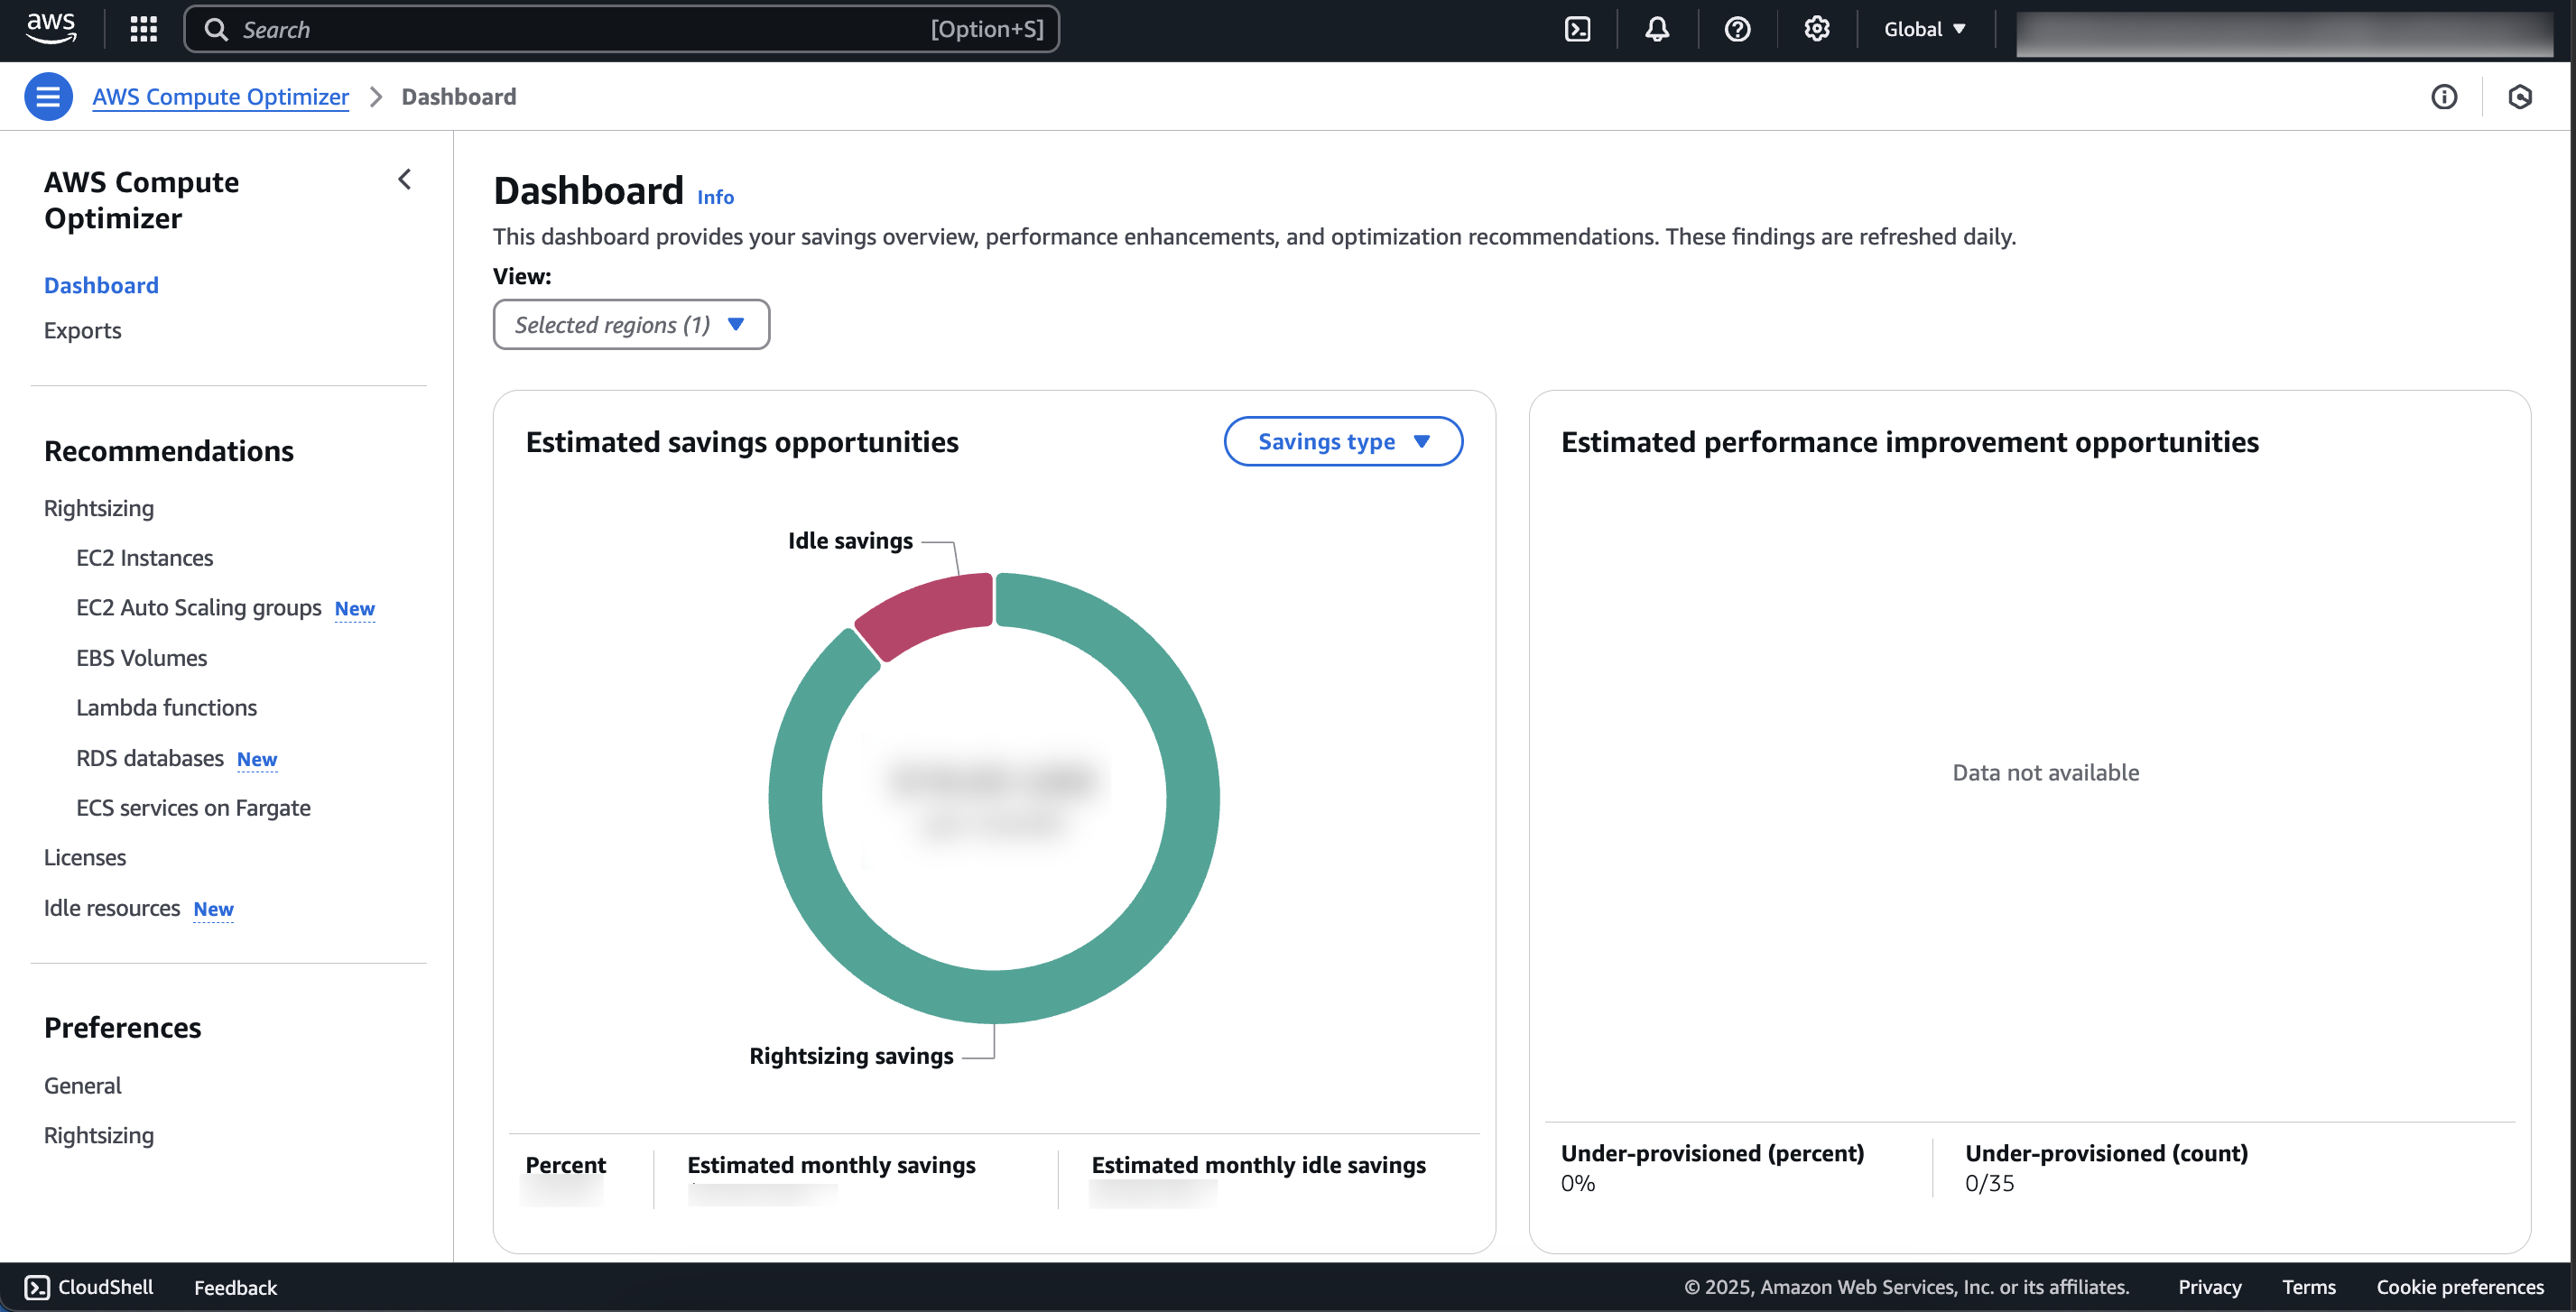
Enable AWS Compute Optimizer
You can enable AWS Compute Optimizer for your account by opening *AWS Compute Optimizer for the first time by searching AWS Compute Optimizer in AWS console. You can't enable AWS Compute Optimizer using the API.
Enable AWS Resource Explorer
You can enable AWS Resource Explorer for your account by following official documentation. You can't enable AWS Resource Explorer using the API.
-
Go to AWS Console and log in to your account.
-
After logged in to your account, go to the search bar and search for AWS Compute Optimizer.
Show the instruction with images
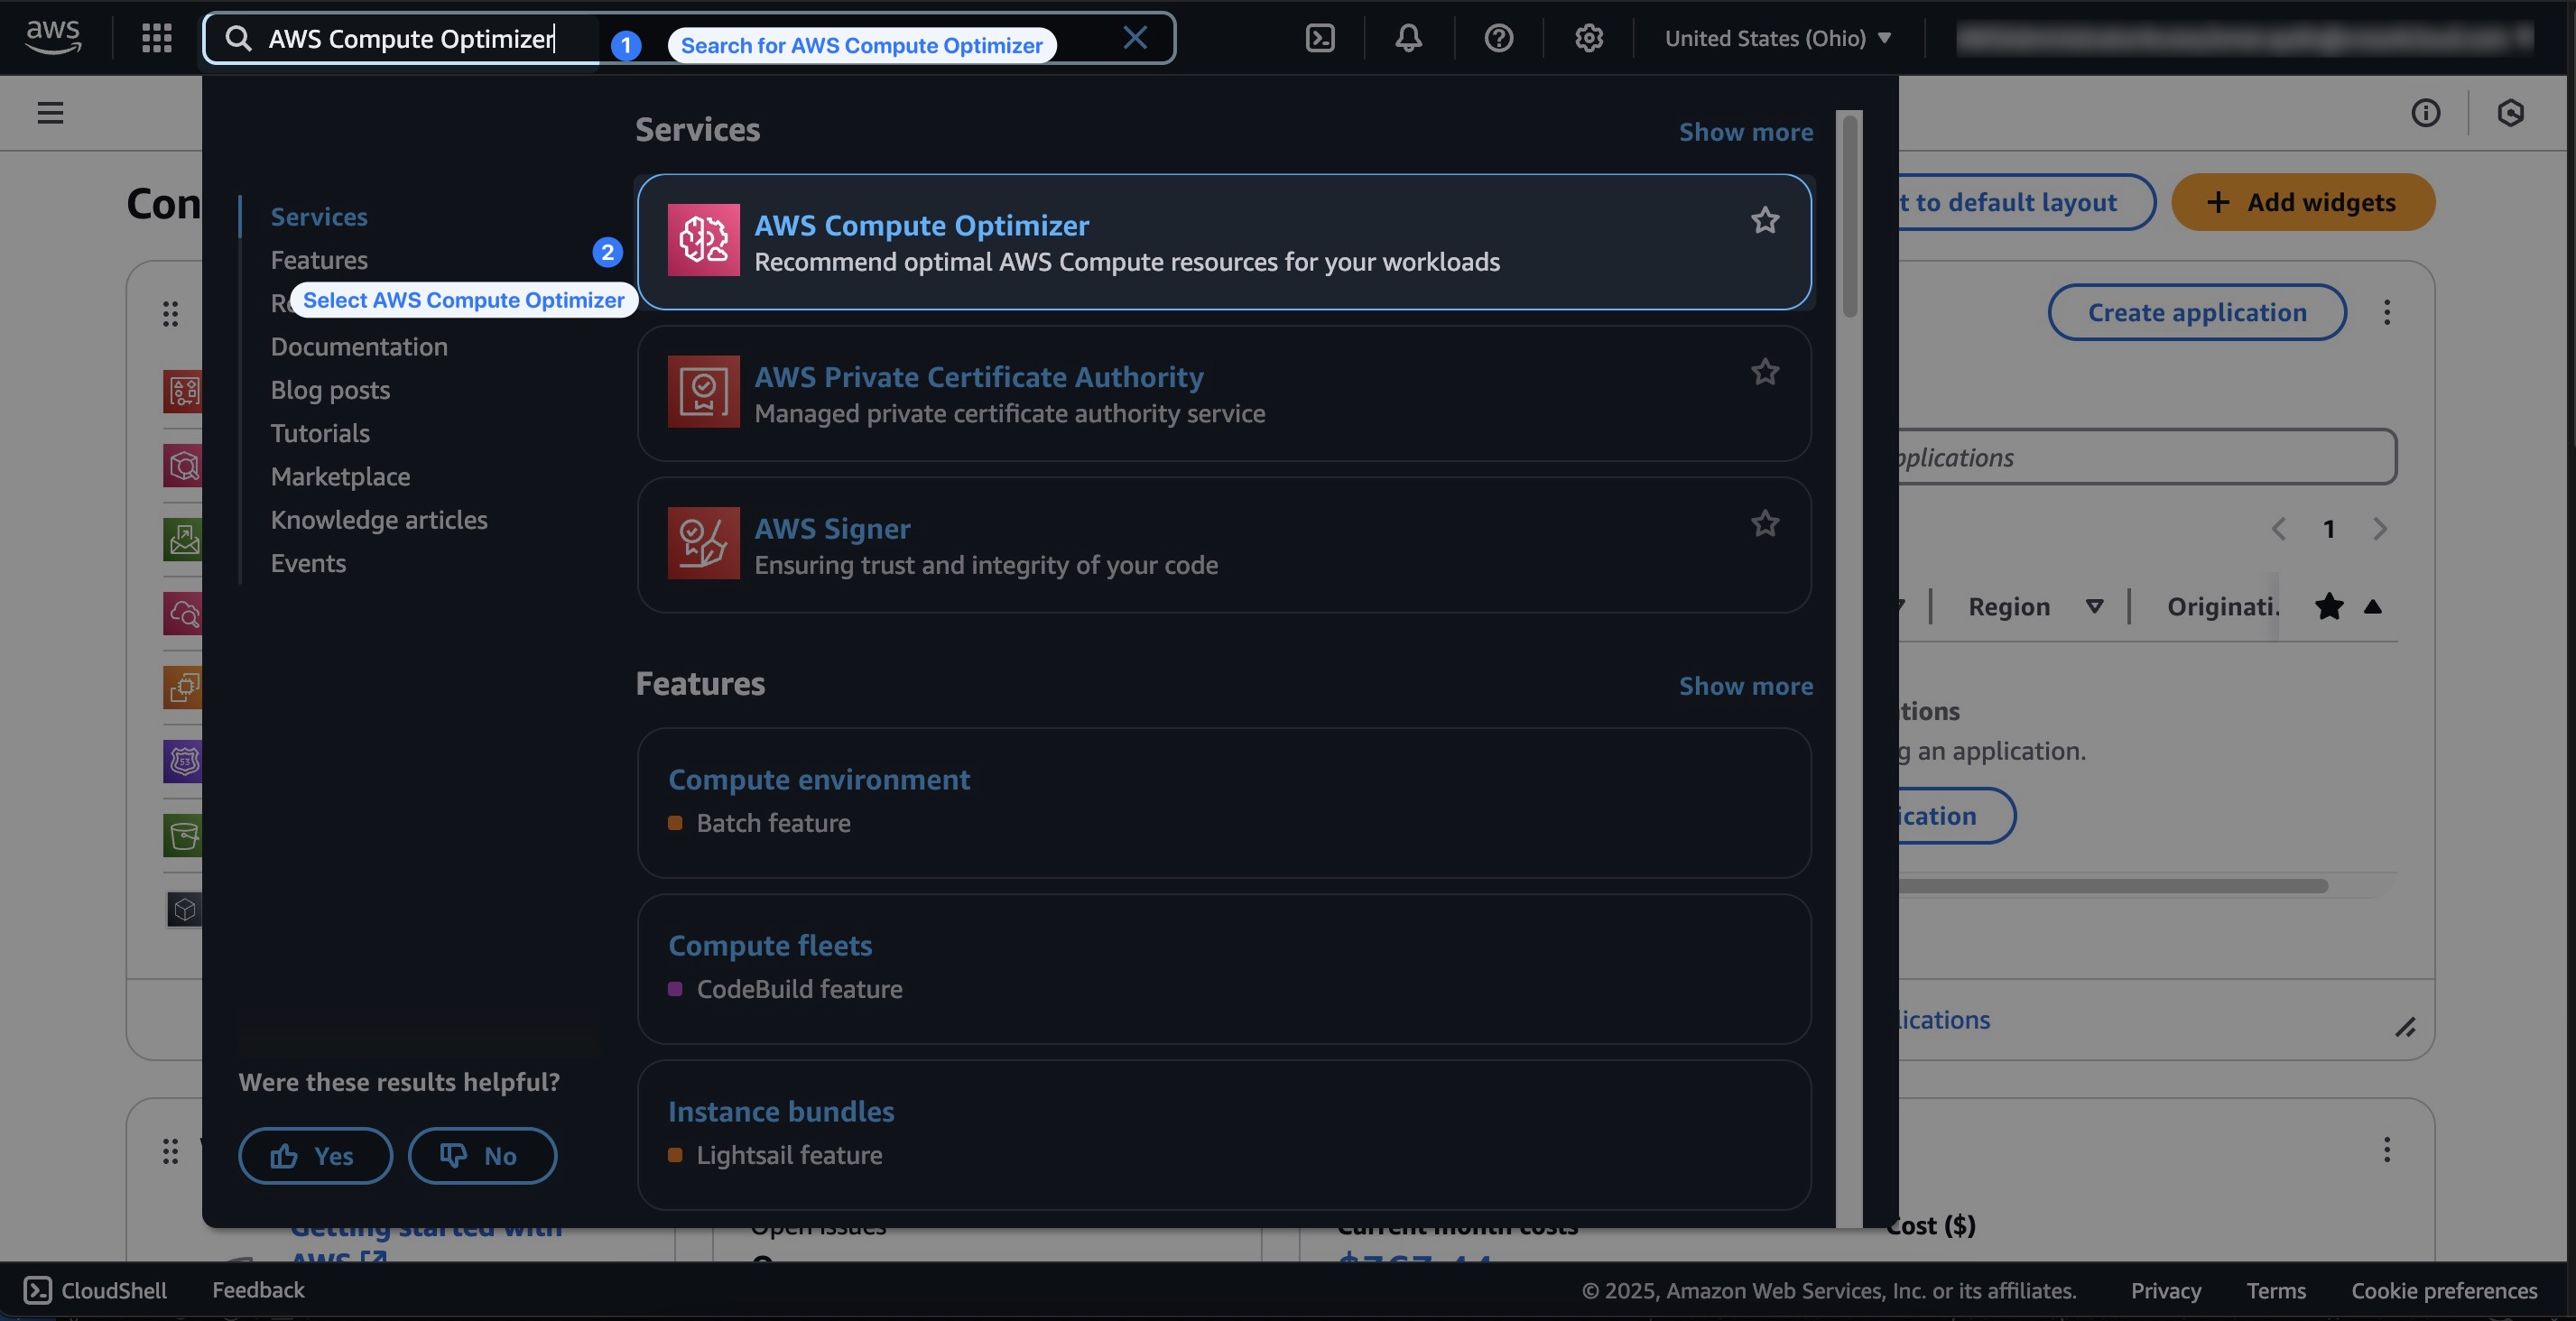
- Visit AWS Compute Optimizer. Service
Show the instruction with images
1. User Creation
-
Go to AWS Console and log in to your account.
-
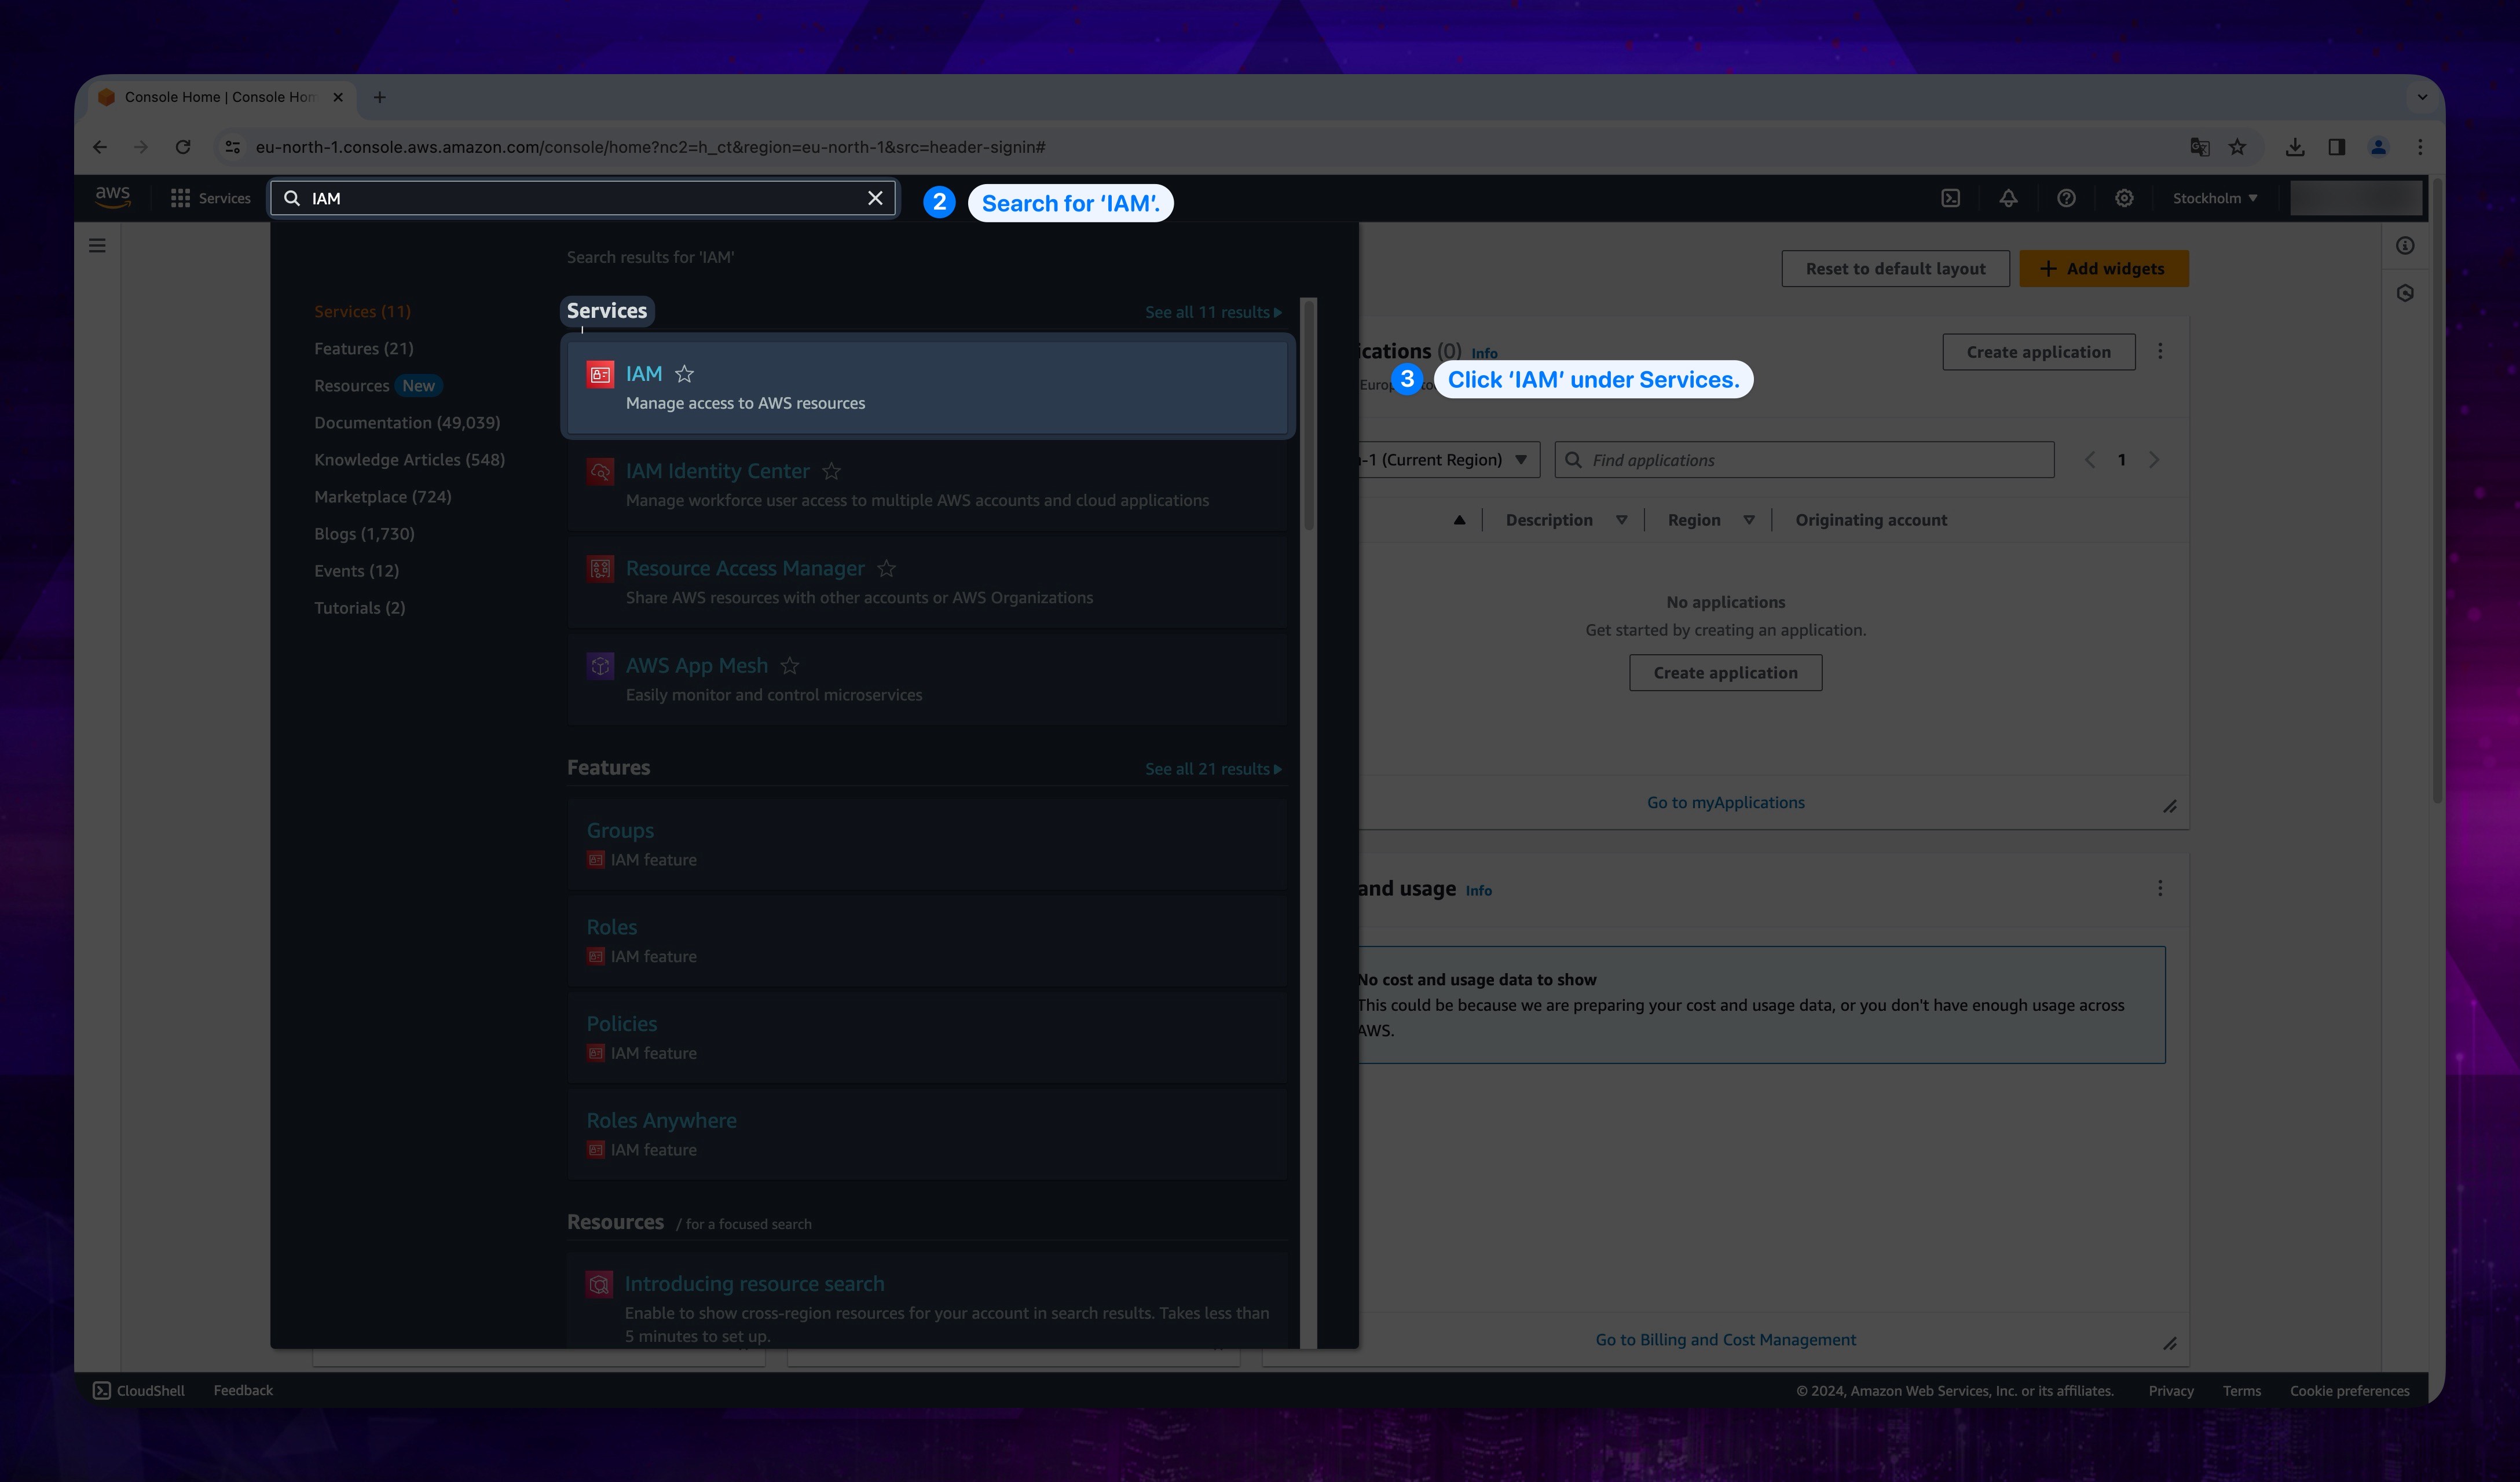
After loged in to your account, go to the search bar and search for IAM.
-
Click IAM under Services.
Show the instruction with images
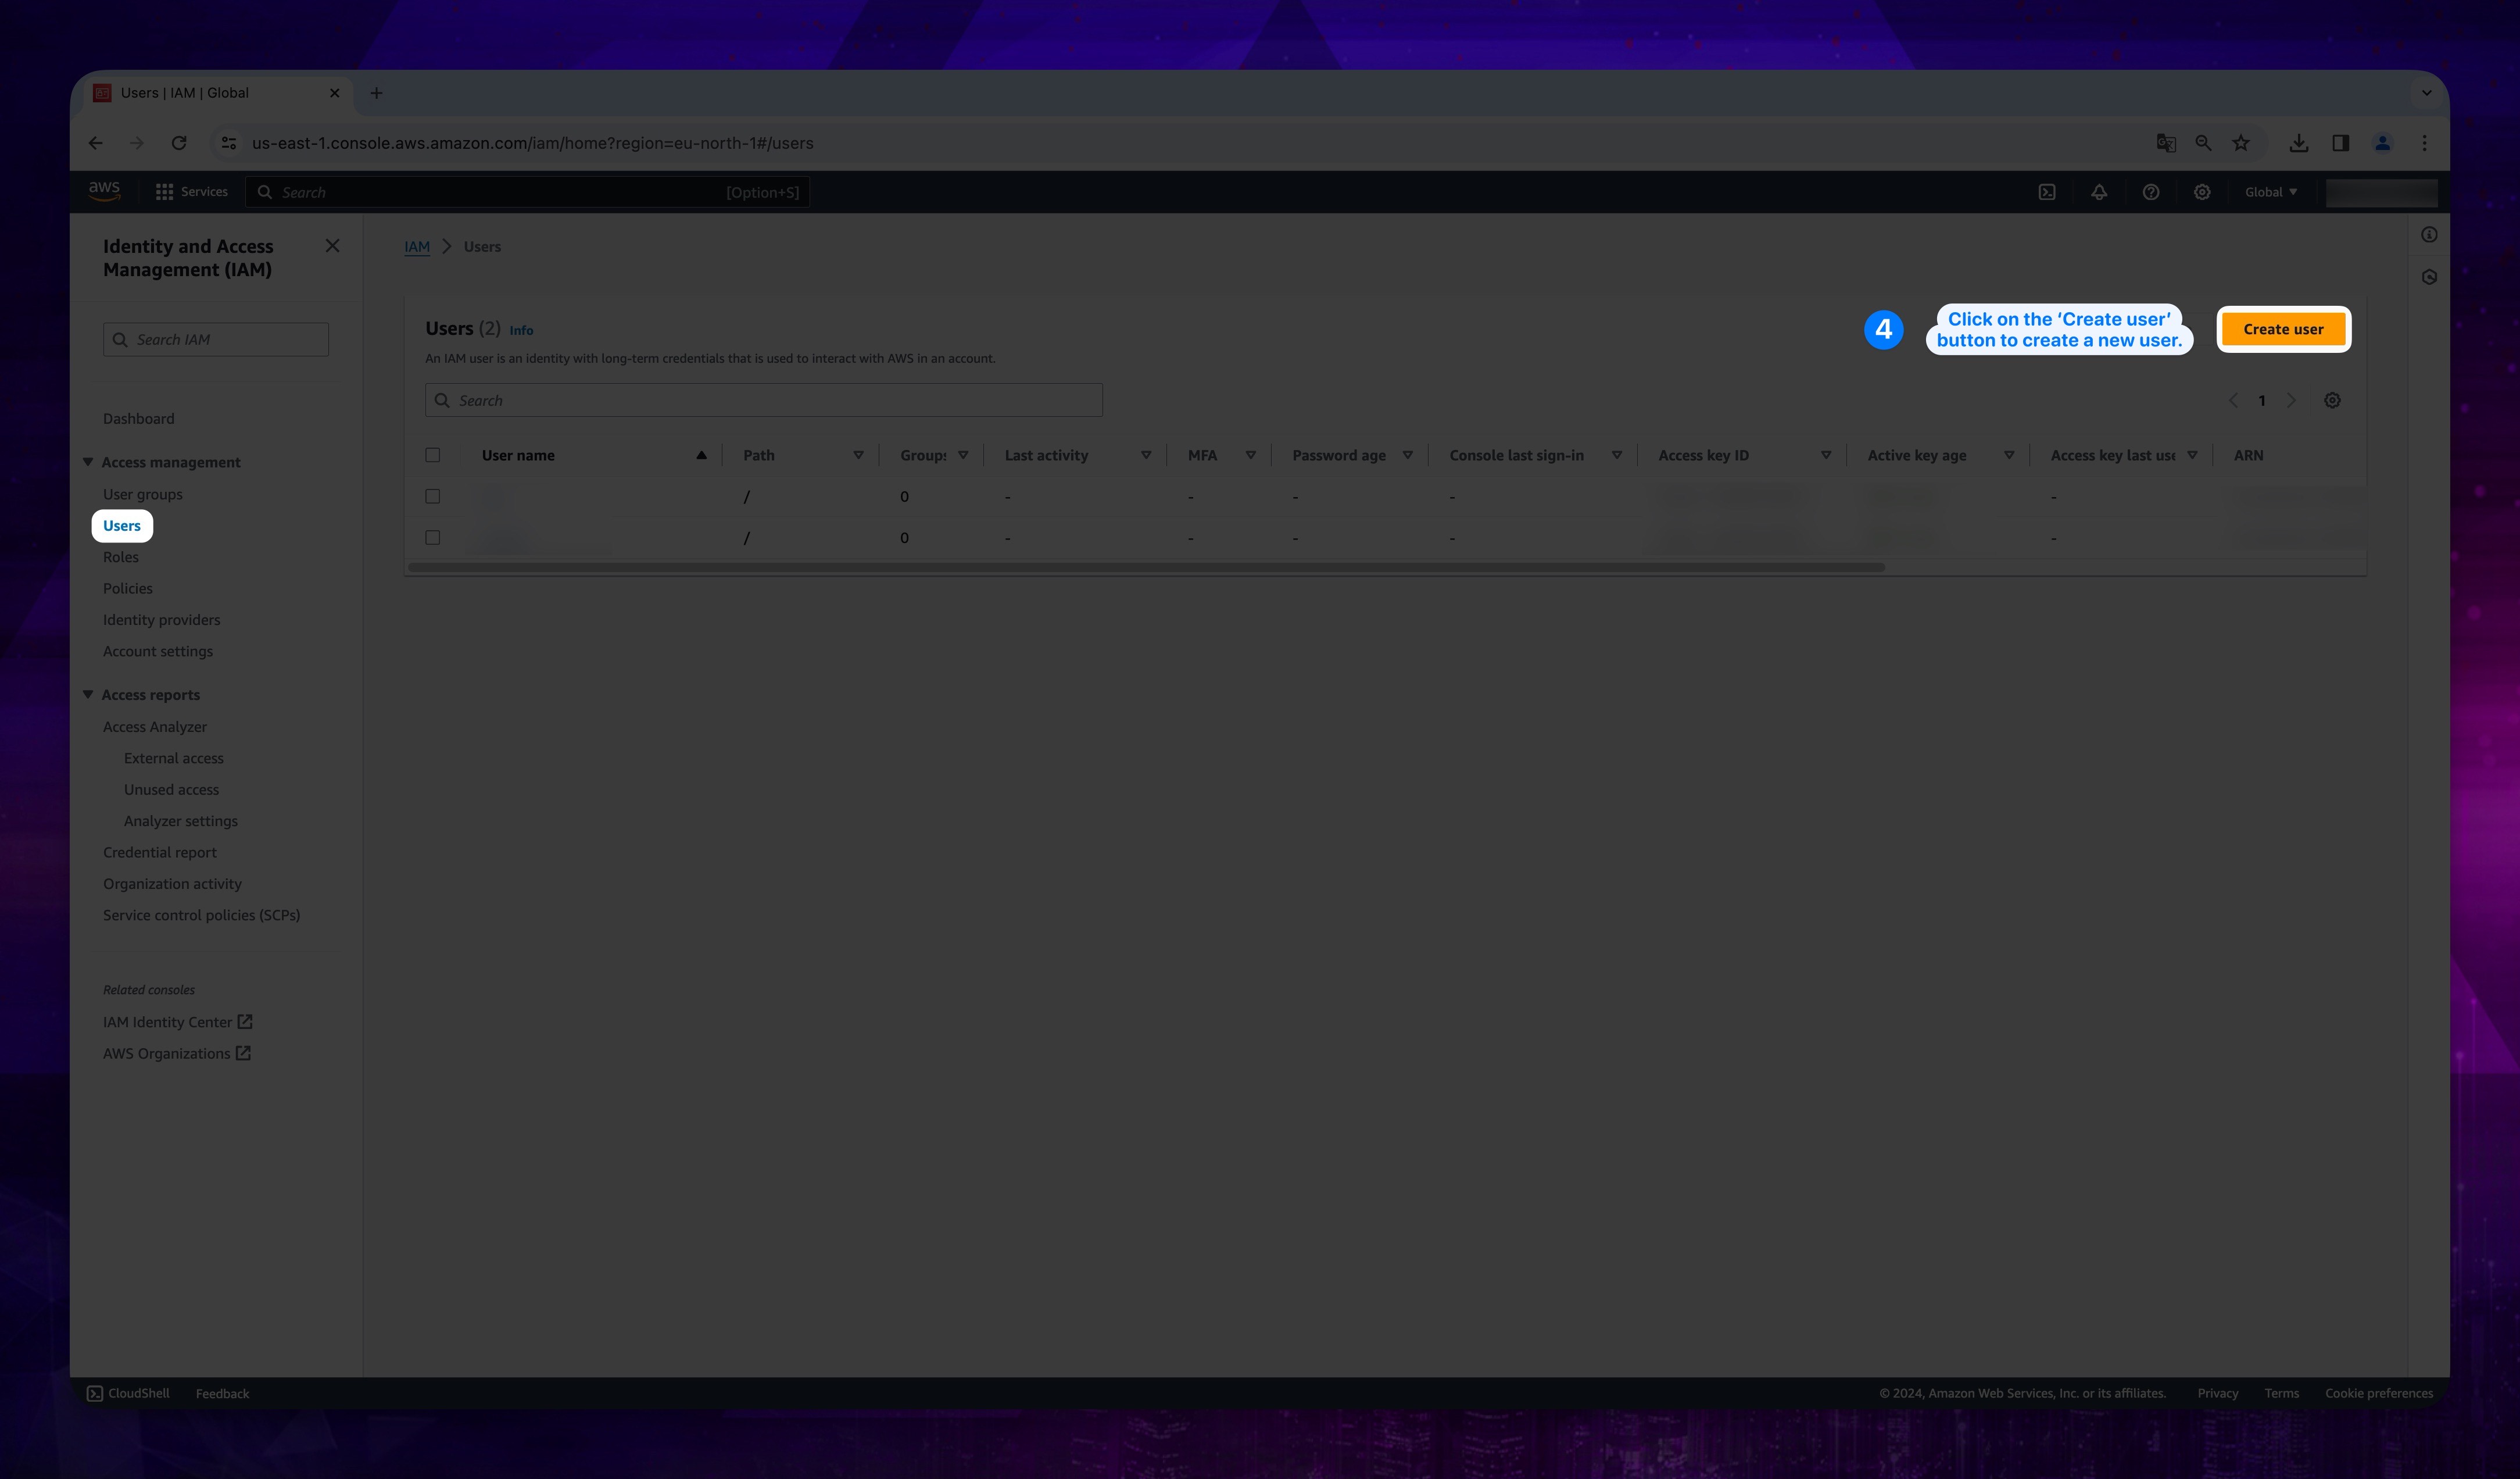
- Click Users on the left and then click Create user.
Show the instruction with images
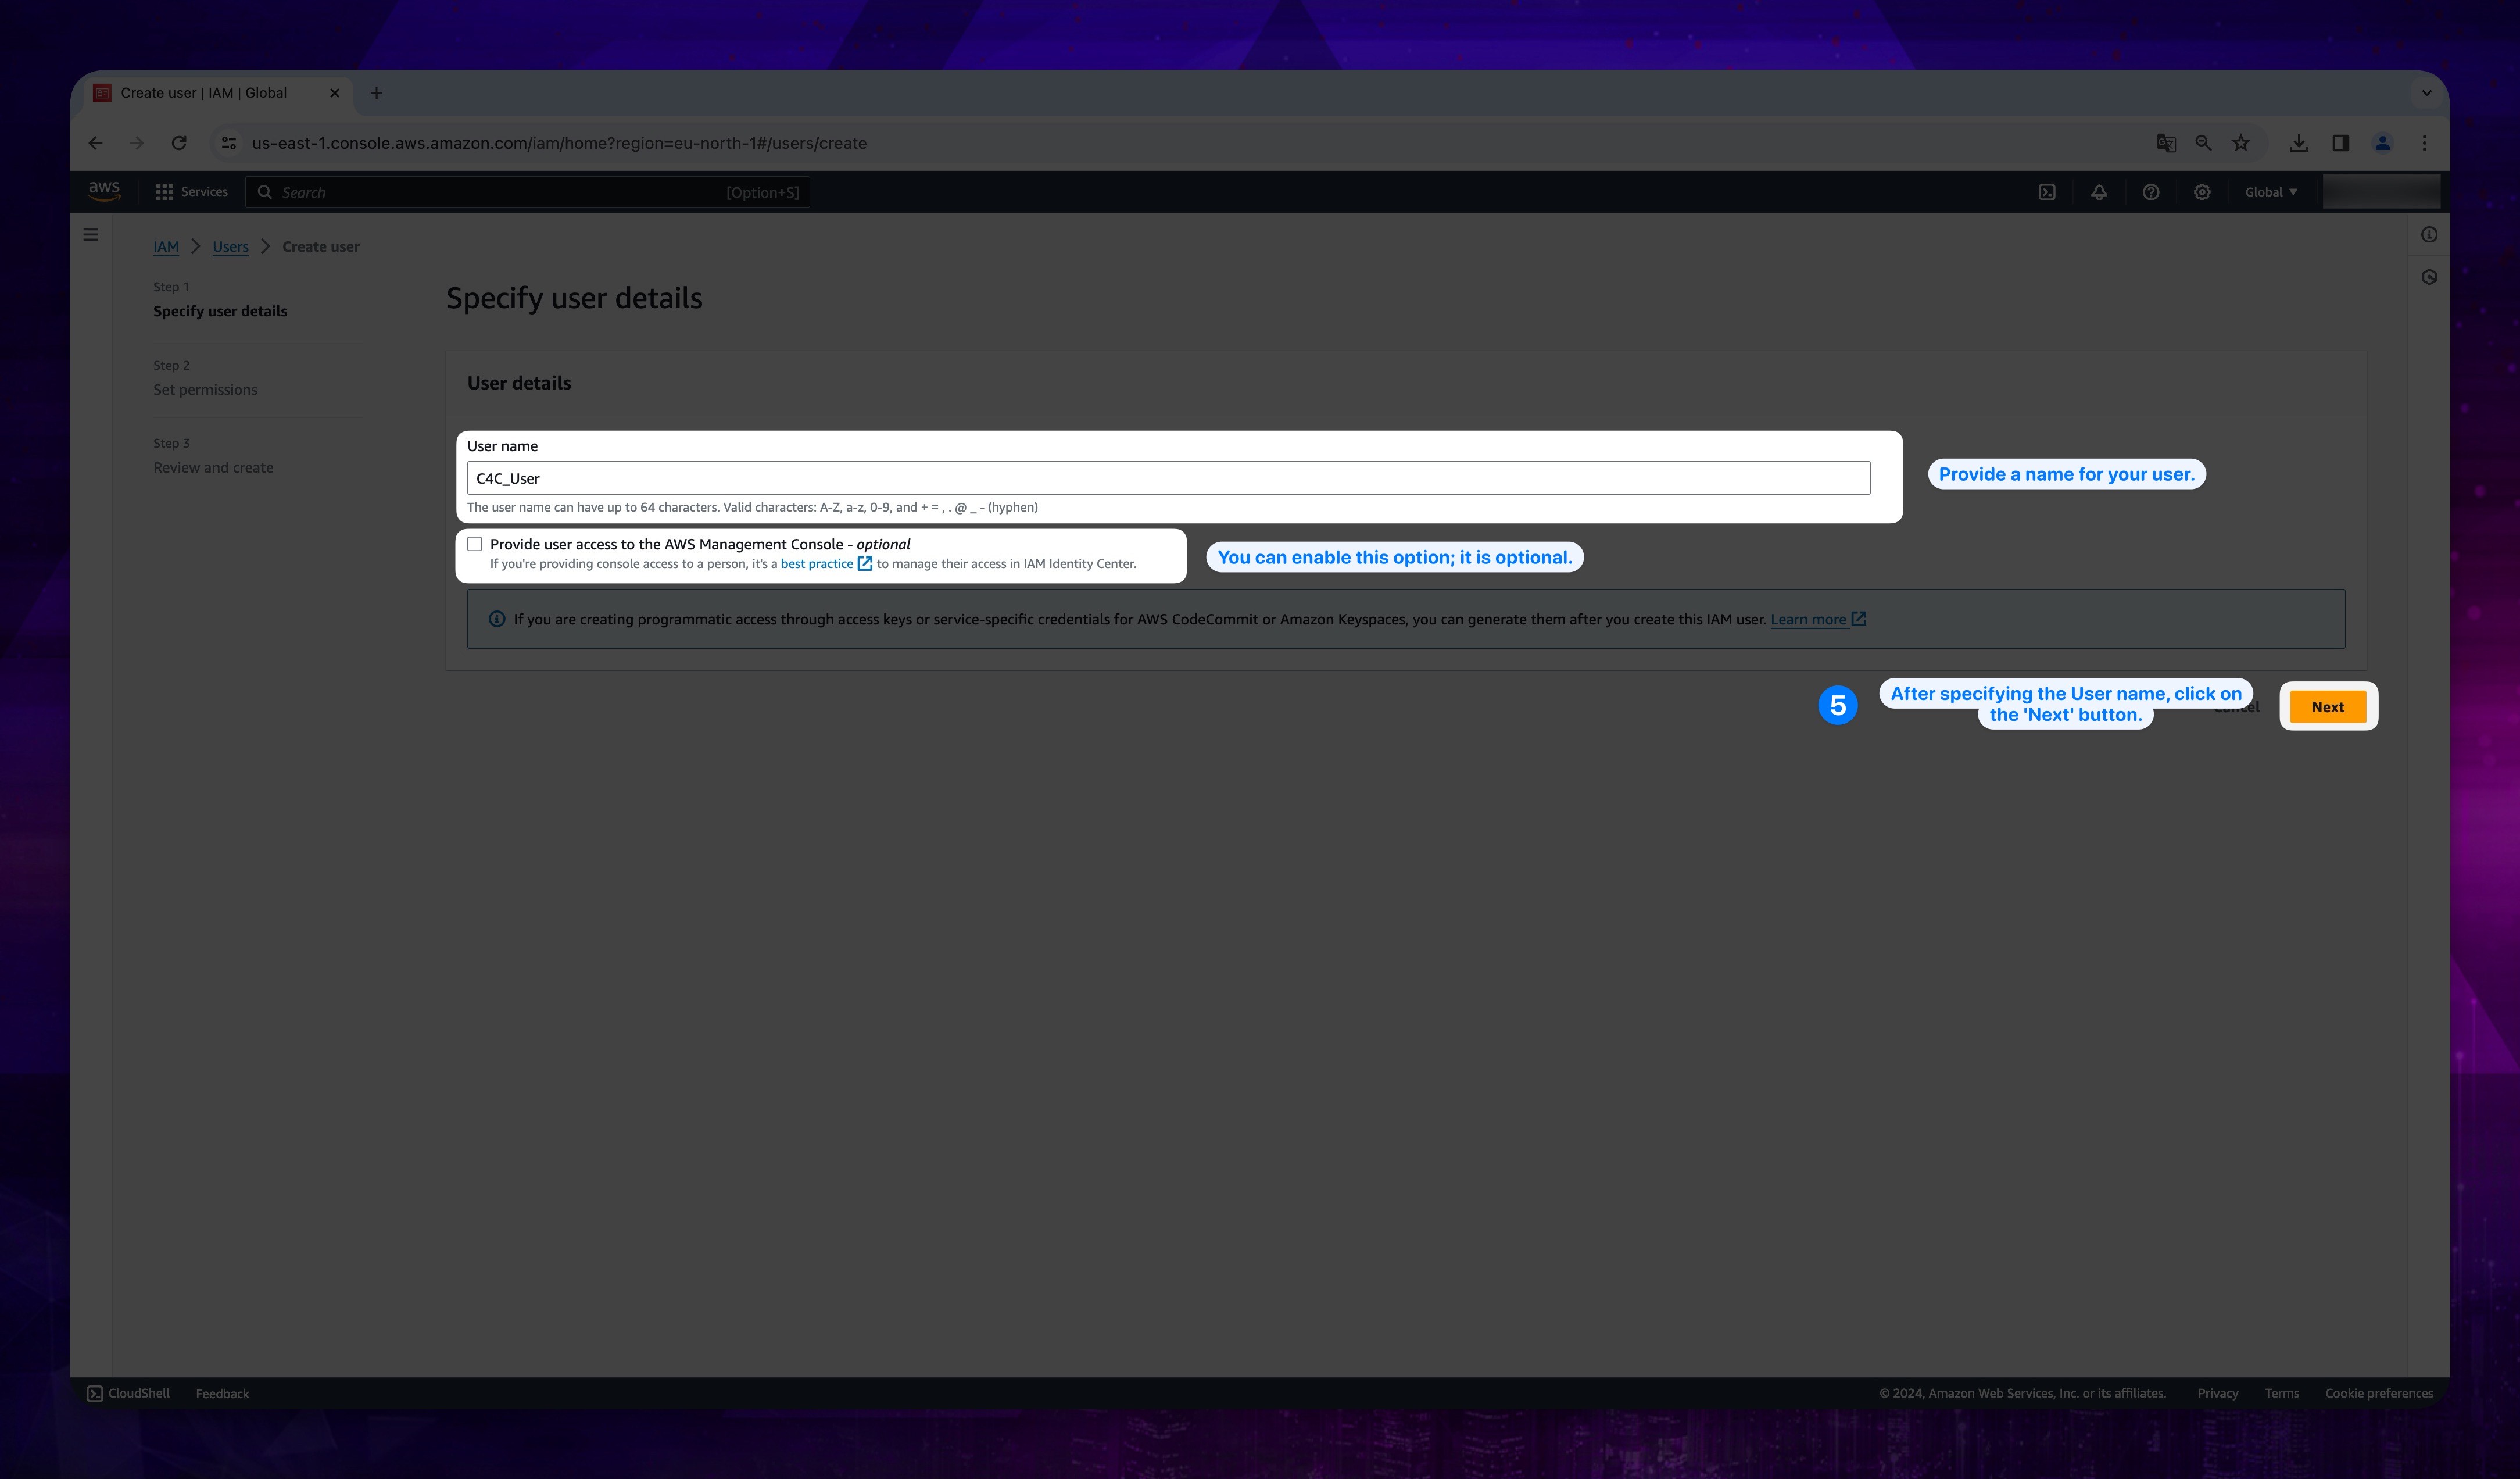
- Click Next button after entering a User name. Optionally you can provide user access to the AWS Management Console.
Show the instruction with images
2. Permission Assignment
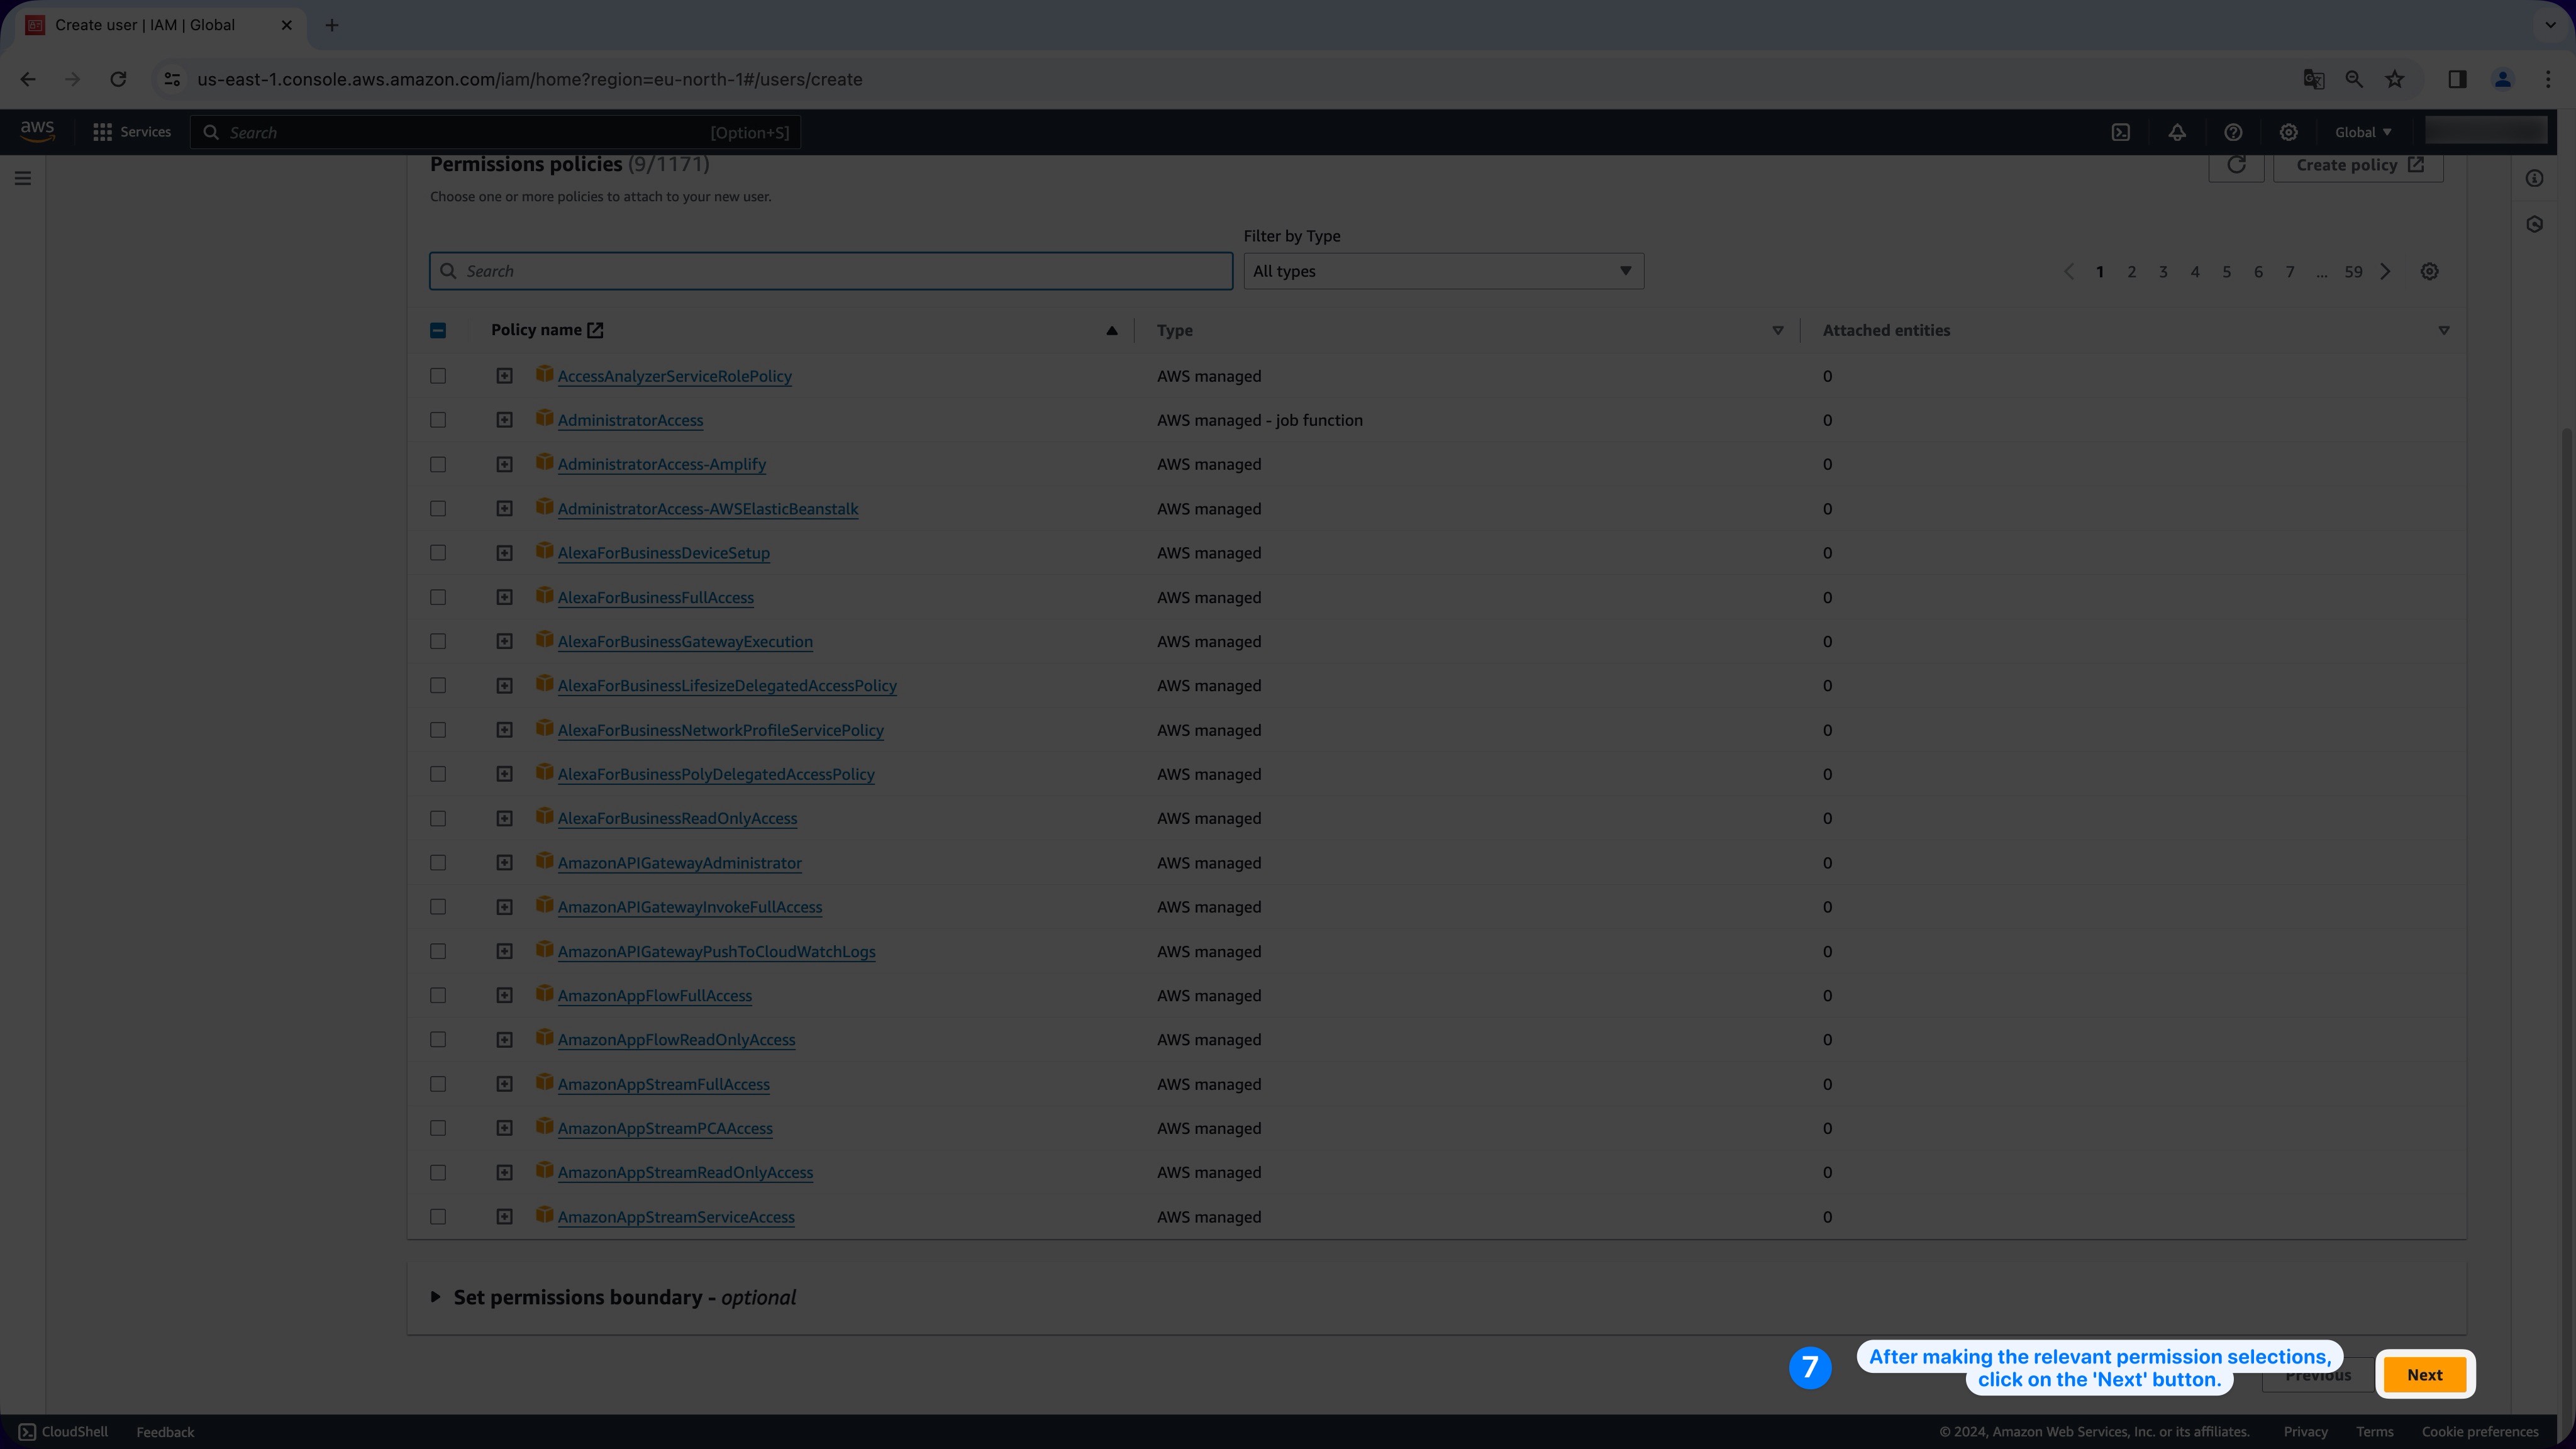
- In the opened screen, it is necessary to grant the user the required permissions. Therefore, click on the Attach Policies button. After this point, you have two options to proceed. The first option is to manually add the permissions listed below one by one. The second option is to select only the AdministratorAccess permission, granting full authorization.
- without Cross4Storage
- with Cross4Storage
| Manuel (Recommended) | Full Access |
|---|---|
| ReadOnlyAccess | AdministratorAccess |
| AmazonEC2FullAccess | |
| AmazonS3FullAccess | |
| IAMReadOnlyAccess | |
| AmazonSNSFullAccess | |
| CloudWatchFullAccessV2 | |
| CloudWatchReadOnlyAccess |
Show the instruction with images
| Manuel (Recommended) | Full Access |
|---|---|
| ReadOnlyAccess | AdministratorAccess |
| AmazonEC2FullAccess | |
| AmazonS3FullAccess | |
| IAMReadOnlyAccess | |
| AmazonSNSFullAccess | |
| CloudWatchFullAccessV2 | |
| CloudWatchReadOnlyAccess | |
| AmazonEC2ContainerRegistryFullAccess | |
| AmazonECS_FullAccess | |
| AmazonEventBridgeFullAccess | |
| AmazonSQSFullAccess | |
| AWSCertificateManagerFullAccess | |
| AWSDataSyncFullAccess | |
| AWSLambda_FullAccess | |
| CloudFrontFullAccess | |
| CloudWatchLogsFullAccess | |
| CloudWatchFullAccess | |
| IAMFullAccess | |
| SecretsManagerReadWrite |
Show the instruction with images
For more detailed information about the Policies and permissions you can check AWS Documentation.
- Click on the Next button at the bottom of the page.
Show the instruction with images
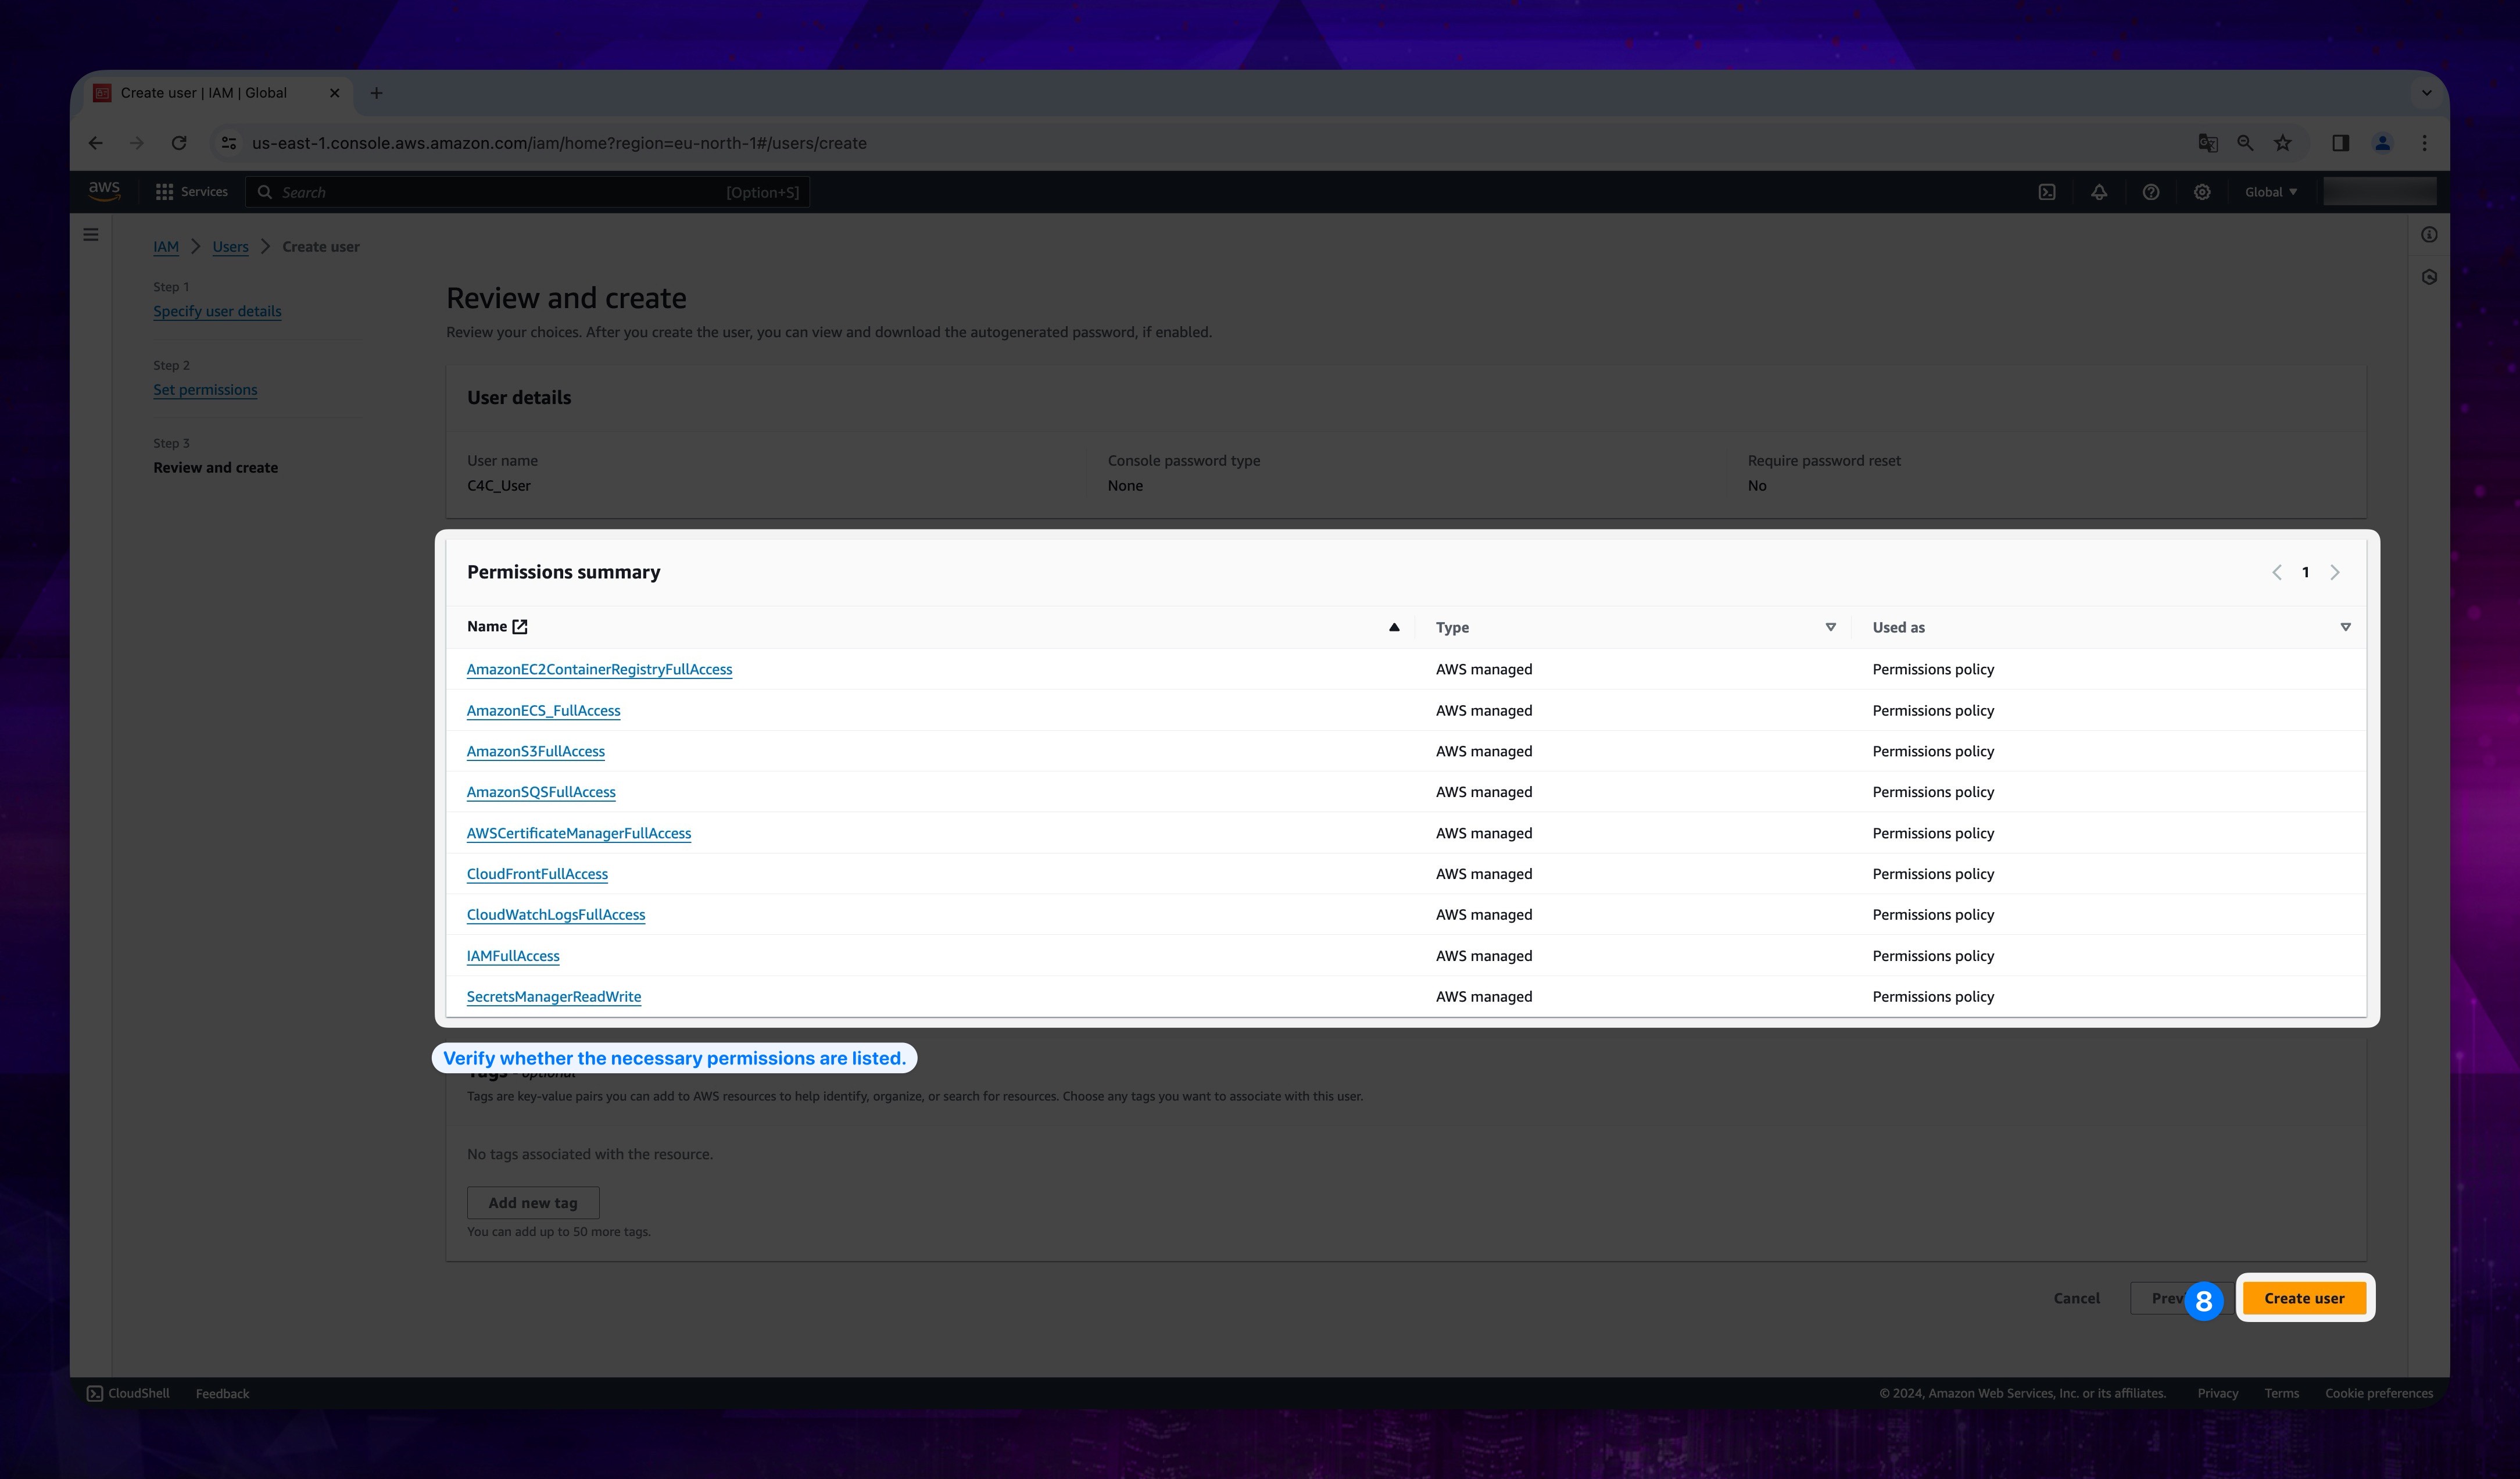
- After verifying the presence of the necessary permissions under the Permission Summary tab on the opened page, finally, click the Create User button.
Show the instruction with images
After completing these steps, you should have successfully created the user with the specified permissions.
You need to create an inline policy by following through guidance below so that you use those credentials properly.
3. Inline Policy Creation
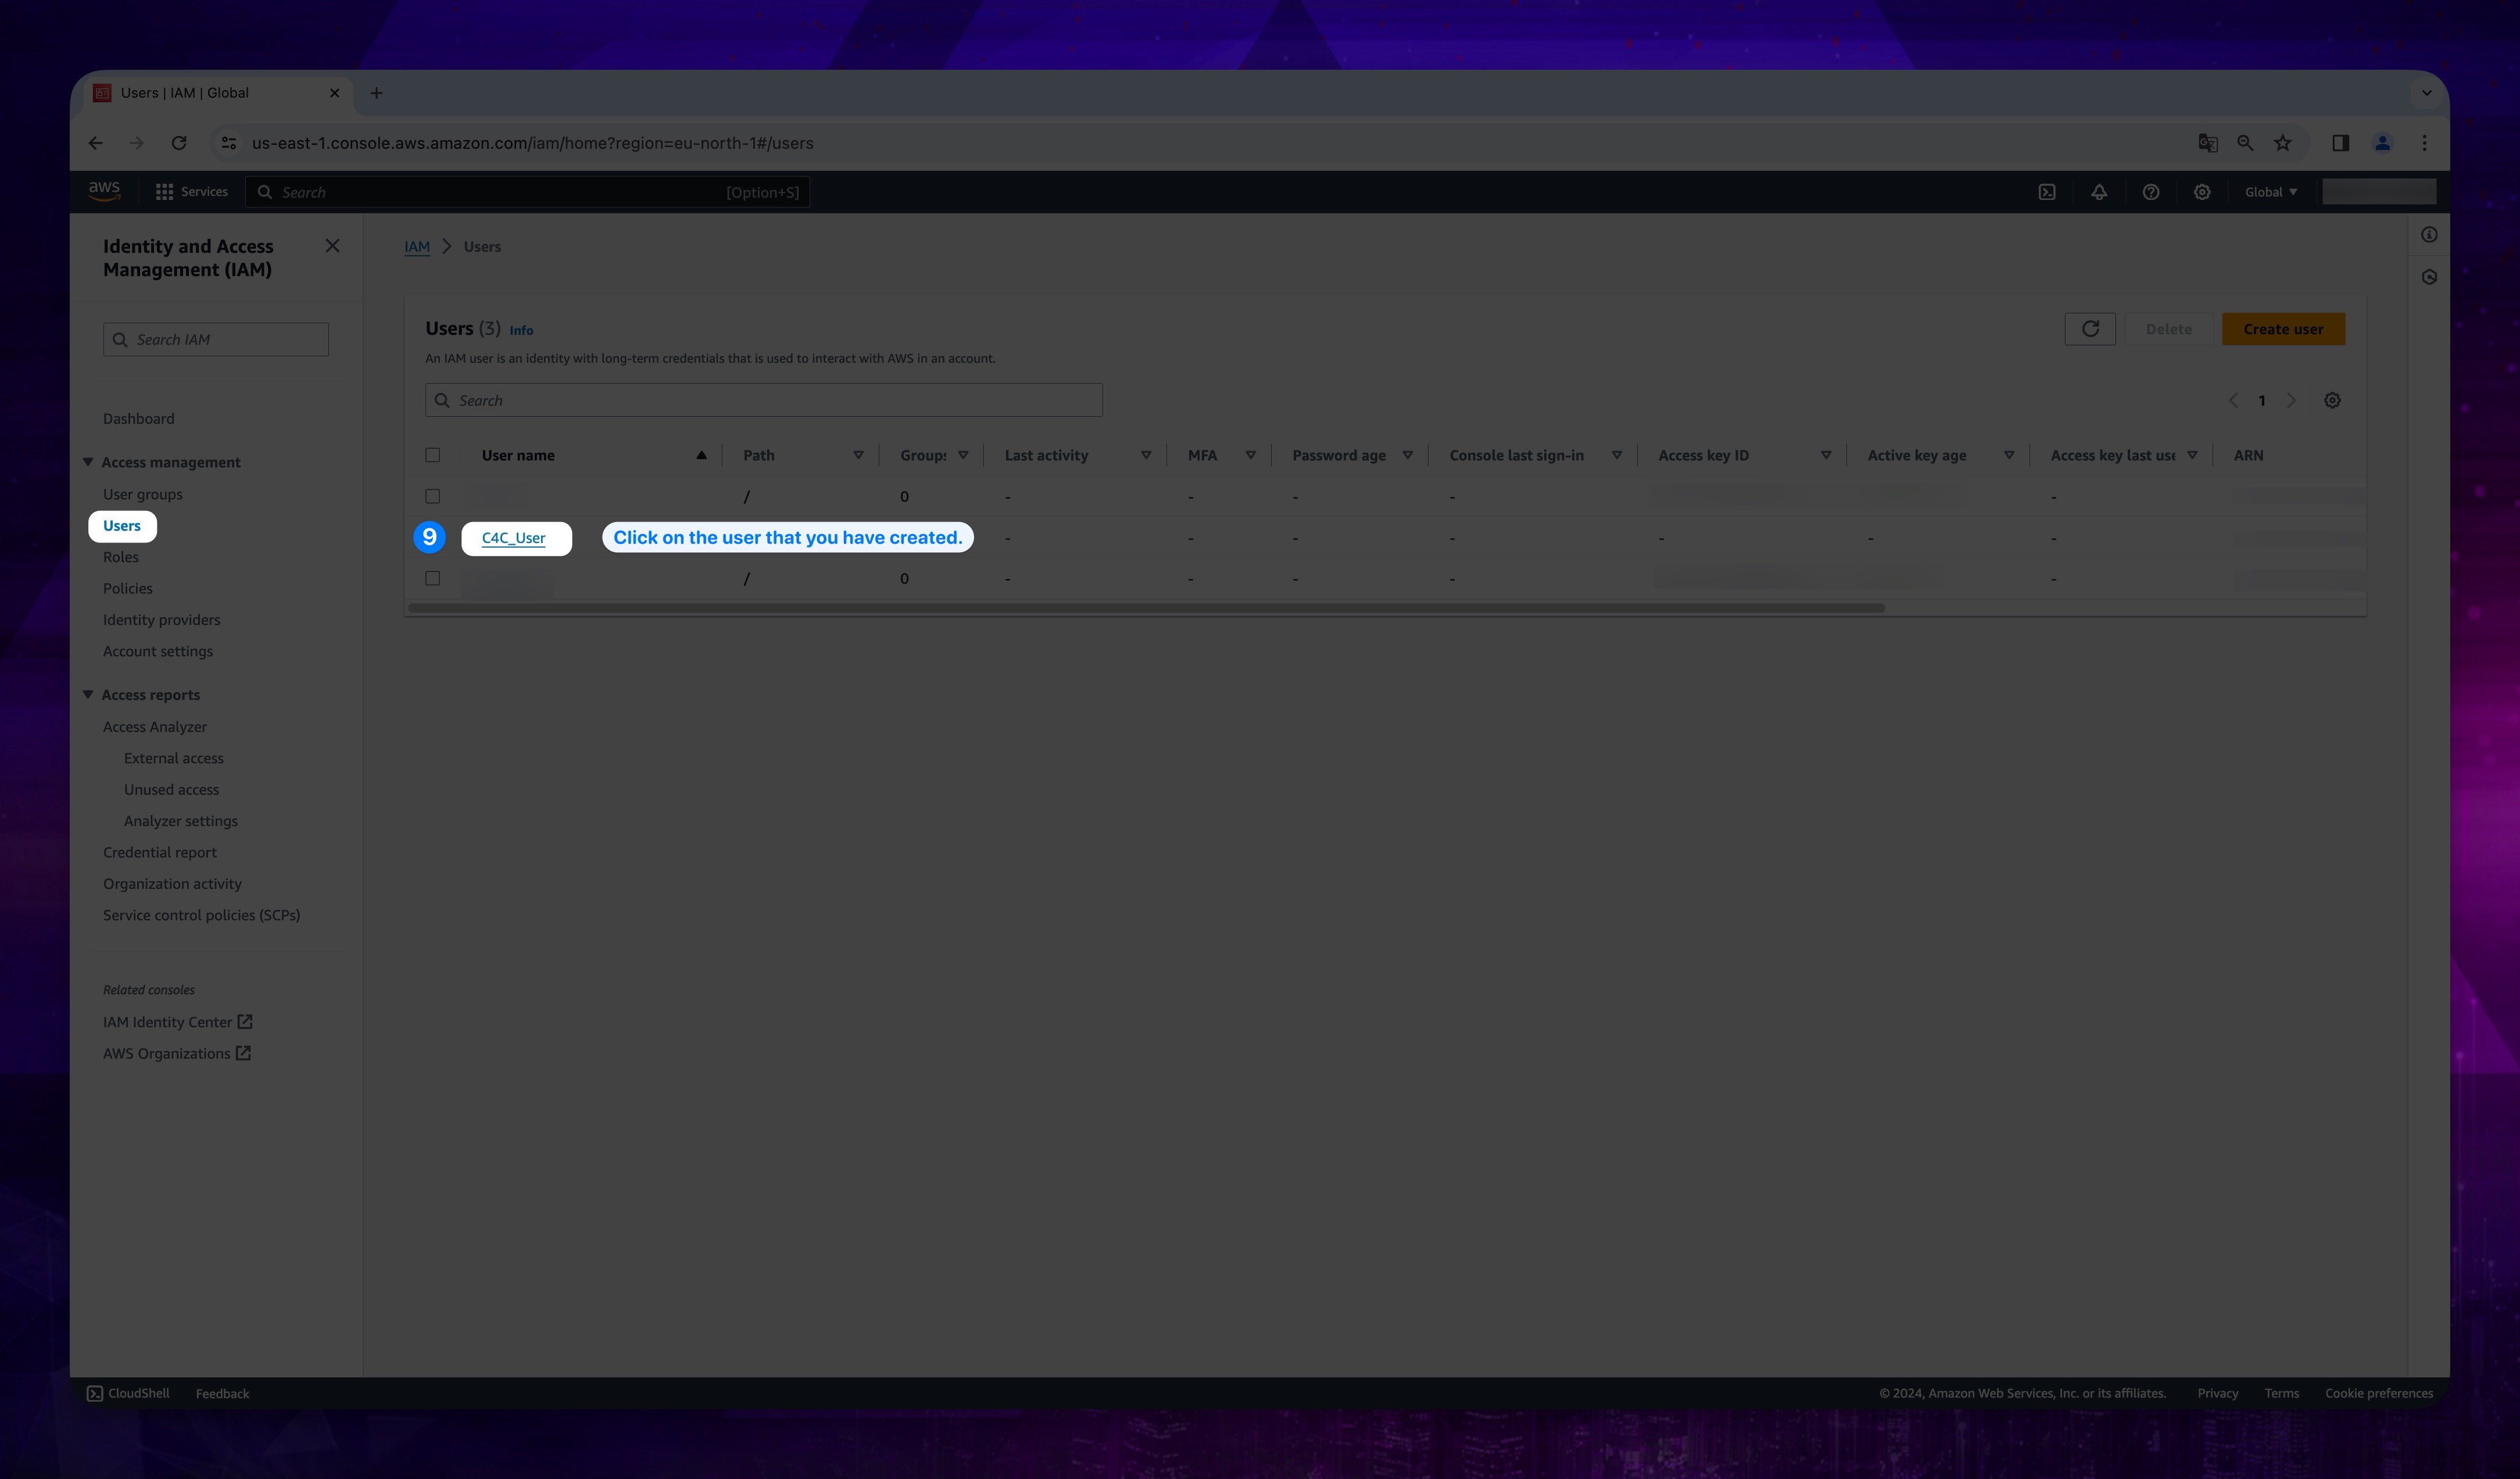
- From the list of users, click on the user that you have created.
Show the instruction with images
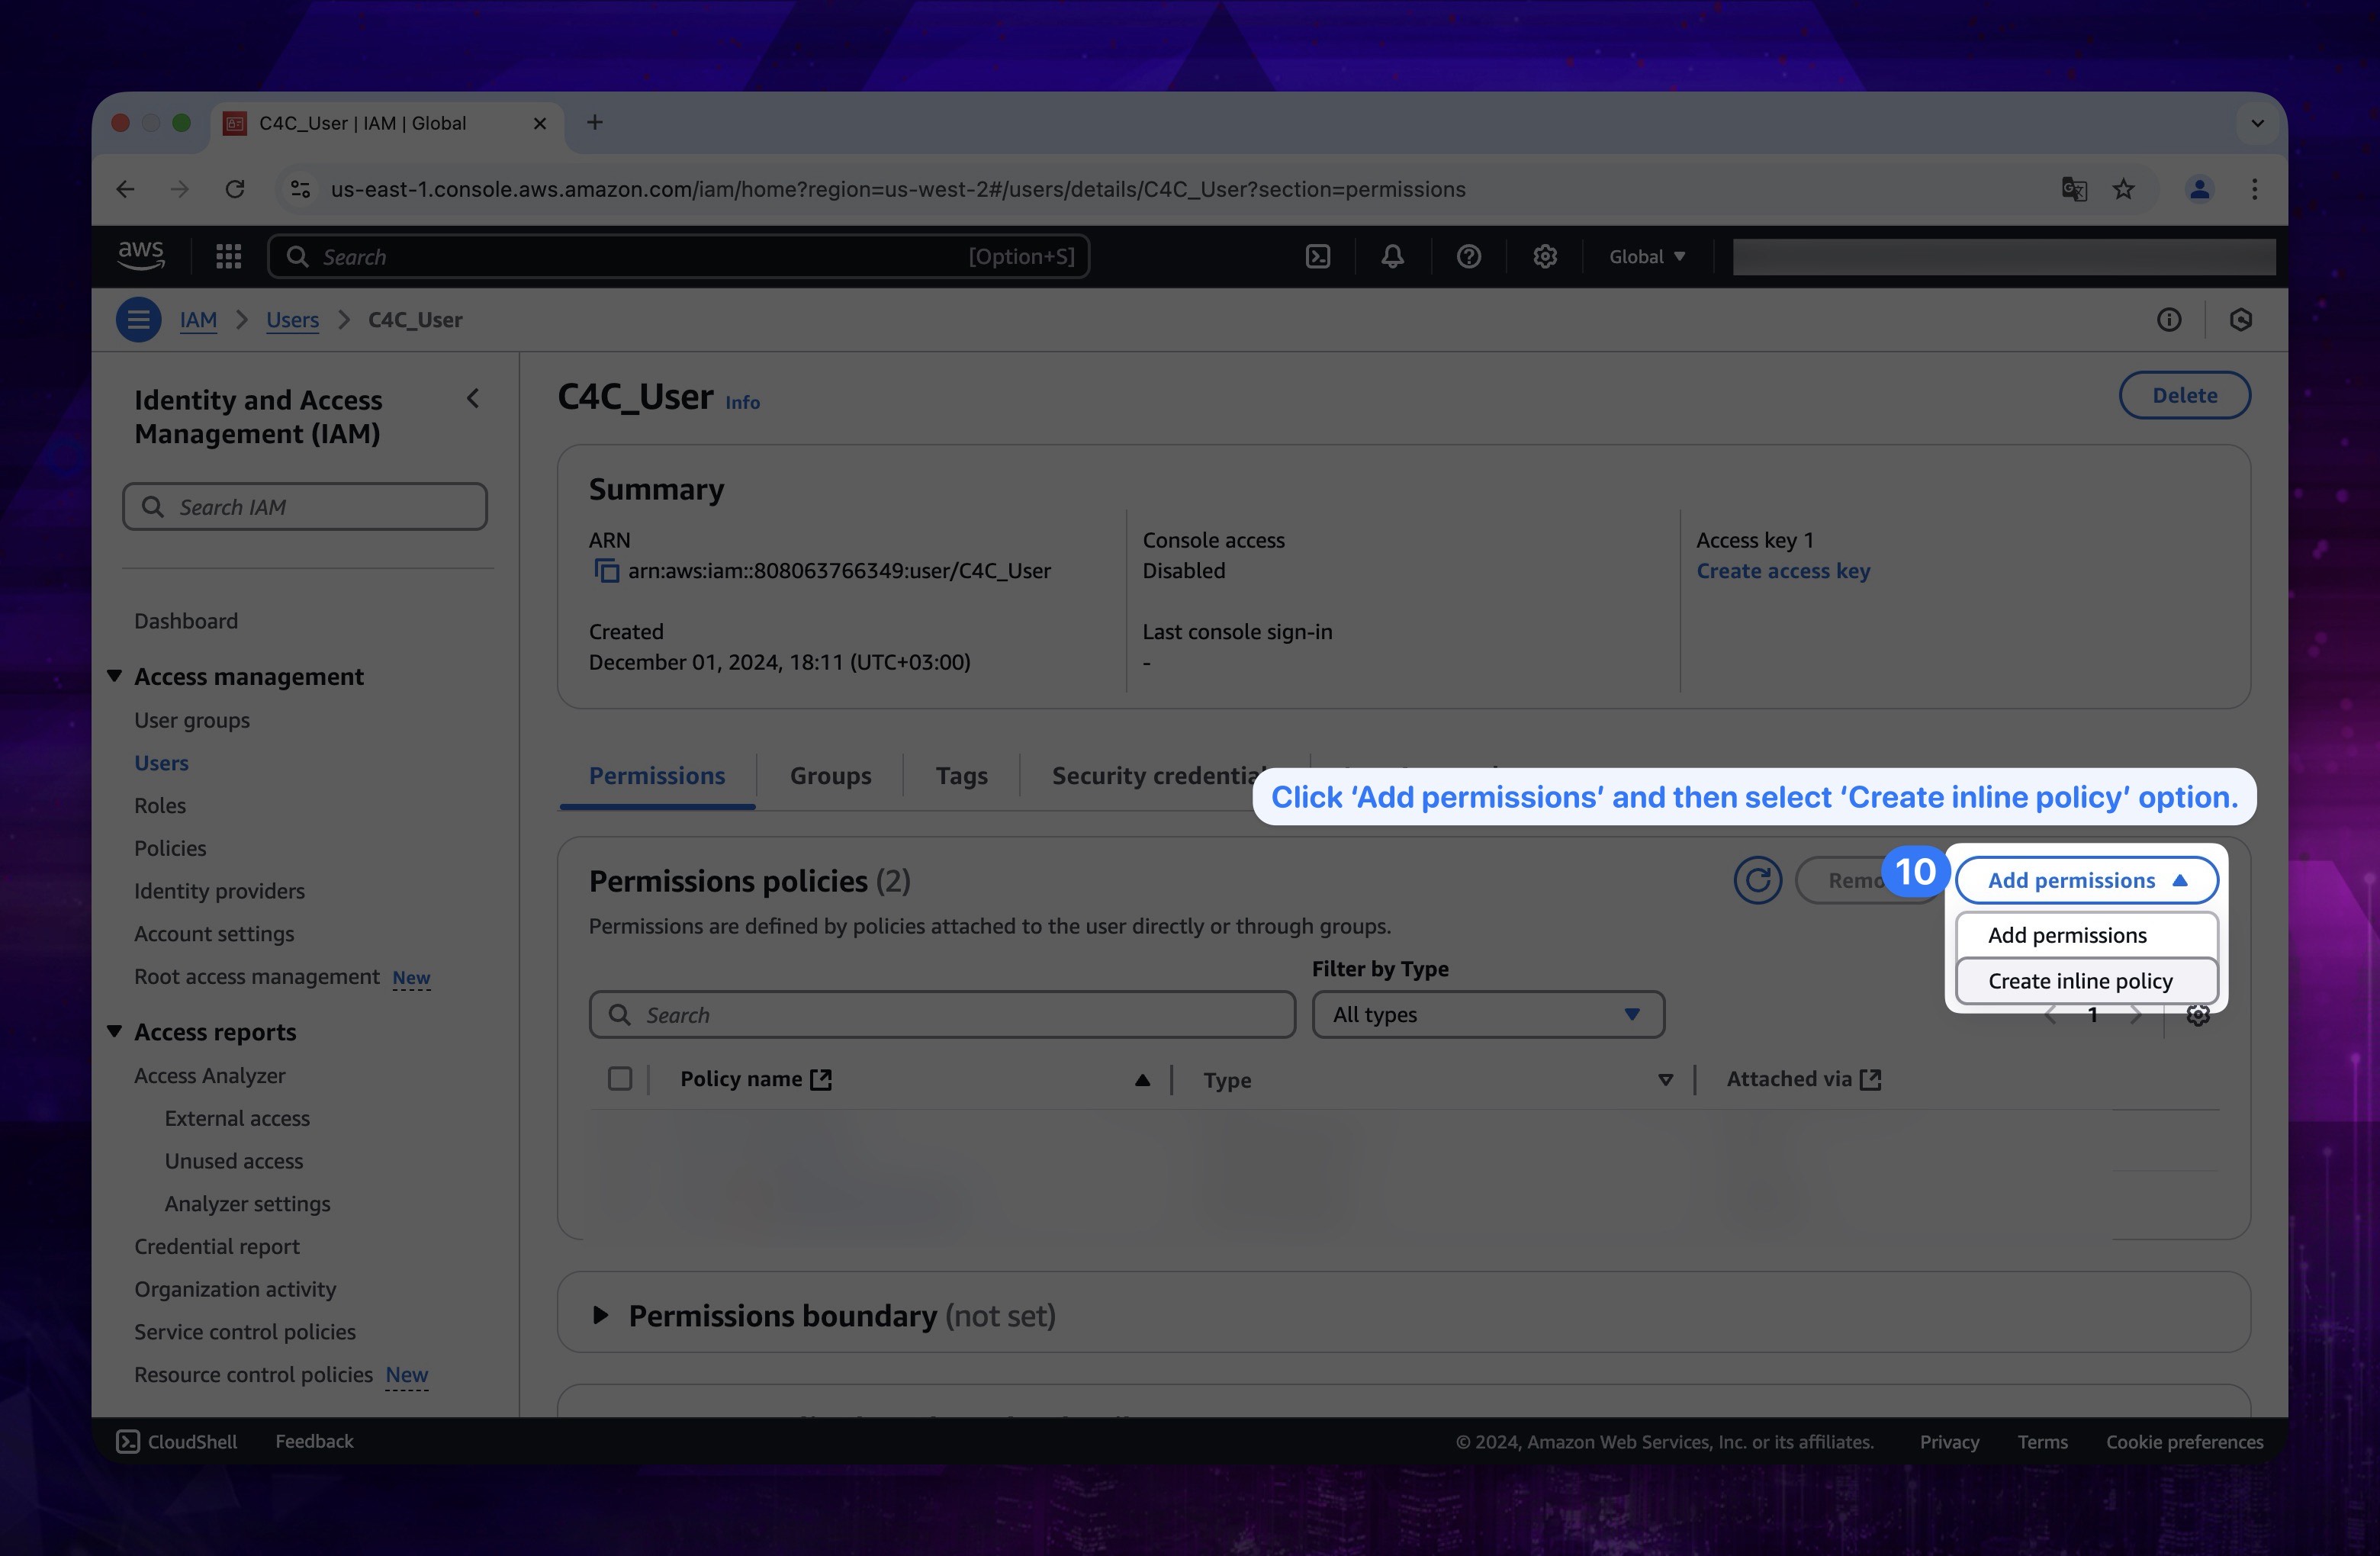
- On the page that you see, click on the Add Permissions and Create Inline Policy.
Show the instruction with images
- Click JSON button on the right top.
Show the instruction with images
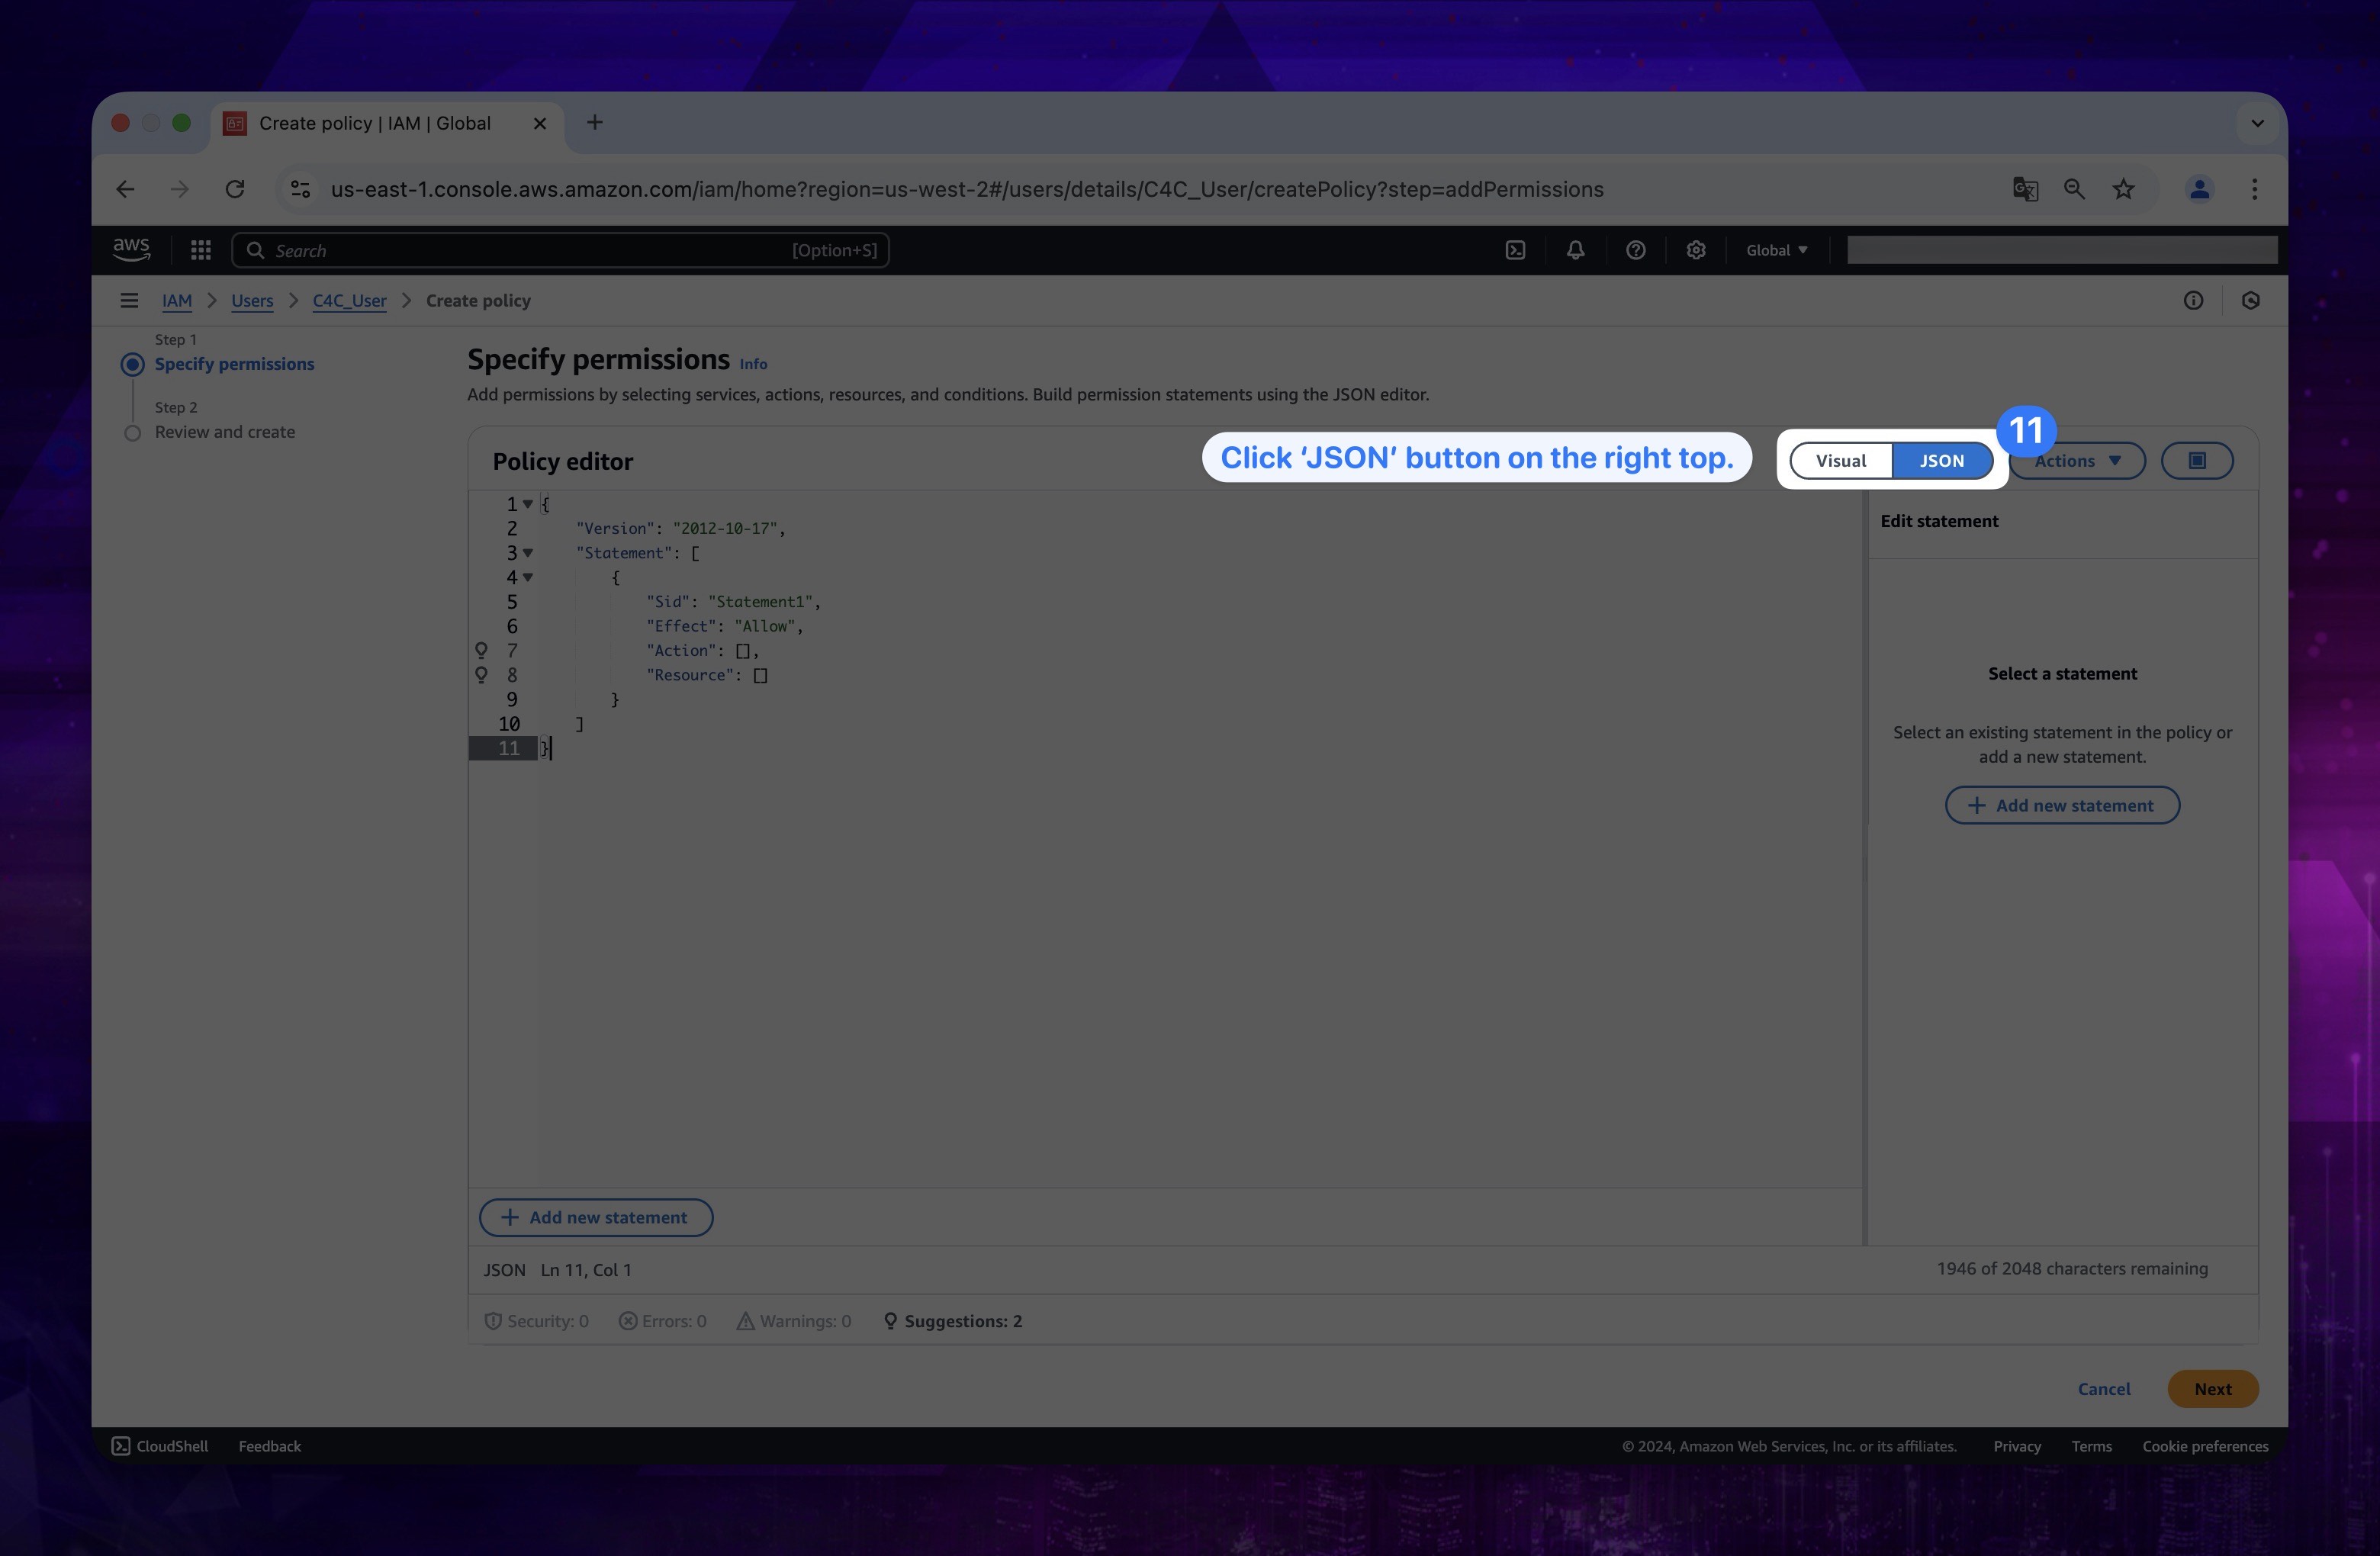
- Then click on the JSON button on the page that opens. Delete the existing code and copy-paste the following code in its place. And then Click Next button.
{
    "Version": "2012-10-17",
    "Statement": [
        {
            "Sid": "VisualEditor0",
            "Effect": "Allow",
            "Action": "ce:GetCostAndUsage",
            "Resource": "*"
        },
        {
            "Sid": "VisualEditor1",
            "Effect": "Allow",
            "Action": "ce:GetCostForecast",
            "Resource": "*"
        },
        {
            "Sid": "CreateCurExportsInDataExports",
            "Effect": "Allow",
            "Action": "bcm-data-exports:*",
            "Resource": "*"
        },
        {
            "Sid": "CurDataAccess",
            "Effect": "Allow",
            "Action": [
                "cur:PutReportDefinition"
            ],
            "Resource": "*"
        },
        {
            "Sid": "listS3",
            "Effect": "Allow",
            "Action": [
                "s3:ListAllMyBuckets"
            ],
            "Resource": "*"
        },
        {
            "Sid": "CurDataAccess1",
            "Effect": "Allow",
            "Action": [
                "s3:*"
            ],
            "Resource": "arn:aws:s3:::c4ccostusage*"
        },
        {
            "Sid": "Statement1",
            "Effect": "Allow",
            "Action": [
                "resource-explorer-2:Search",
                "resource-explorer-2:GetDefaultView",
                "tag:GetResources",
                "servicequotas:ListServices",
                "servicequotas:ListServiceQuotas",
                "servicequotas:GetServiceQuota"
            ],
            "Resource": ["*"]
        }
    ]
}
Show the instruction with images
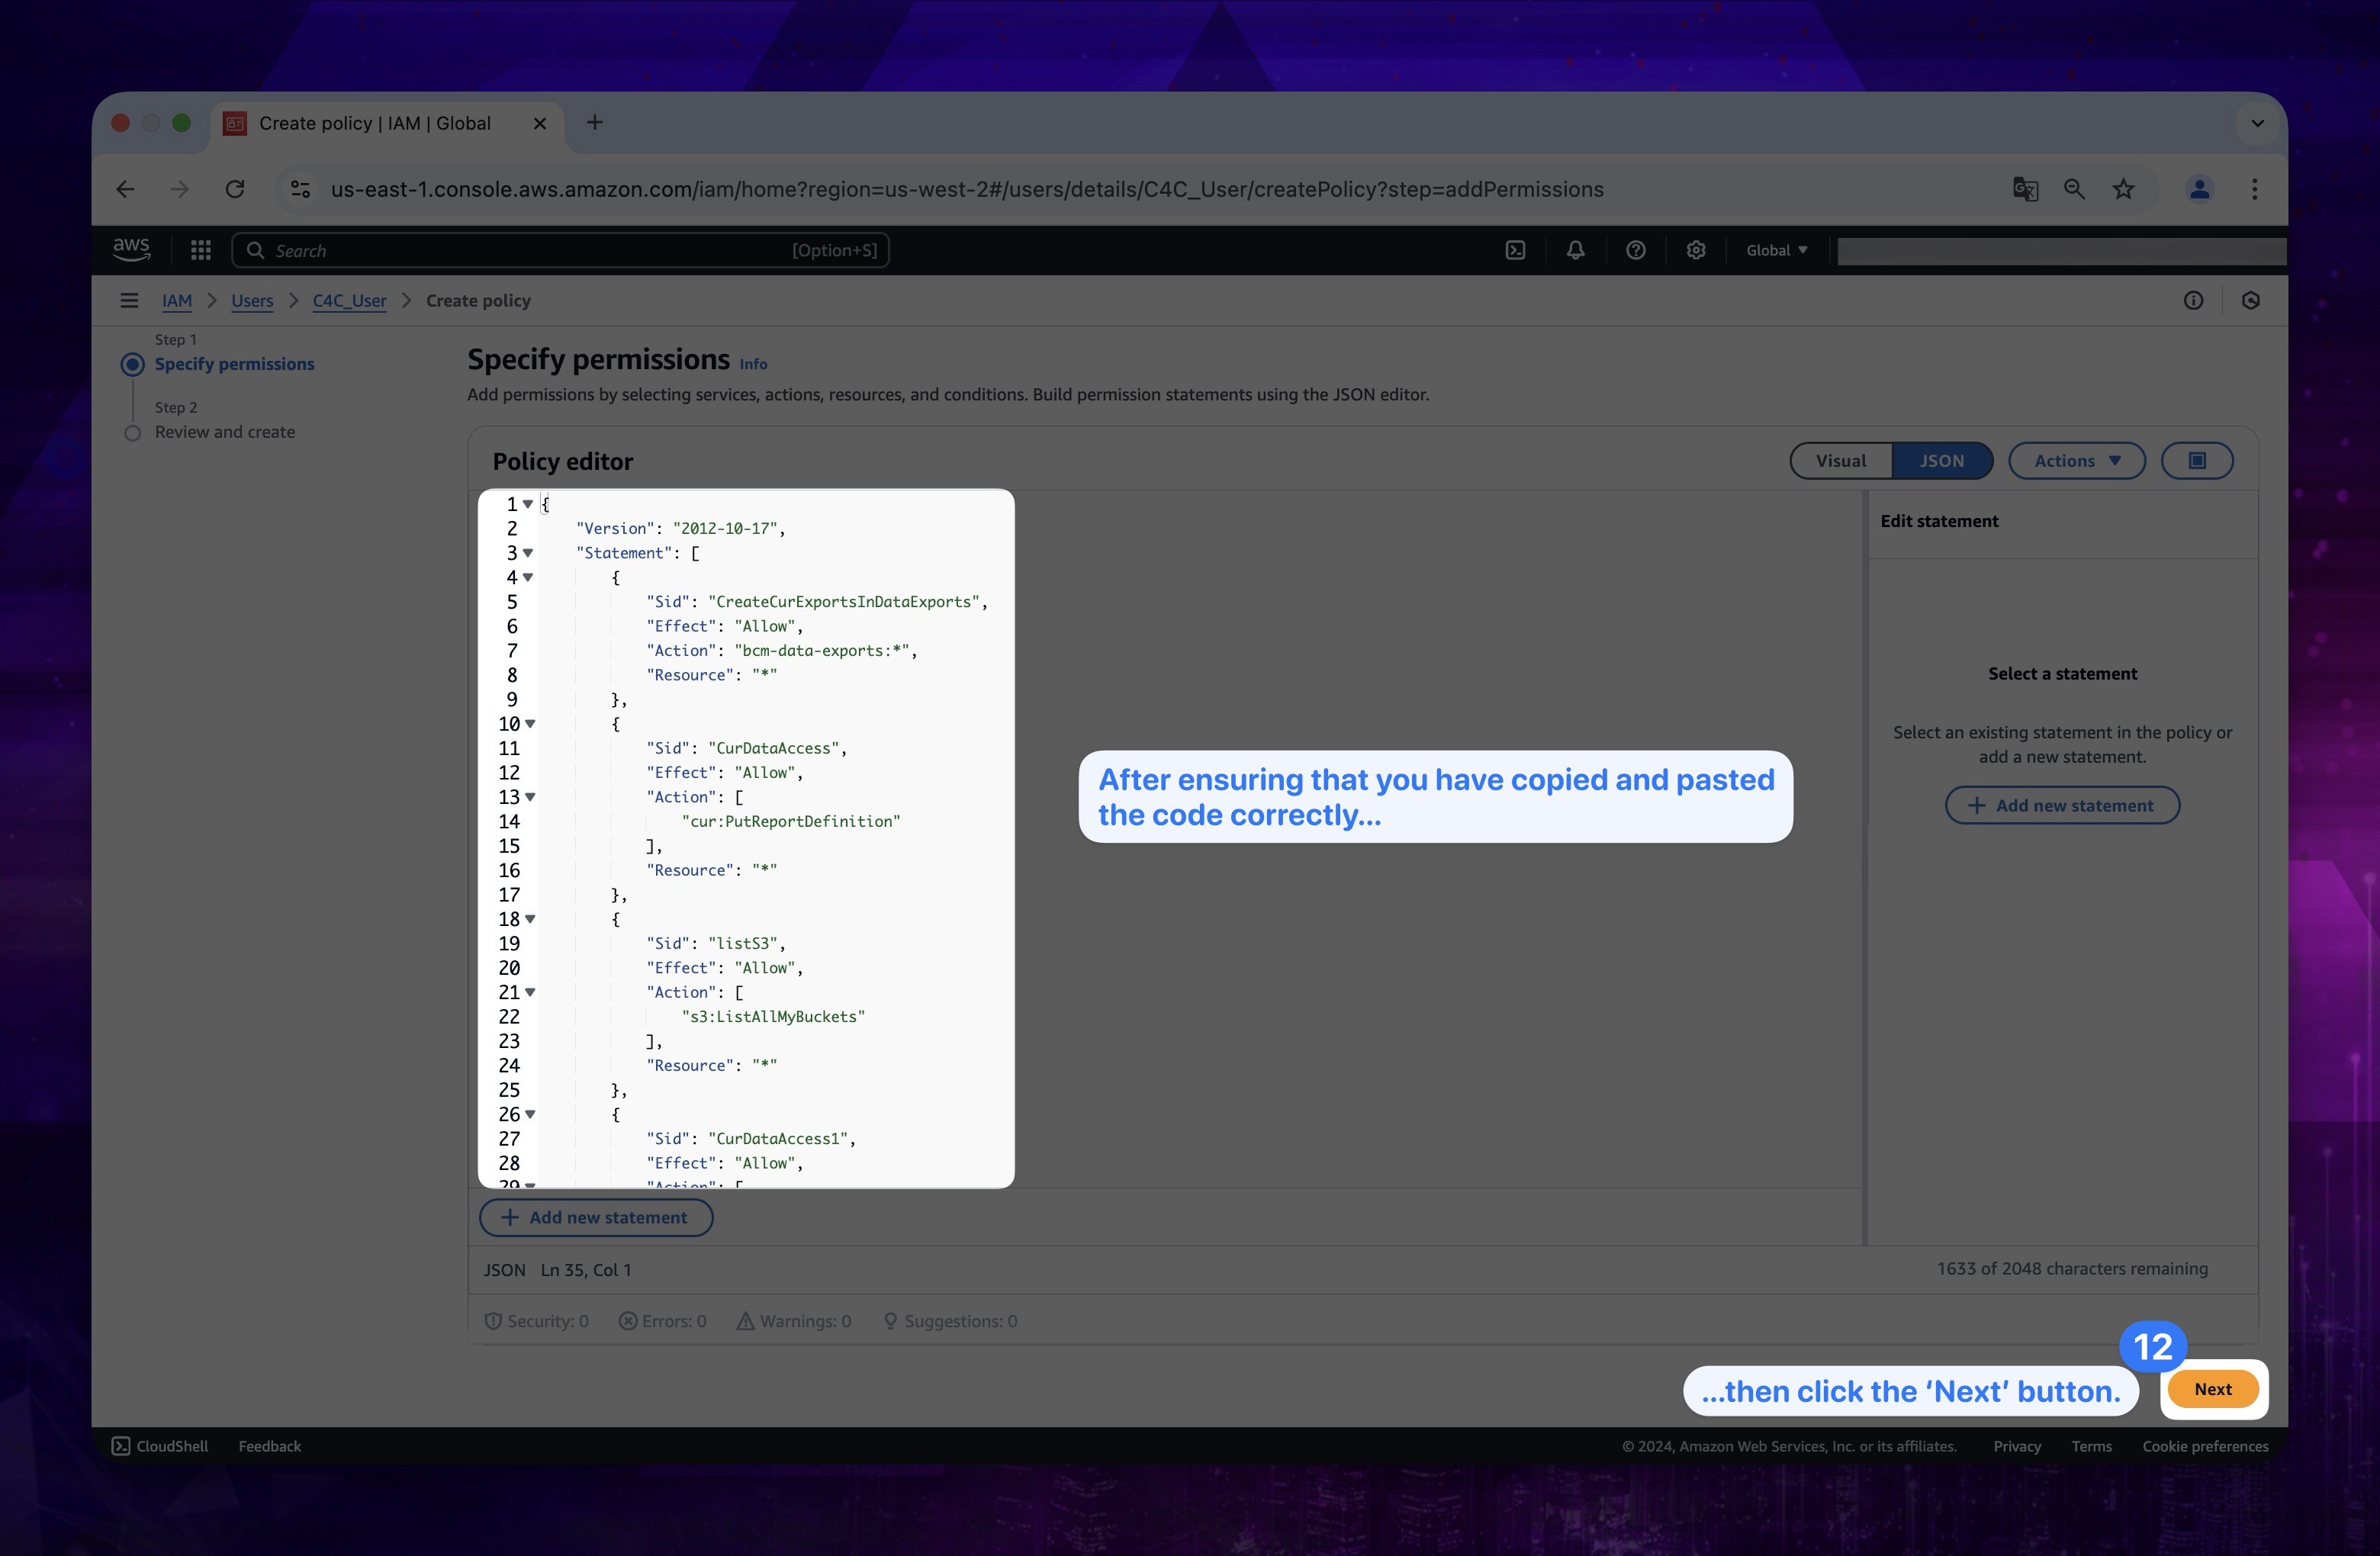
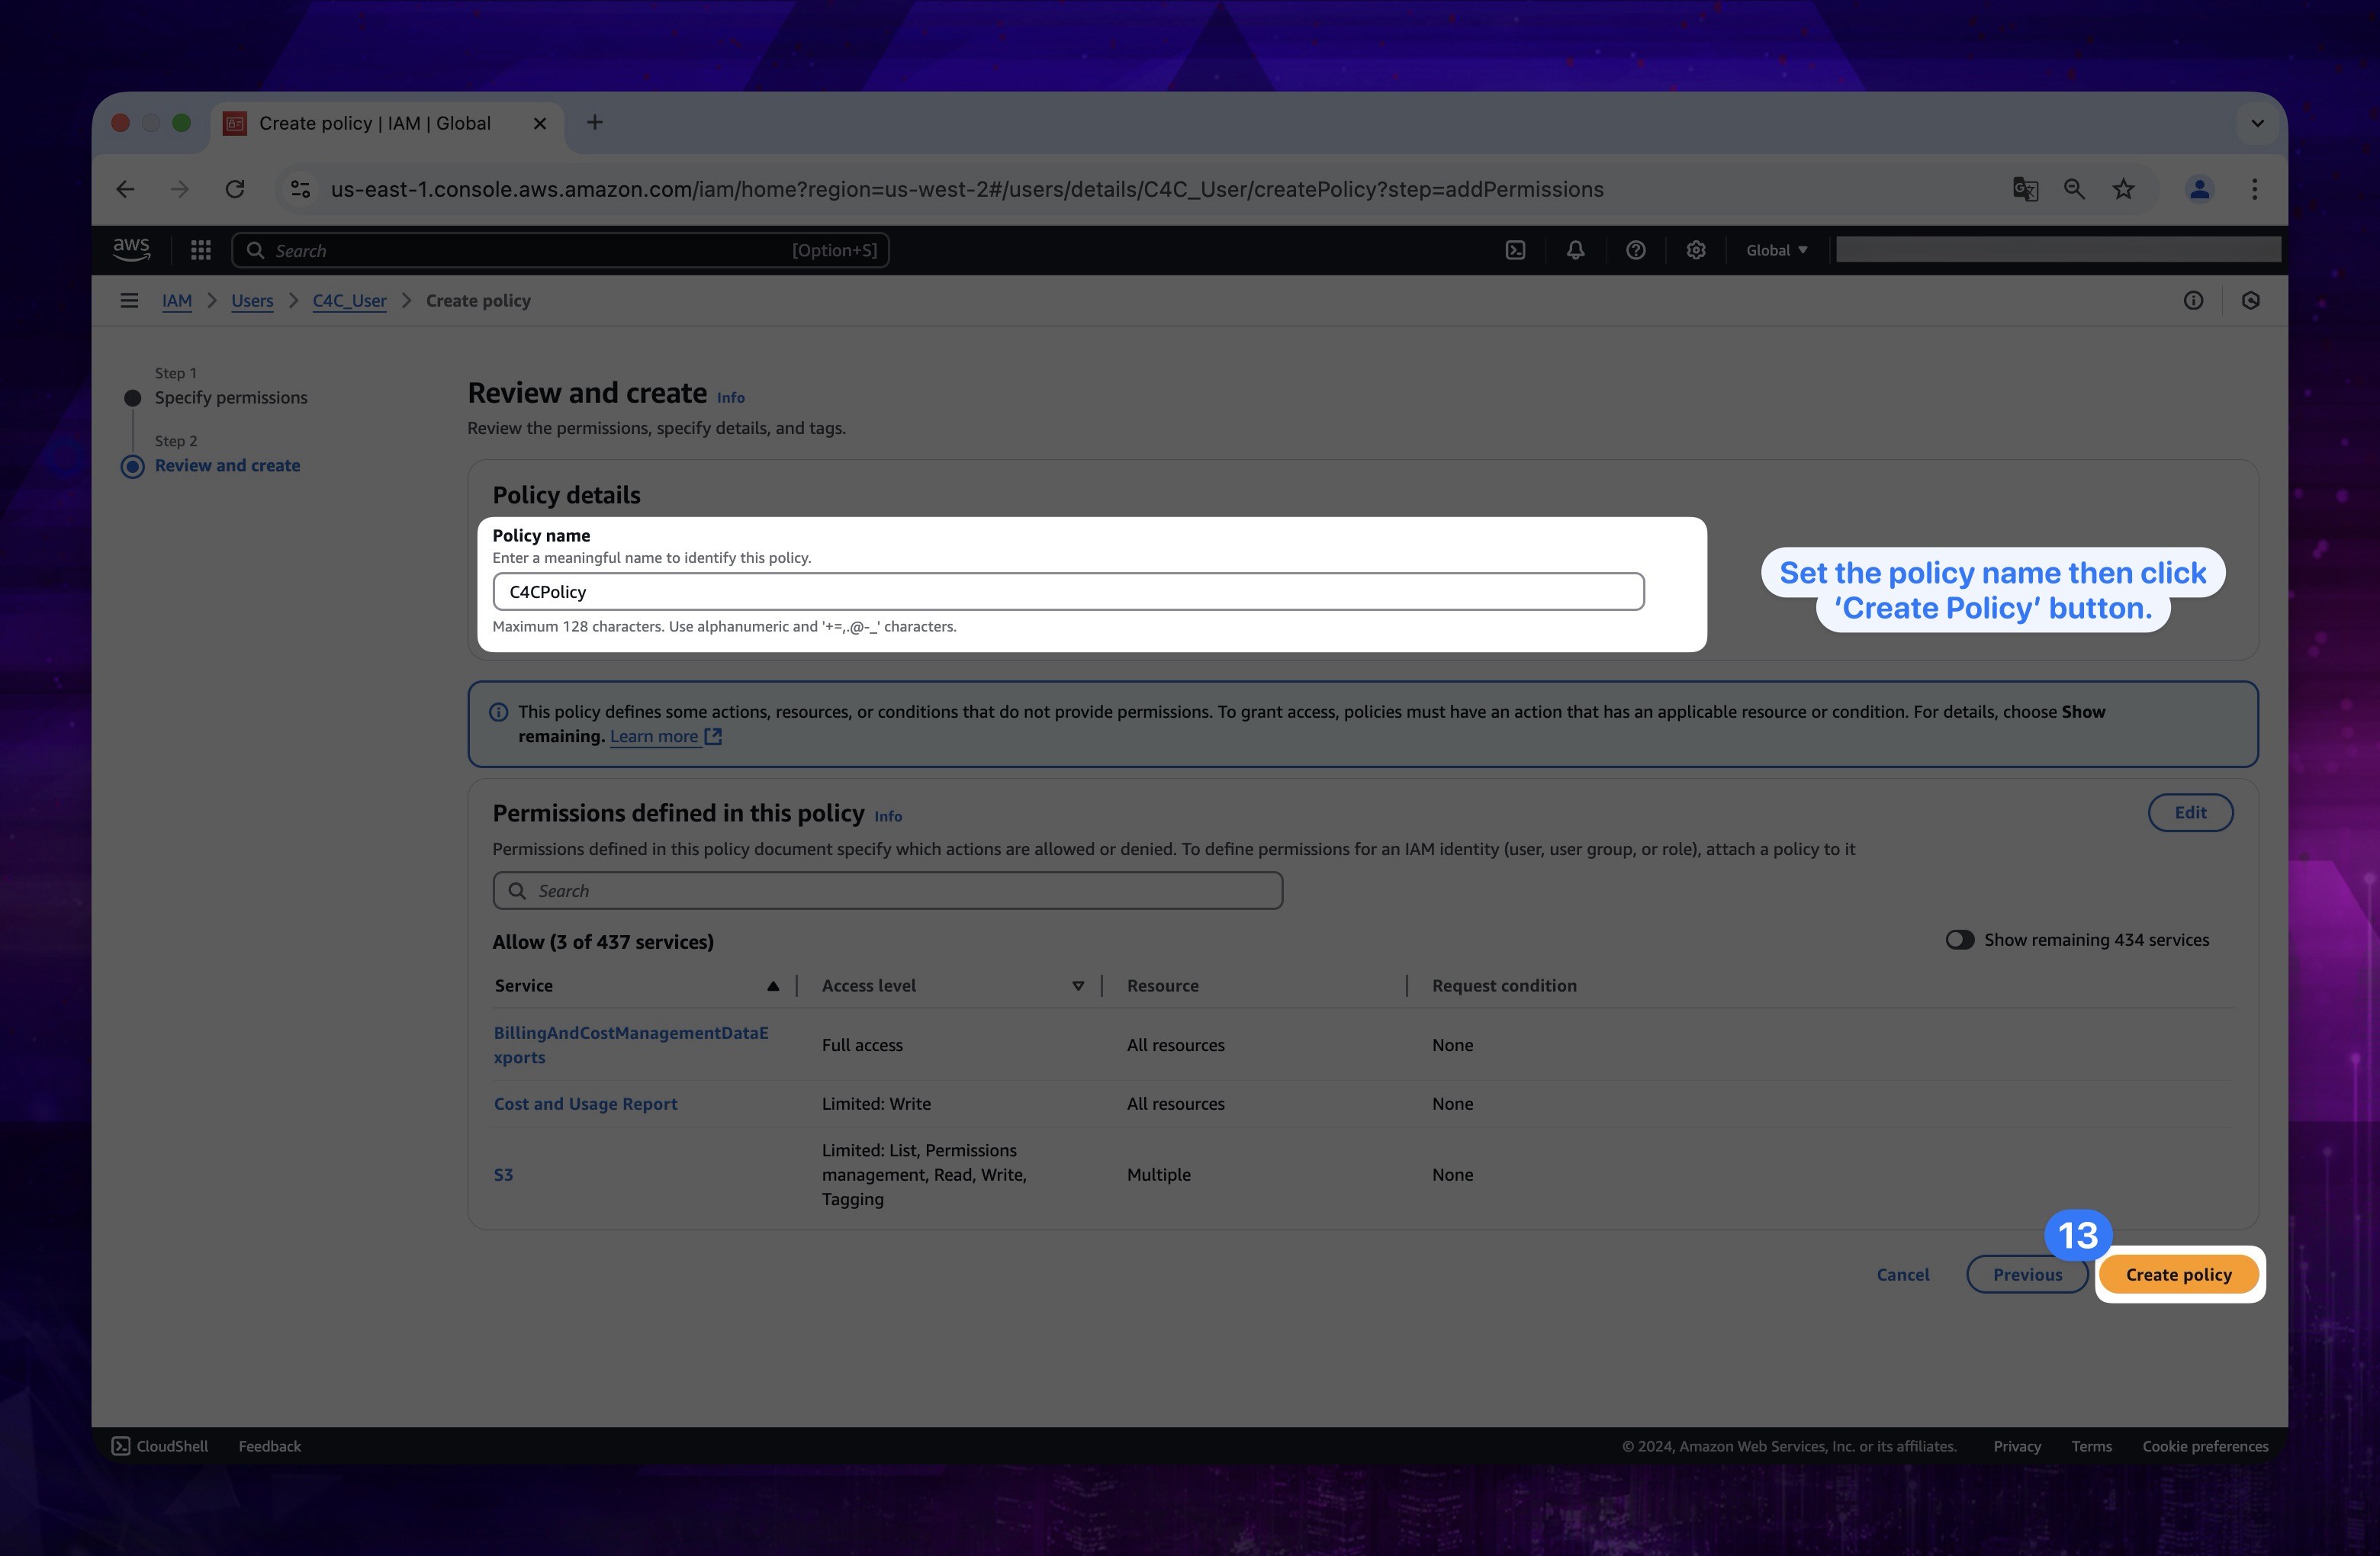
- On the page that appers, Enter a Policy Name then Click Create Policy button.
Show the instruction with images
After completing these steps, you should have successfully created the user with the specified permissions.
4. Key Creation
- From the list of users, click on the user that you have created.
Show the instruction with images
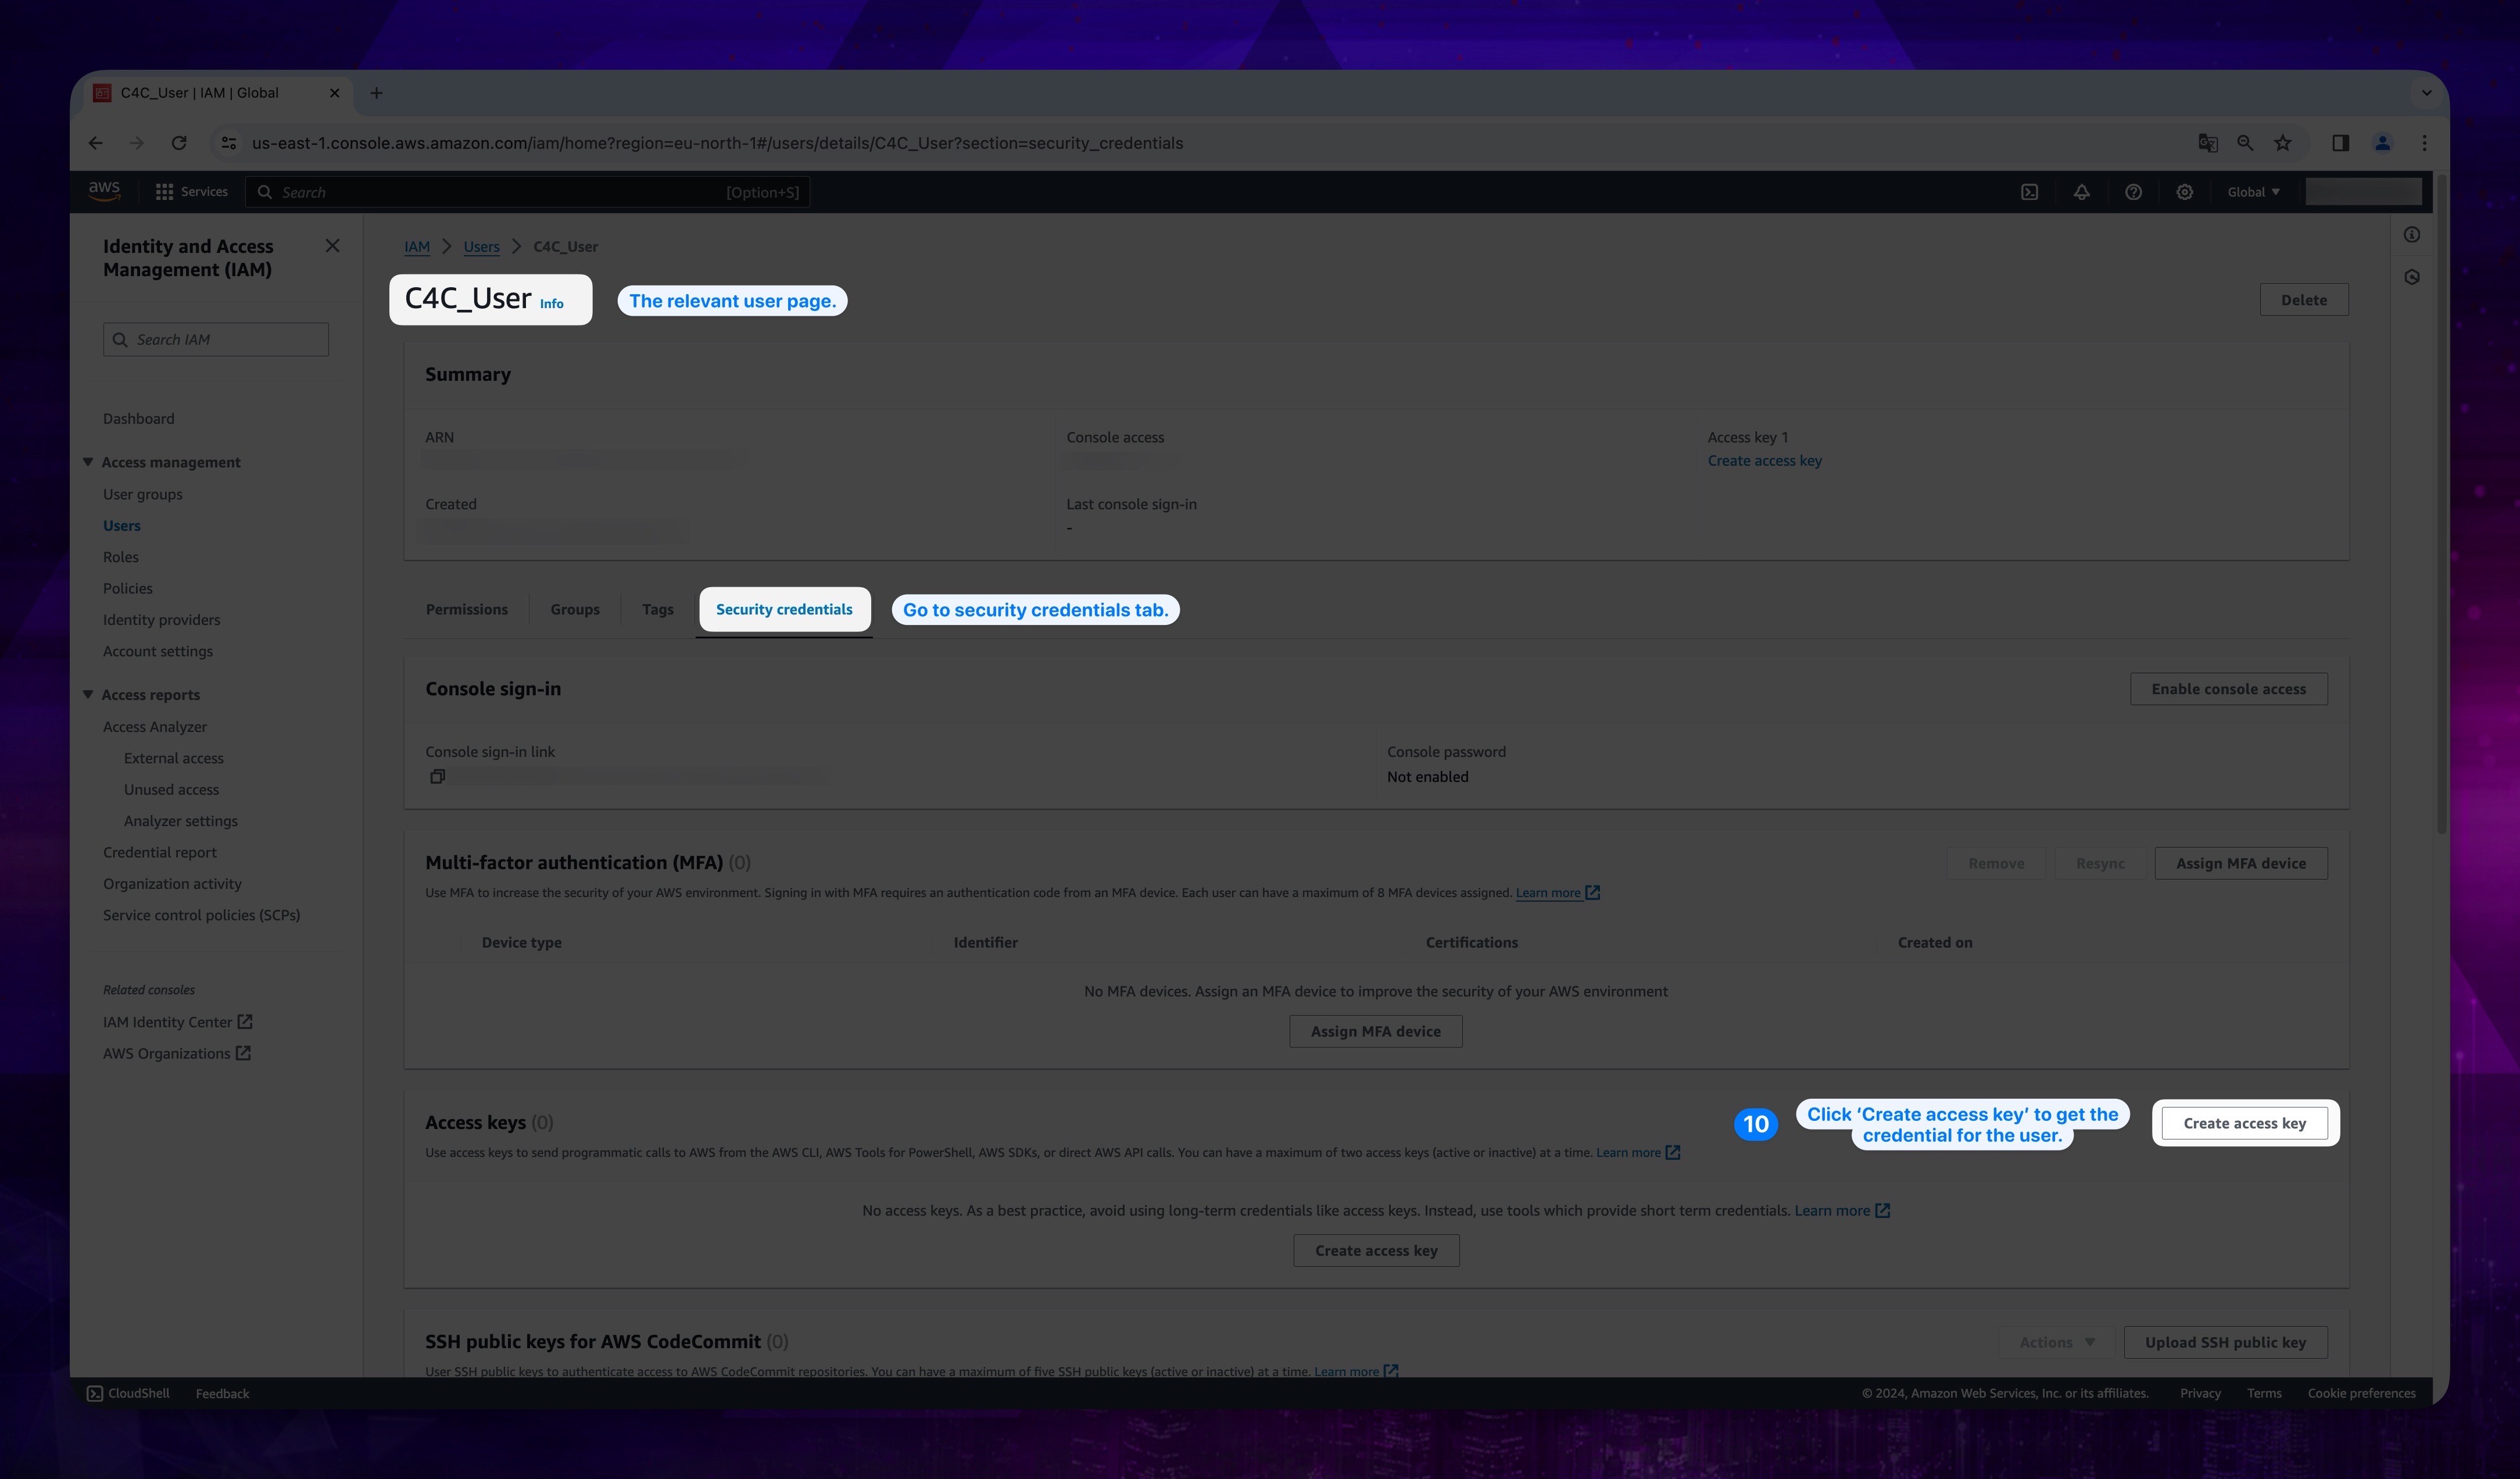
- In the relevant user page, go to the Security Credentials tab and click Create access key under Access Keys section.
Show the instruction with images
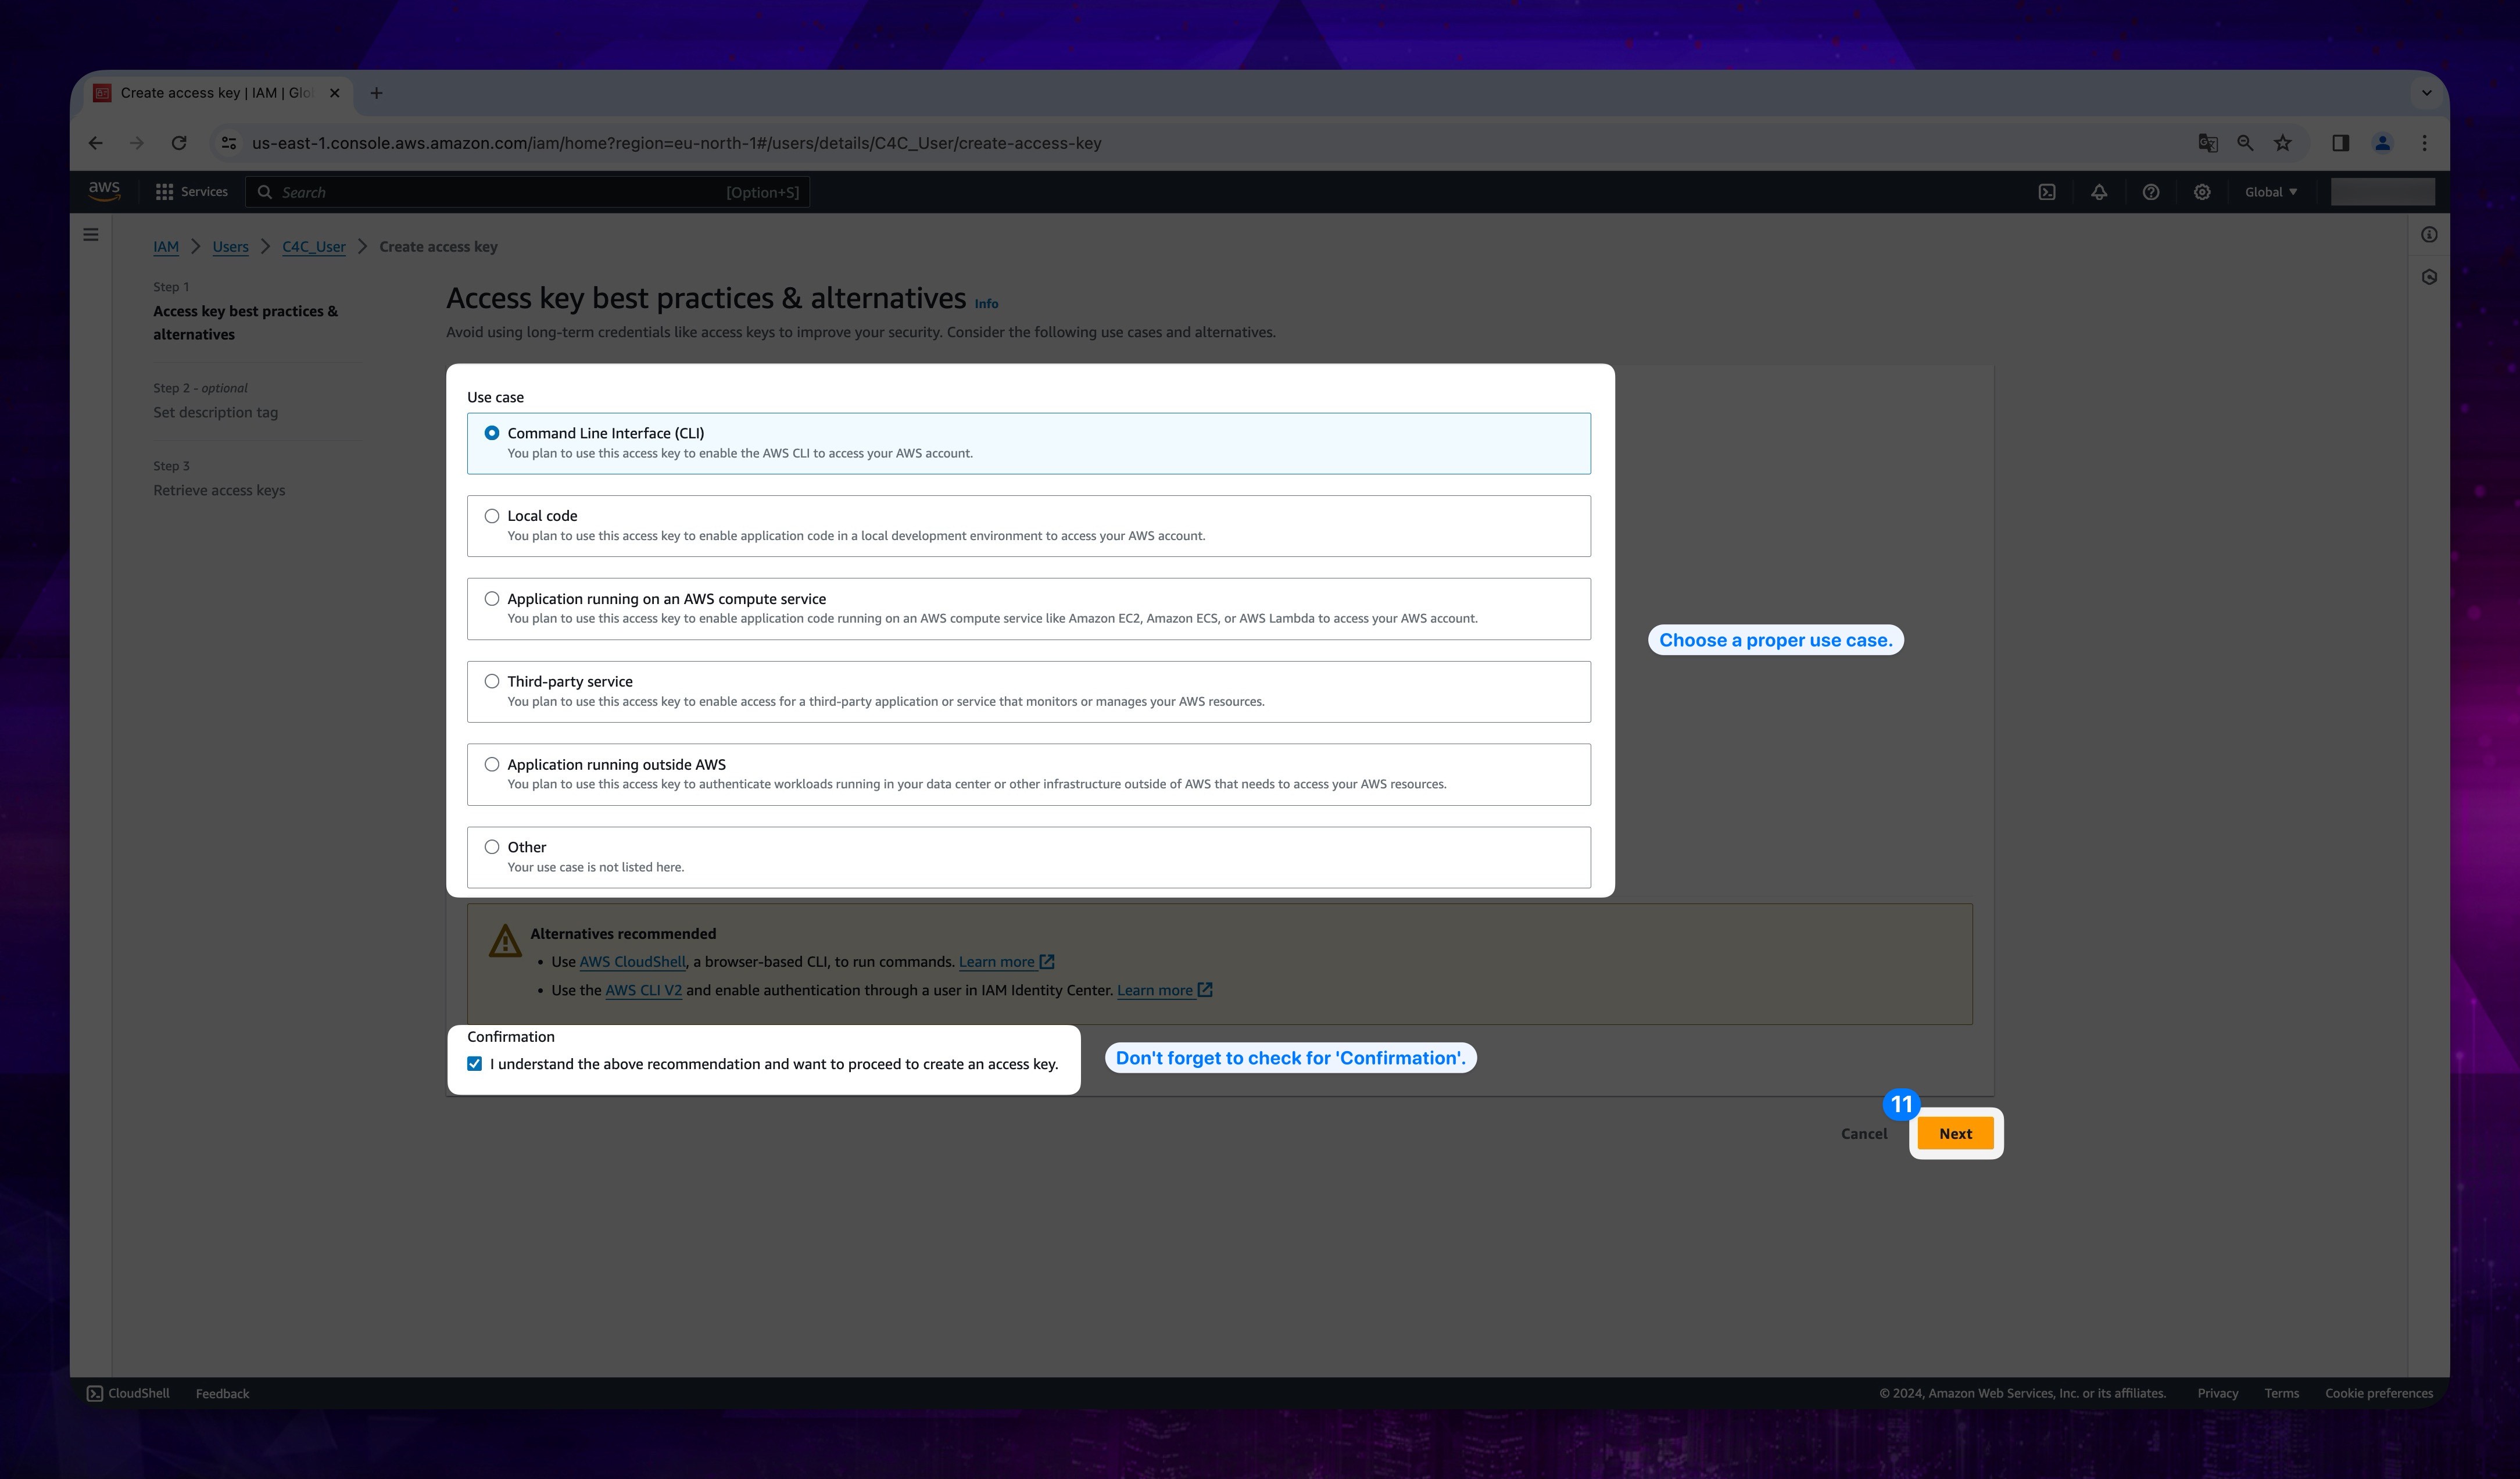
- Choose a proper use case. In this case, we chose Commond Line Interface (CLI). Then click Next button.
Show the instruction with images
- You can add Description tag value, it's optional. After that, click Create access key.
Show the instruction with images

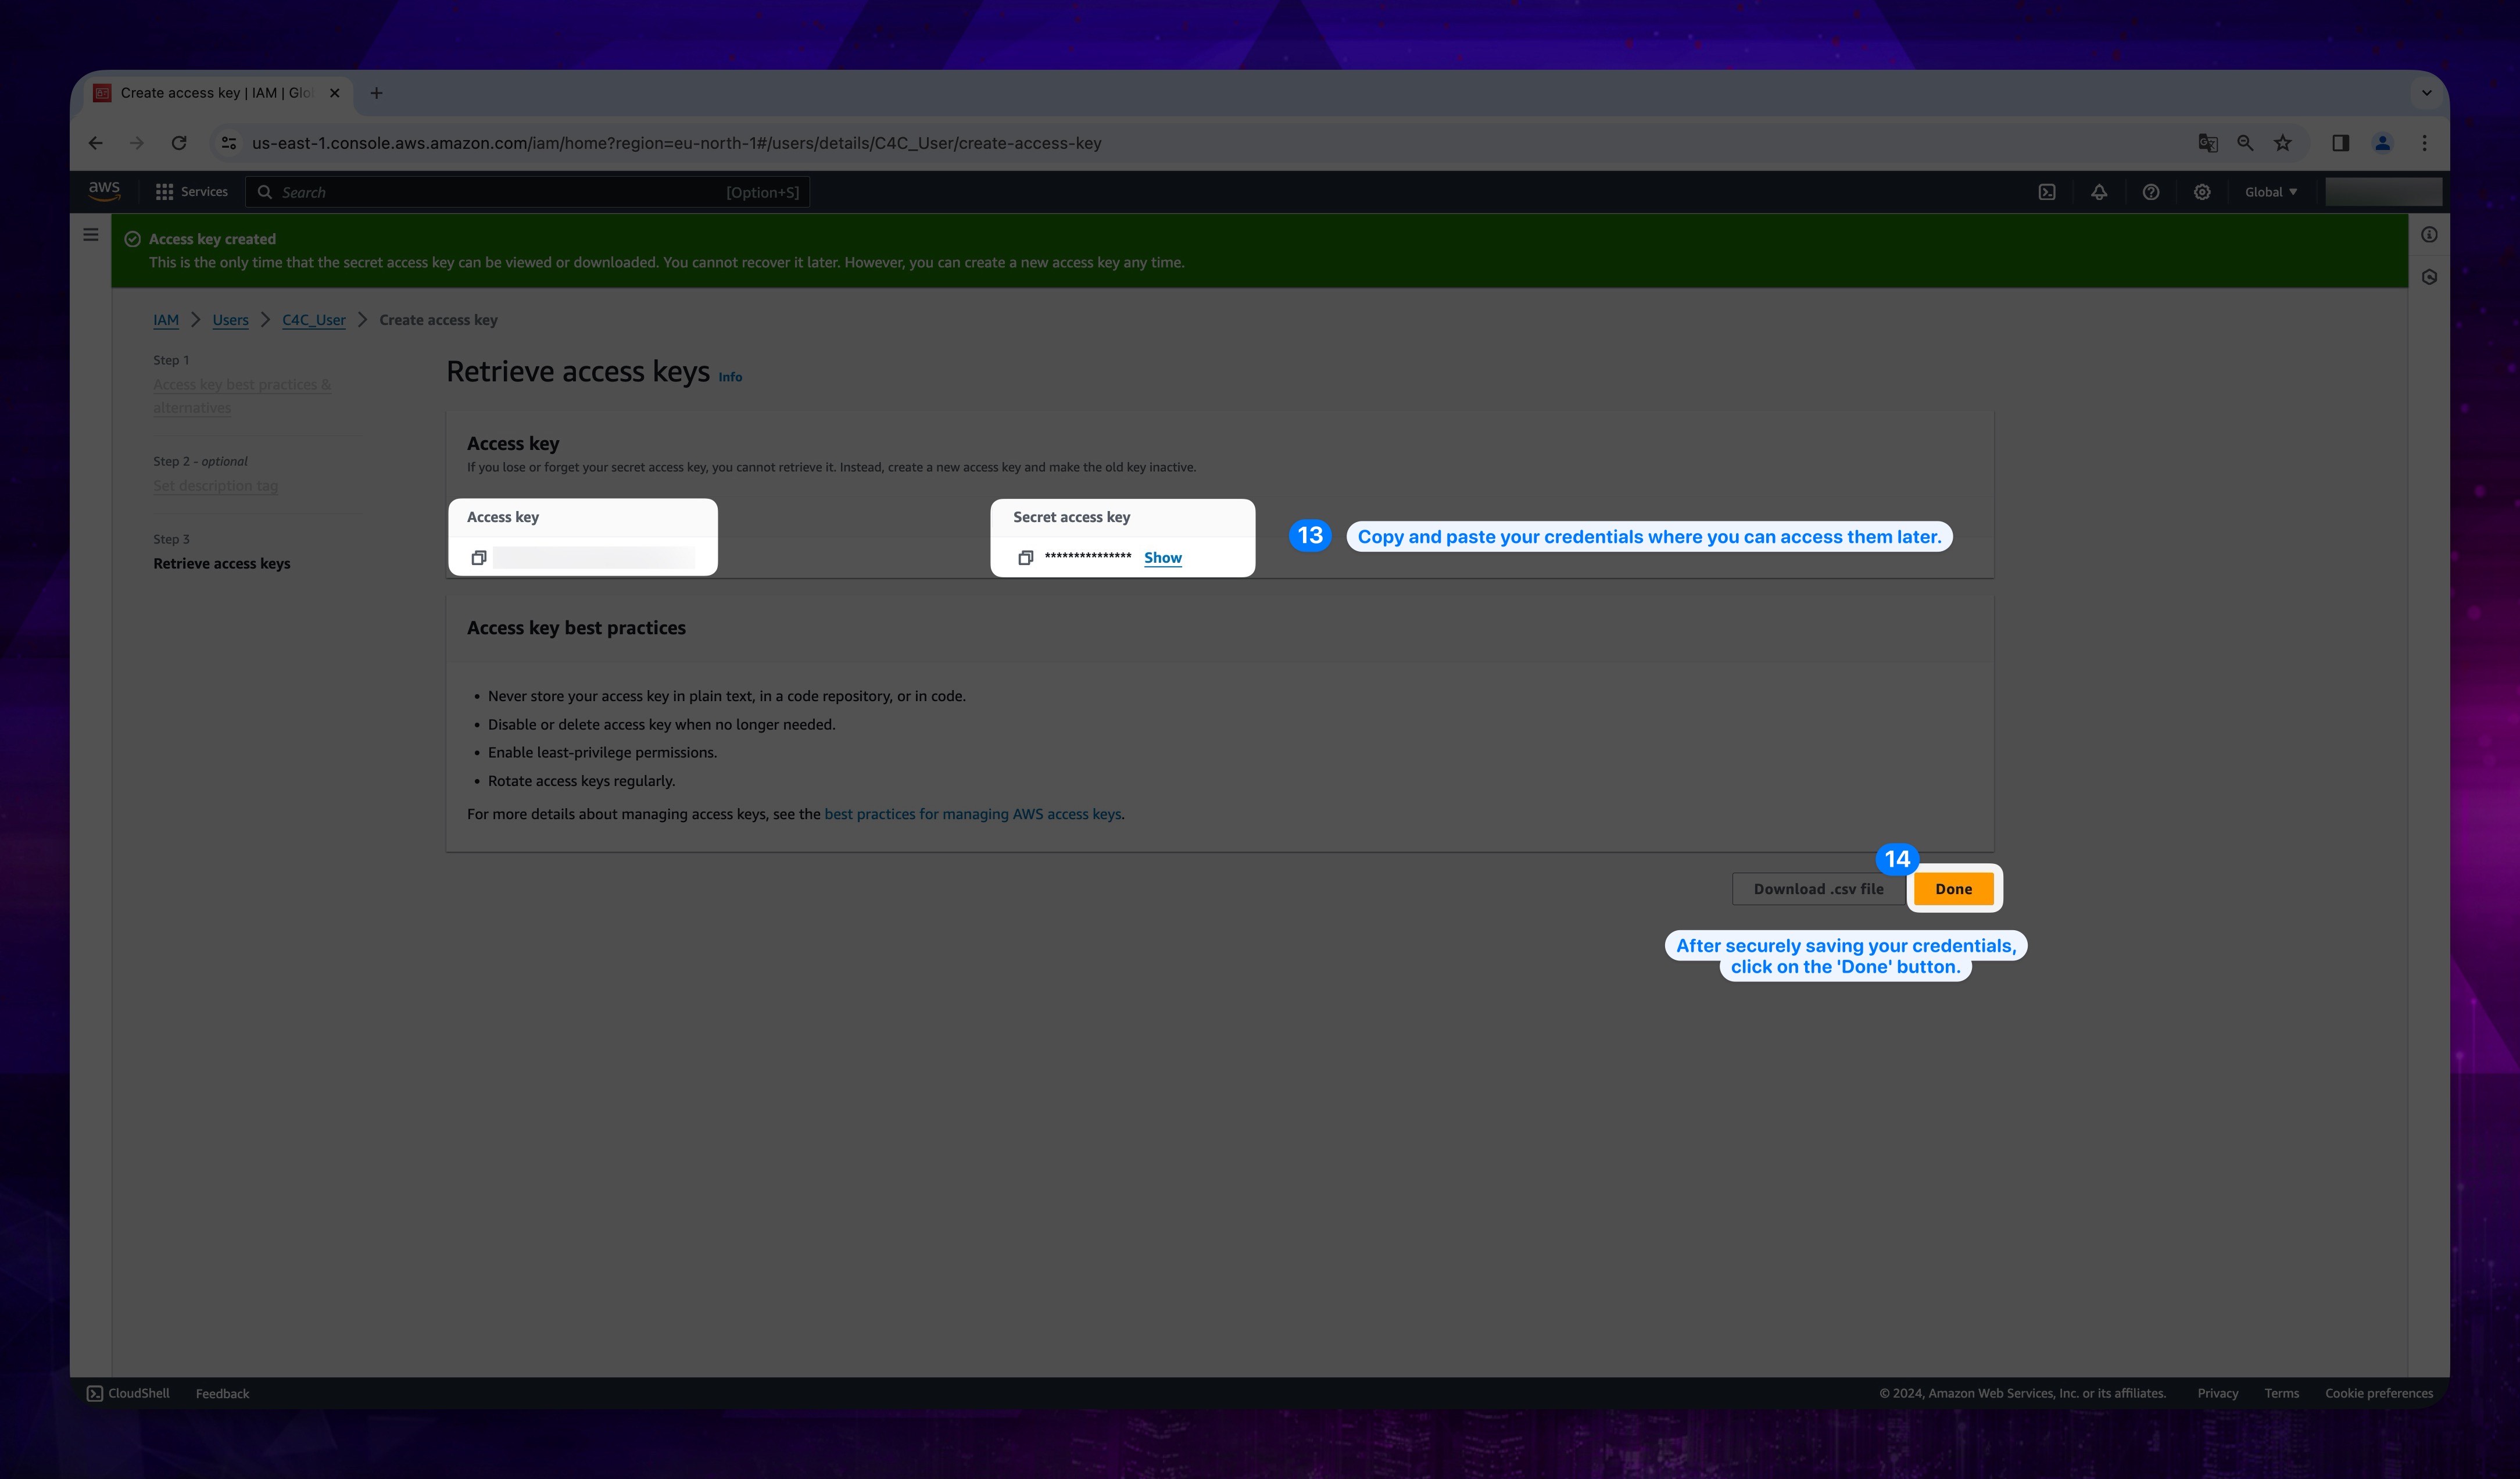
-
CRITICAL STEP
From the screen that you see, copy and paste your Access Key and Secret Access Key where you can access them later, you will need them in our console.
-
When you are sure that the credentials are accessible, you can click the Done button.
Show the instruction with images