Cross4FinOps
Cost Management Preferences
For Cross4FinOps, there are a few changes you need to make to your account's cost settings on the AWS. Follow the instructions below to easily make these changes.
Due to the structure of your account, some settings may not be available for the account from which you want to obtain credentials. Please review the existing settings and complete the necessary steps for those settings before proceeding with the steps to obtain your credentials.
-
Go to AWS Console and log in to your account.
-
After logged in to your account, go to the search bar and search for Billing and Cost Management.
-
In the left navigation menu, click on Cost Management Preferences located under the Preferences and Settings section.
- The settings you need to configure on this page are divided into three sections: General, Cost Explorer, and Cost Optimization Hub. Please make the required adjustments under each of these sections.
- General
- Cost Explorer
- Cost Optimization Hub
-
You need to allow linked account users to view cost and usage data. For that under Member Account Permissions section, enable Linked account access and select Linked account refunds and credits option.
-
You must activate 'Linked Account Access' within the 'Data Access' settings. This allows linked account users to view cost and usage data. For that inside Rightsizing section, enable Allow linked accounts to see recommendations option.
To view costs and usage at the resource level, you need to select specific services. To perform this action:
- First enable Resource-level data at daily granularity option inside Granular data section.
- Click the 'Choose Services' bar and select: EC2-Instances (Elastic Compute Cloud - Compute), Relational Database Services (RDS) and S3(Simple Storage Service) services.
You must enable the setting to display cost optimization recommendations for all member accounts in your organization, and you must also configure the pricing model for your analysis to accurately estimate your savings with Cross4FinOps. You must choose to estimate savings based on AWS public pricing before discounts. This setting ensures that your cost management reflects the actual savings you get from AWS discounts or standard public pricing. To perform this configuration, follow these steps:
- Enable Enable Cost Optimization Hub selection inside Cost Optimization Hub.
- You need to select Enable Cost Optimization Hub for all member accounts option for Organization and member account settings.
- Also you need to select After discounts option for Savings estimation mode section.
Getting Credentials
-
Go to AWS Console and log in to your account.
-
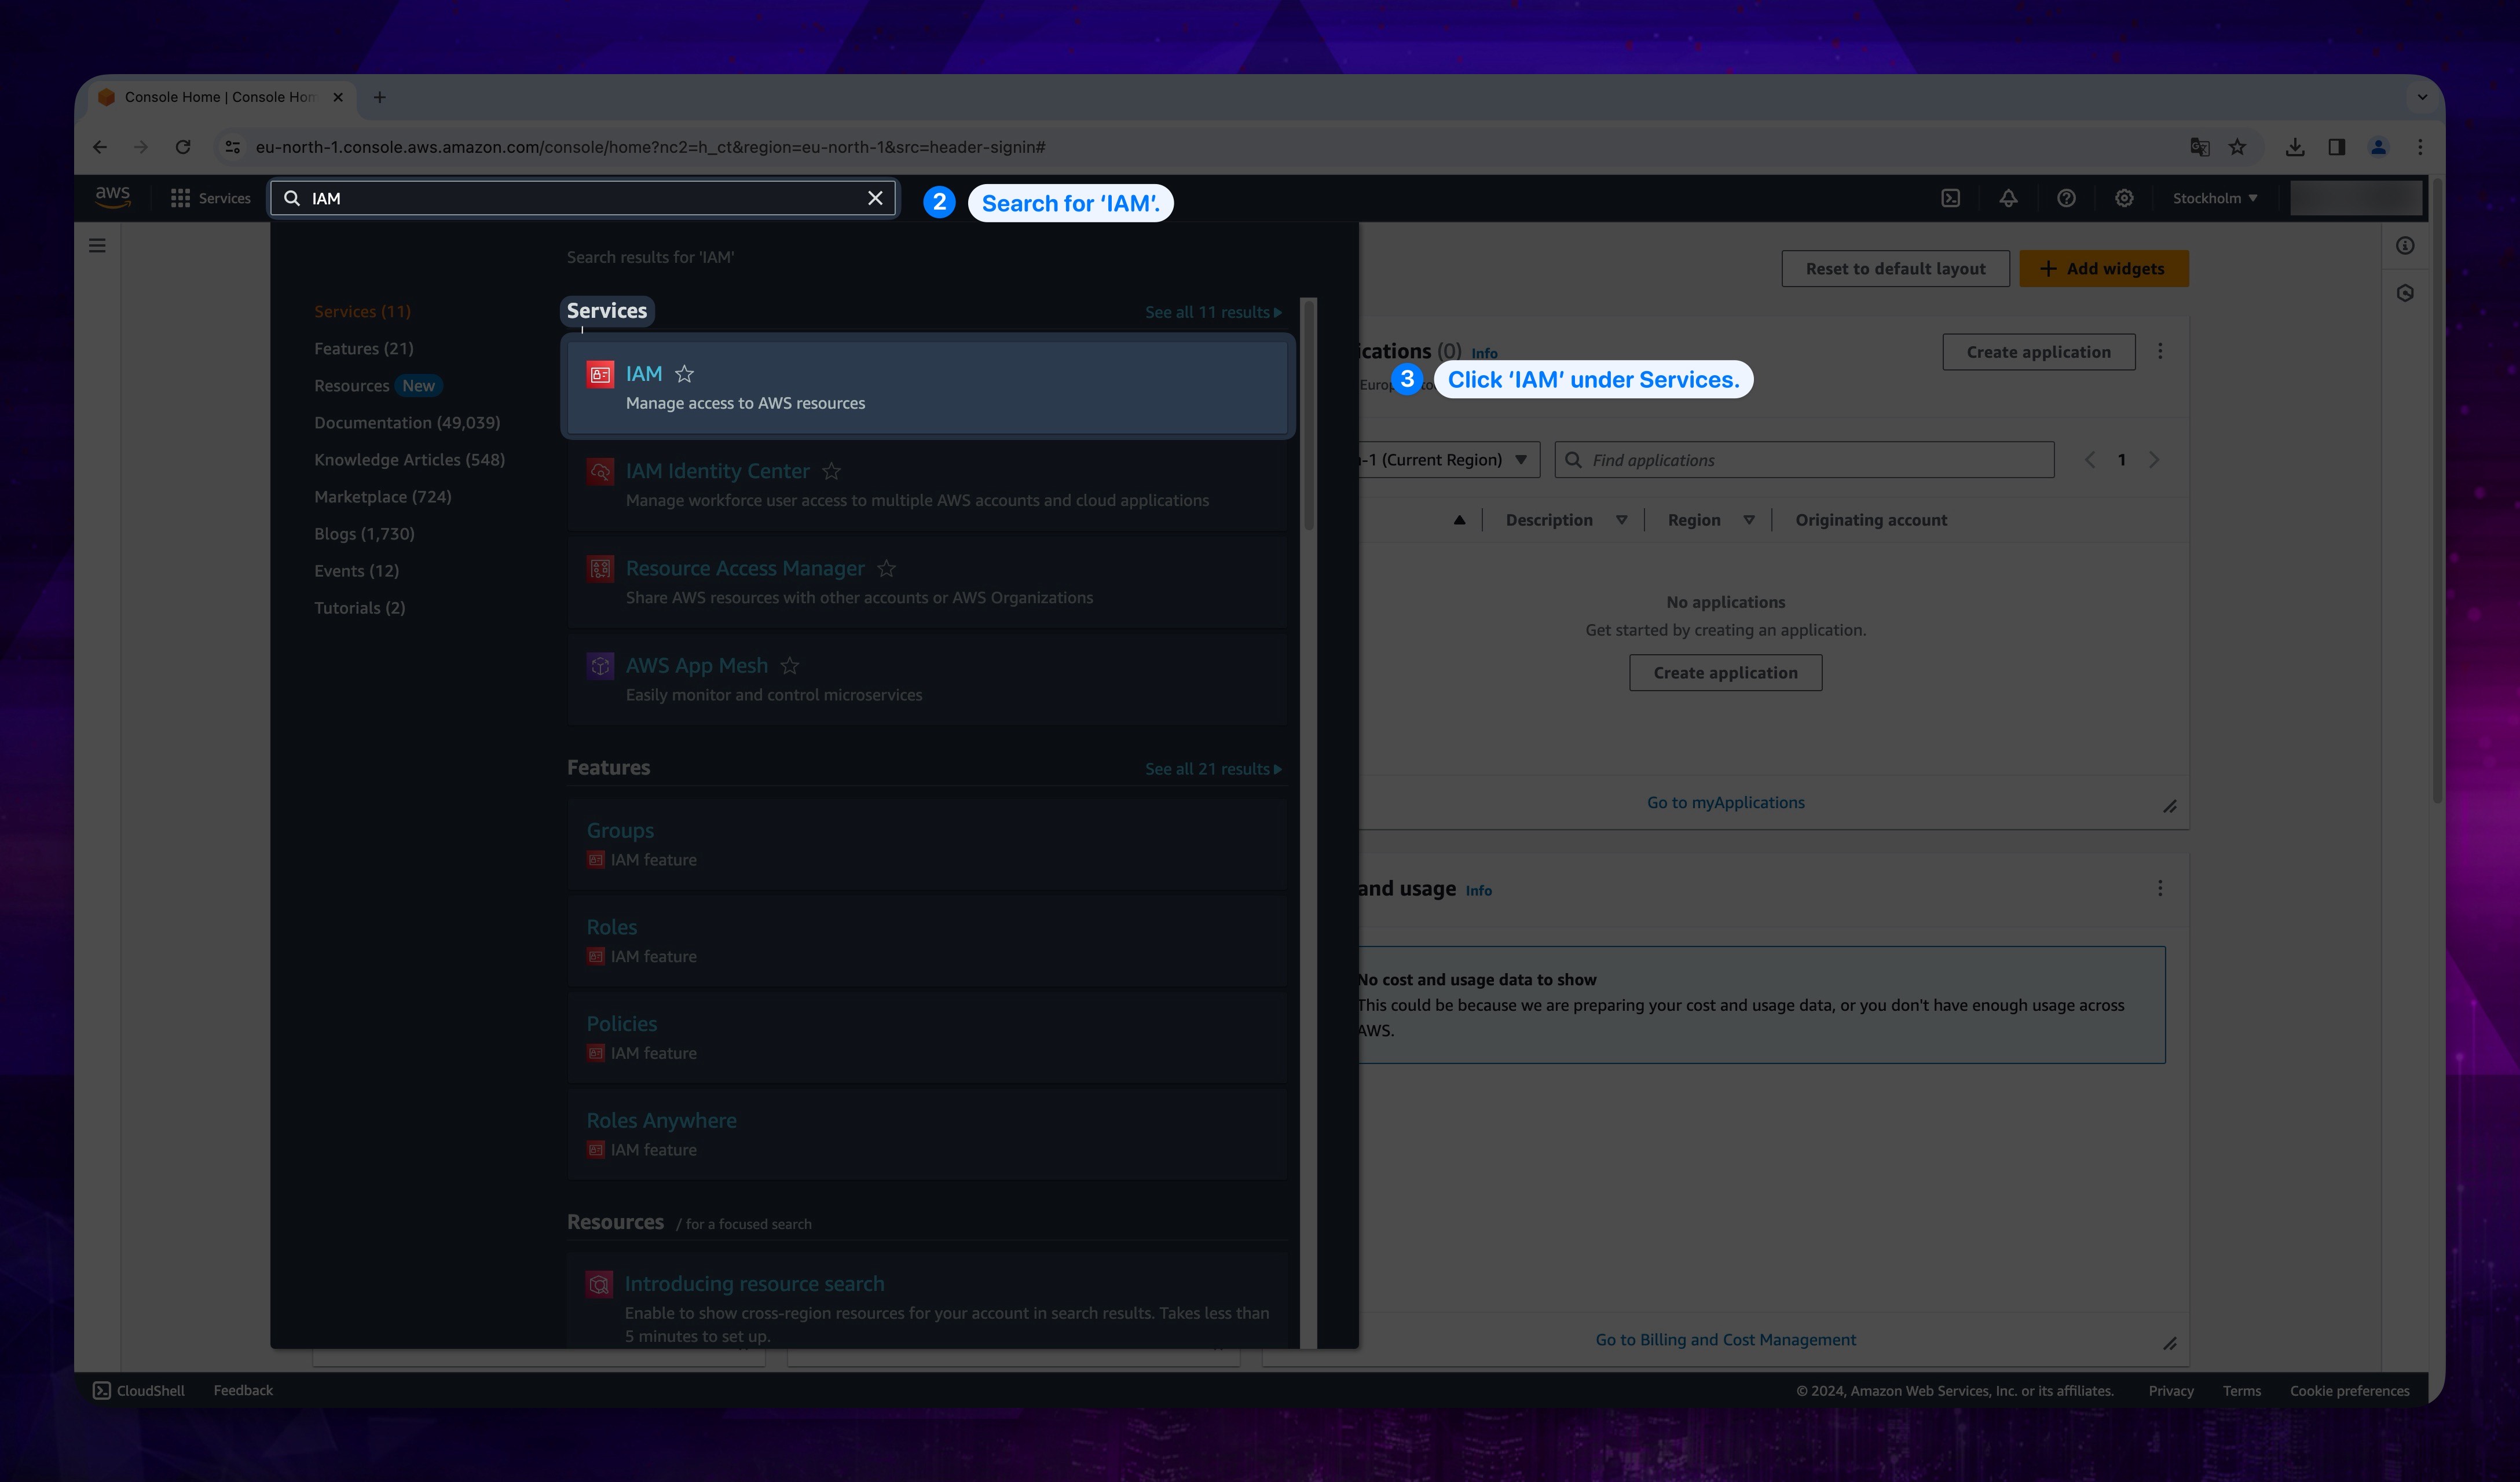
After loged in to your account, go to the search bar and search for IAM.
-
Click IAM under Services.
Show the instruction with images
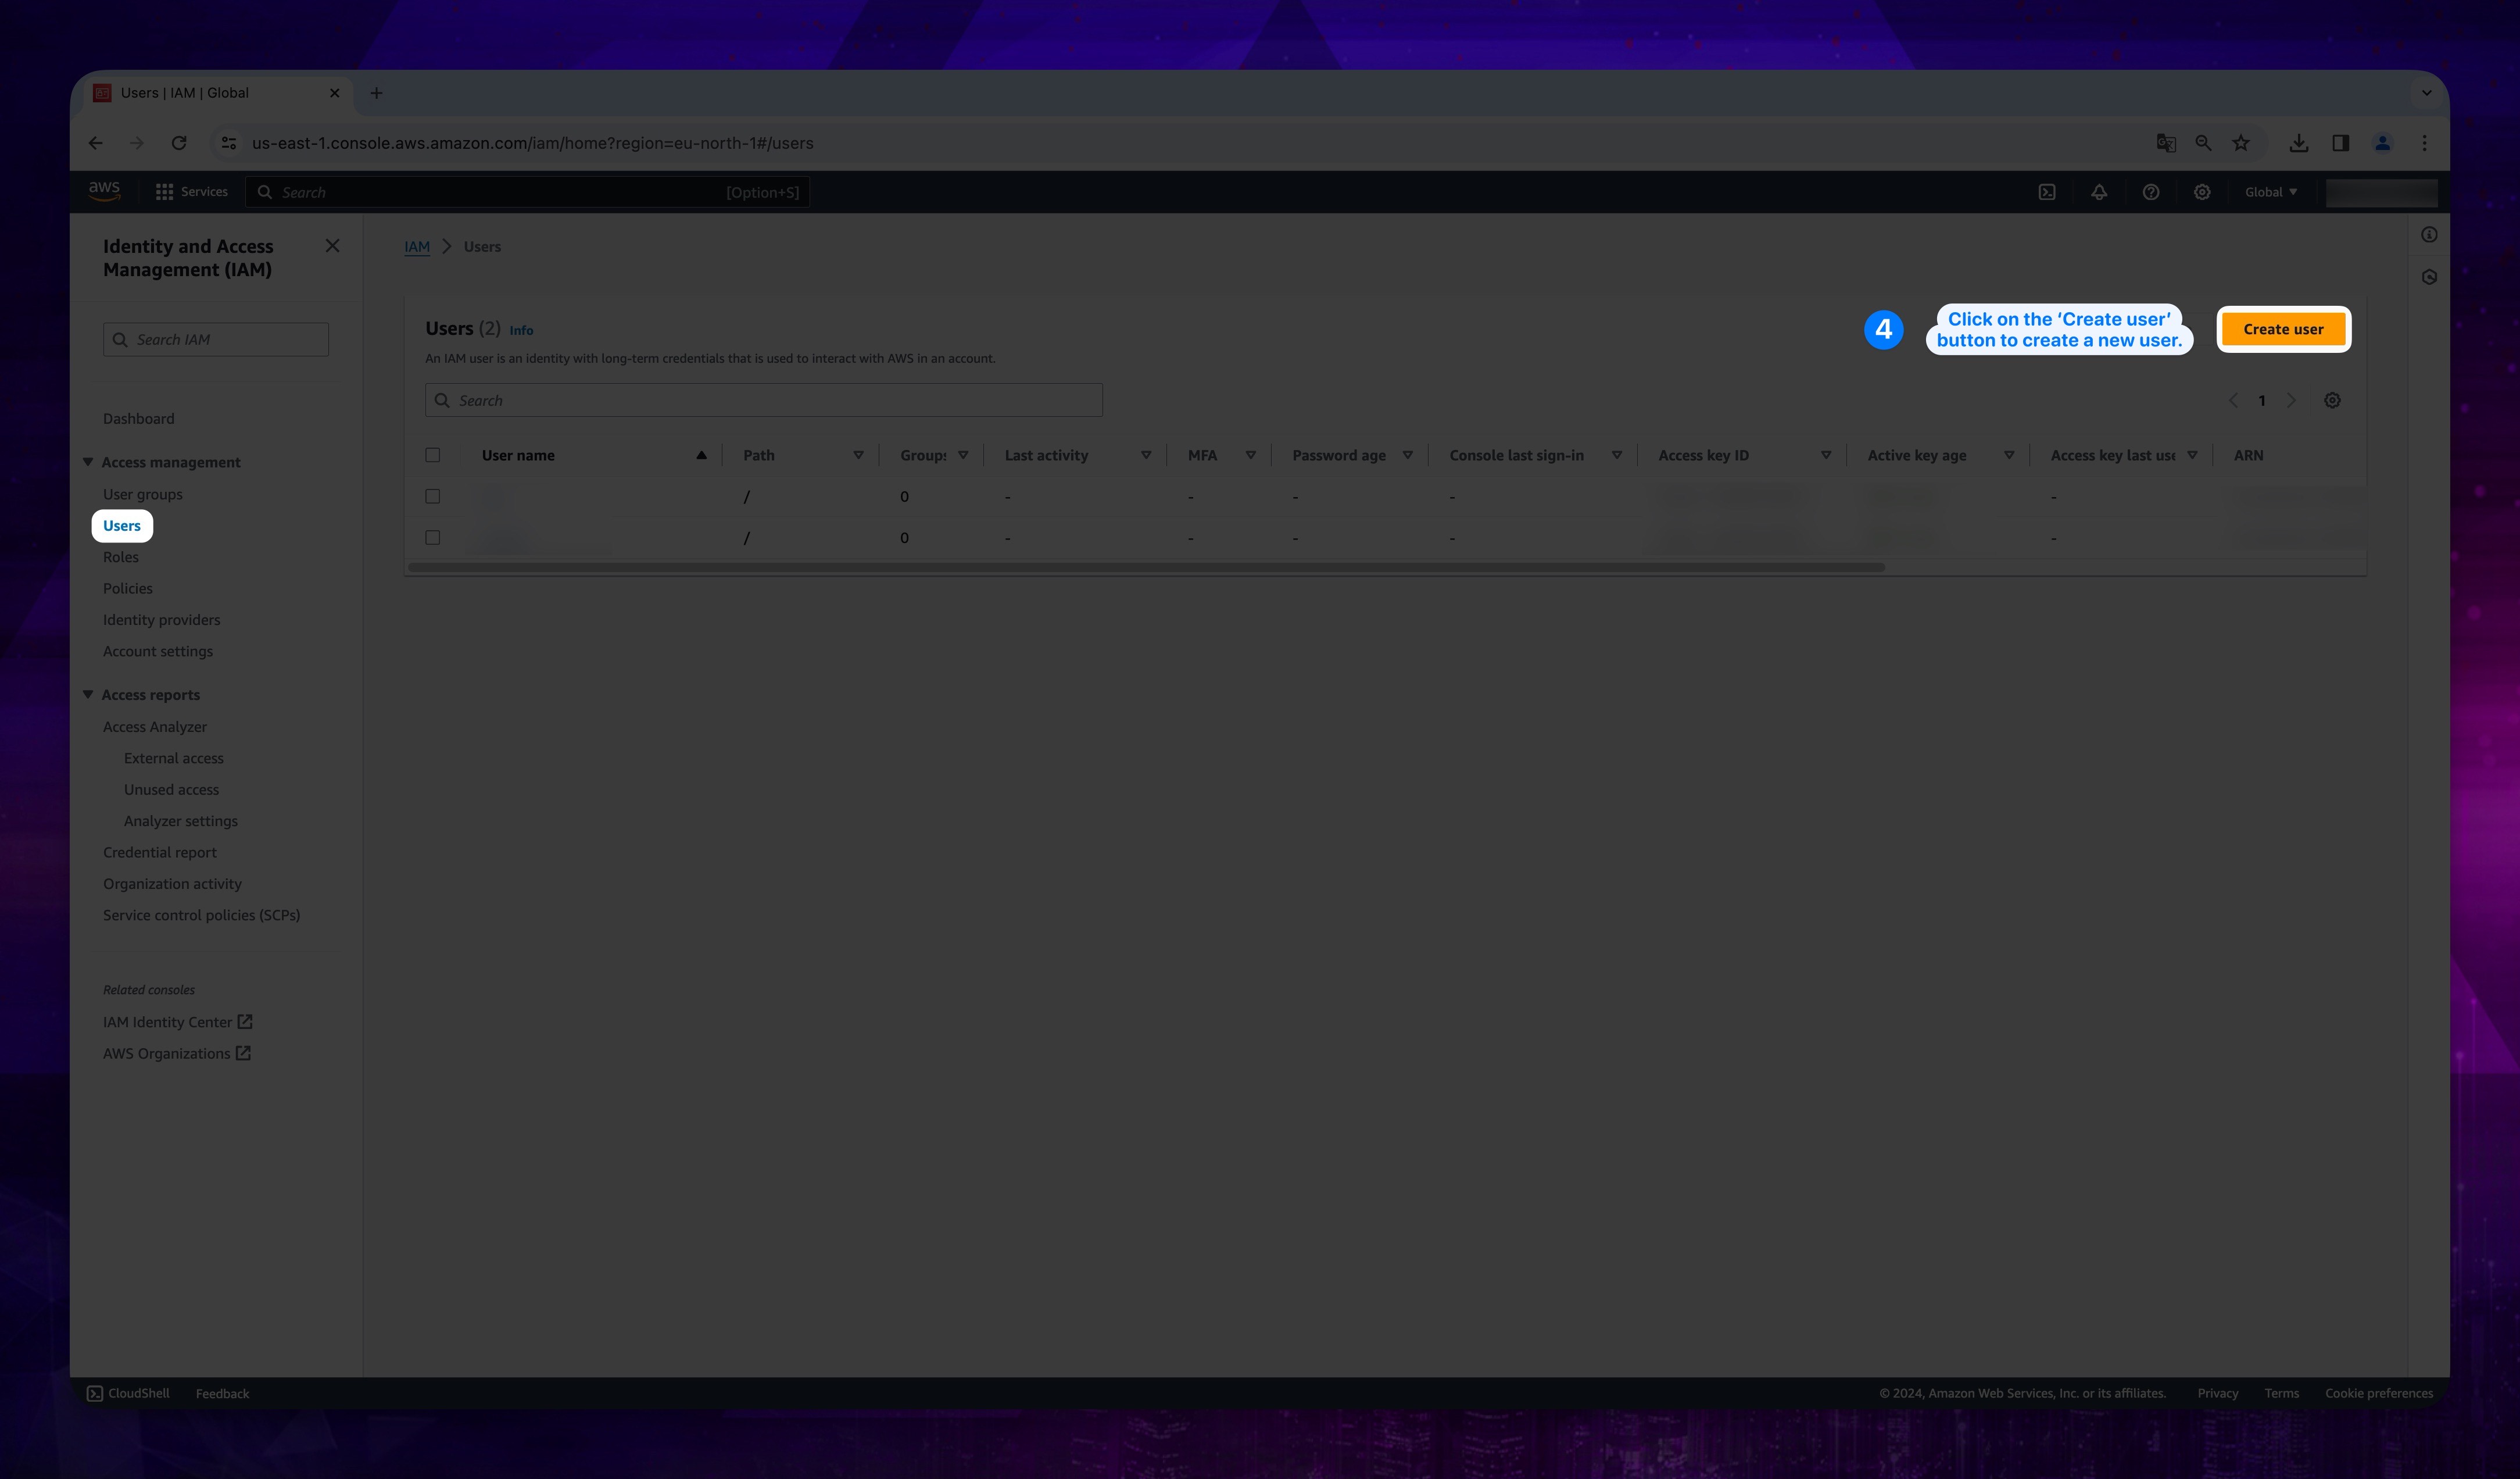
1. User Creation
- Click Users on the left and then click Create user.
Show the instruction with images
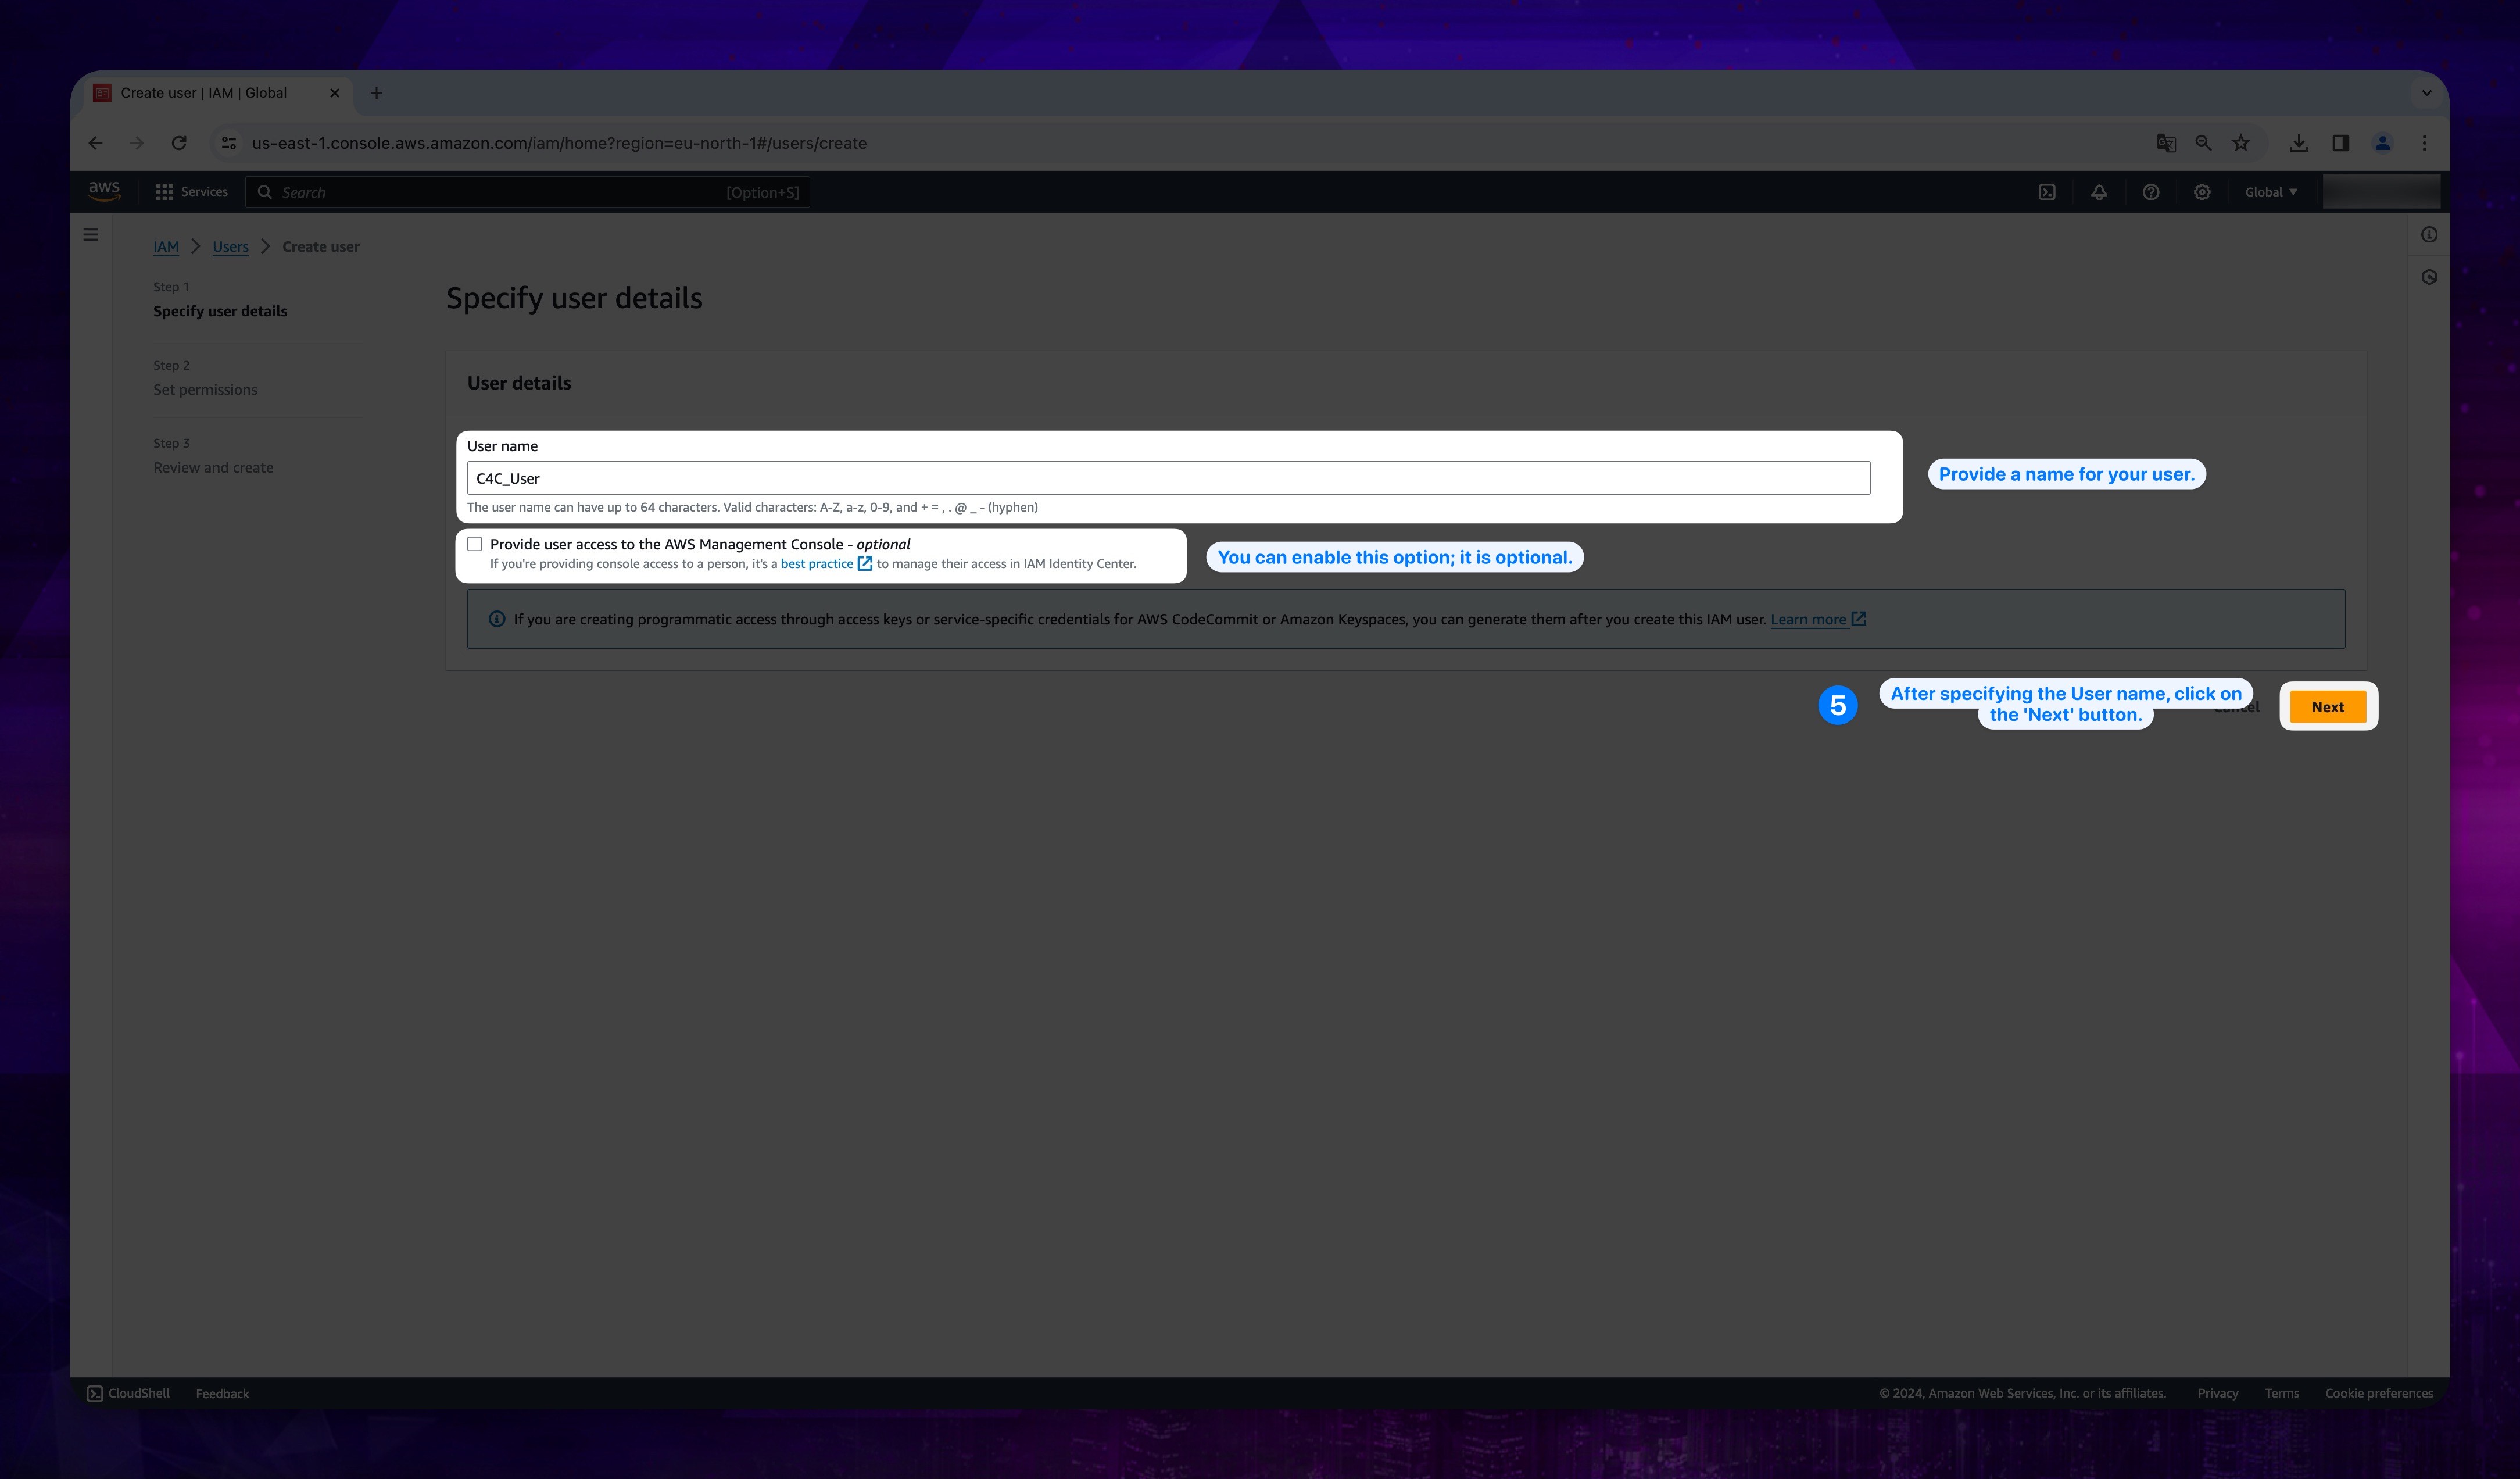
- Click Next button after entering a User name. Optionally you can provide user access to the AWS Management Console.
Show the instruction with images
2. Permission Assignment
-
In the opened screen, it is necessary to grant the user the required permissions. Therefore, click on the Attach Policies button. After this point, you have two options to proceed. The first option is to manually add the permissions listed below one by one. The second option is to select only the AdministratorAccess permission, granting full authorization.
Manuel (Recommended) Full Access ReadOnlyAccess AdministratorAccess AmazonEC2FullAccess AmazonS3FullAccess
For more detailed information about the Policies and permissions you can check AWS Documentation.
- Click on the Next button at the bottom of the page.
Show the instruction with images
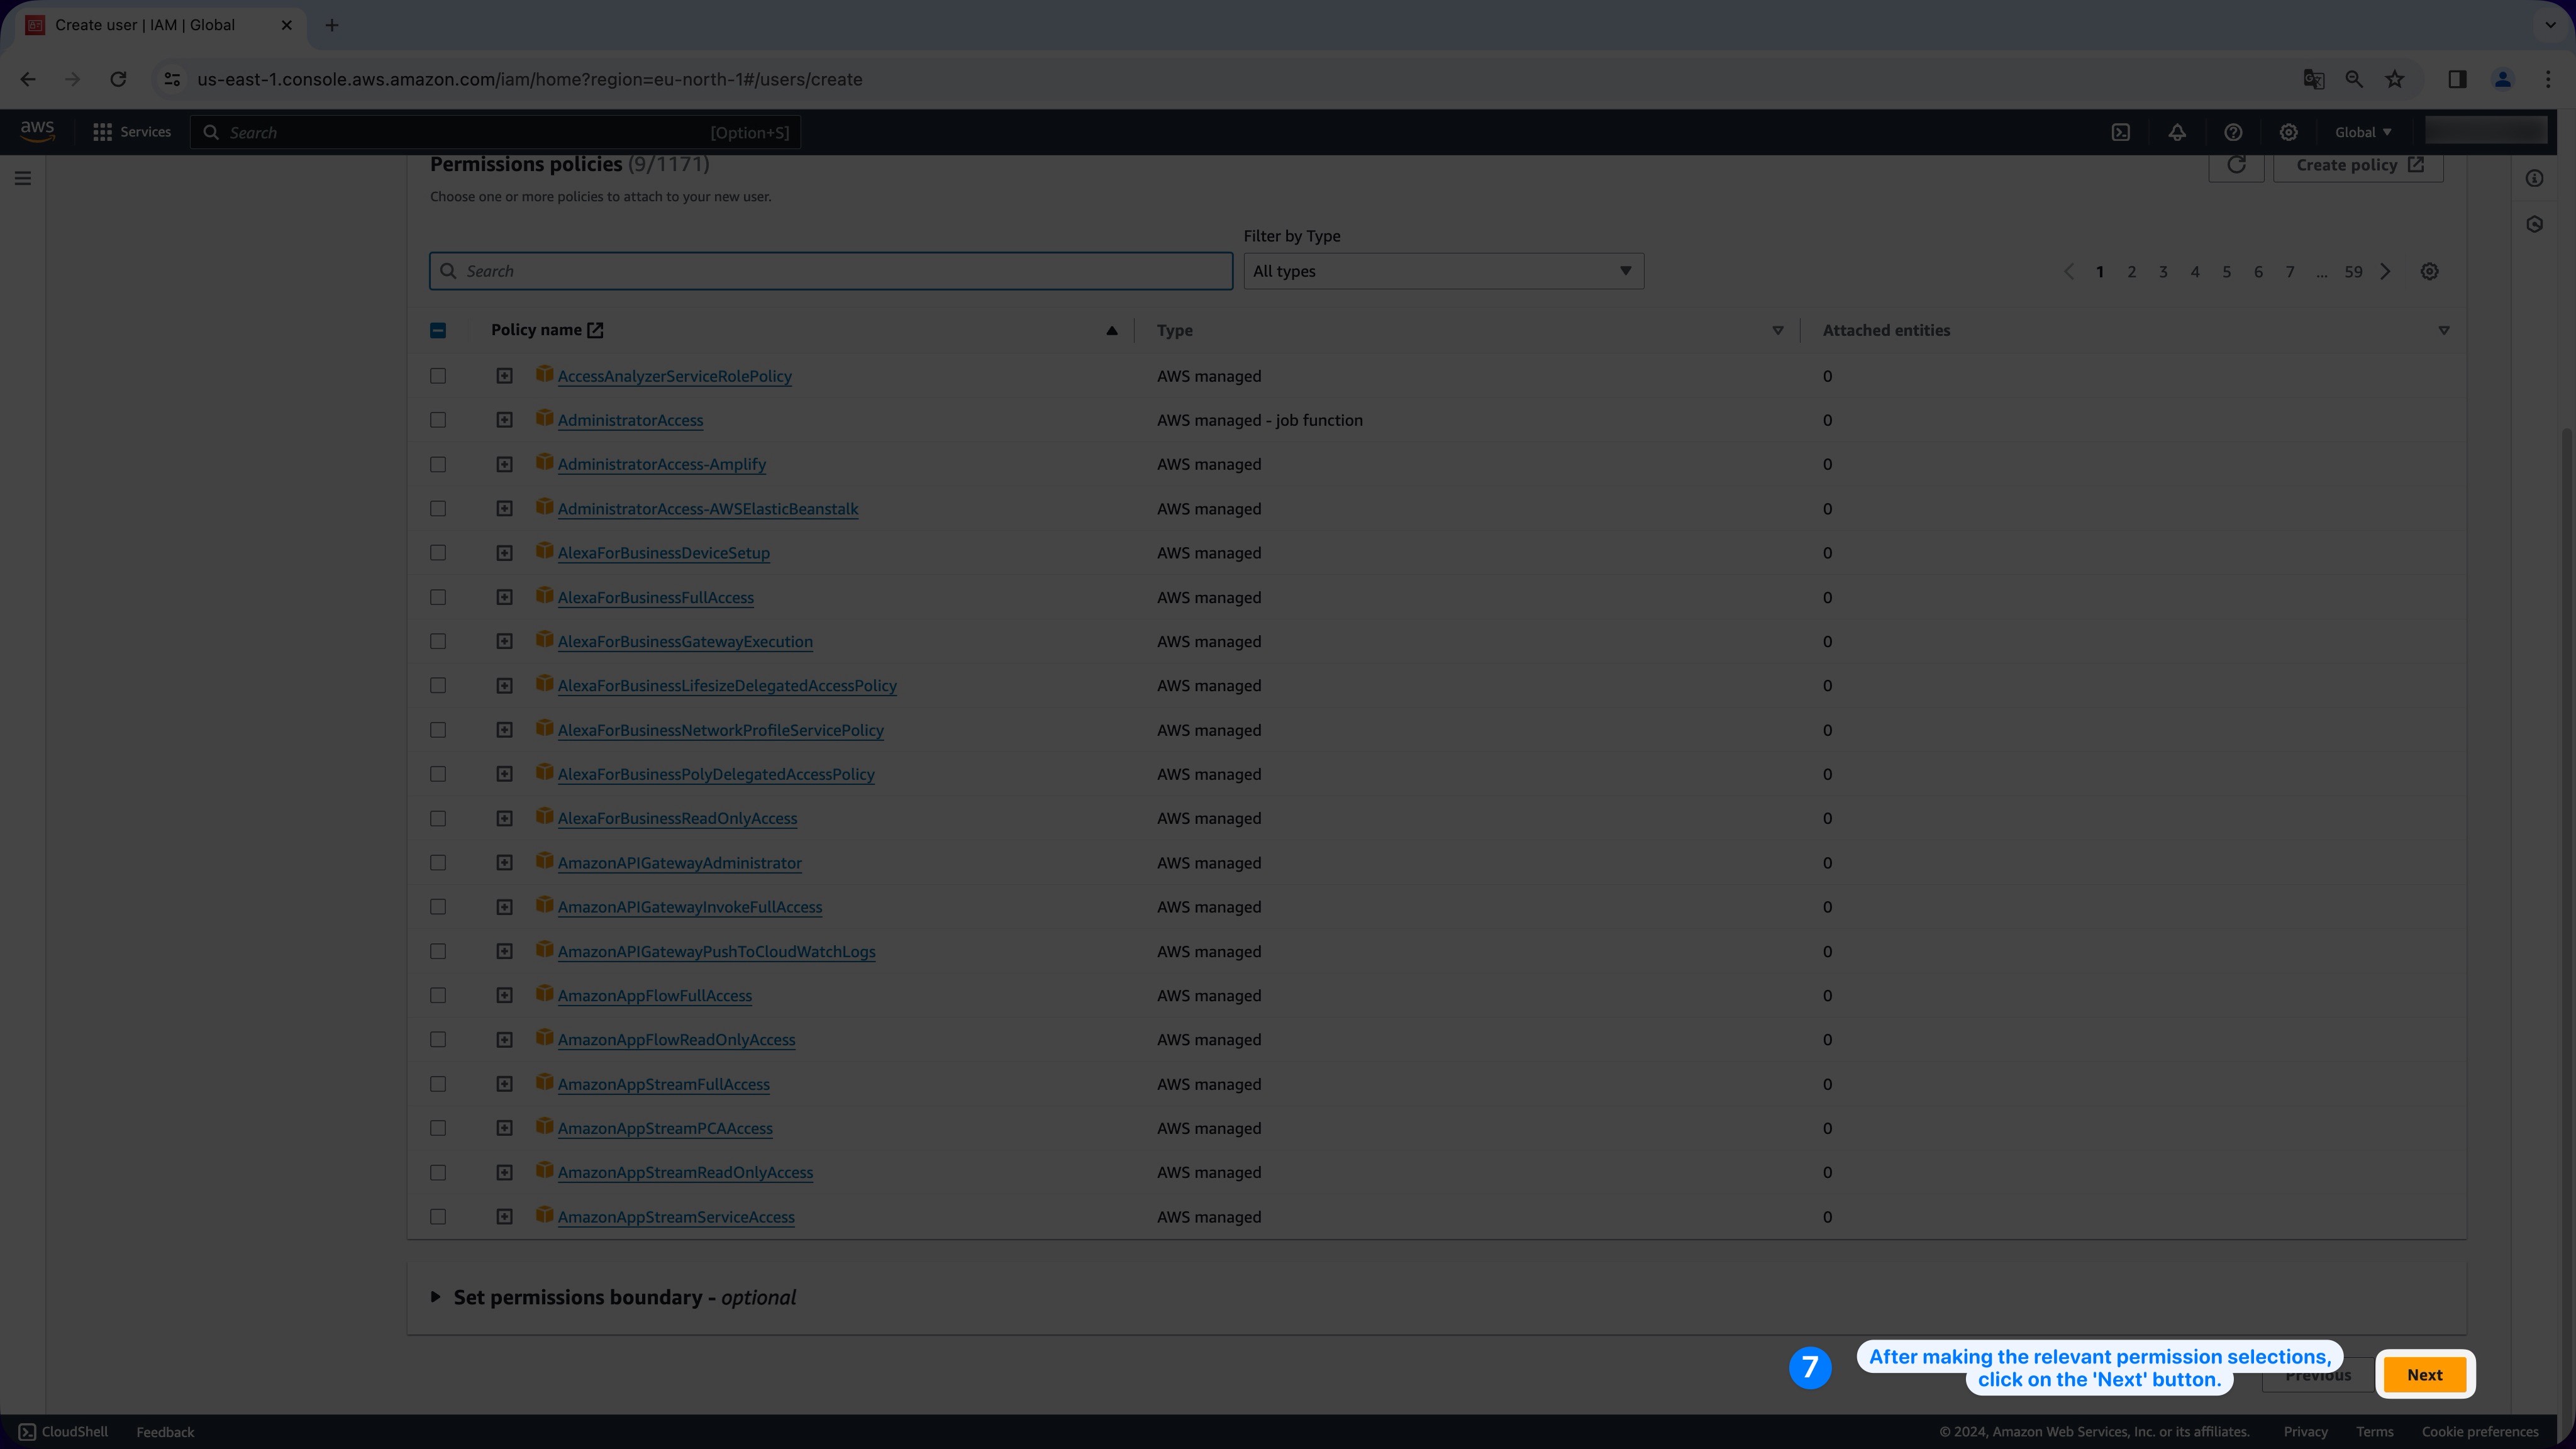
- After verifying the presence of the necessary permissions under the Permission Summary tab on the opened page, finally, click the Create User button.
3. Key Creation
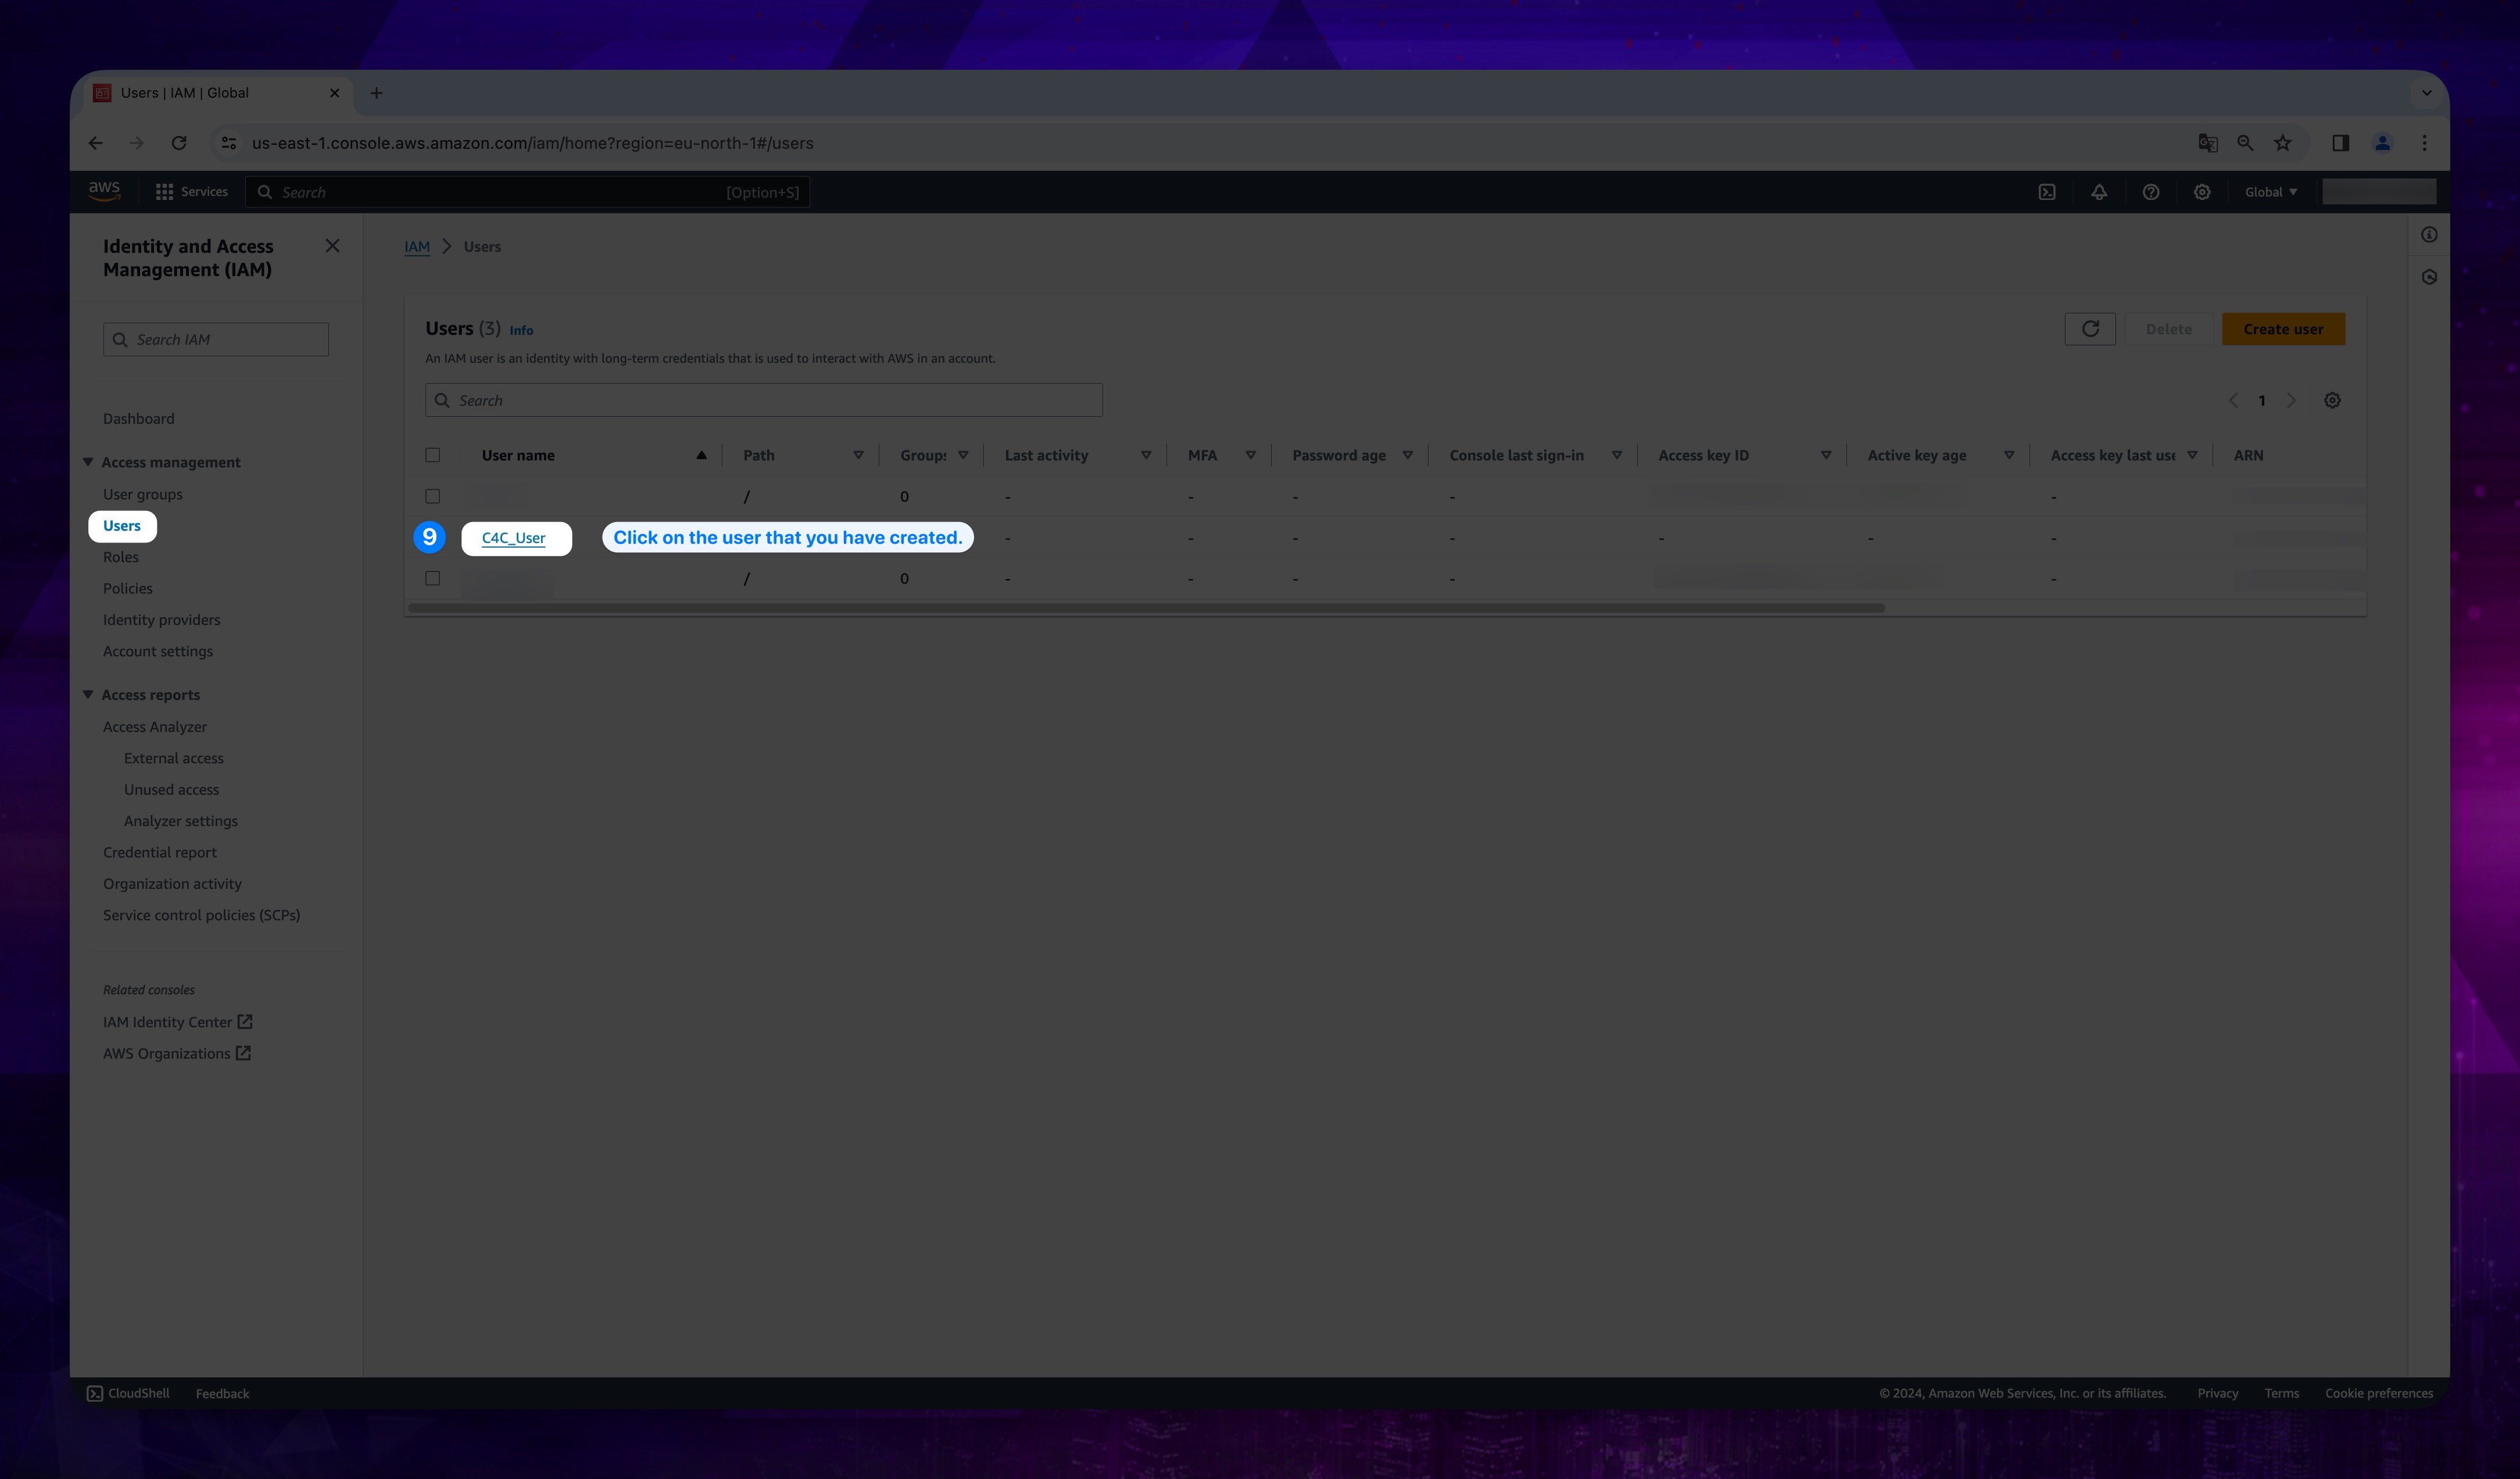
- From the list of users, click on the user that you have created.
Show the instruction with images
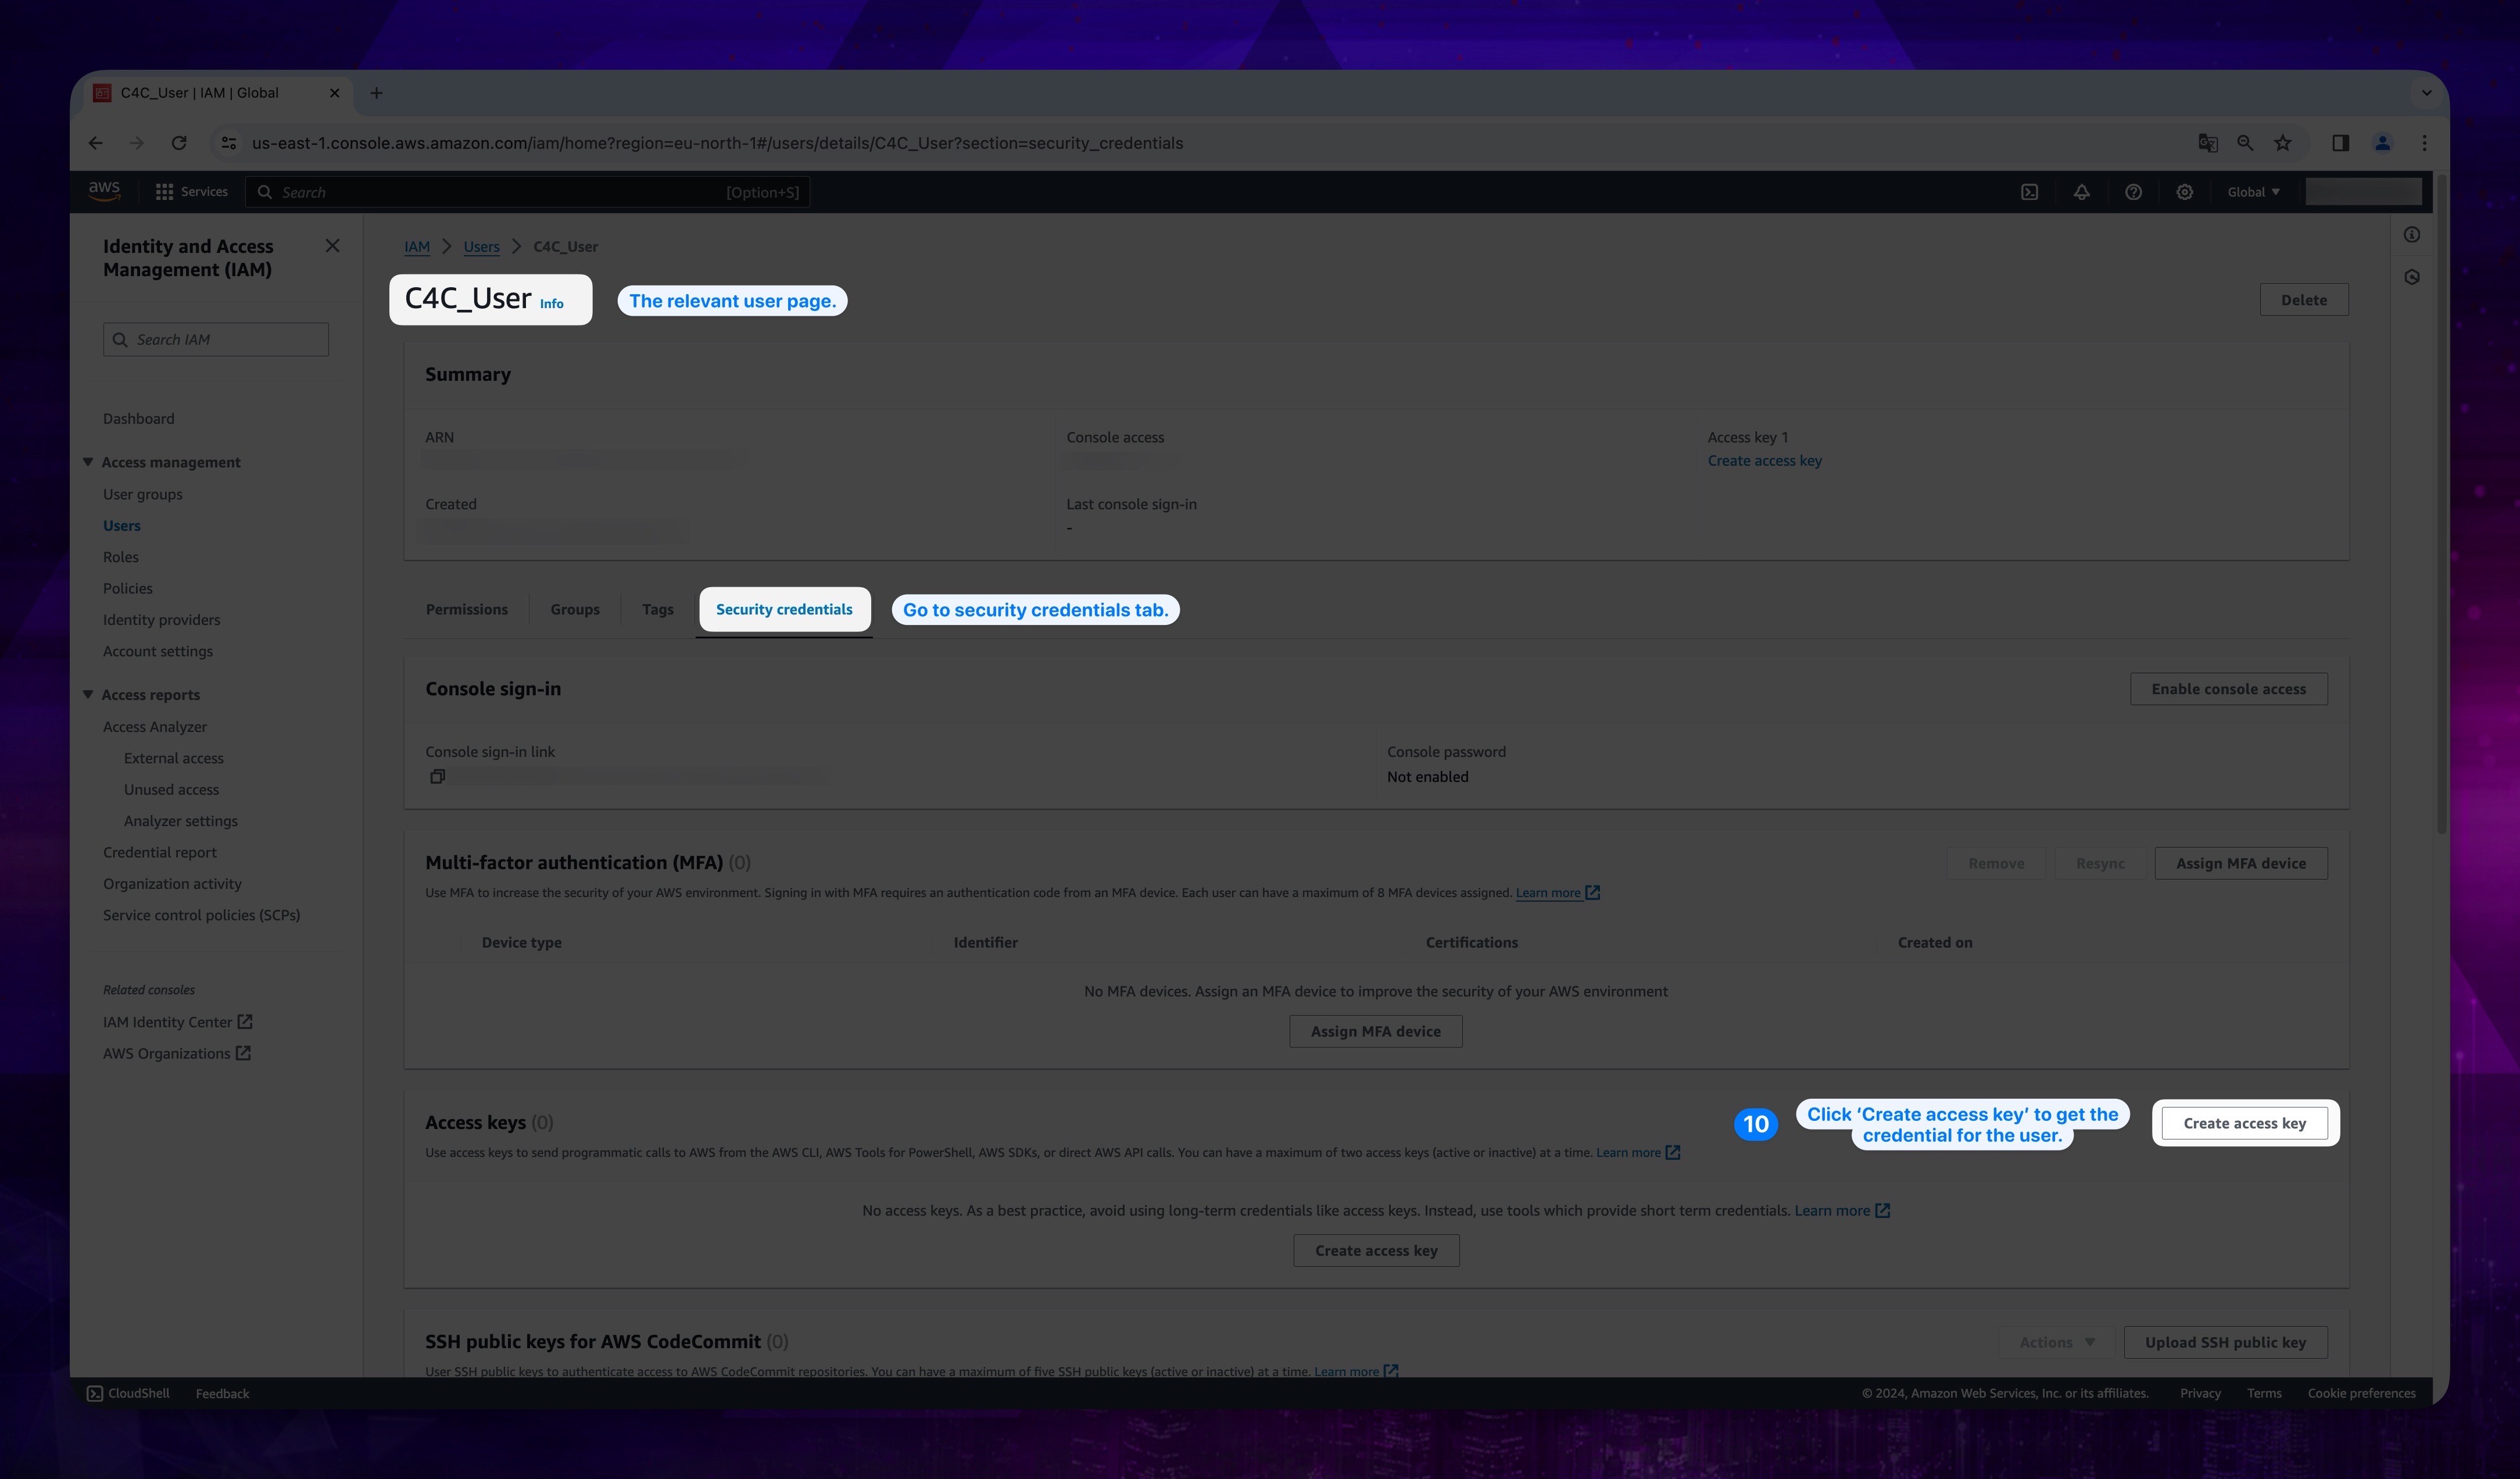
- In the relevant user page, go to the Security Credentials tab and click Create access key under Access Keys section.
Show the instruction with images
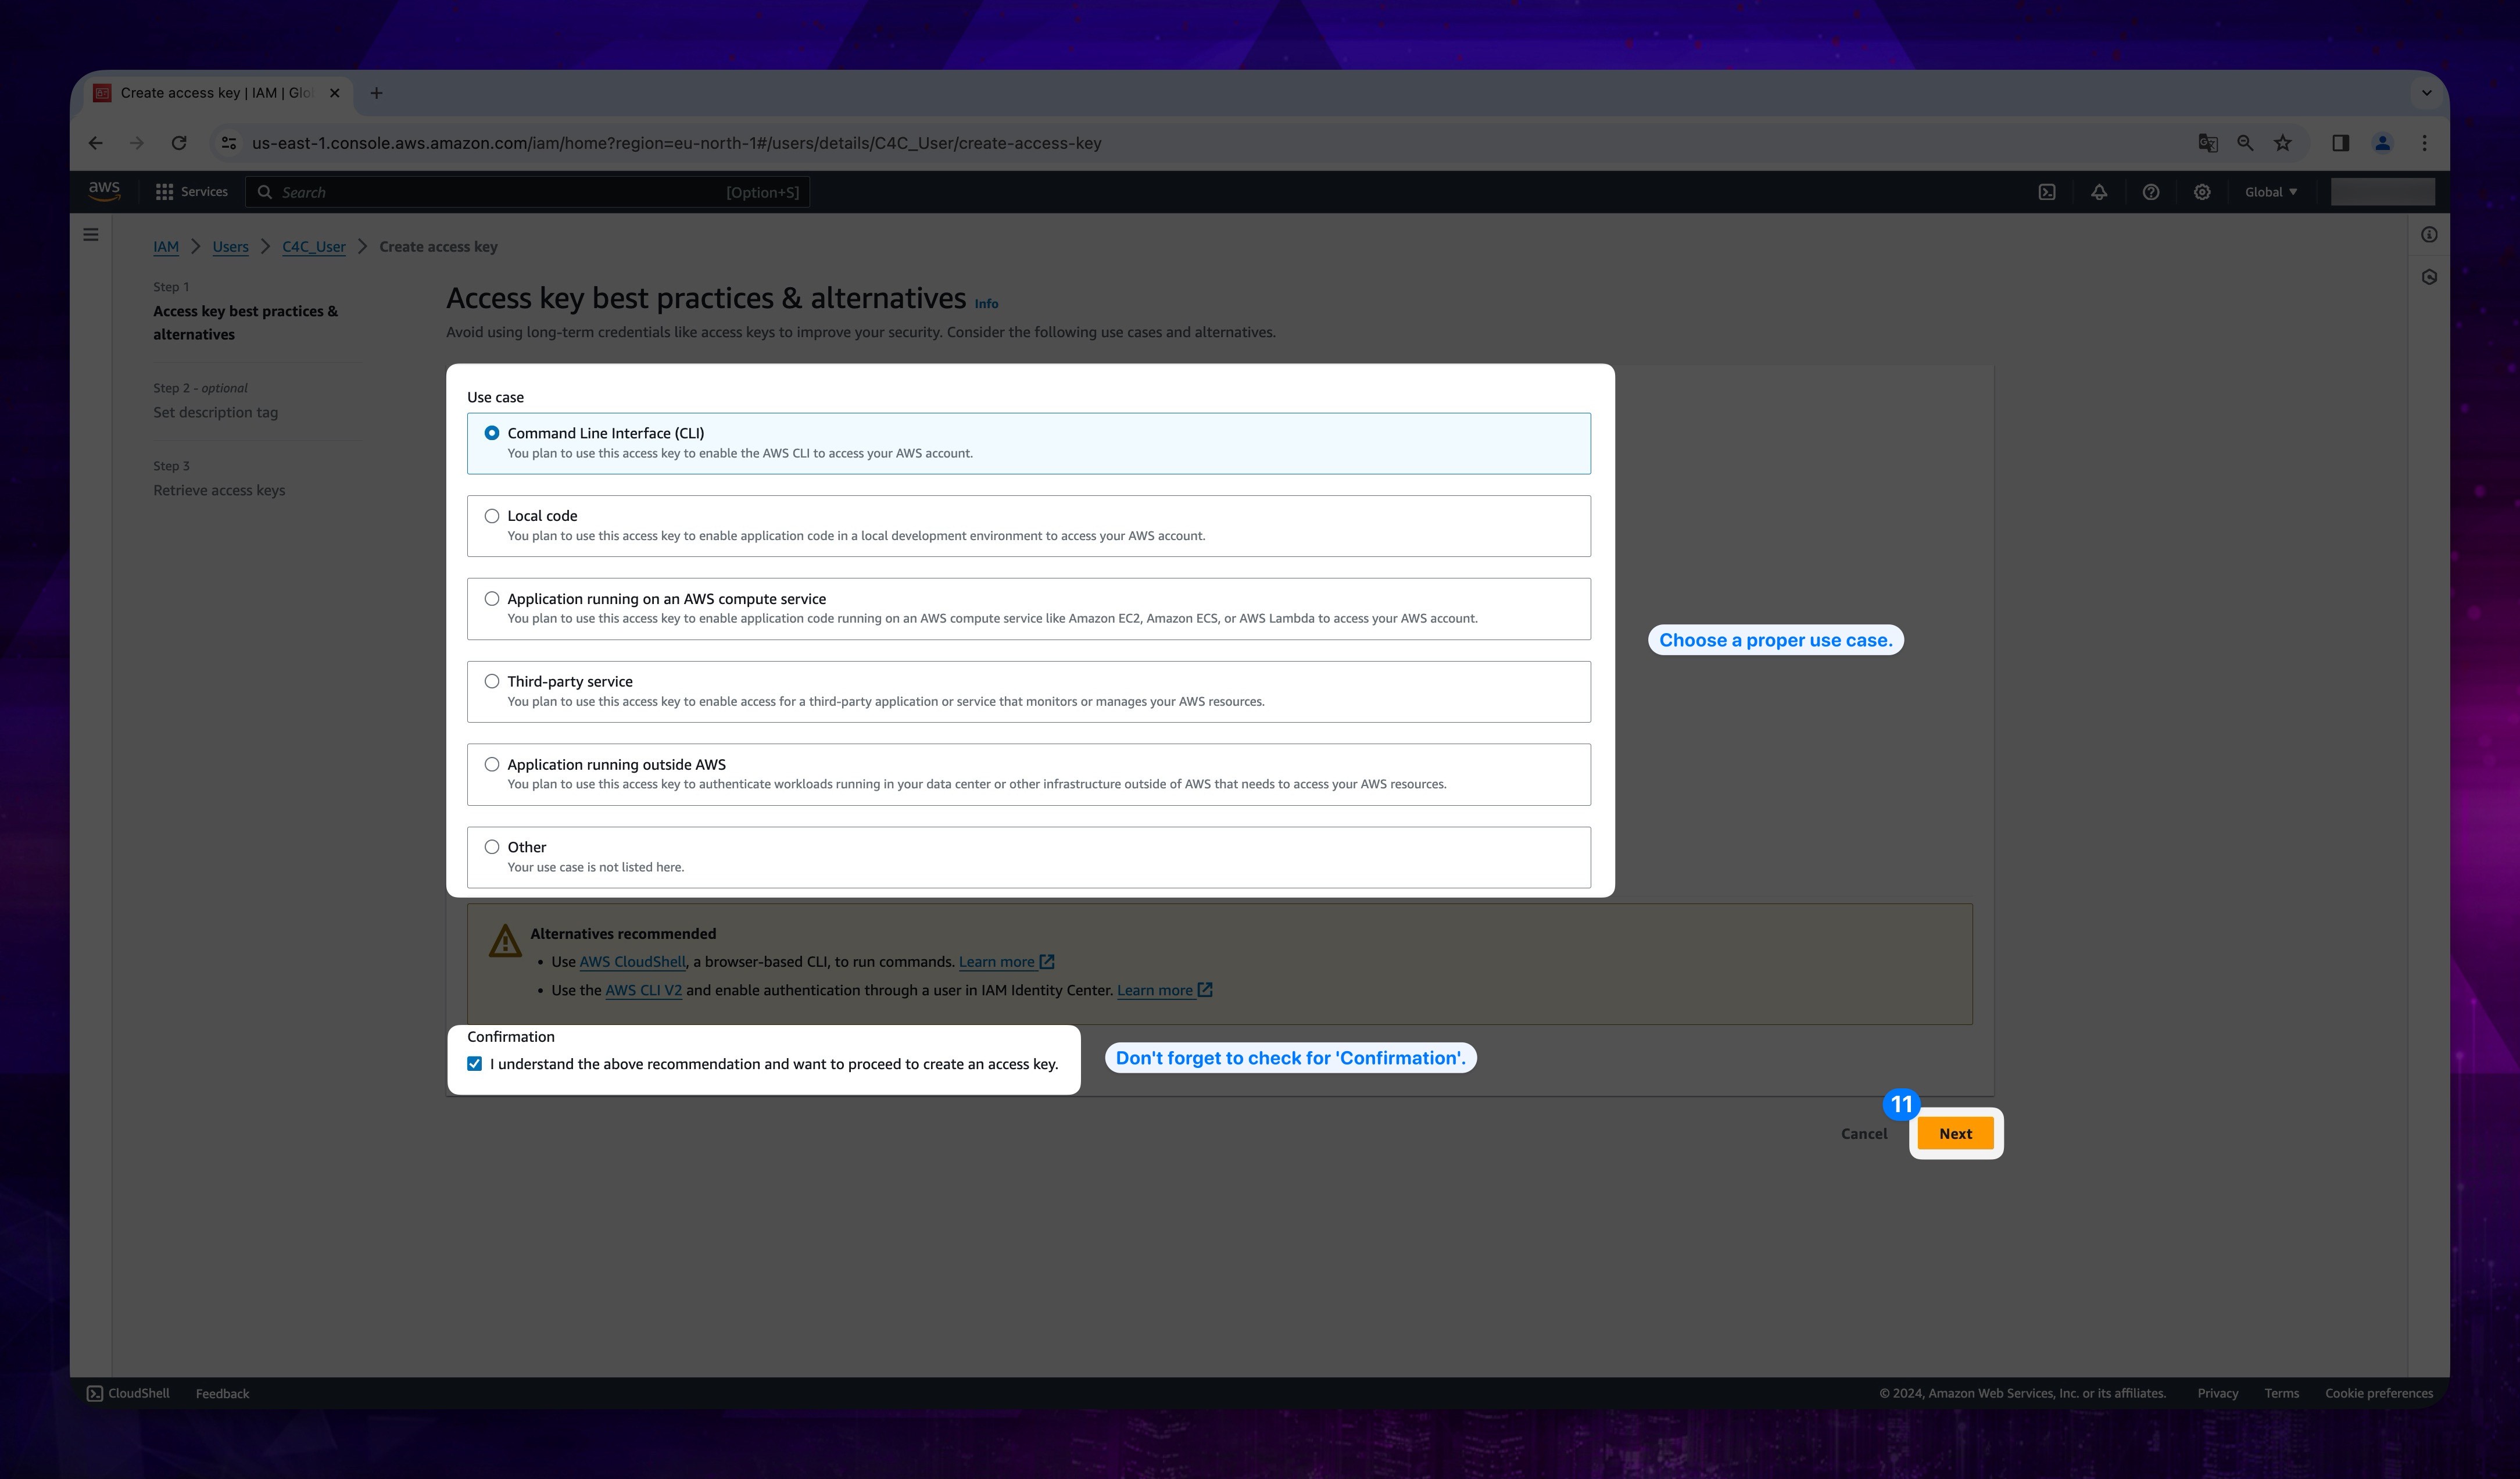
- Choose a proper use case. In this case, we chose Commond Line Interface (CLI). Then click Next button.
Show the instruction with images
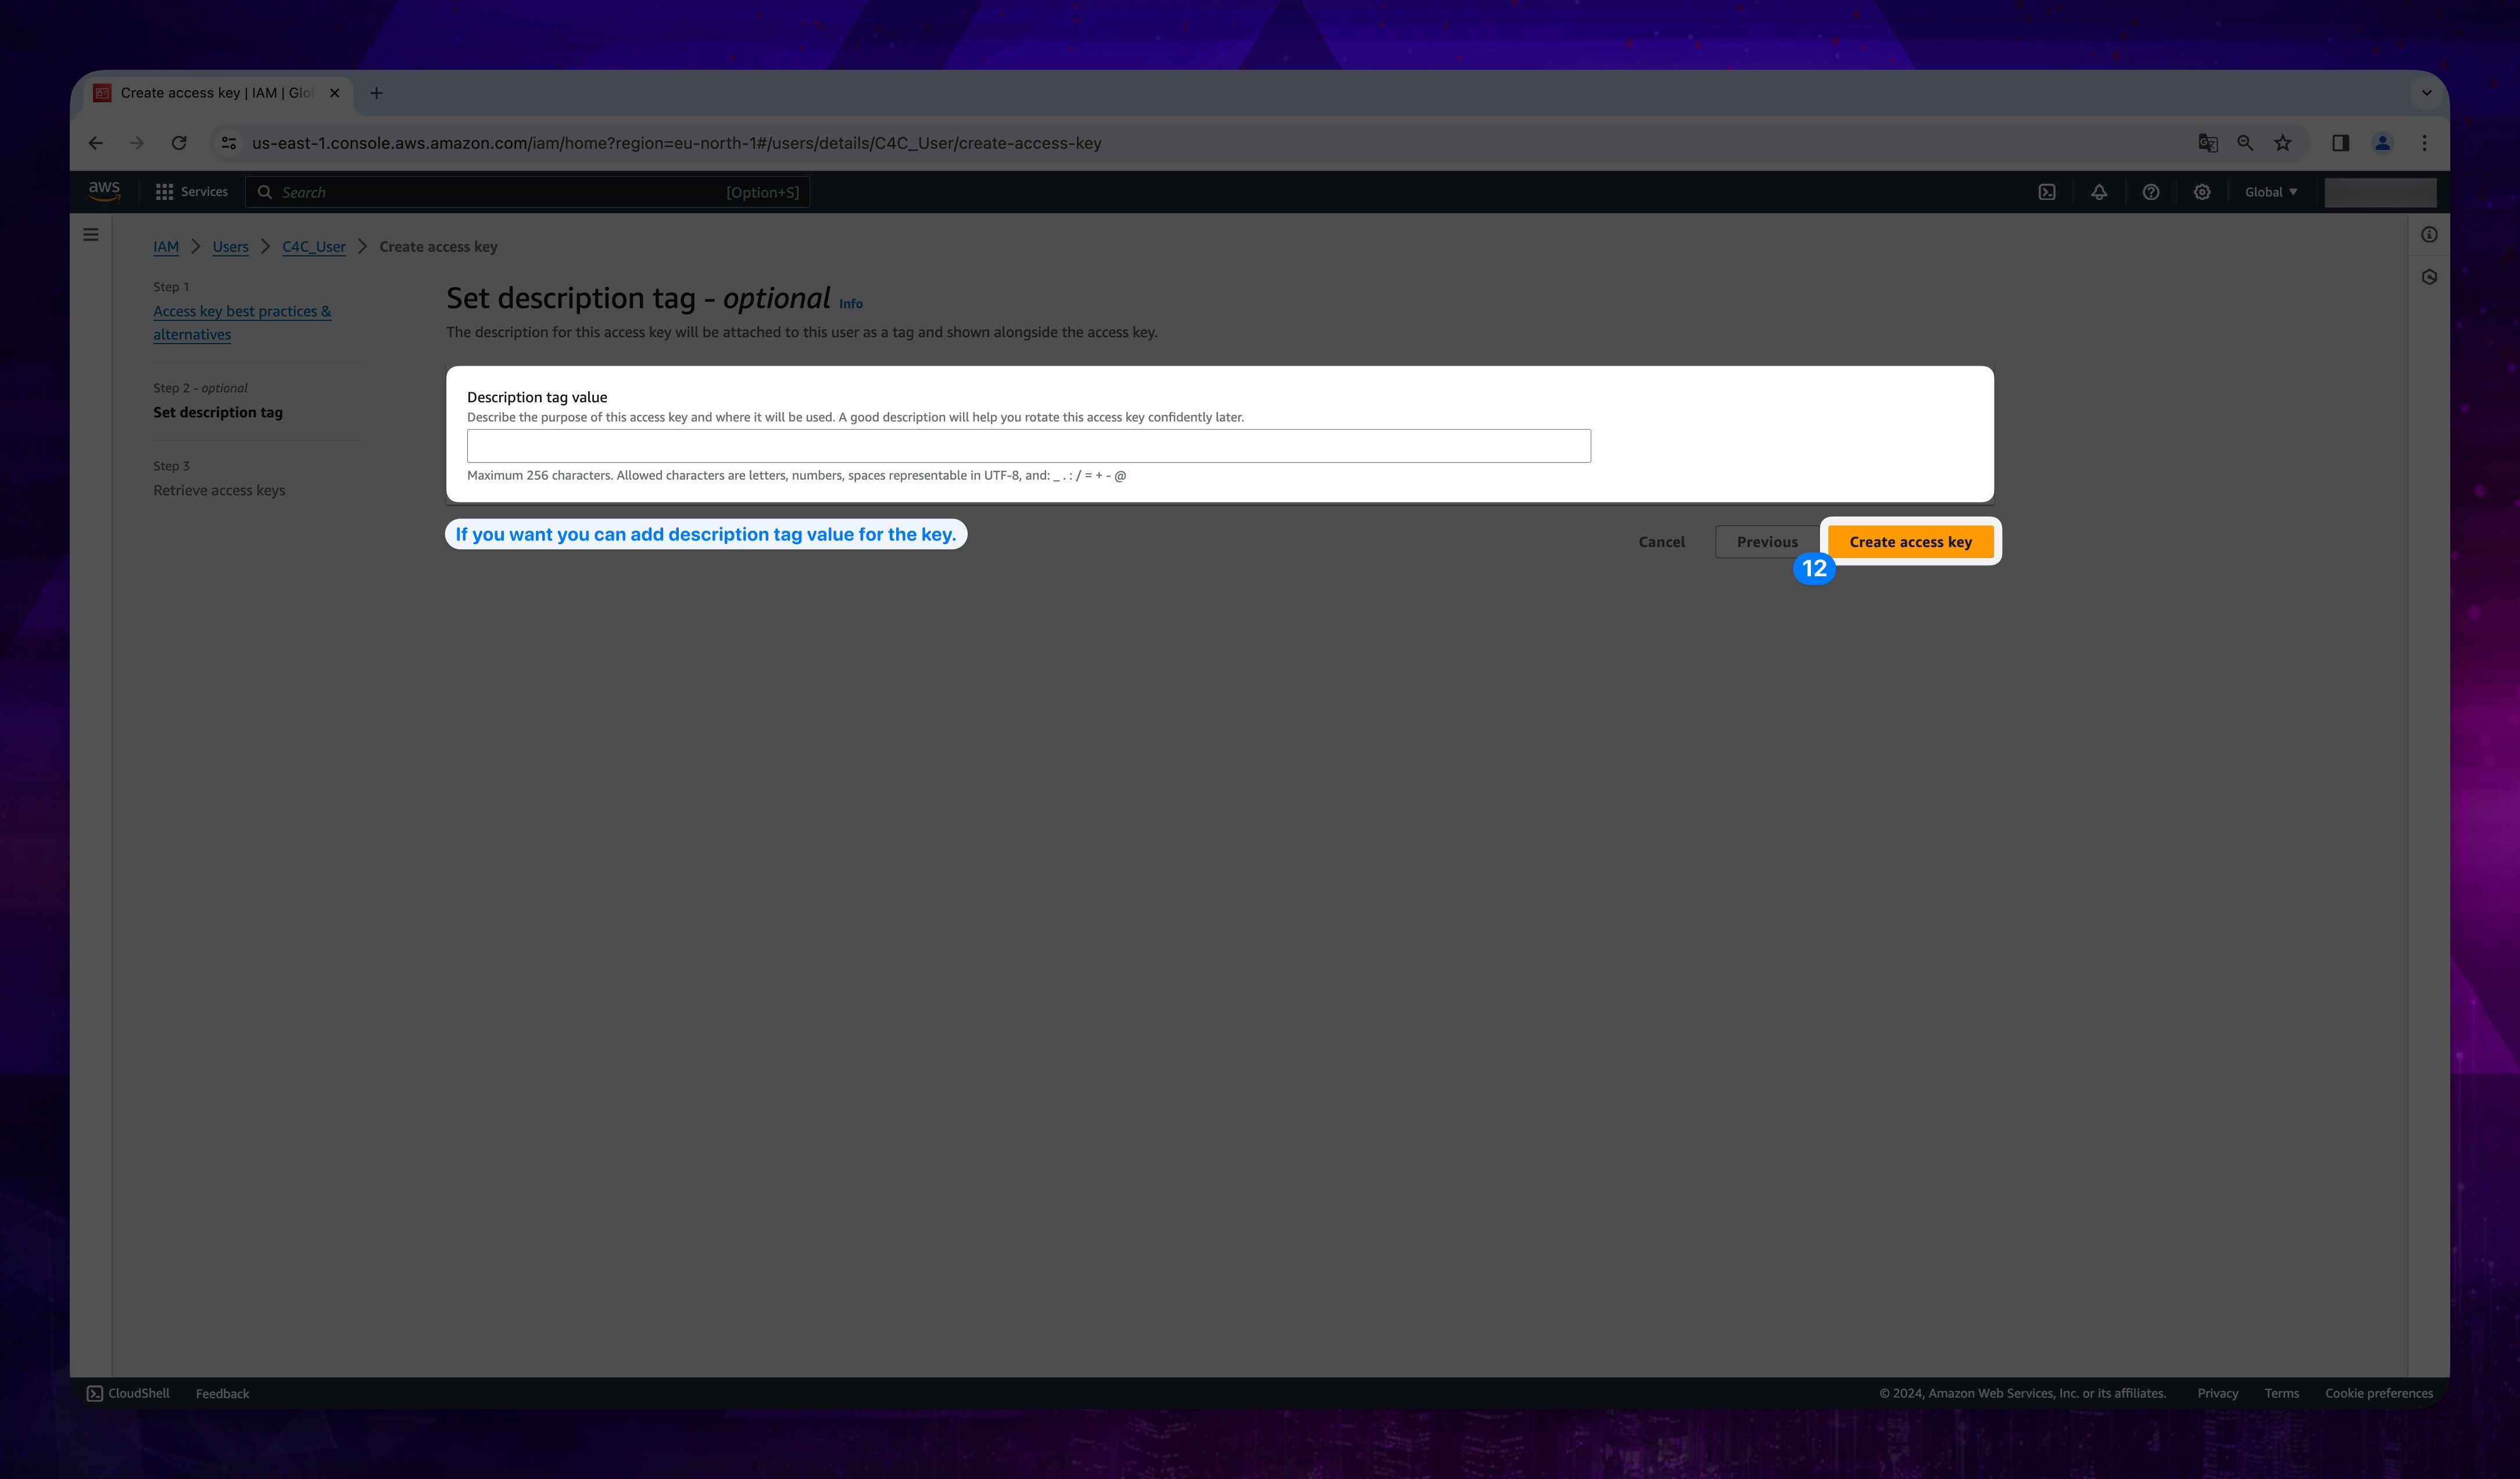
- You can add Description tag value, it's optional. After that, click Create access key.
Show the instruction with images
-
CRITICAL STEP
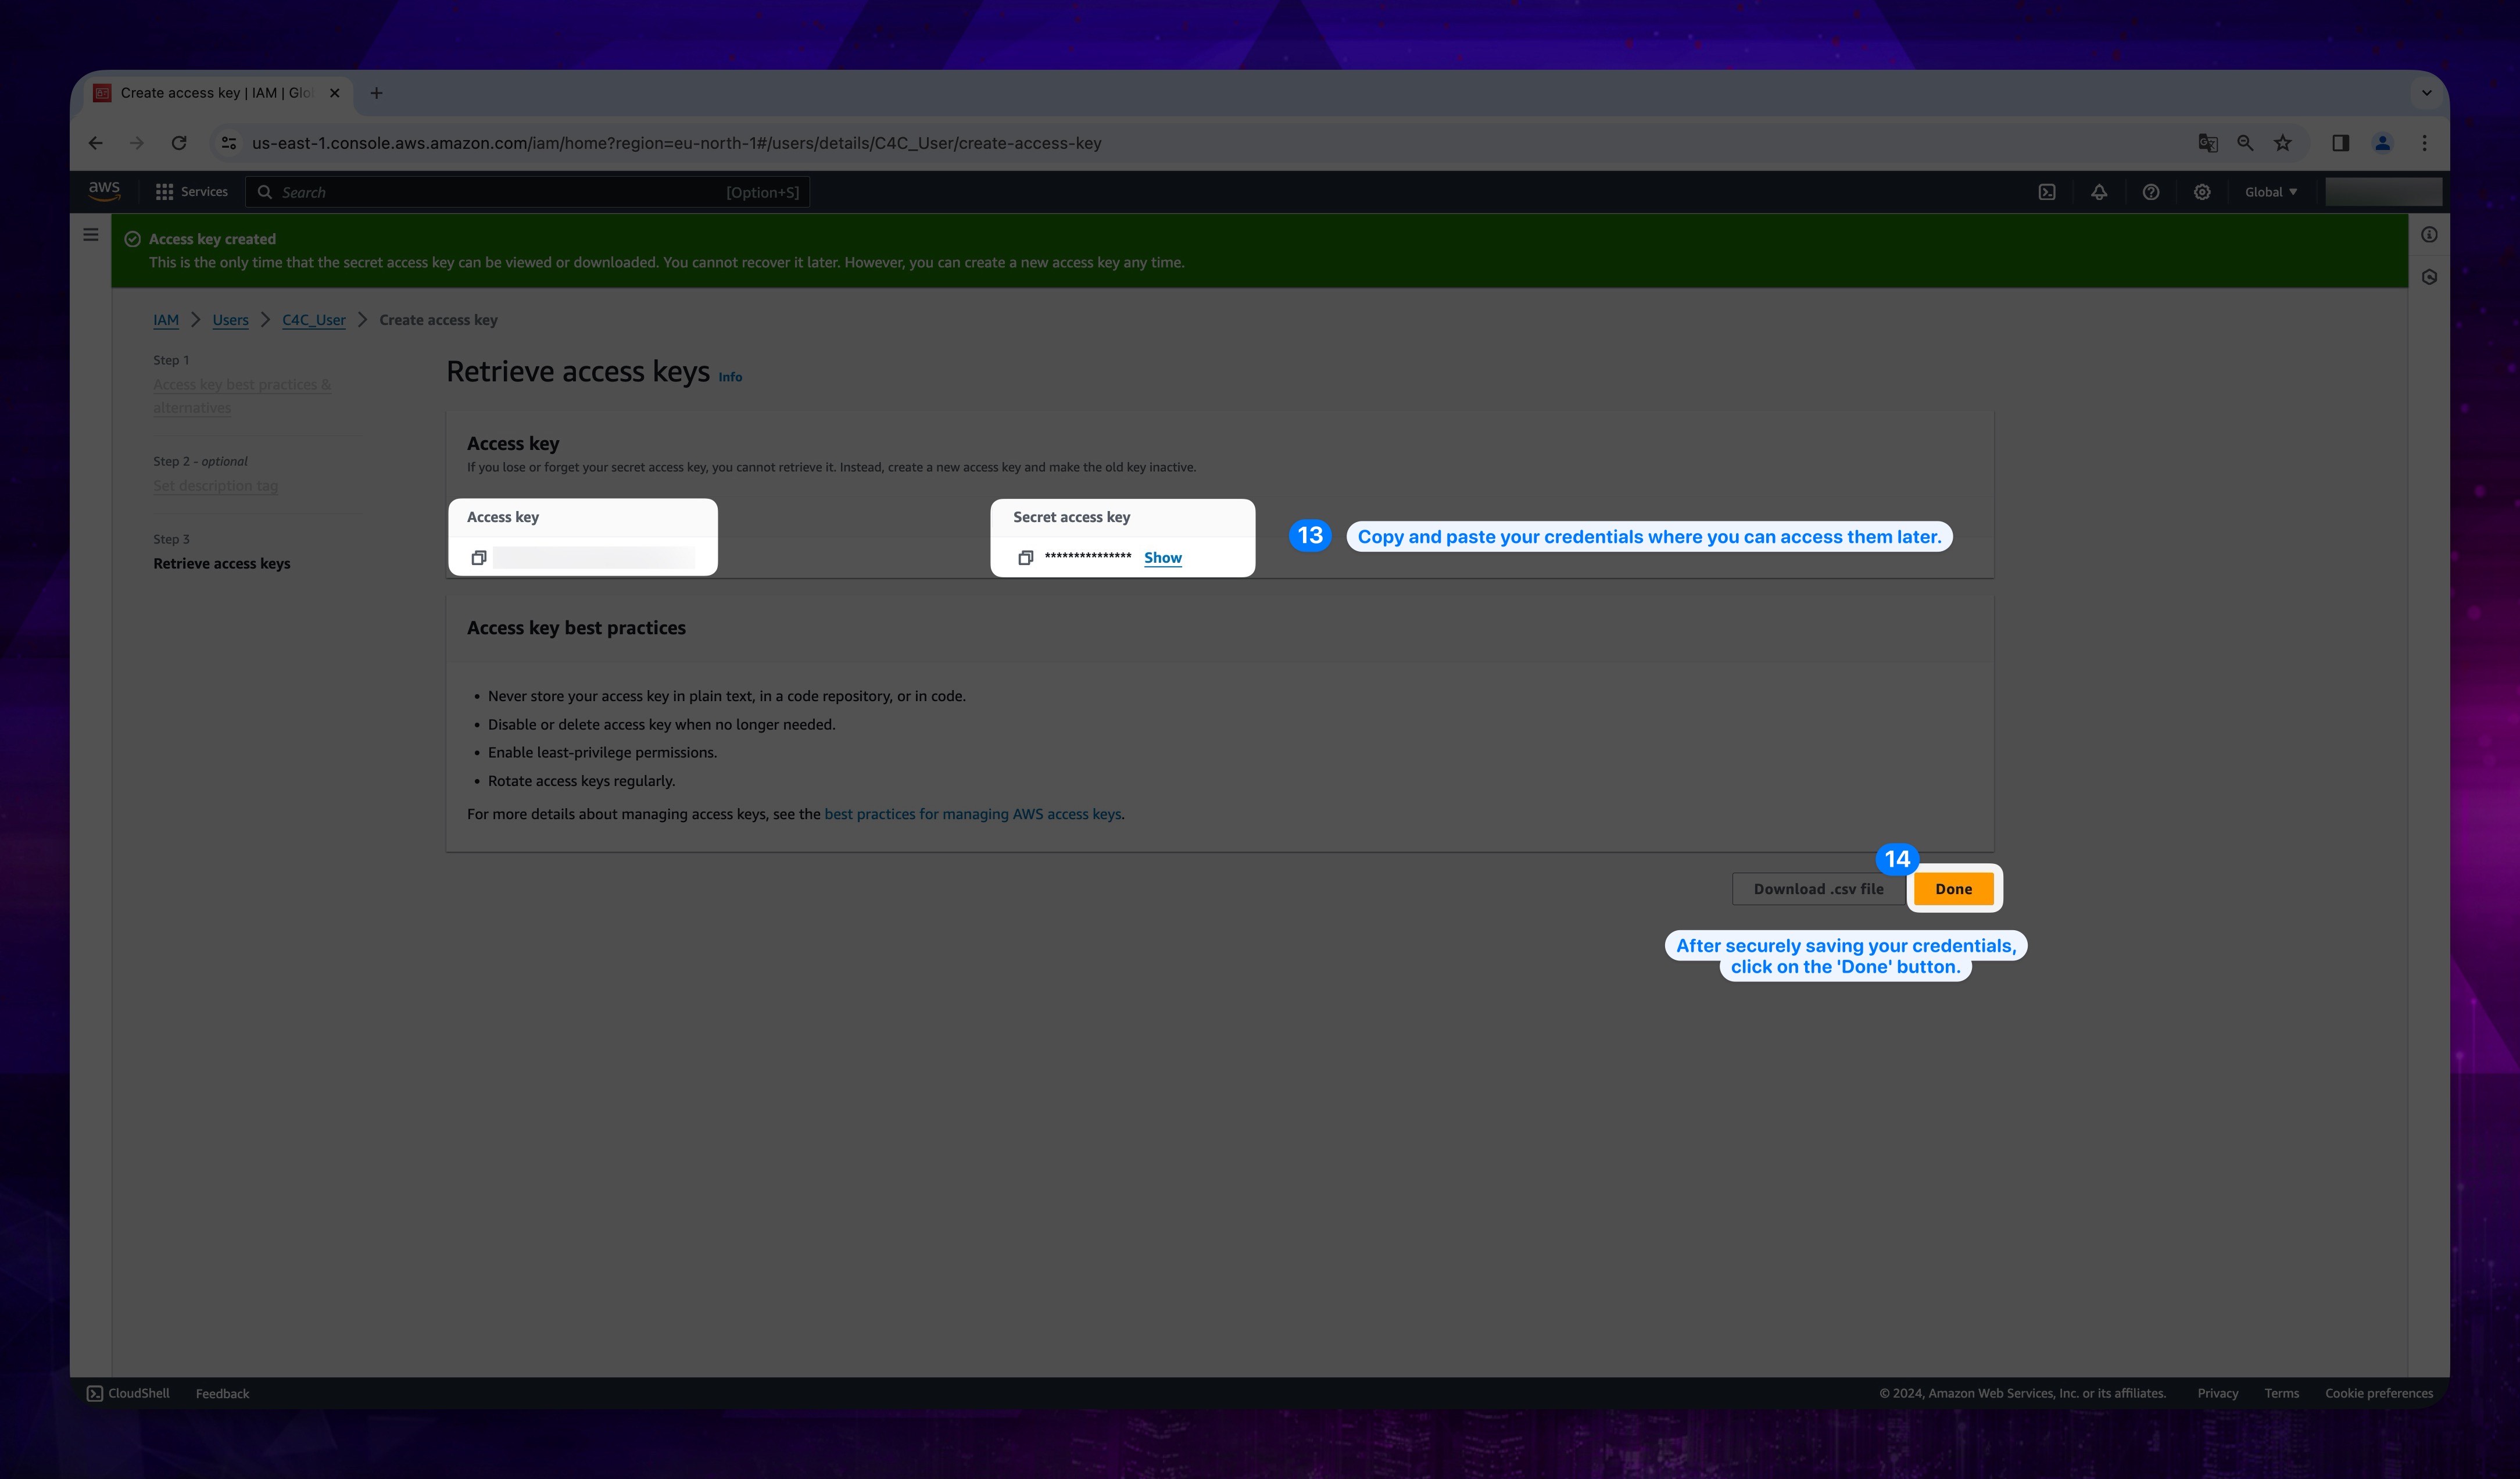
From the screen that opens, copy and paste your Access Key and Secret Access Key where you can access them later, you will need them in our console.
-
When you are sure that the credentials are accessible, you can click the Done button.
Show the instruction with images
