Cost Information Configuration
While the Cost and Usage panel provides users with cost and usage data, there are instances where we may encounter missing price information from providers. This situation could arise from the user not having the necessary permissions in the provider's console that we integrate with. To avoid this issue, you should follow the steps below to perform the necessary actions.
1. Creating a Policy for Cost Information
-
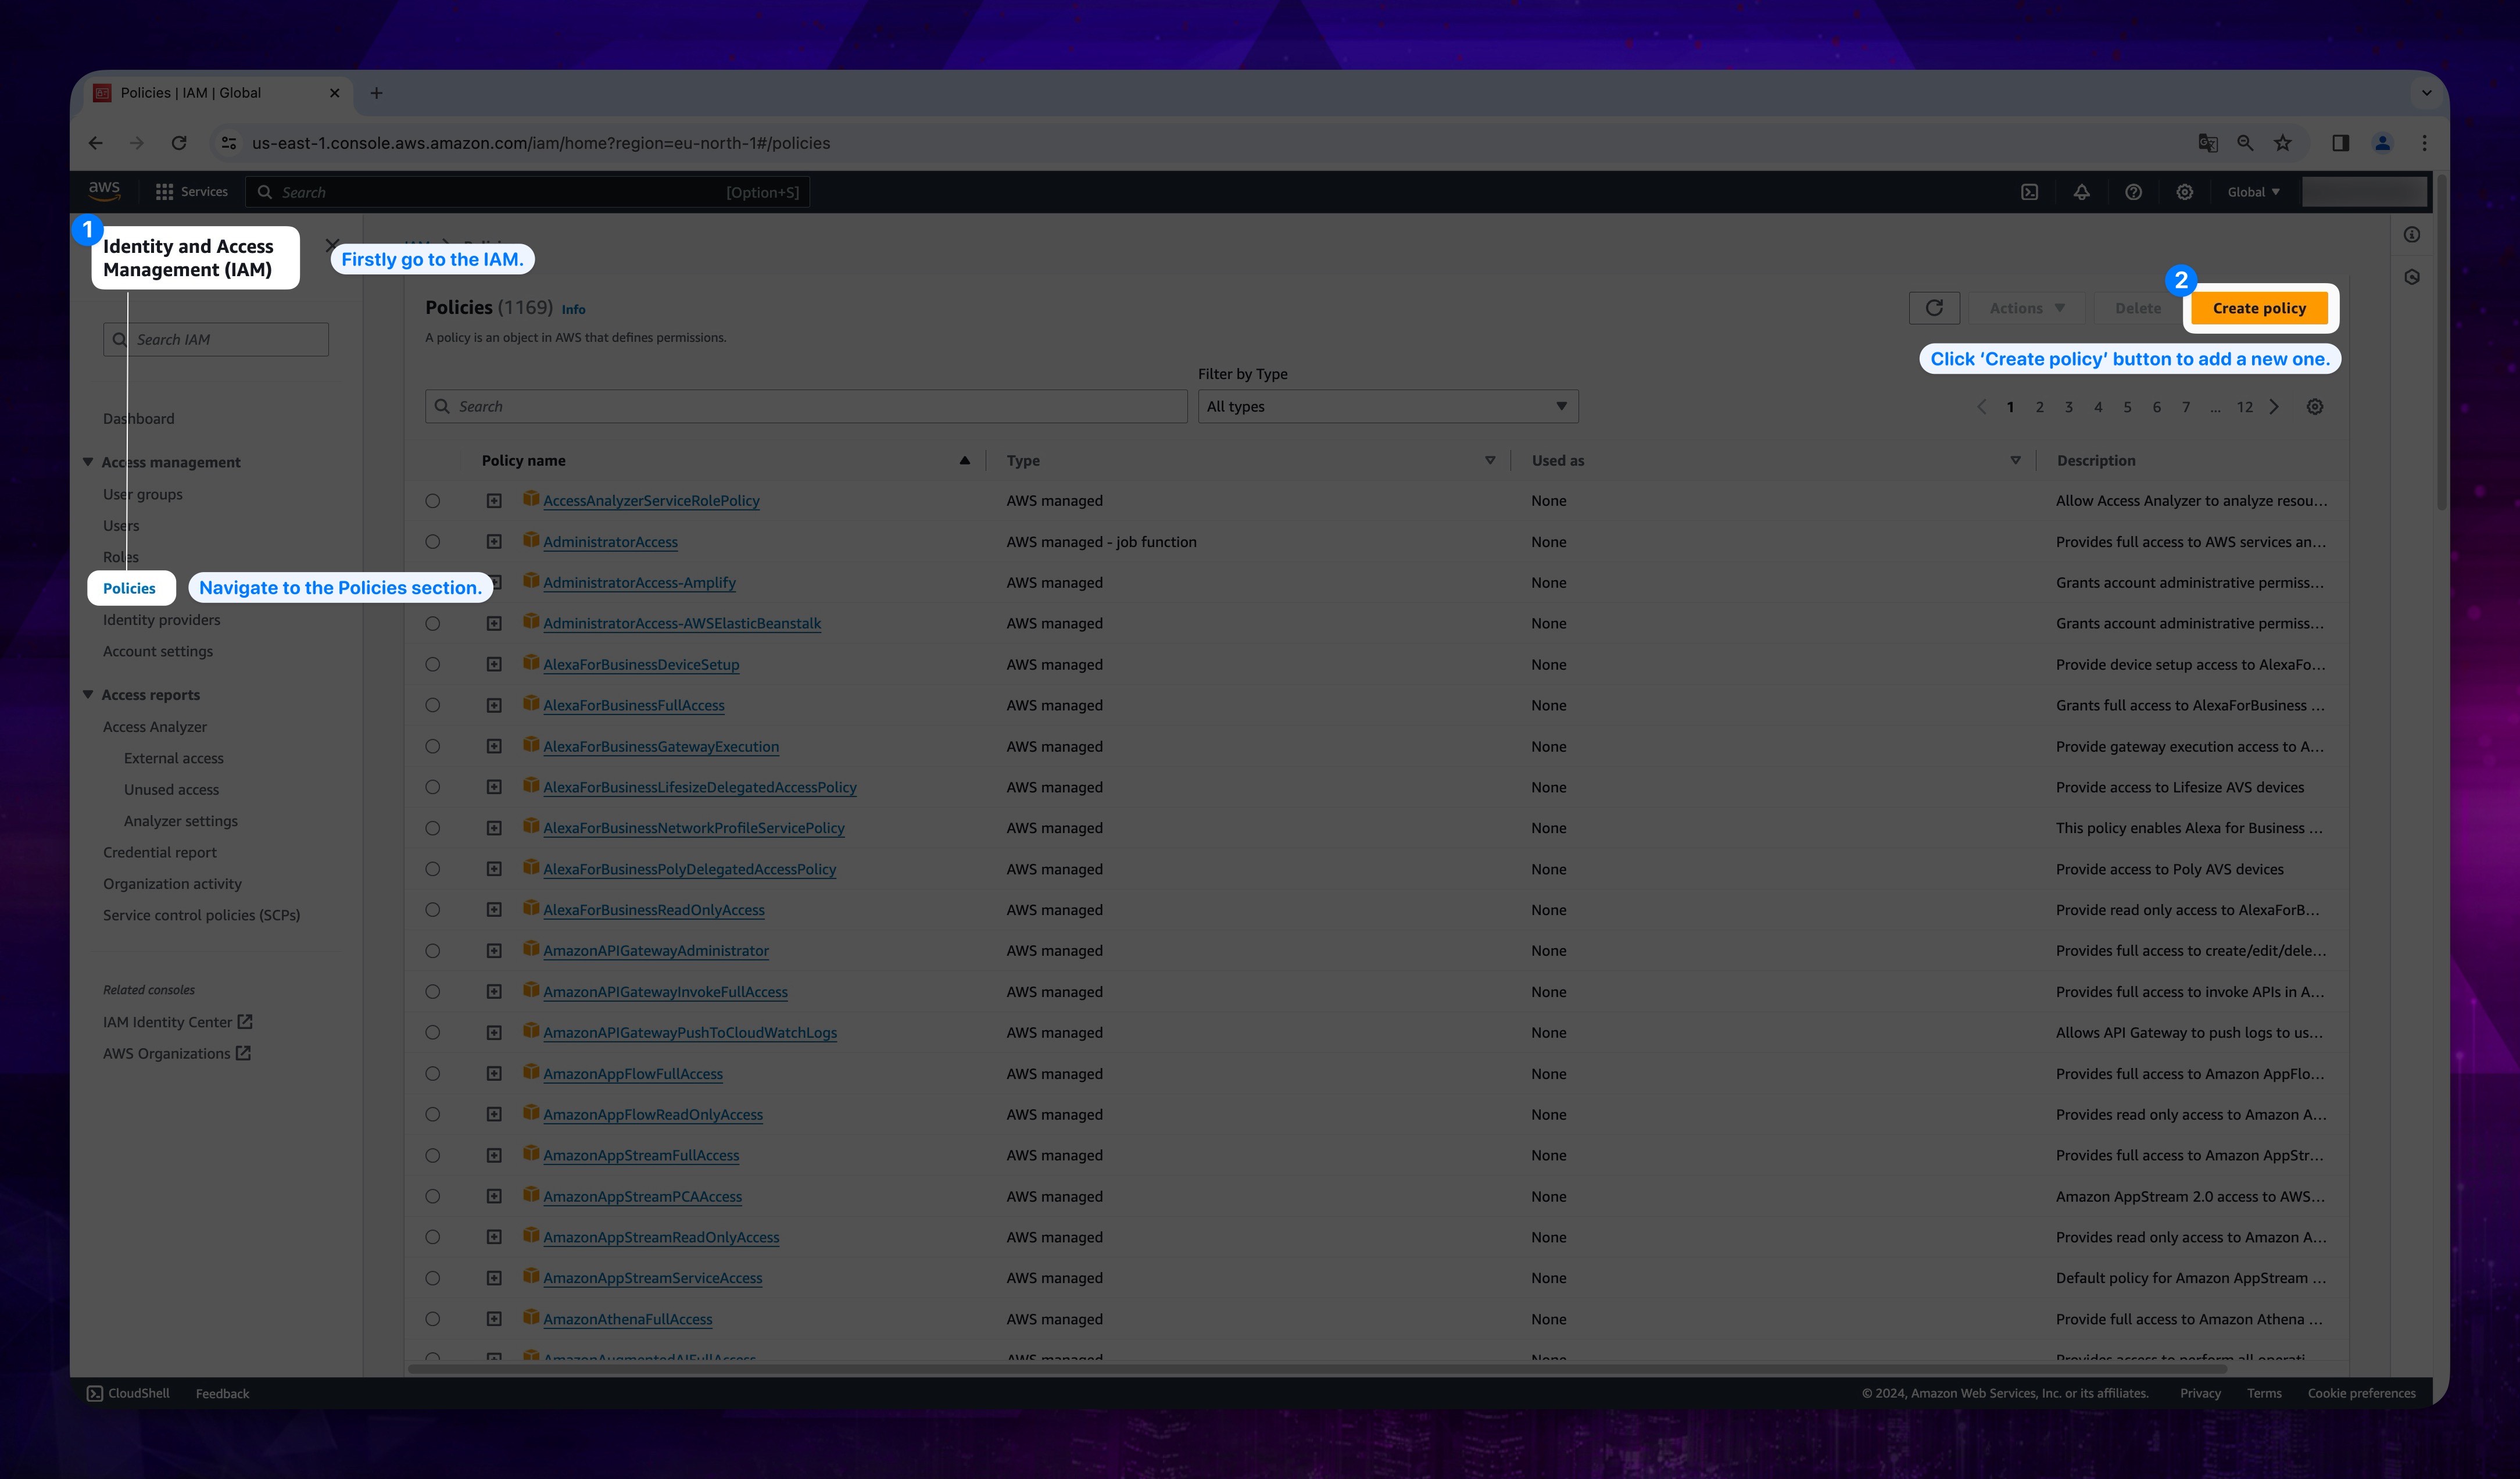
Go to IAM, then click the Policies link on the left side.
-
Click the Create Policy button on the page that appears.
Show the instruction with images
-
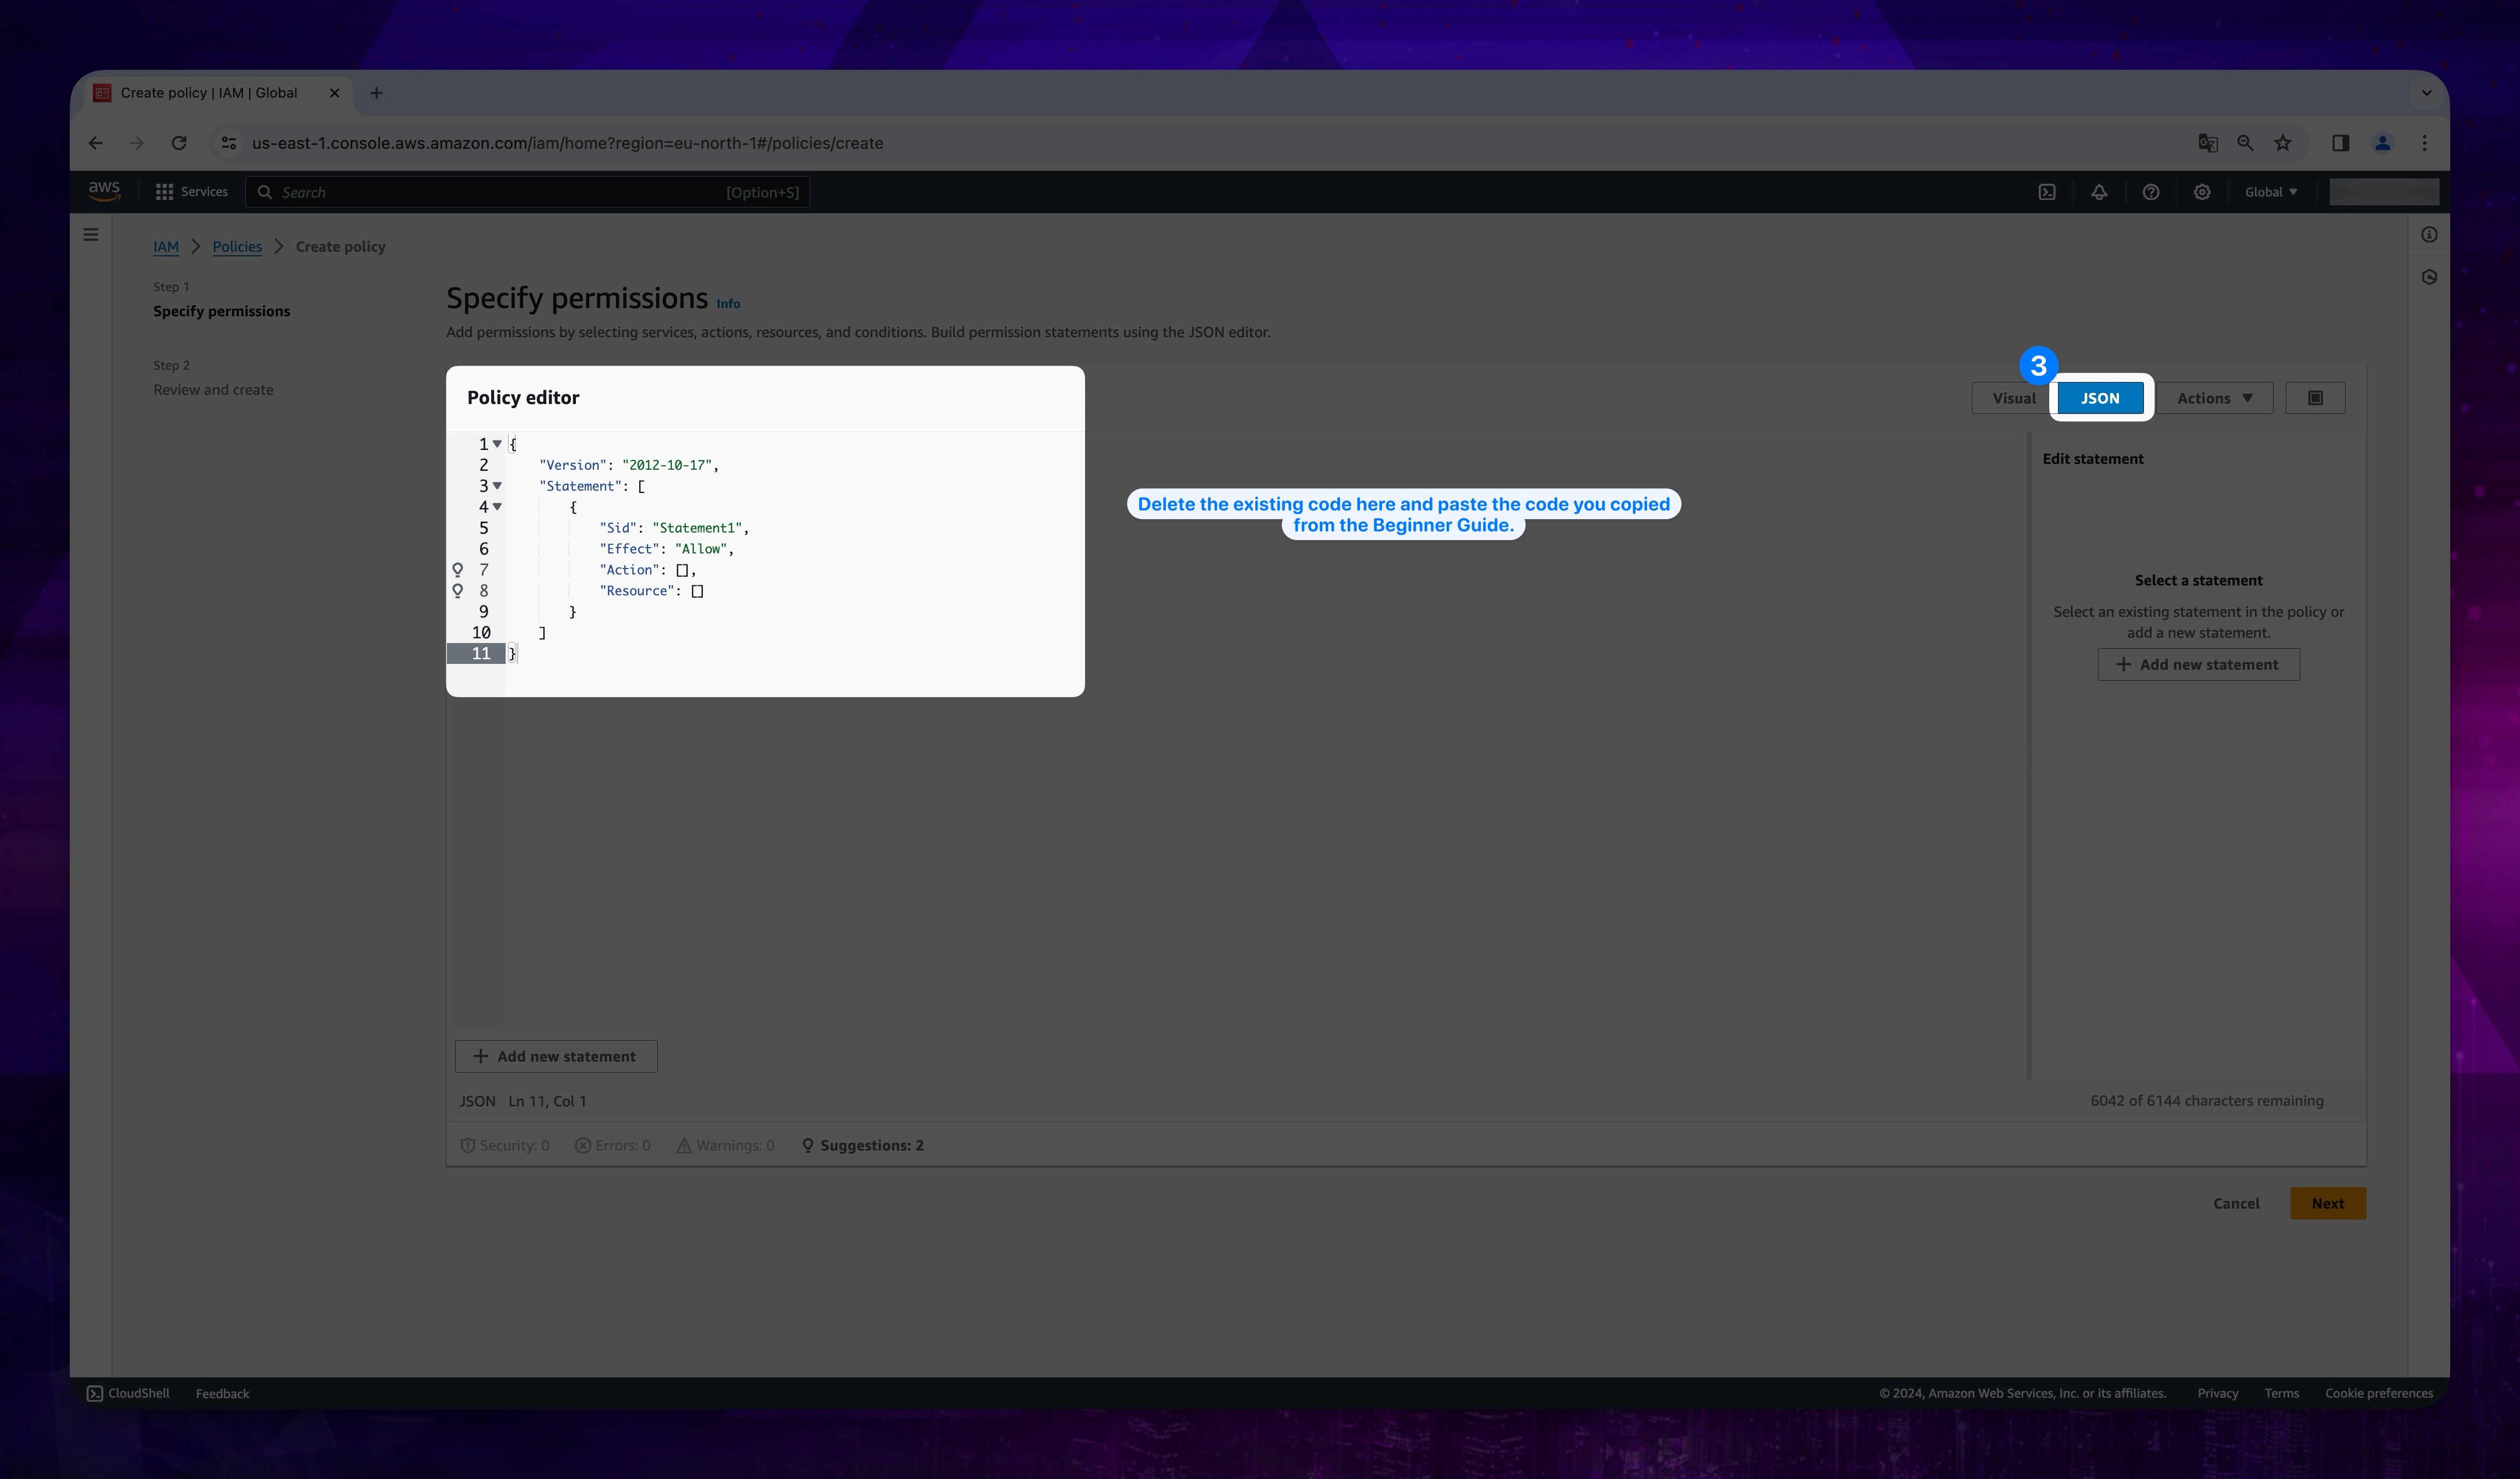
Then click on the JSON button on the page that opens. Delete the existing code and copy-paste the following code in its place.
{
  "Version": "2012-10-17",
  "Statement": [
    {
      "Sid": "Statement1",
      "Effect": "Allow",
      "Action": "ce:GetCostAndUsage",
      "Resource": "*"
    },
    {
      "Sid": "Statement2",
      "Effect": "Allow",
      "Action": "cur:putReportDefinition",
      "Resource": "*"
    },
    {
      "Sid": "AllowListExports",
      "Effect": "Allow",
      "Action": "bcm-data-exports:*",
      "Resource": "*"
    }
  ]
}
Show the instruction with images
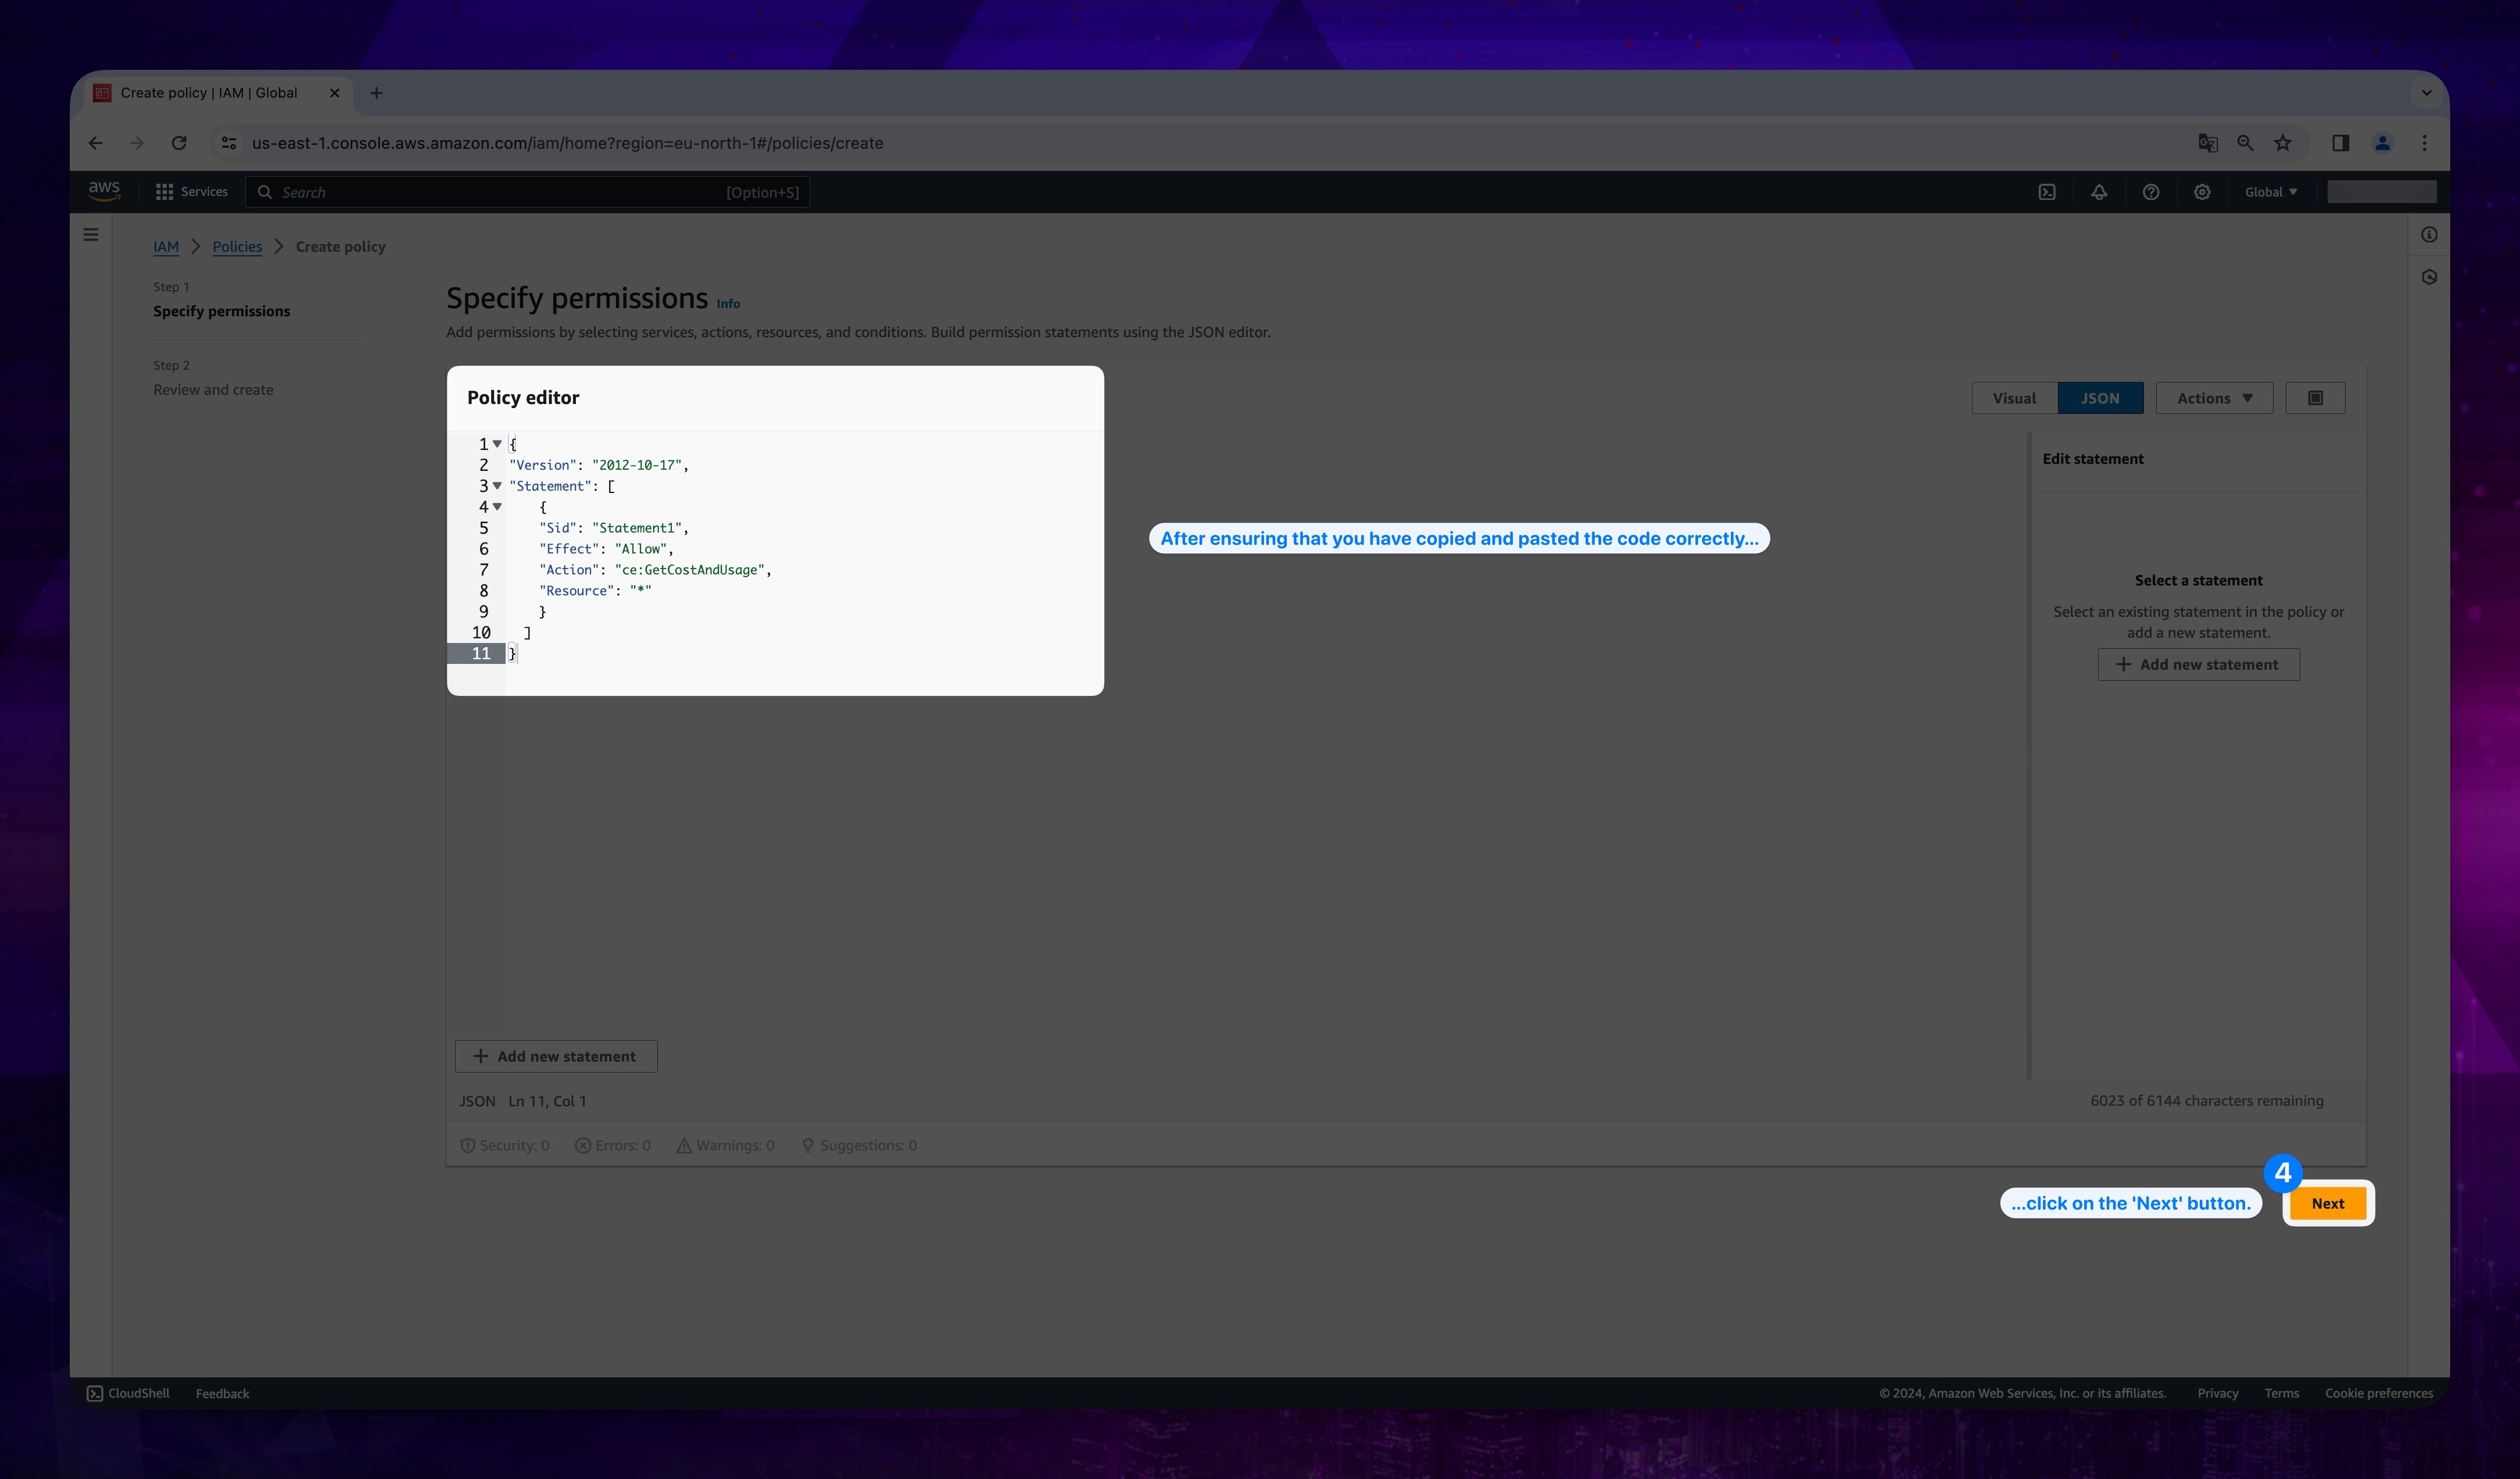
- Please scroll down the page and click the Next button.
Show the instruction with images
-
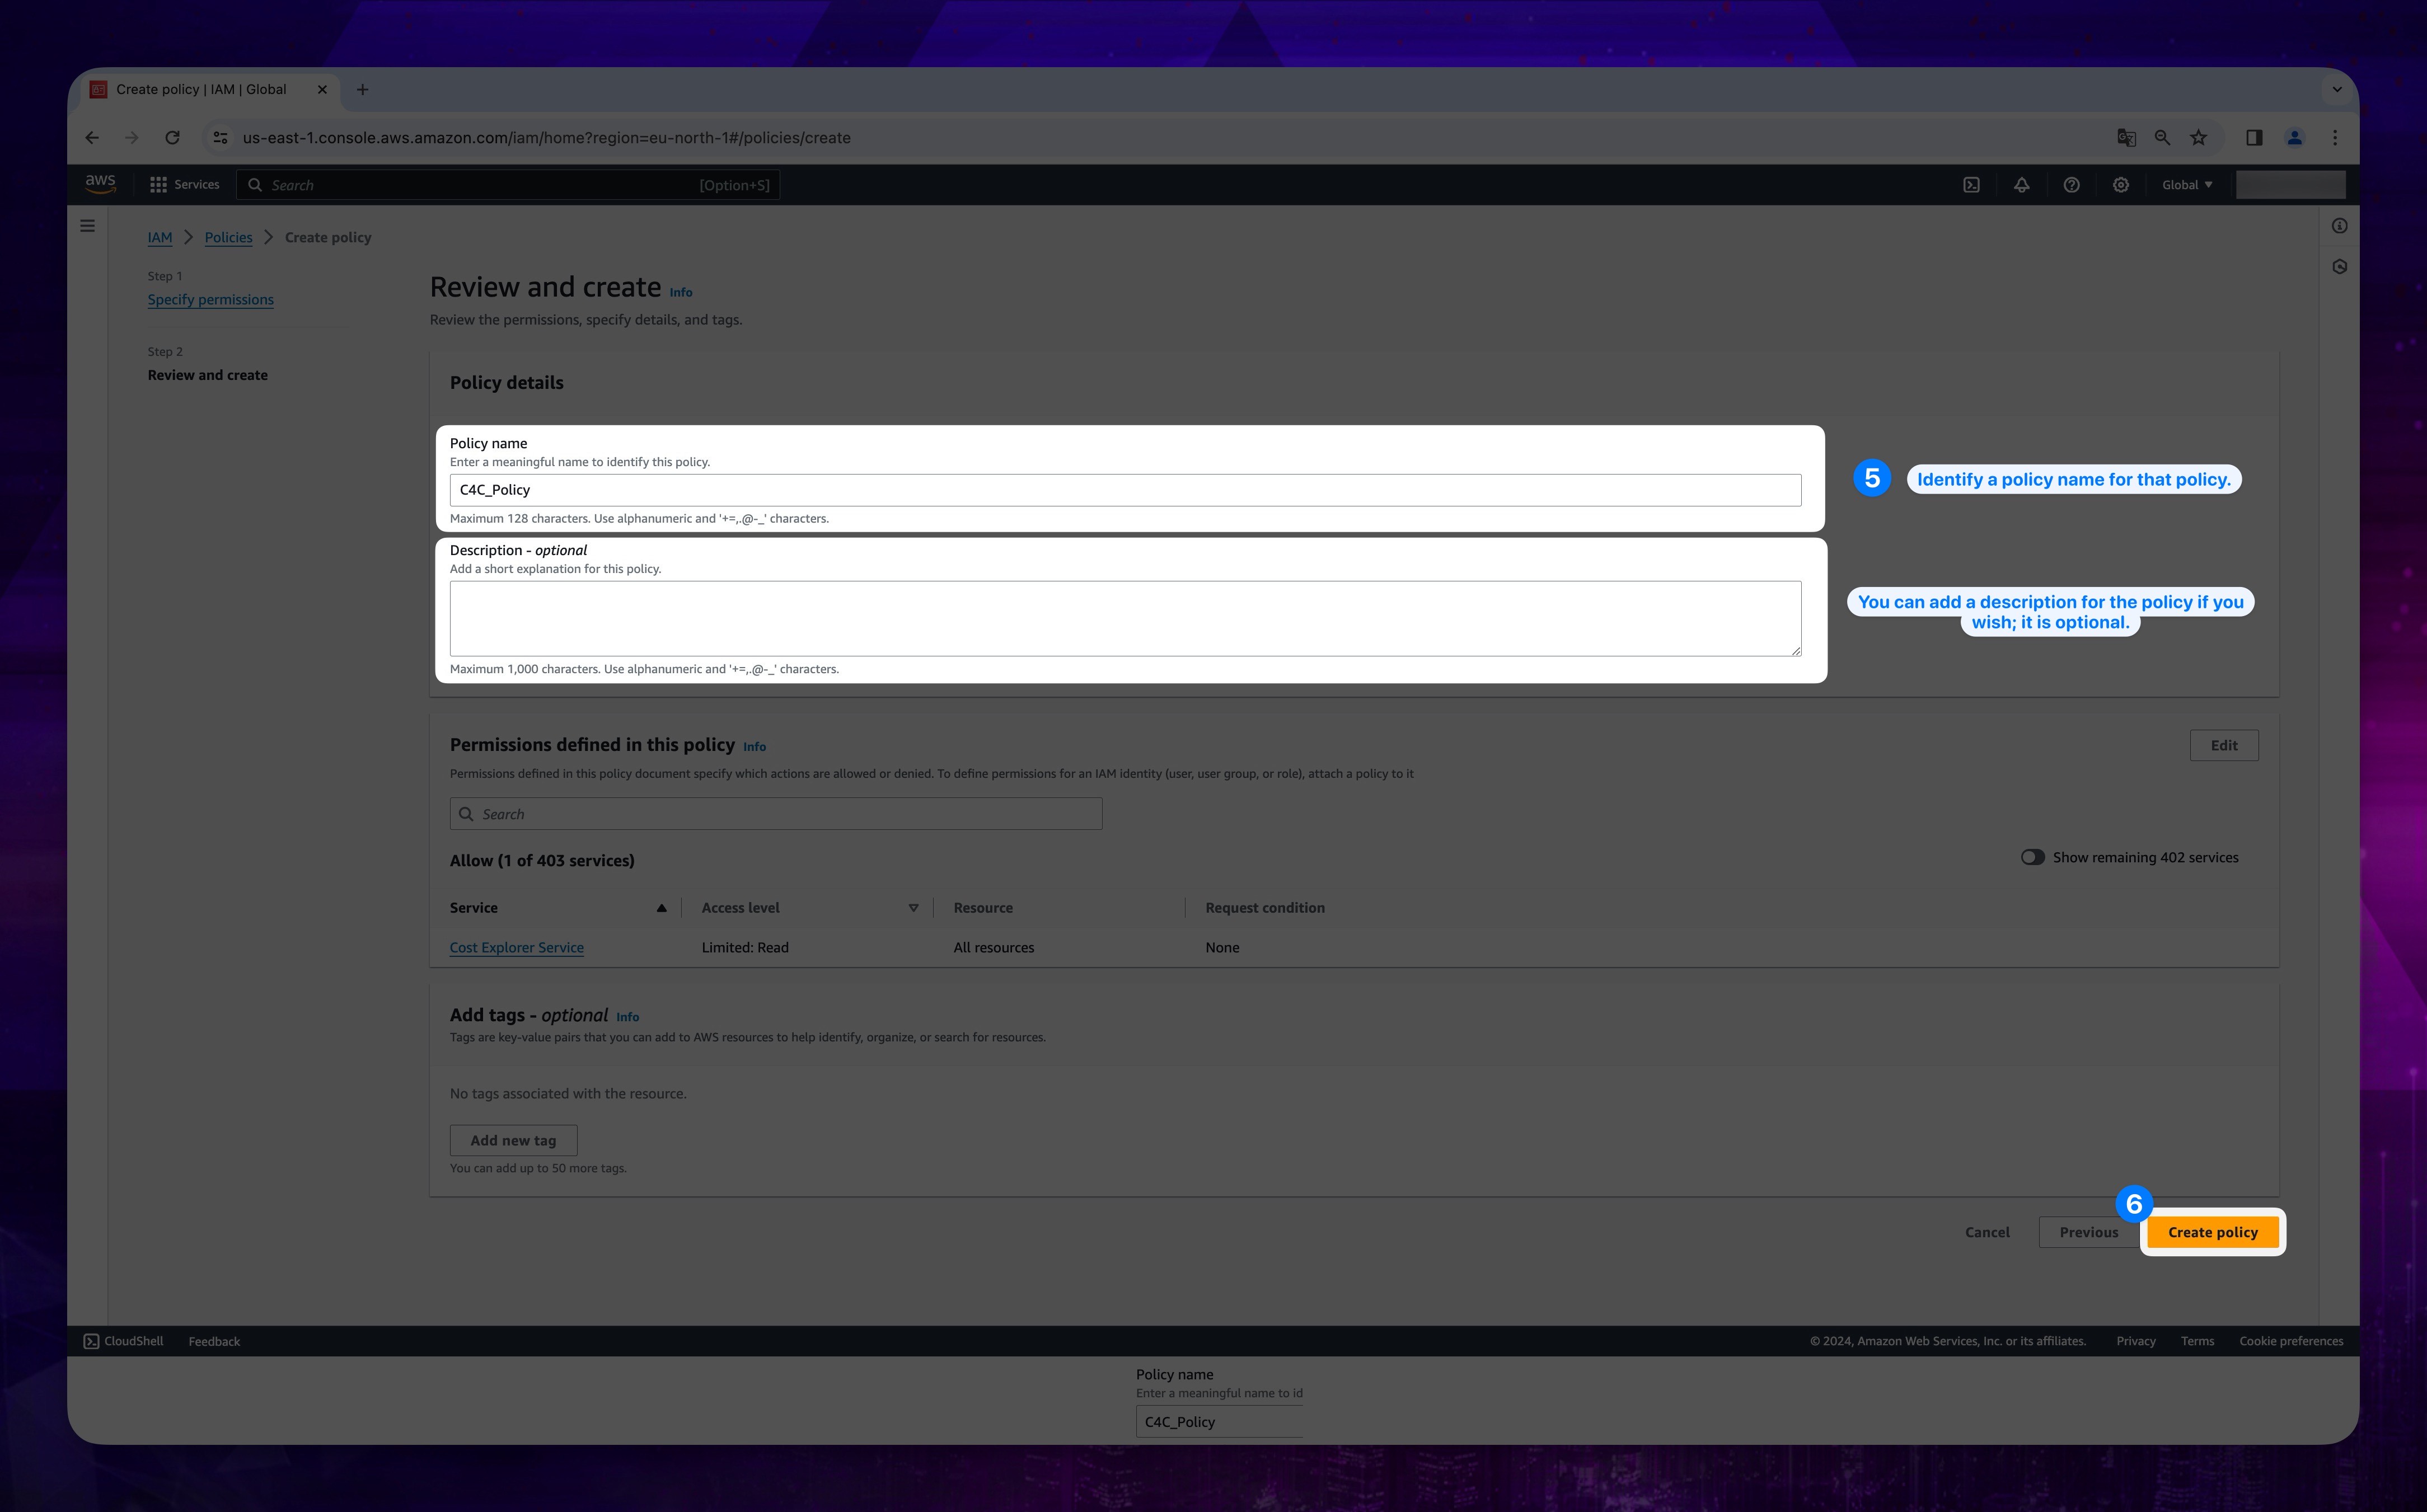
Enter the Policy name information. You can add description if you want.
-
Then click the Create Policy button at the bottom of the page.
Show the instruction with images
2. Assigning Policy to the User
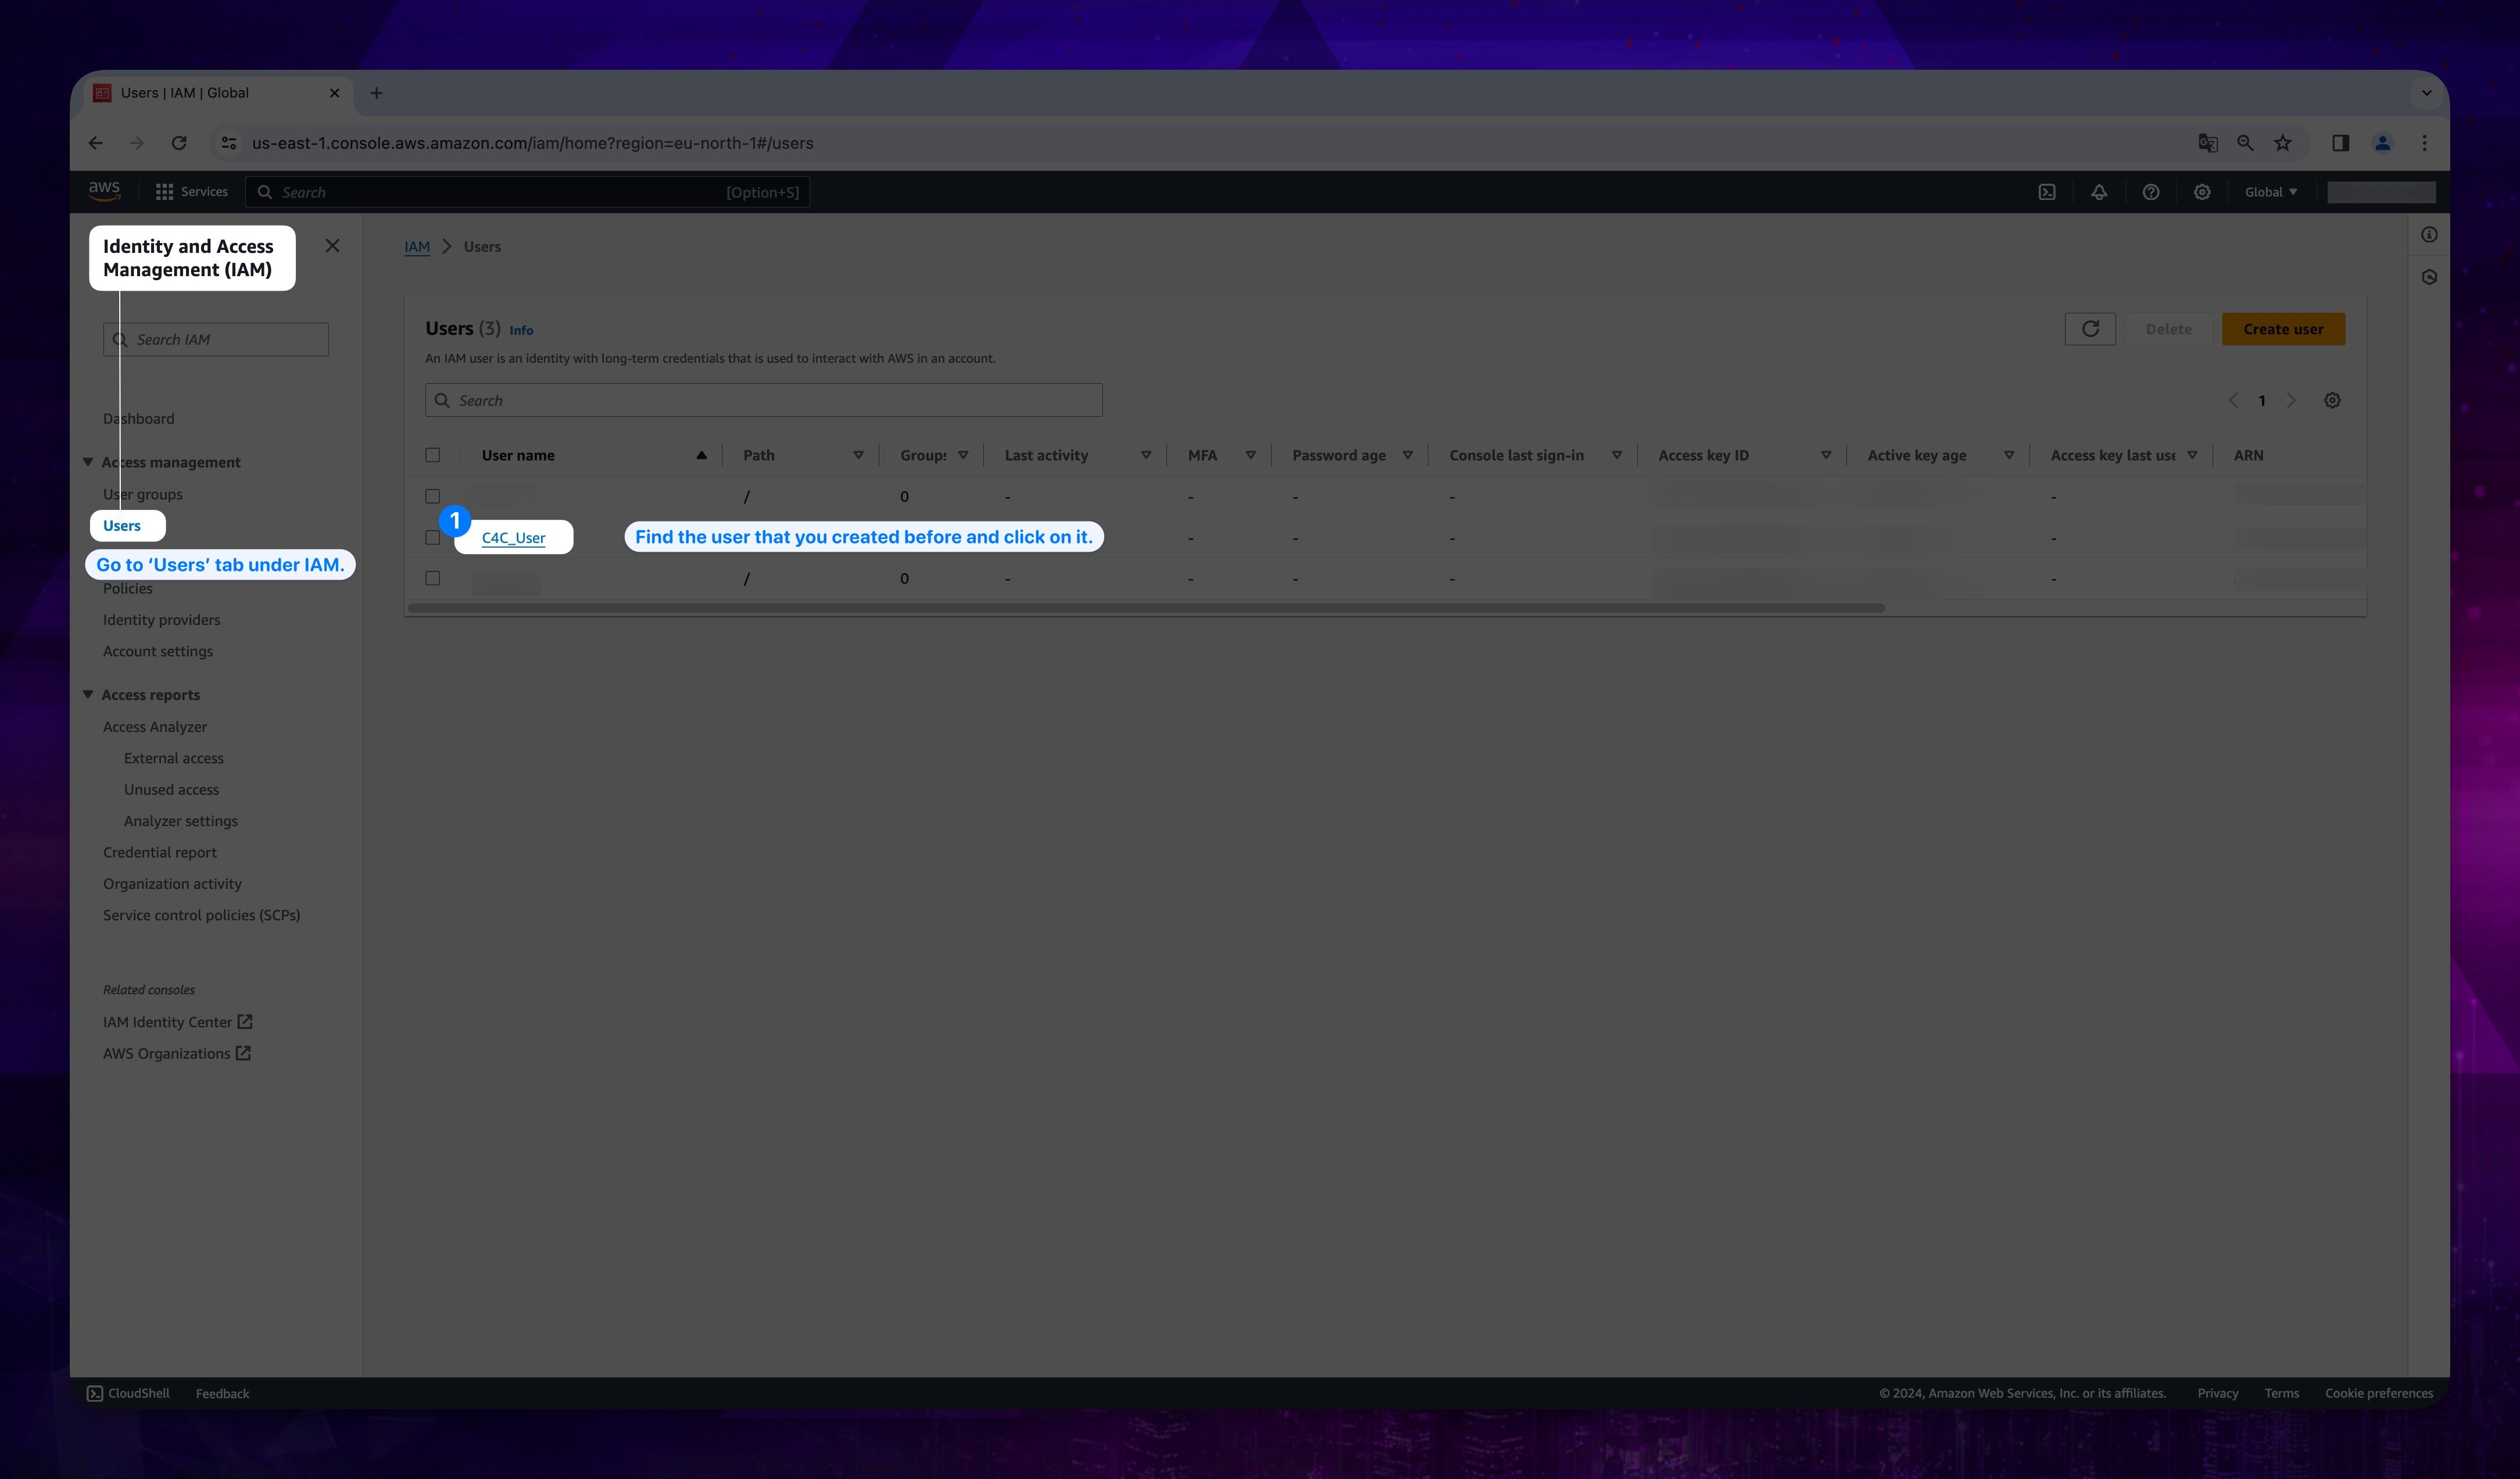
- Go to Users tab on the left, and find the user that we created before.
Show the instruction with images
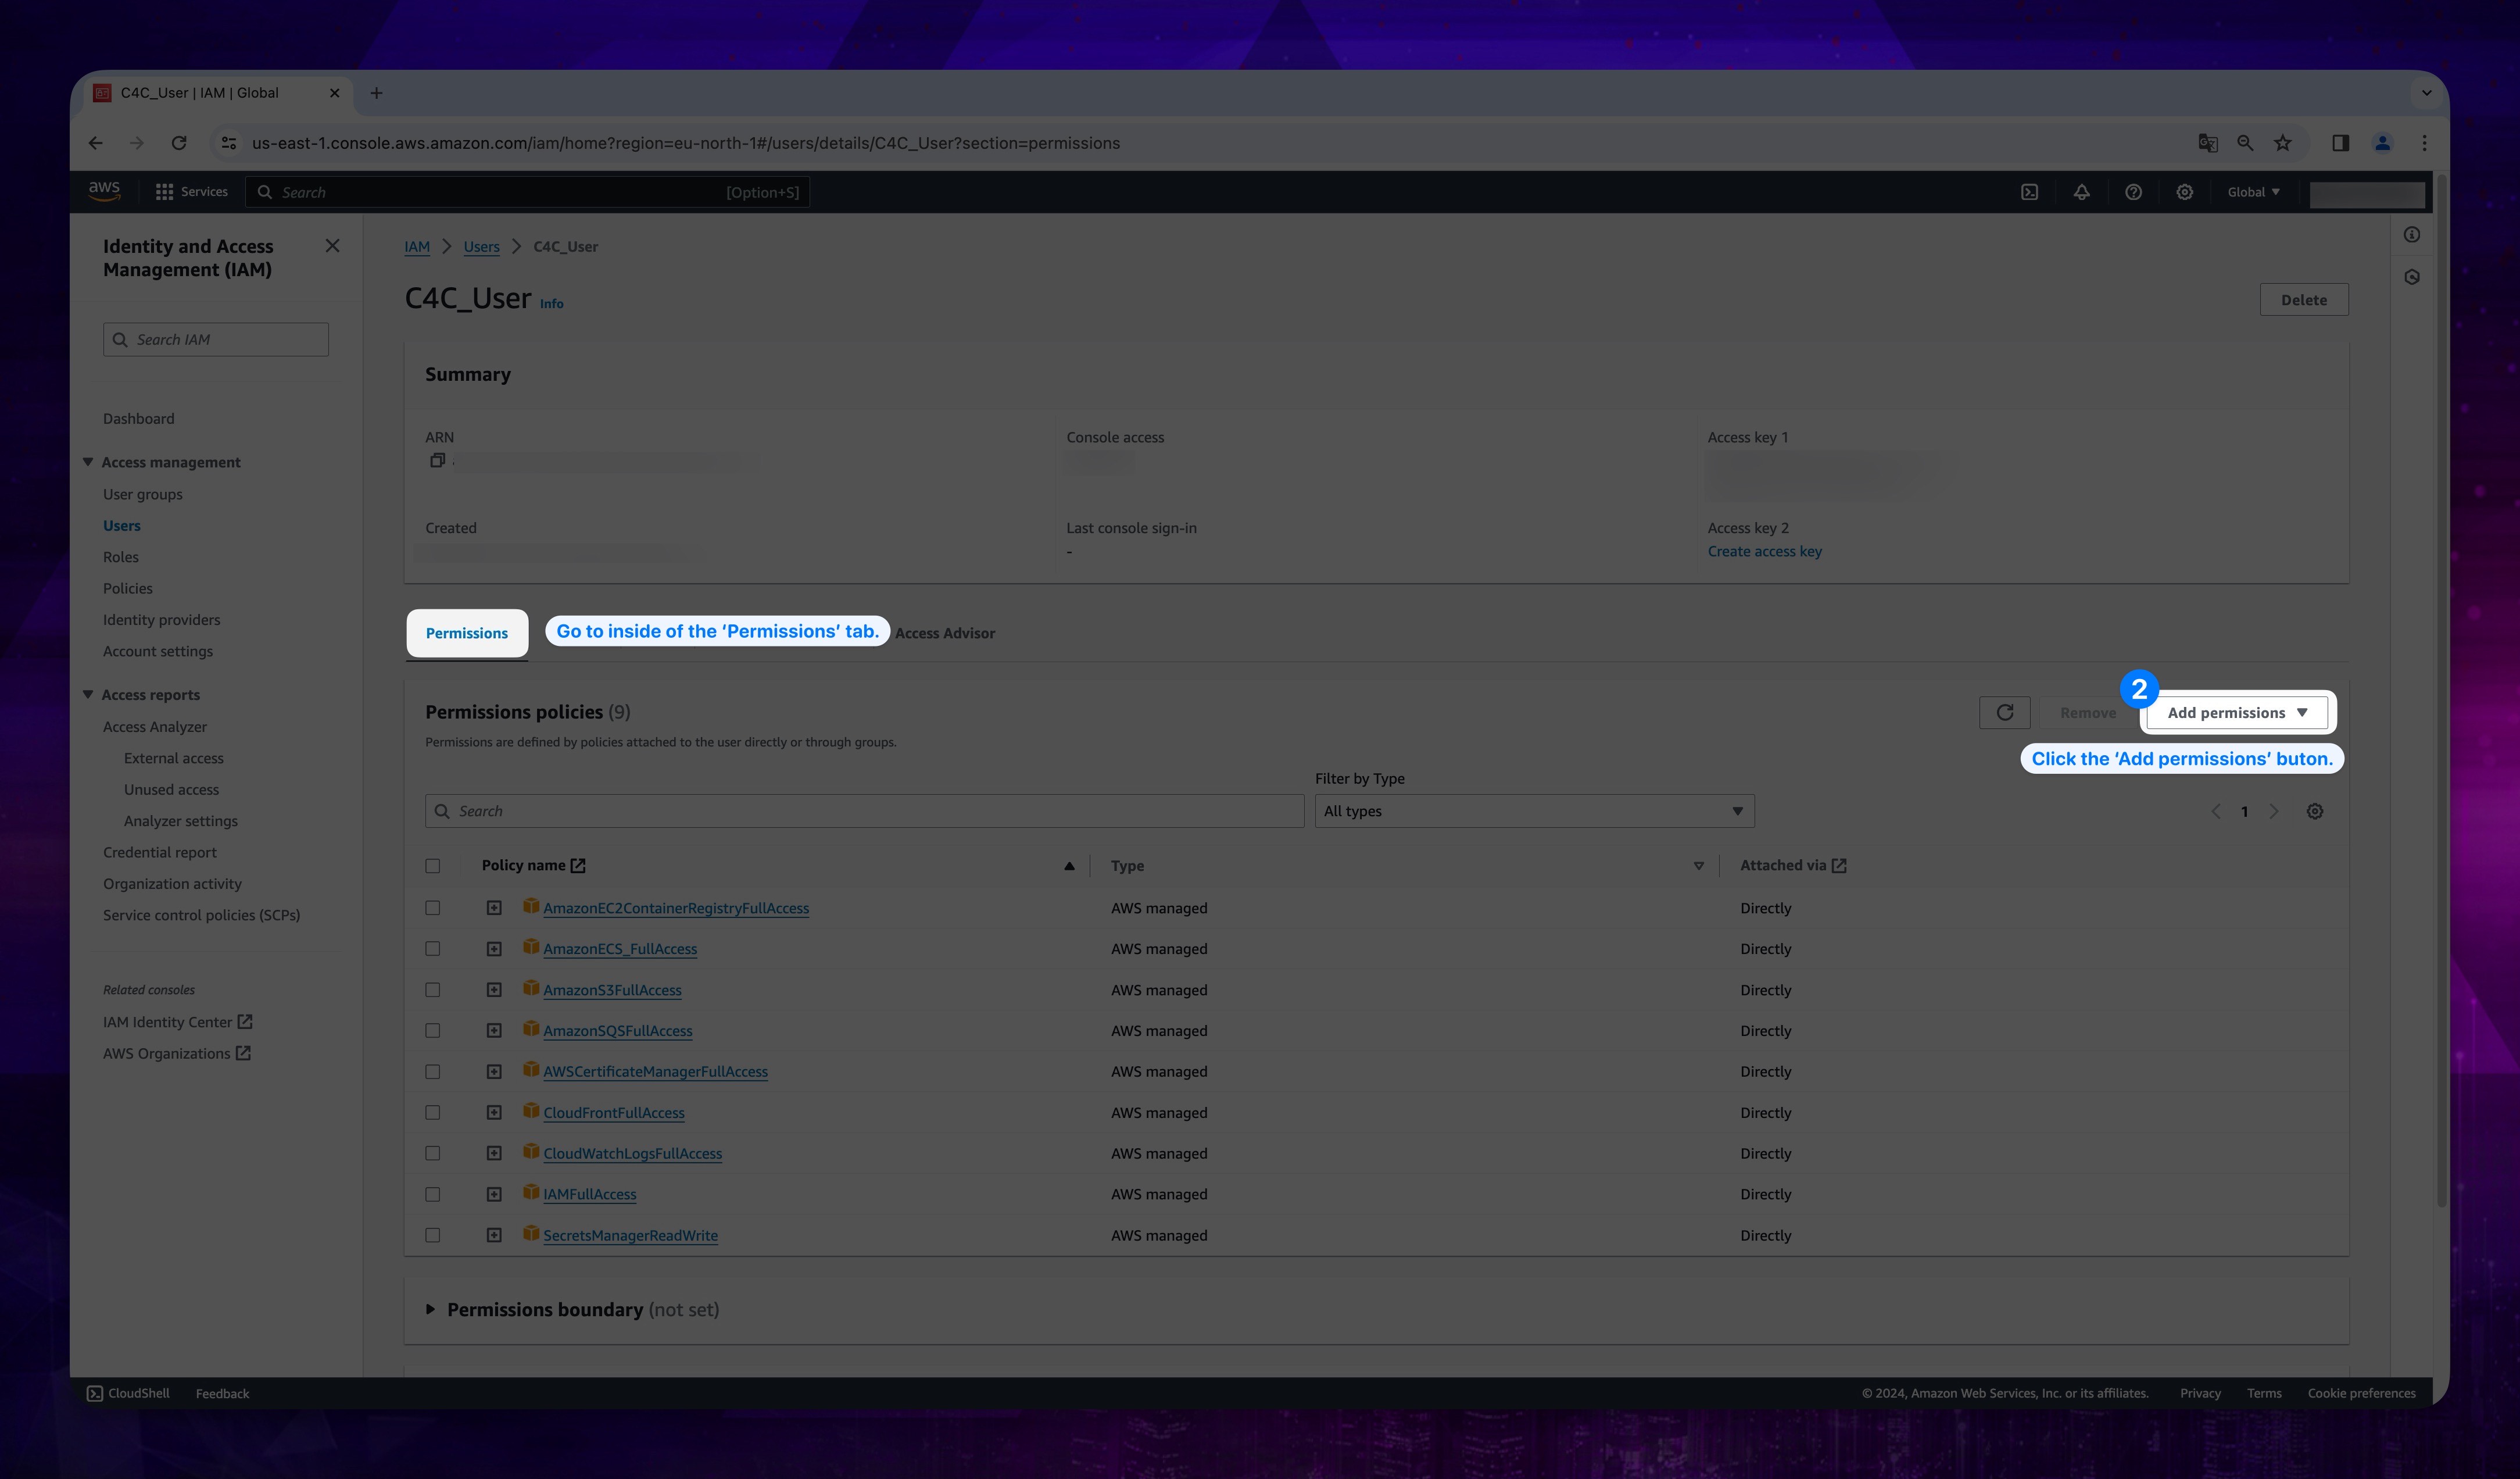
- When inside the Permission tab, click on the Add Permissions button located on the right to add permissions.
Show the instruction with images
-
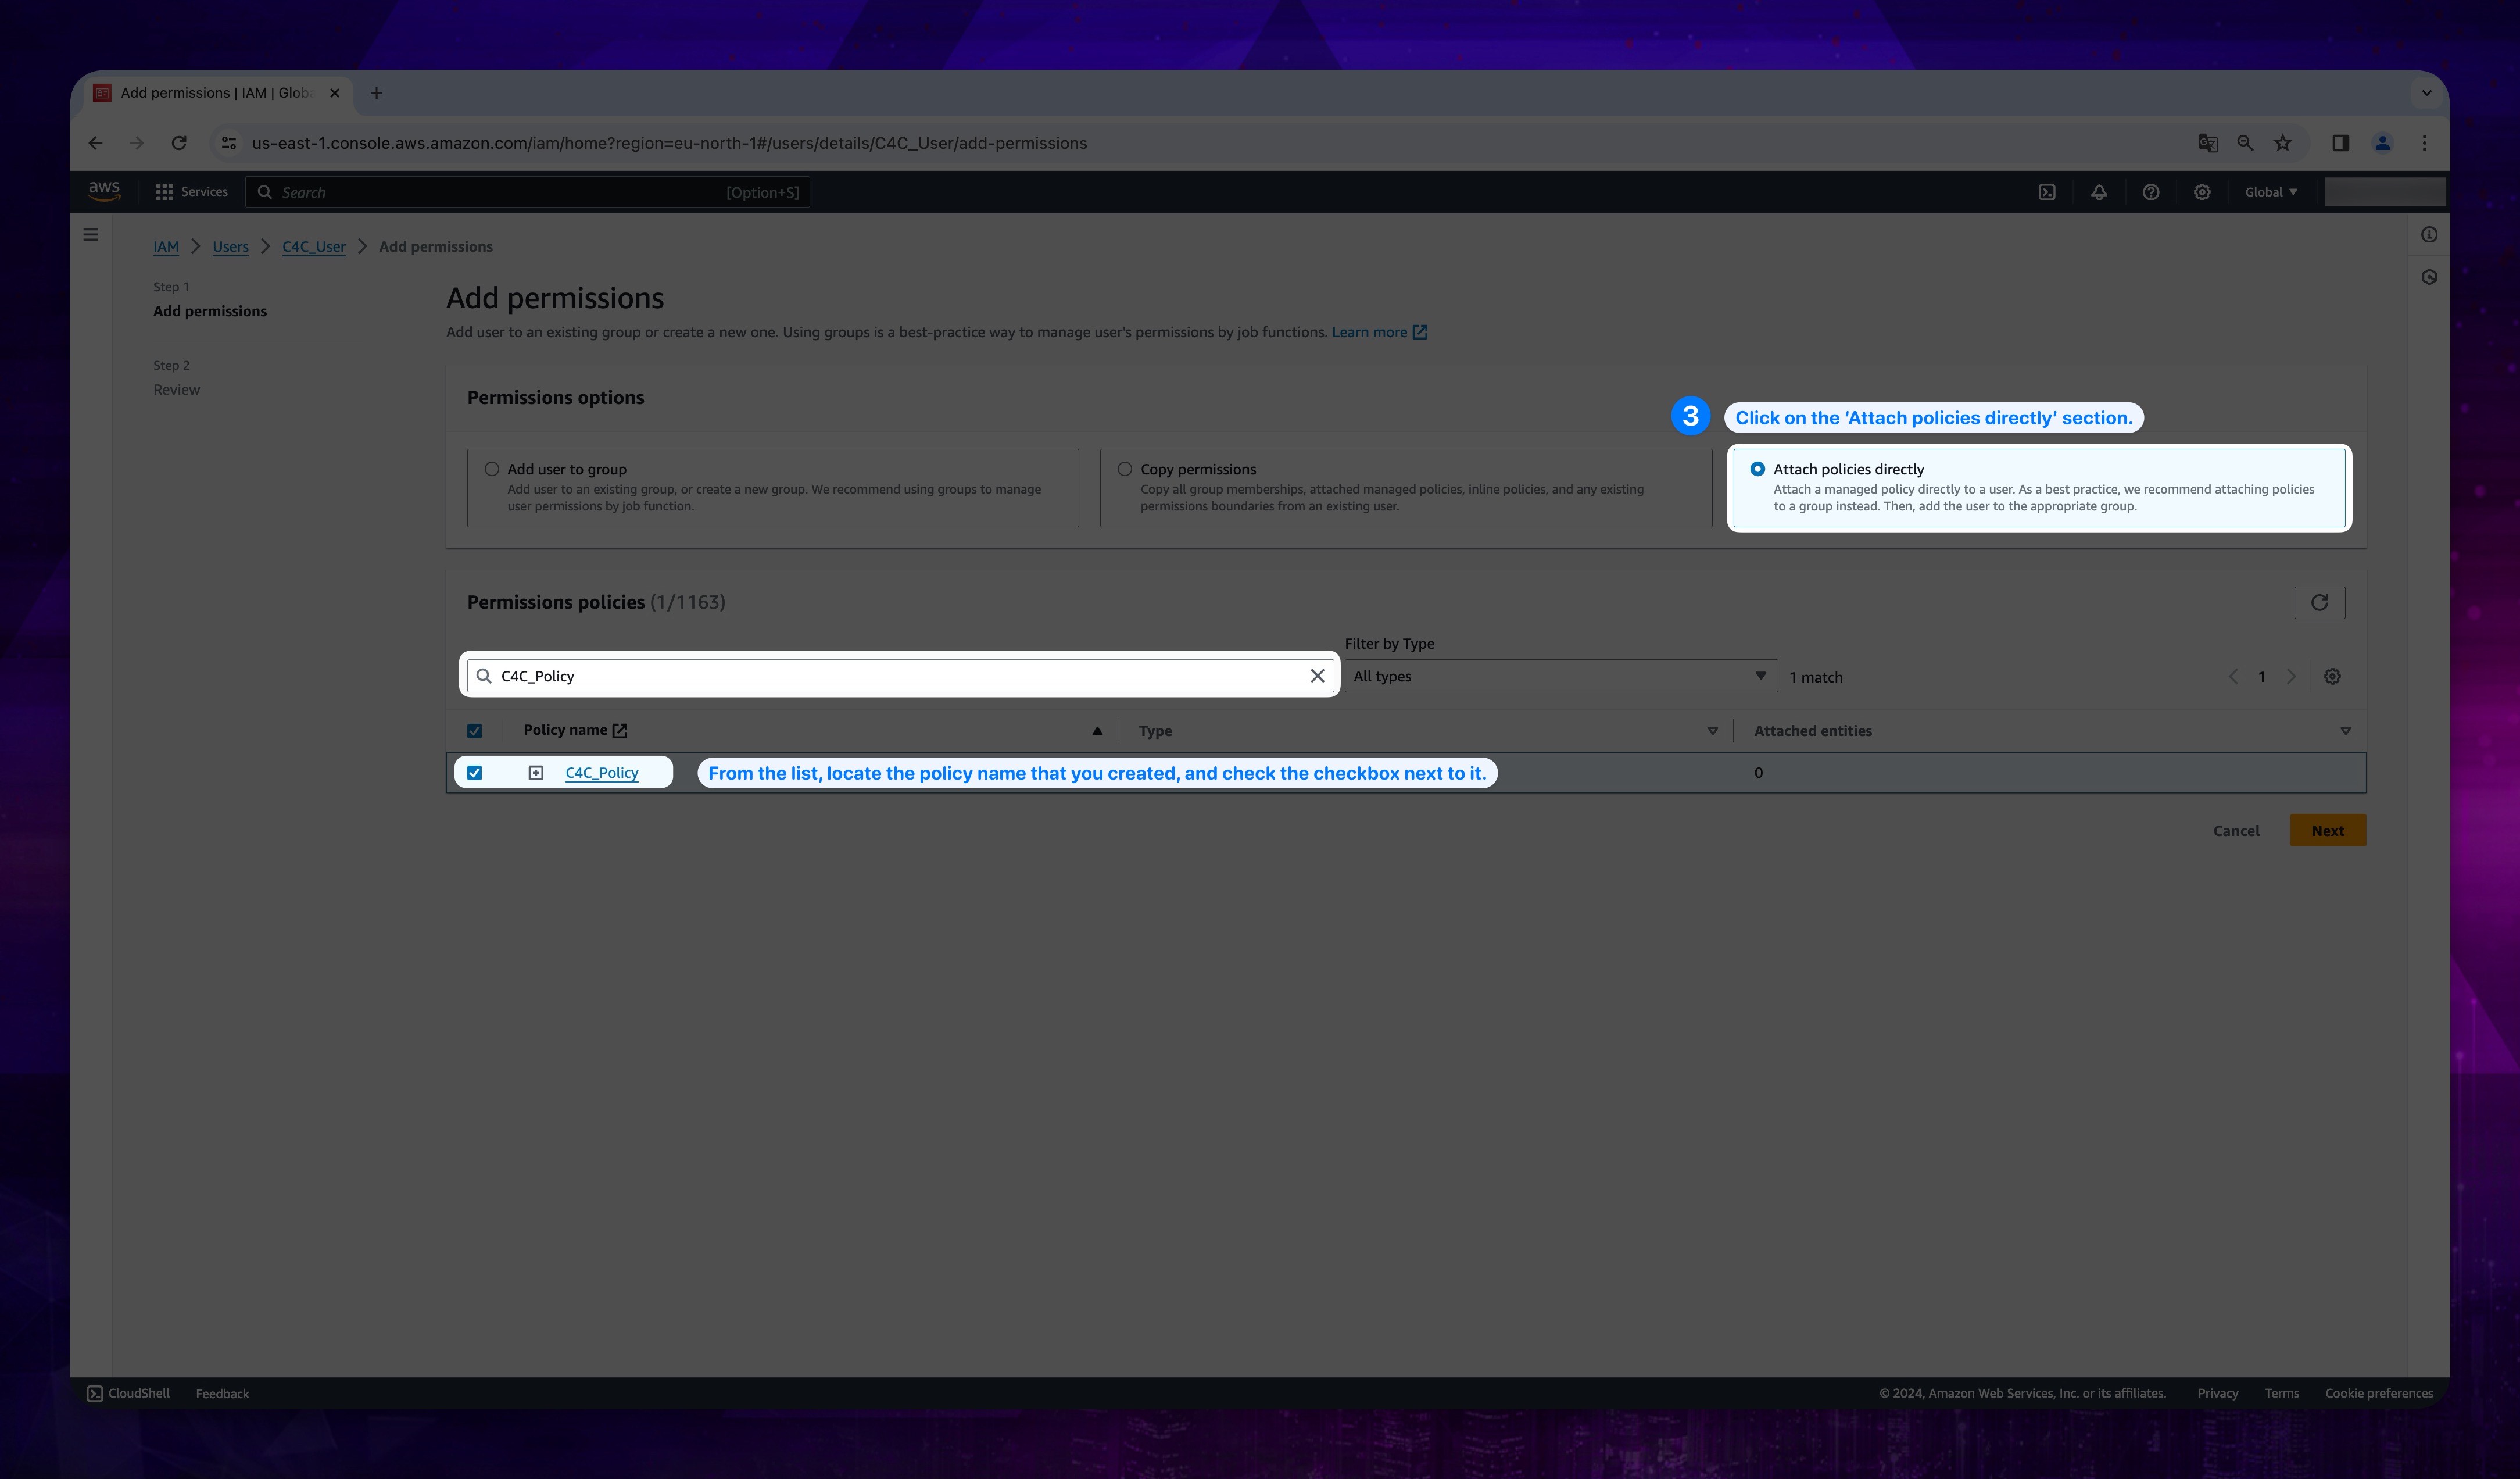
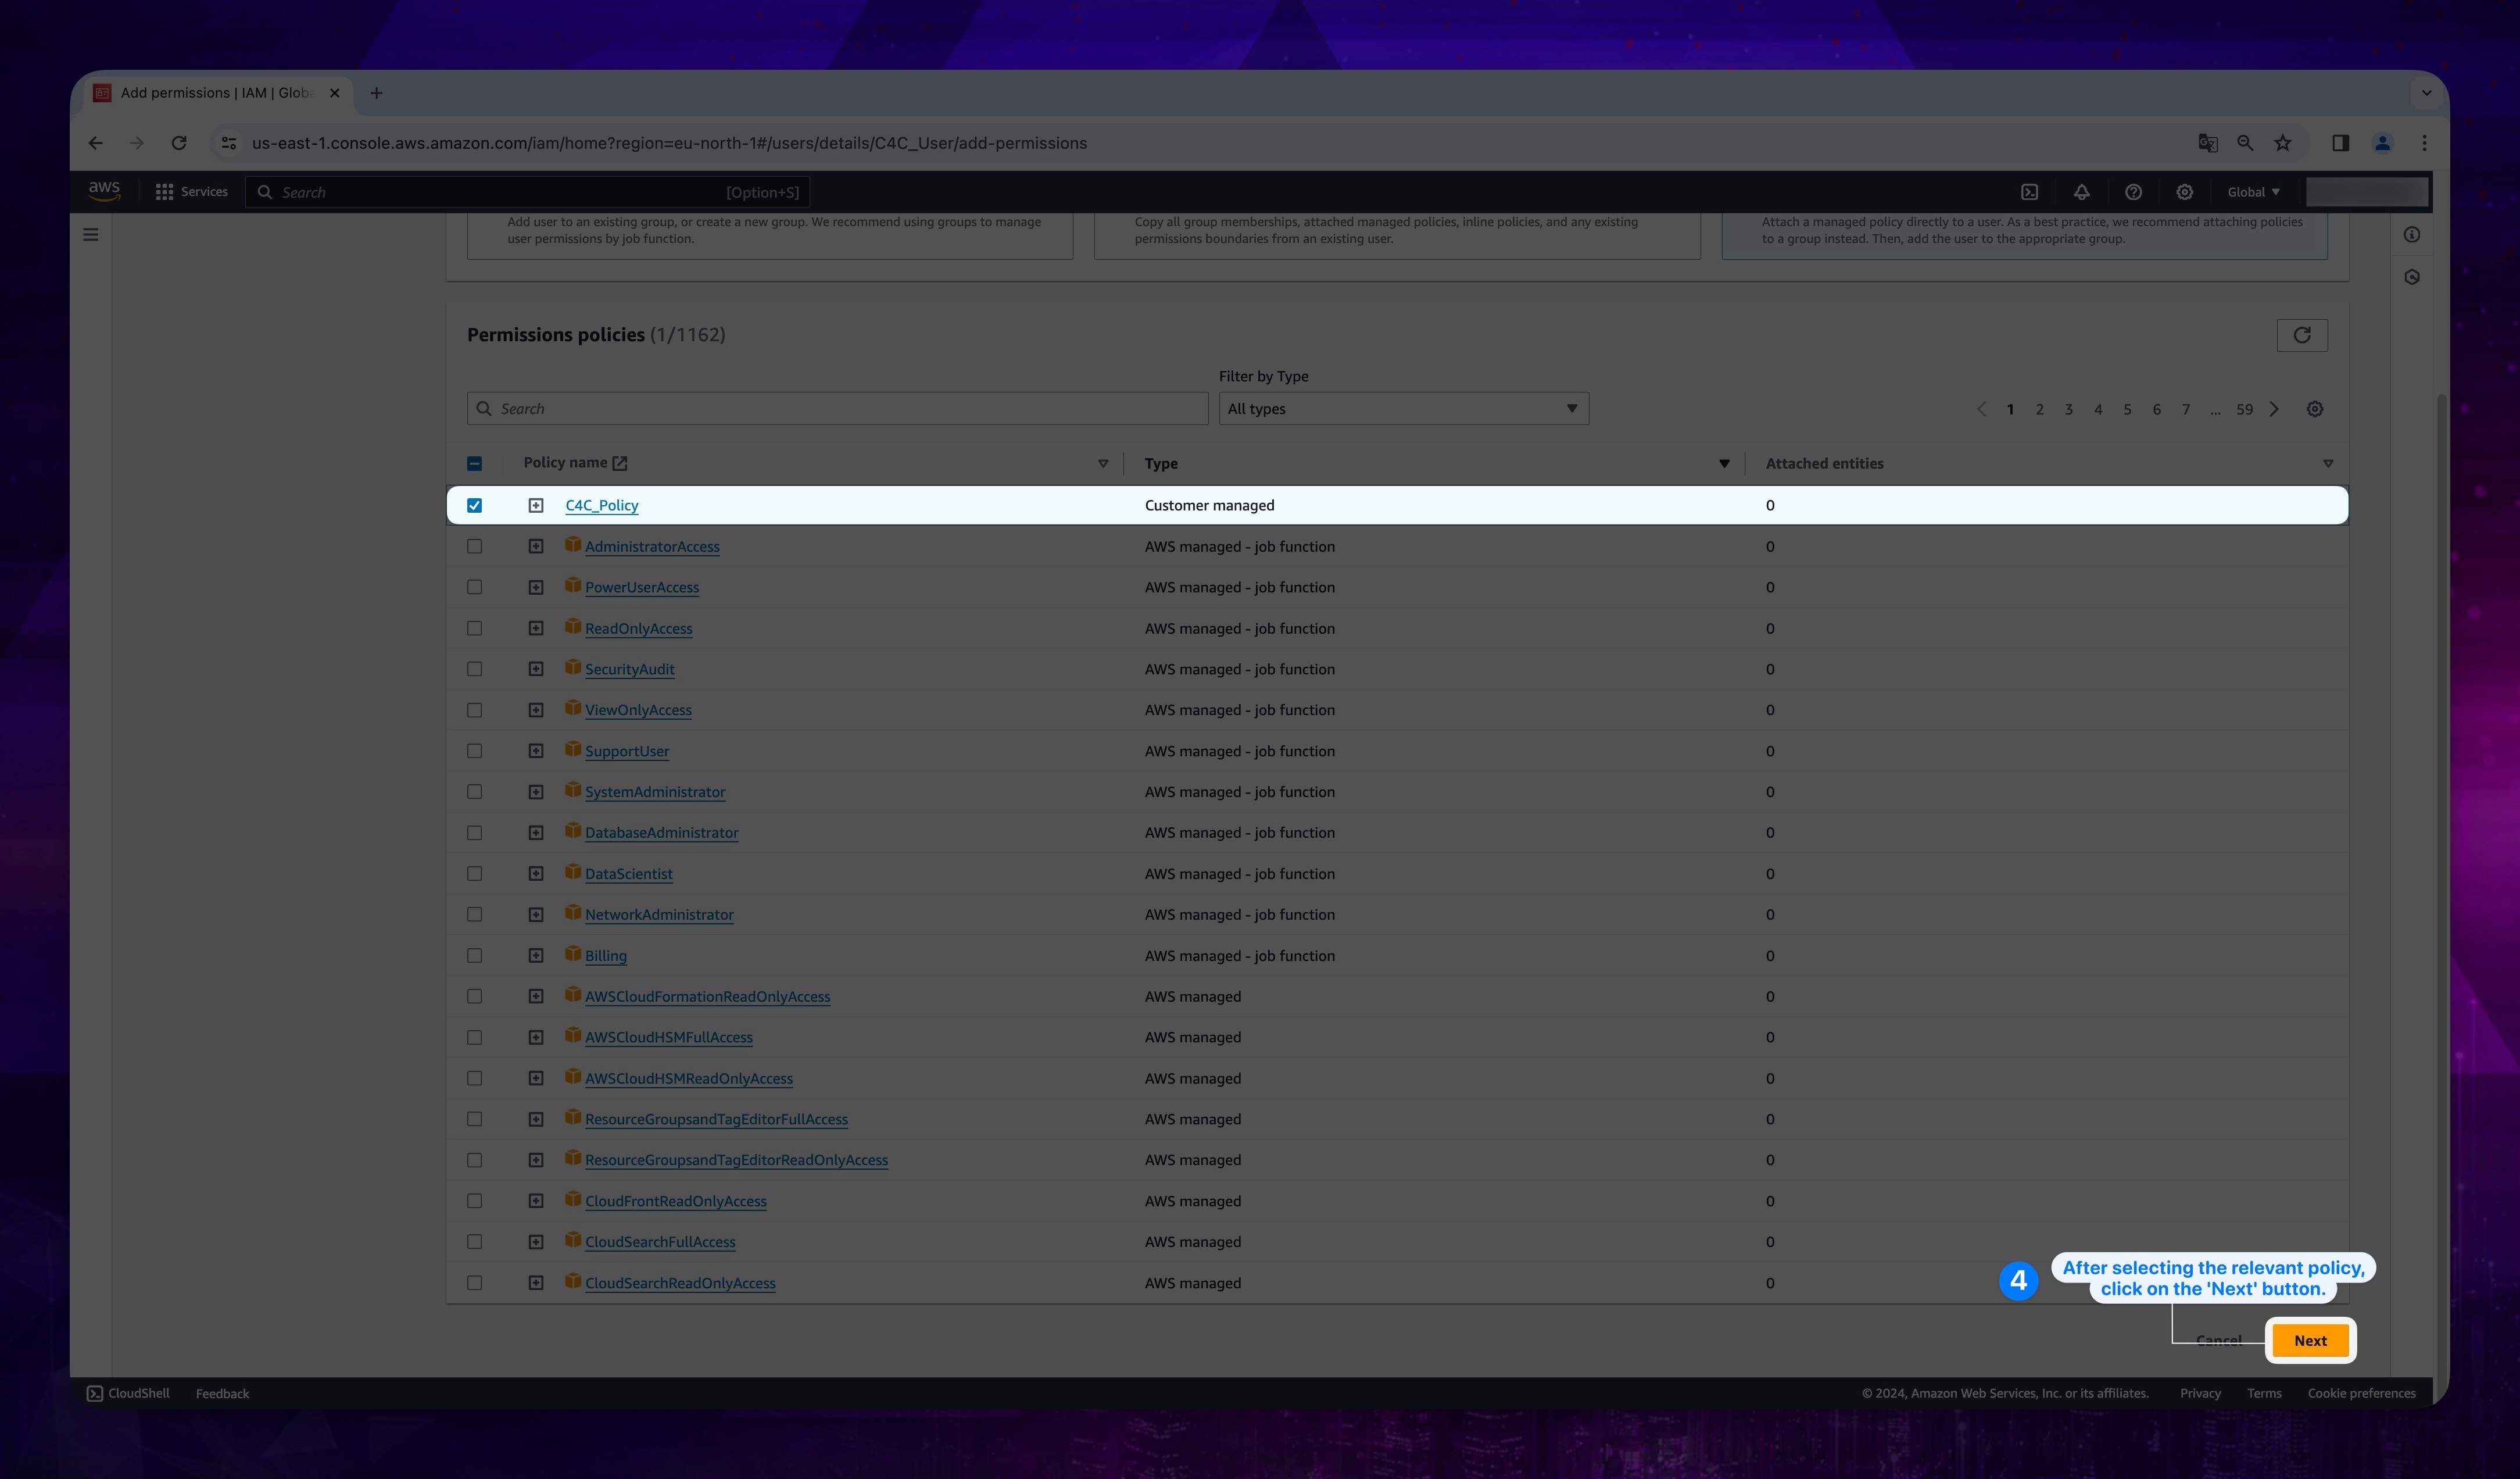
On the opened page, click on the Attach Policies Directly button, and select the policy we created from the displayed list.
tipYou can use the search function to perform a search using the name you assigned previously.
Show the instruction with images
- After selecting the policy, scroll down the page and click Next button.
Show the instruction with images
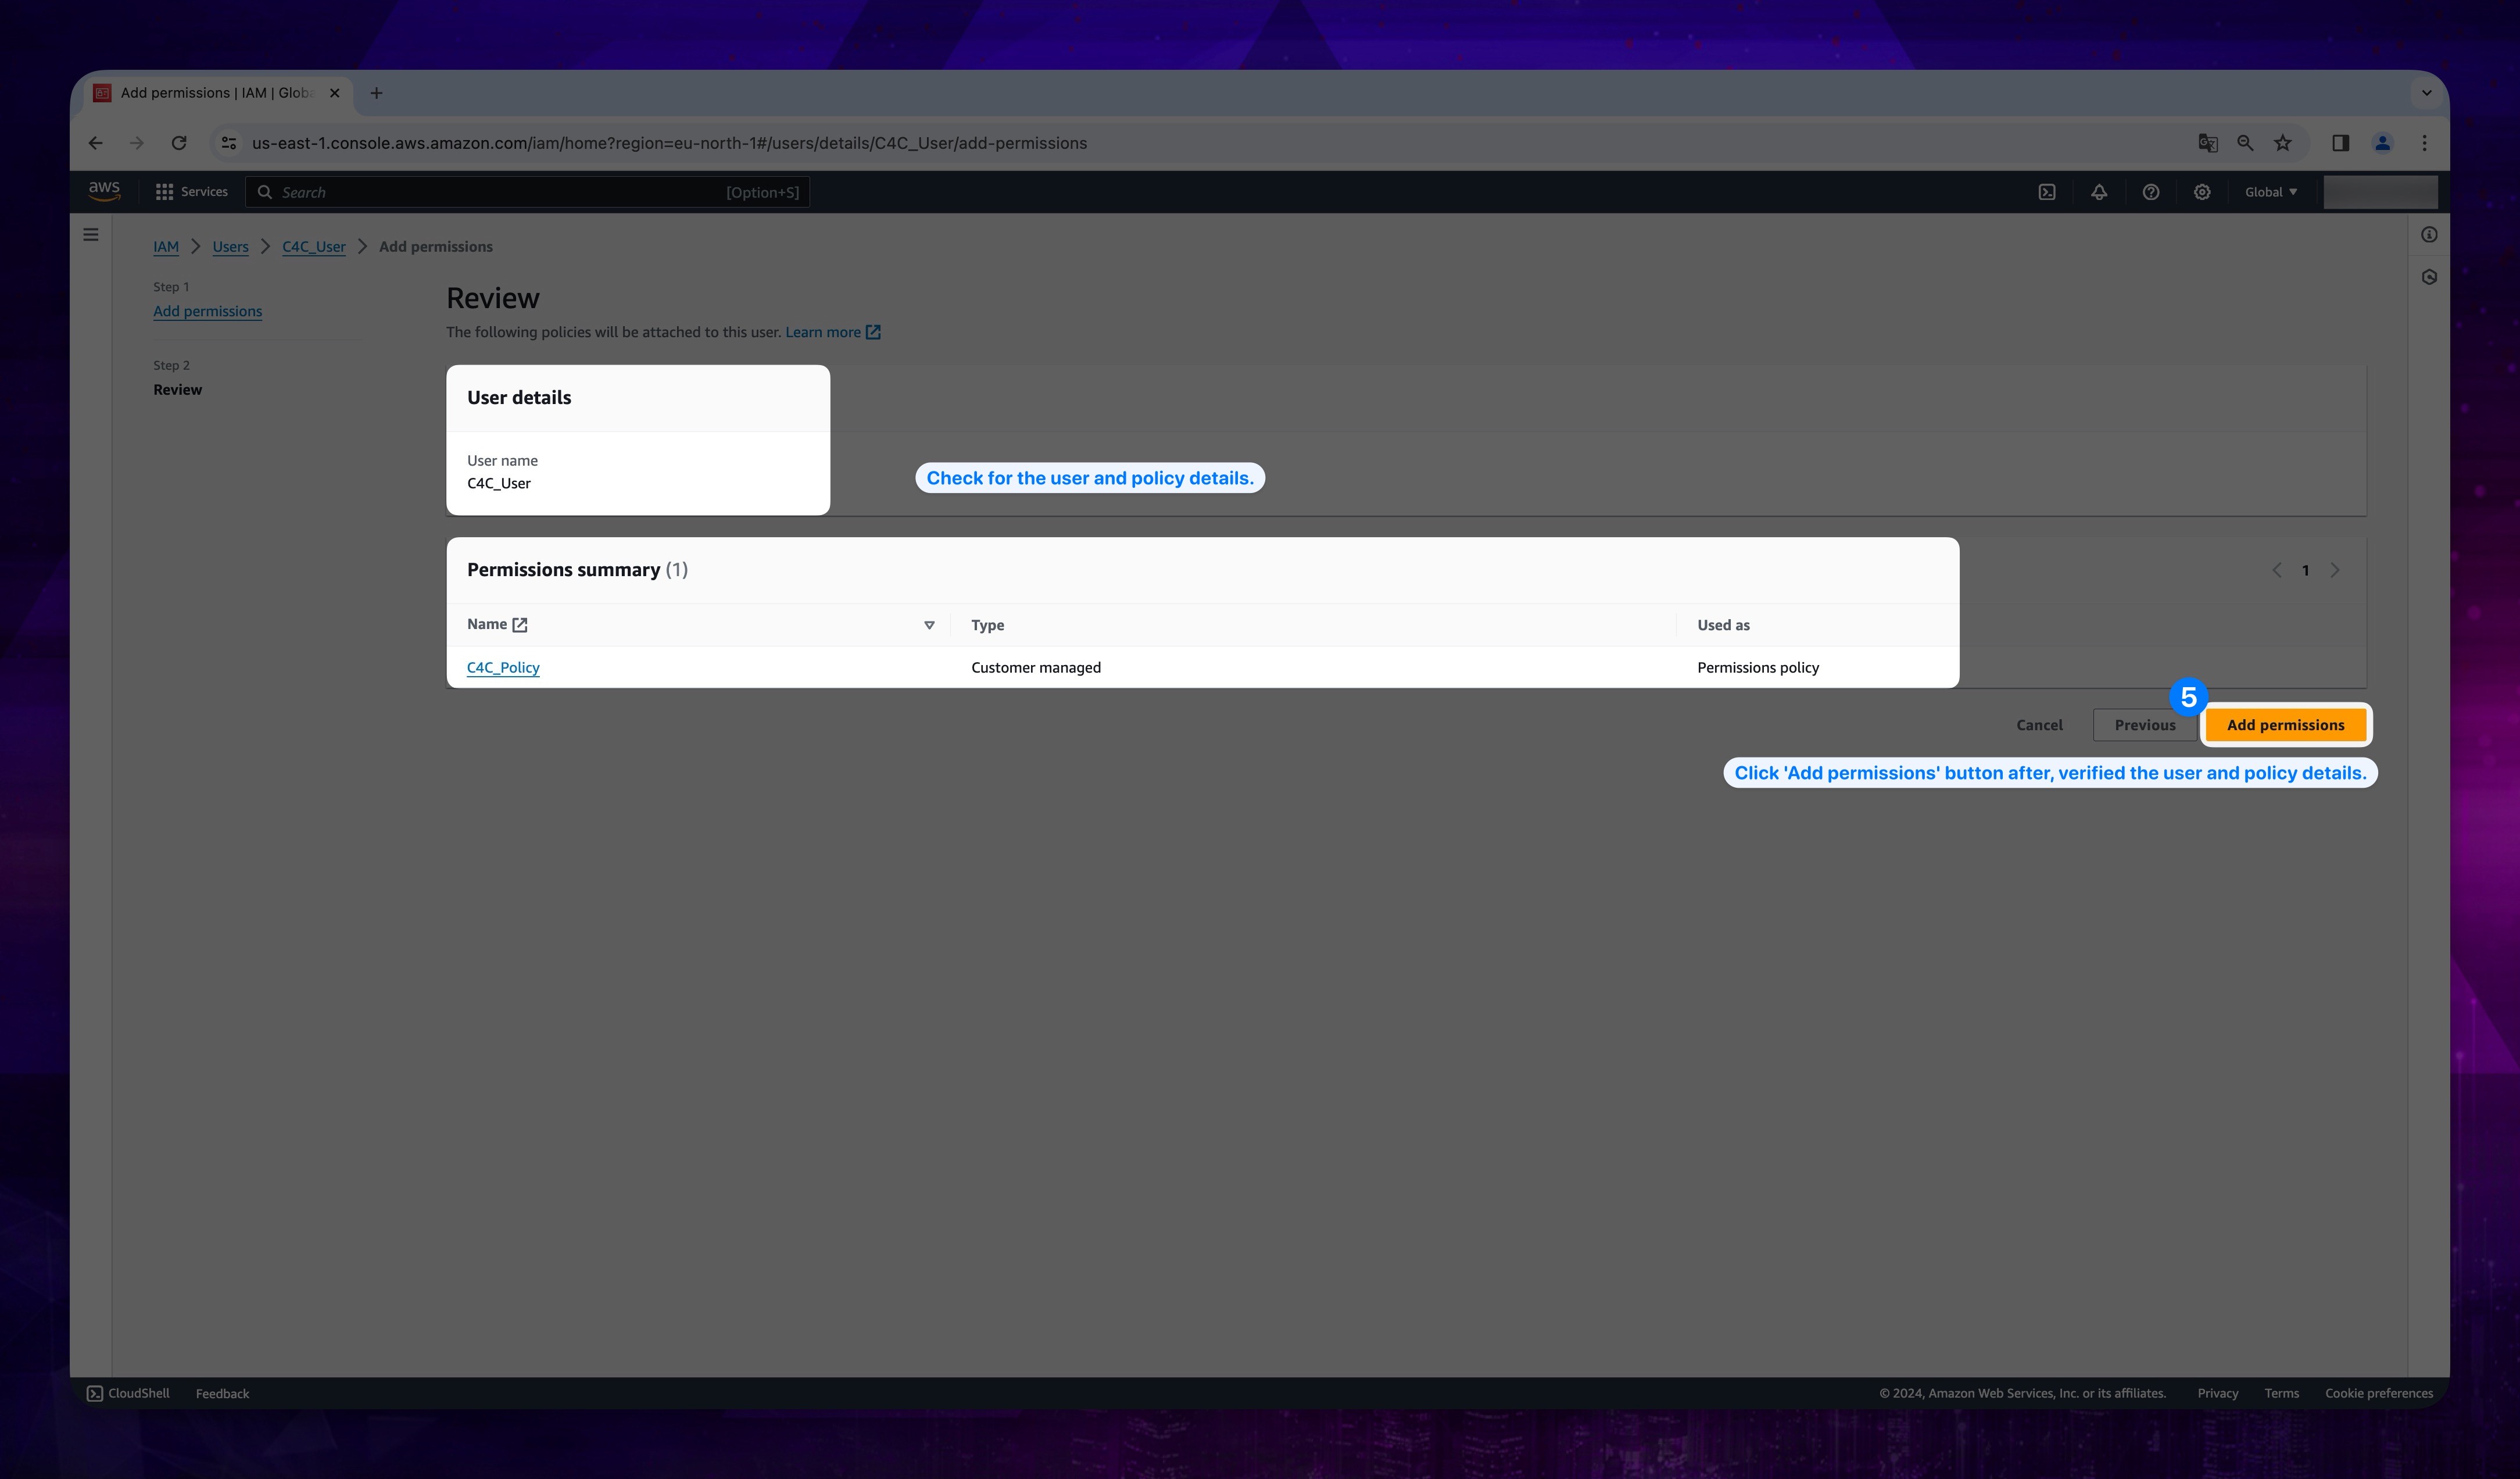
- On the opening page, verify if the User name and policy name are correct, then click on the Add Permissions button.
Show the instruction with images
